Modelling of 25 storey building with the specified properties using ETABS
Question:
Model a 25 storey building on ETABS with structural properties as specified below. Ground floor or plinth floor level can be taken at a height of 1.5 metres from the base. Each of the successive 25 storeys has a storey height of 3 metres.
Answer:
Aim:-
To Model a 25-storey building on ETABS with structural properties as specified below and to cross check the parameters as per 1S -1893 Provisions.
Procedure:-
Step 1:-
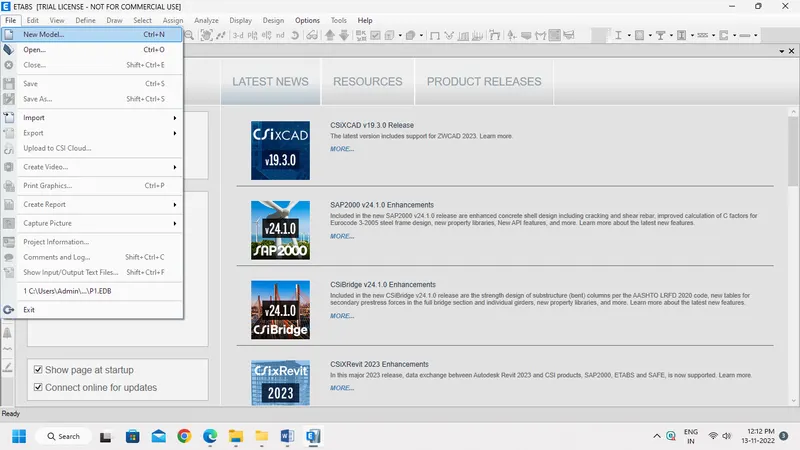
- Open Etabs Software, and click File Tab.
- Select New Model as shown below.
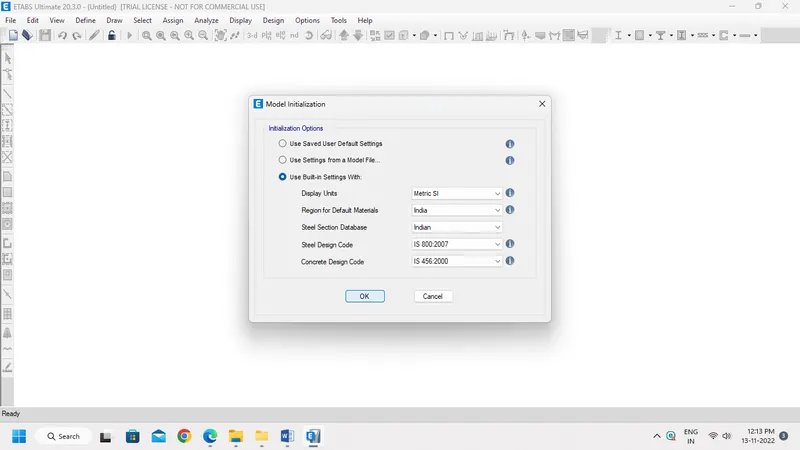
- A new model dialogue box will be open as model initialization.
- Select Use Built in Setting with option.
- Select display unit as Metric SI (or as per your requirement).
Step 2:-
- Next a new dialogue box will appear.
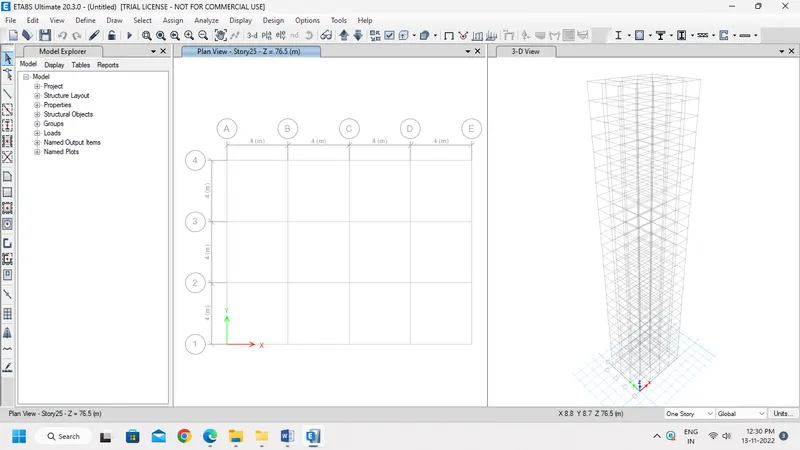
- Select grid and storey inputs and custom story data Enter X grid Data at a distance of 4 meter and Y gird data at 4-meter distance.
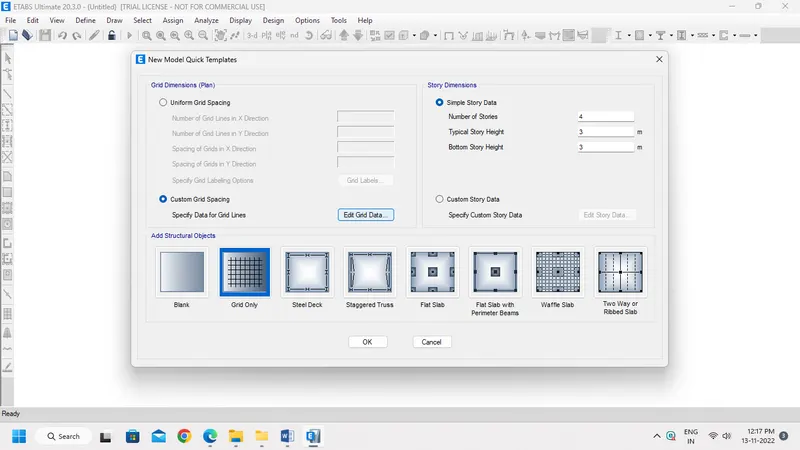
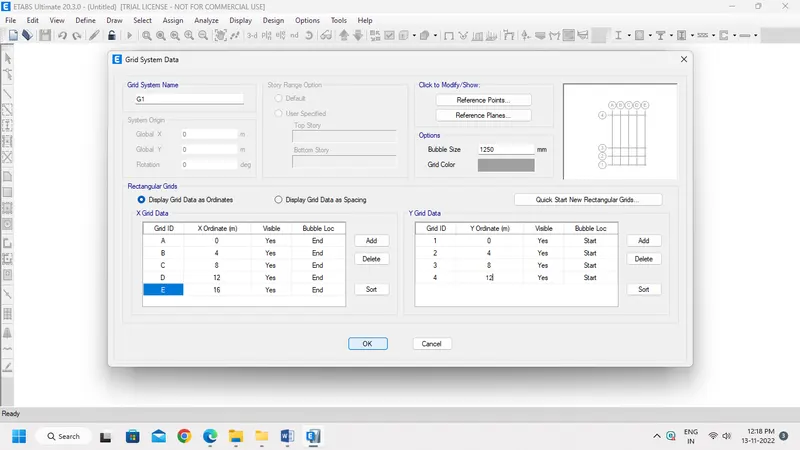
- Now Edit the Story data and select Custom Story Data.
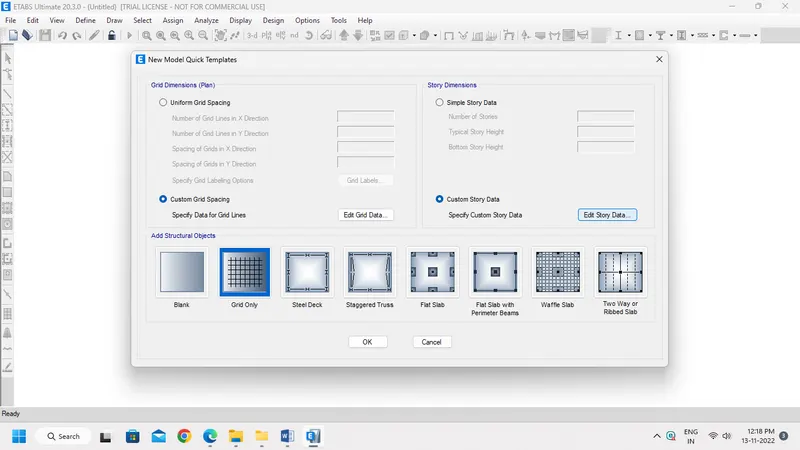
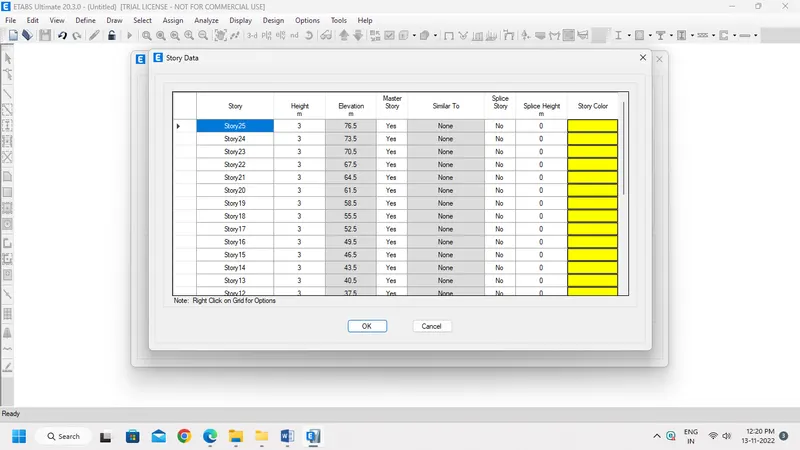
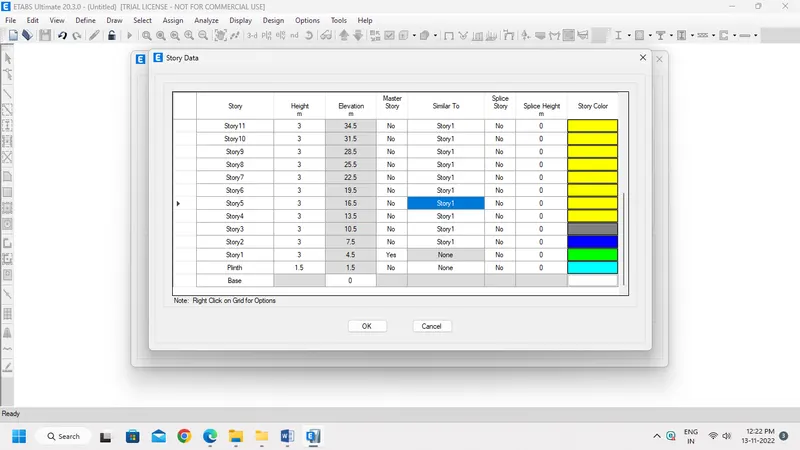
- Add Storys upto 25 and give input Plinth height as 1.5m and all other story height as 3m.
- Then make Story 1 as Master Story and all other Storys are Similar to Story 1 as shown below.
- Then our building model generated in the window.
Step 3:-
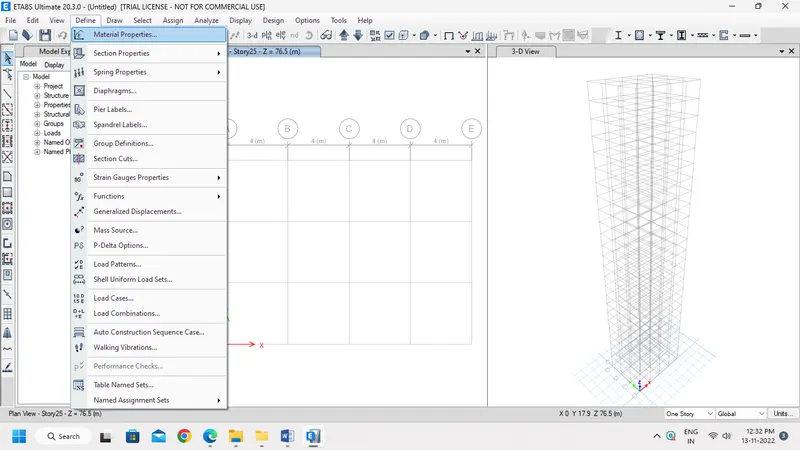
- Now Define Material Properties.
- Go to Define Tab, select Material Properties.
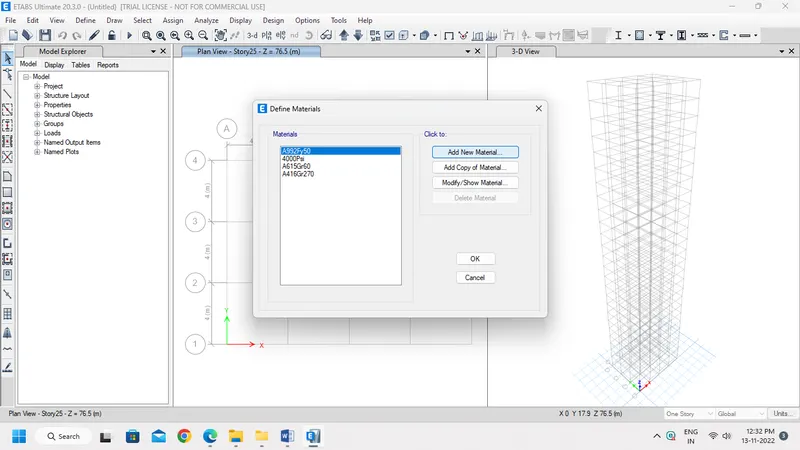
- A Pop-up window appears, in that select Add new property.
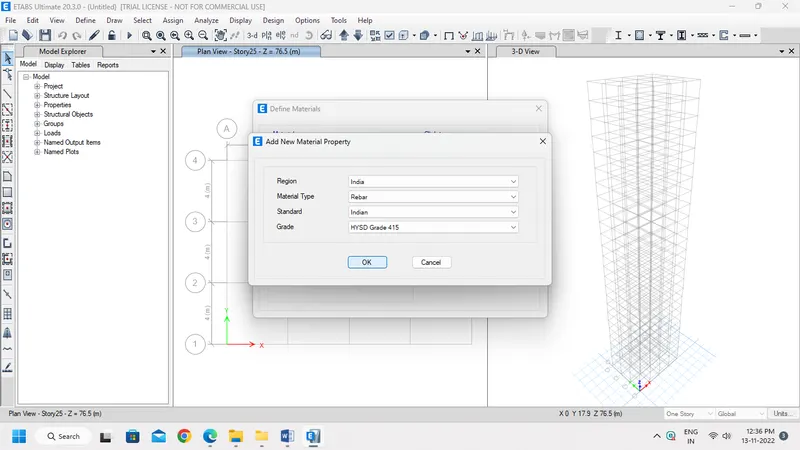
- Again a pop-up window opens, now define concrete as M30 as shown below.
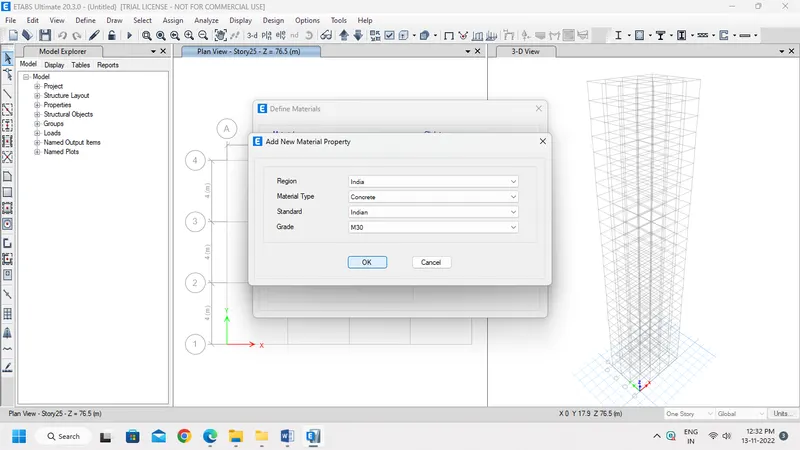
- Similarly define Rebar properties as shown bleow.
Step 4:-
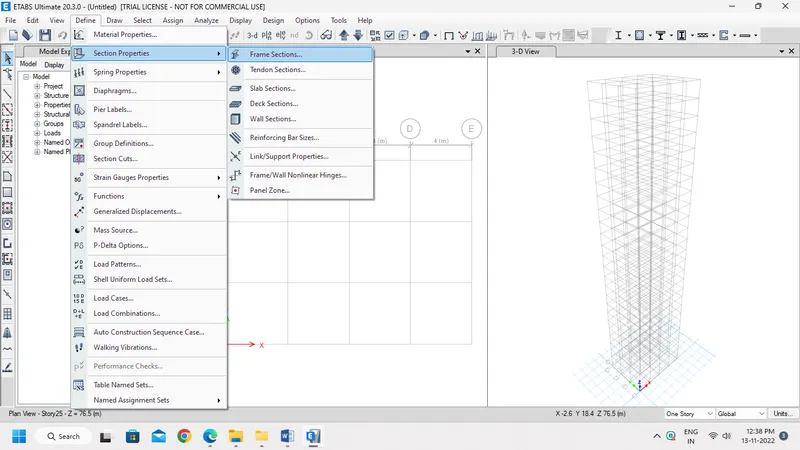
- Then Define Section Properties.
- Go to Define Tab, select Sction Properties and click Frame Sections.
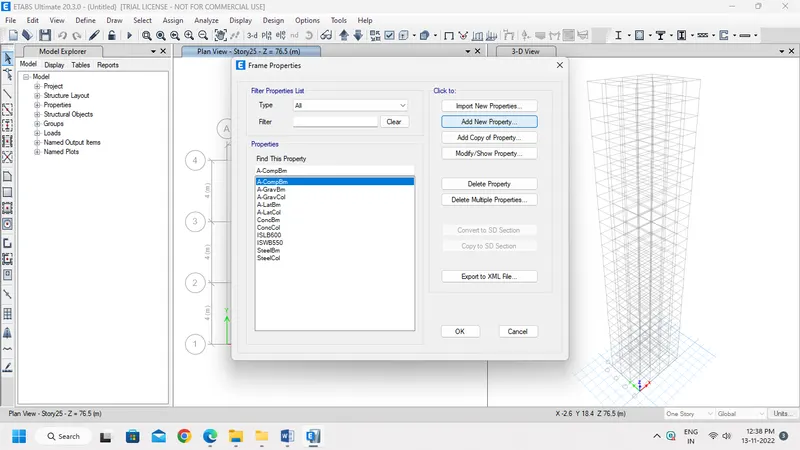
- A pop-up window appears, in that select Add New Property.
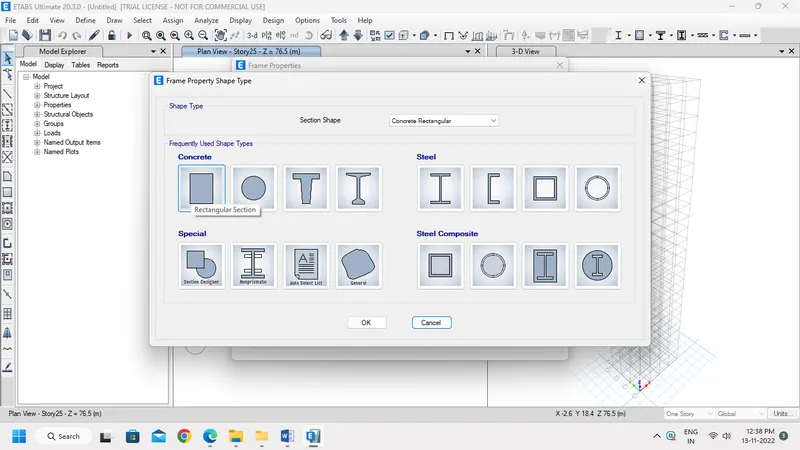
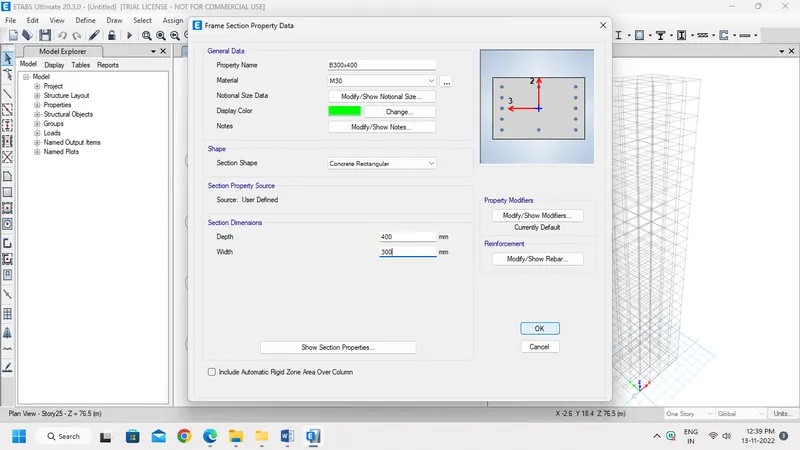
- Then select Rectangluar Concrete section, Rename it as B4300x400, change property as M30 and change the Size as 300 x 400mm.
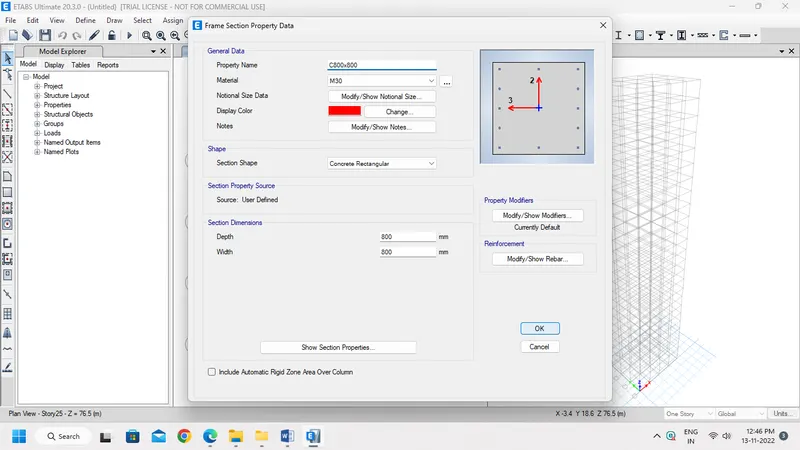
- Then similarly add Column section properties.
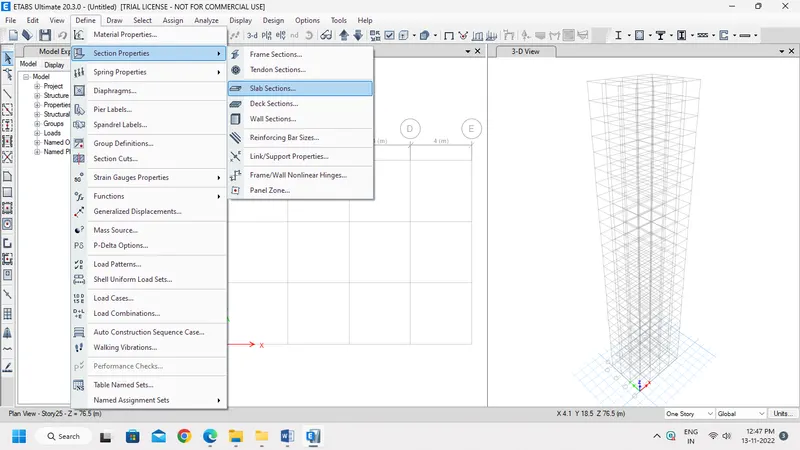
- Then Define Slab property, by selecting Slab sections as shown below.
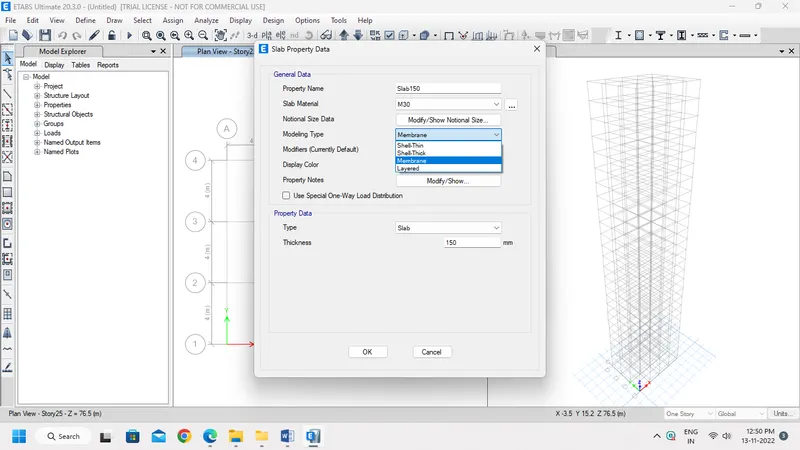
- A pop-up window opens, Rename as Slab150, Modelling type as Membrane and change thickness as 150mm.
Step 5:-
- Now draw the Structural members.
- First select the mode as All Stories at the Right bottom corner.
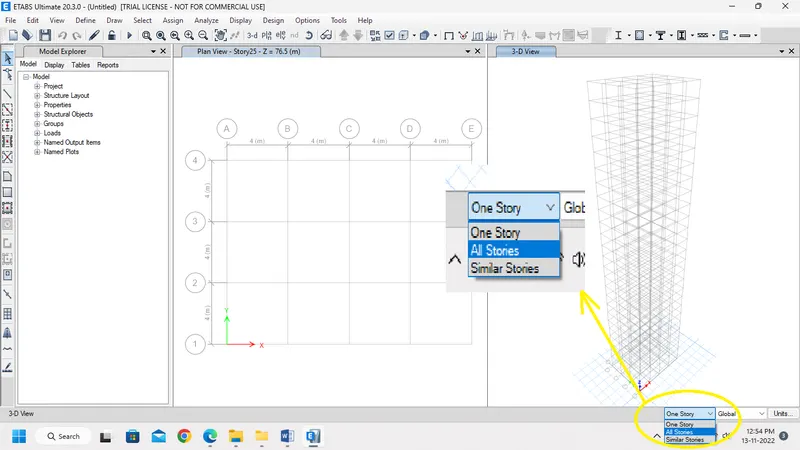
- Then select Quick draw columns and change Property as C800x800.
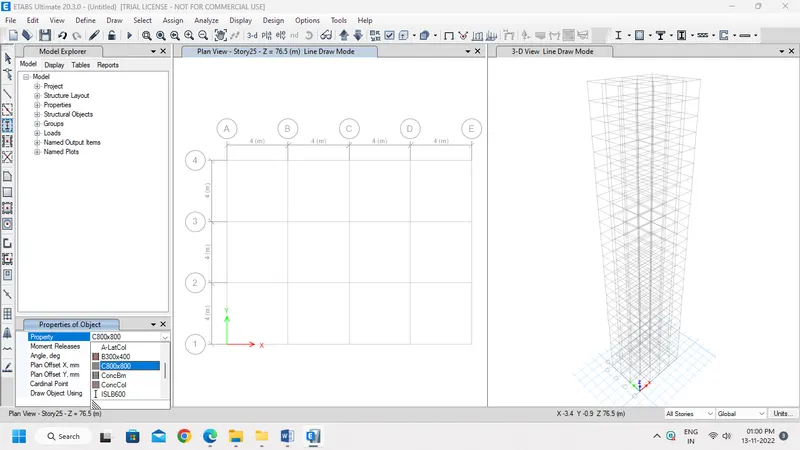
- Now place the columns at every intersection of Grids as shown below.
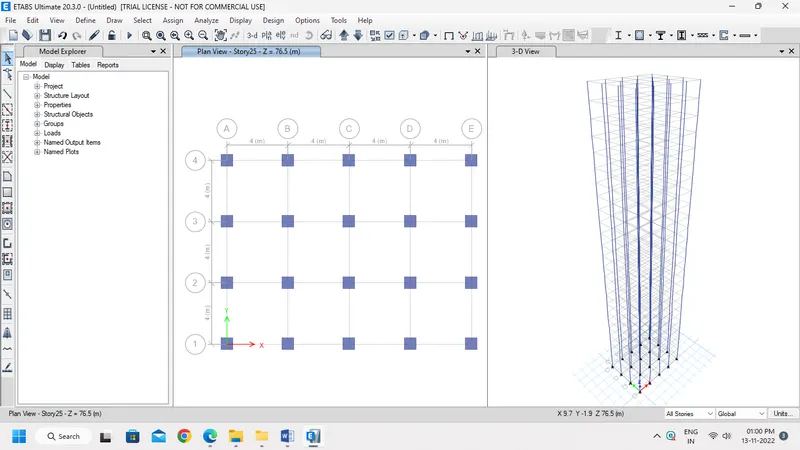
- Now select Quick draw Beams/Columns.
- Change Property as B300x400.
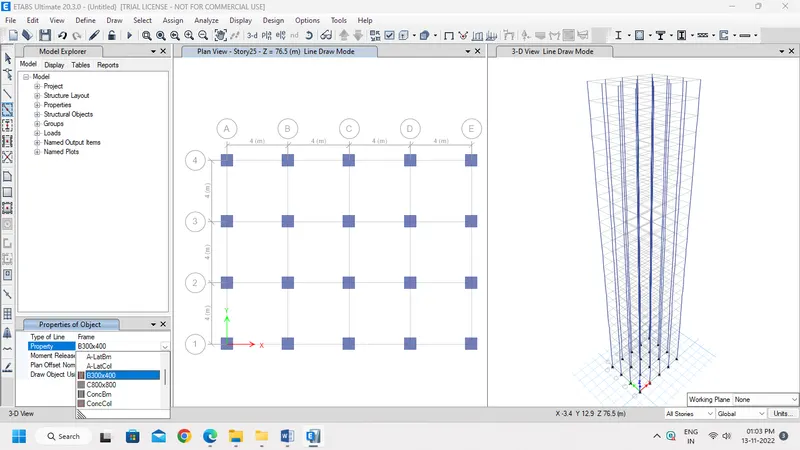
- Place the Beam at all Grids as shown below.
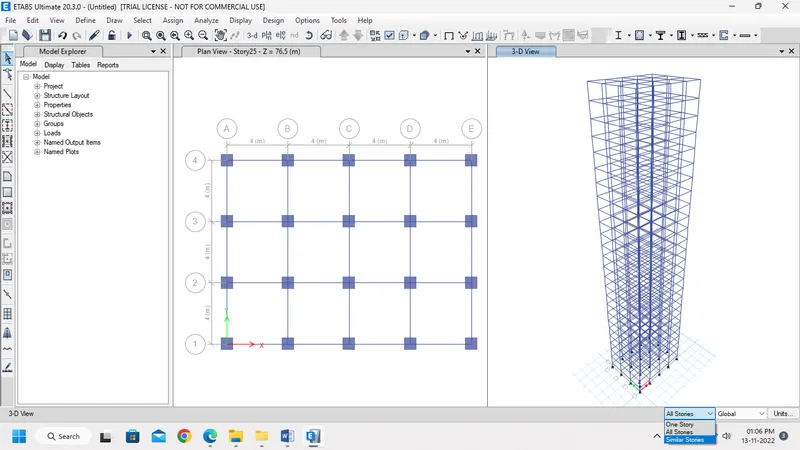
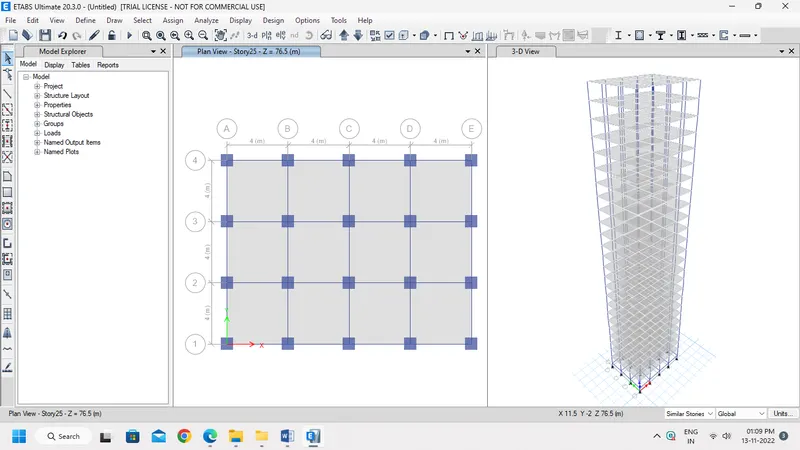
- Then Change mode as Similar stories at the bottom of the window. To avoid slab placement in the Plinth level.
- Select Quick Draw Floor/Slab and draw Slab sections as shown below.
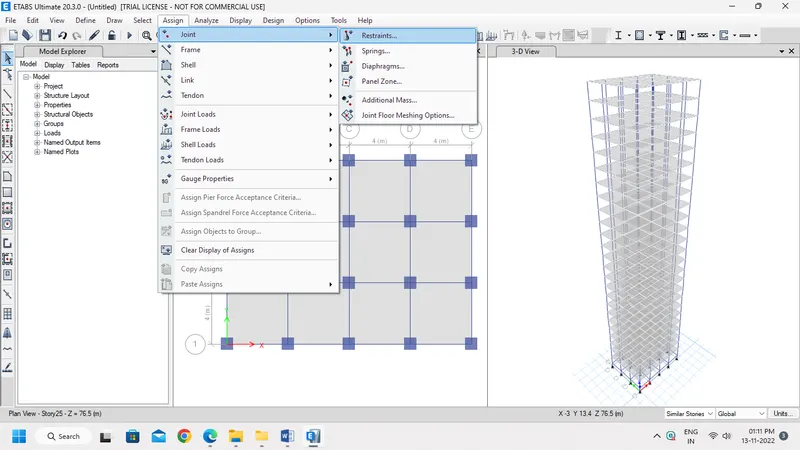
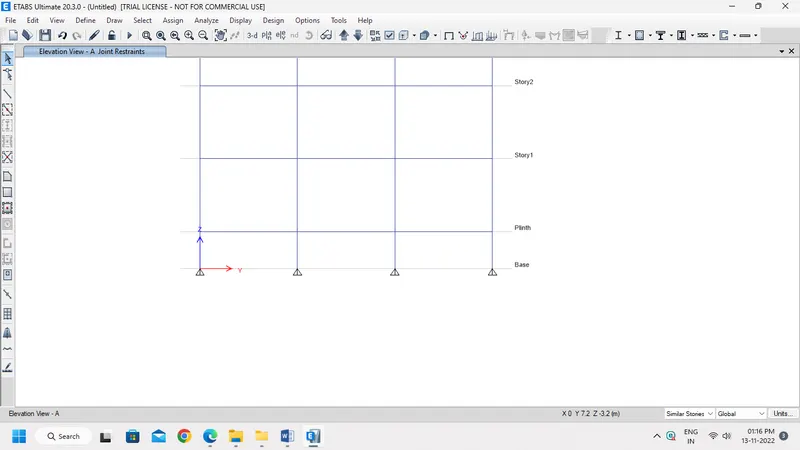
- Now Assign Base of the Structure.
- Open Elevation window, select base of columns and Click Assign -> Joints -> Restraints.
- A Pop-up window appears, in that select the Pinned Supports.
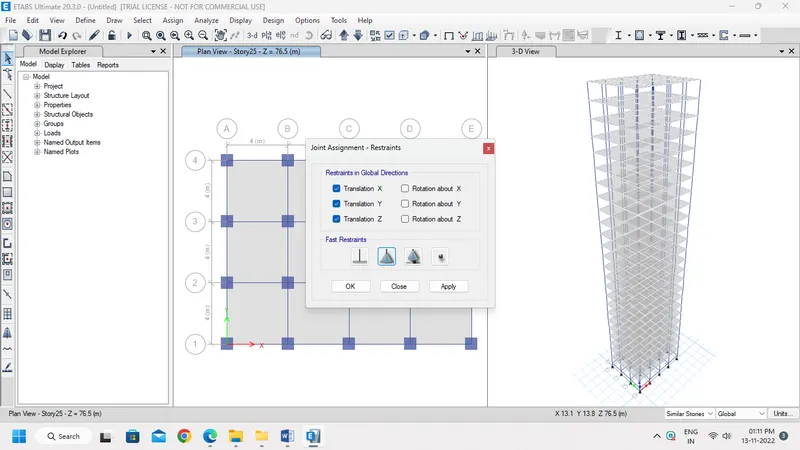
- And place the Pinned Supports at all Base of columns as shown below.
Step 6:-
-
Now define the load patterns:
-
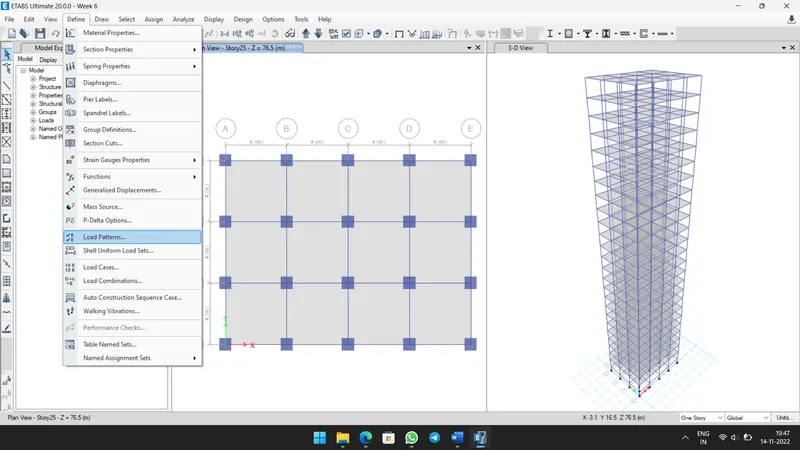
Click on the define to and click on load patterns.
-
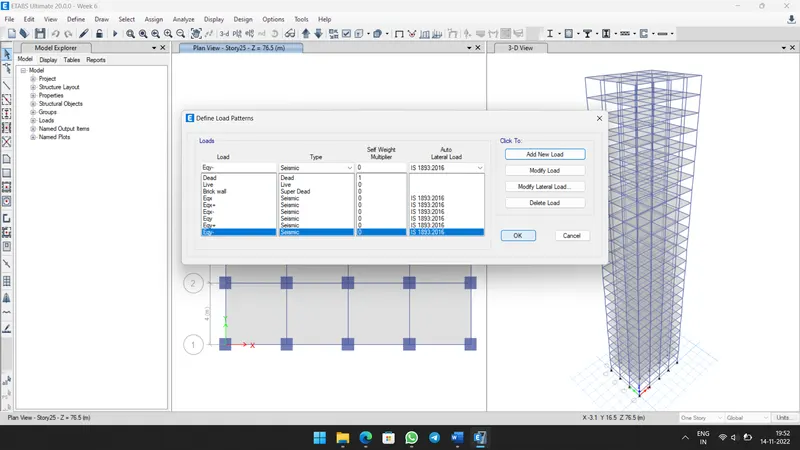
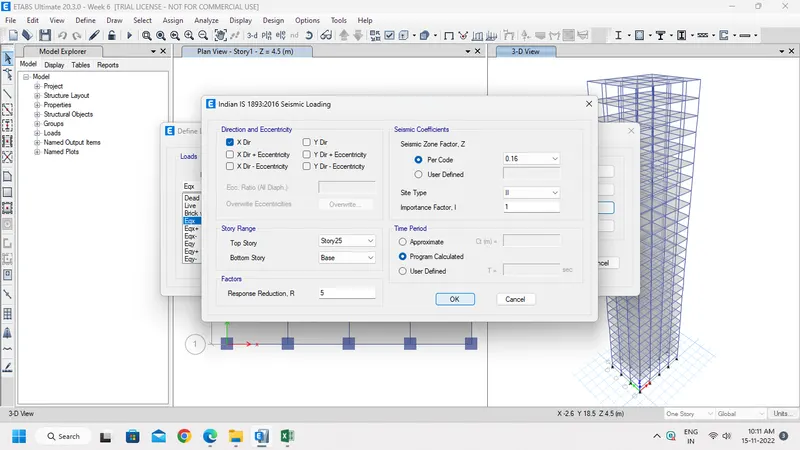
Define the loads like Dead load, Live load, Brick wall load and Earthquake load in x direction and eccentric earthquake loads in positive x and negative x and same loads in the Y direction also Mention IS codes of respective loads.
-
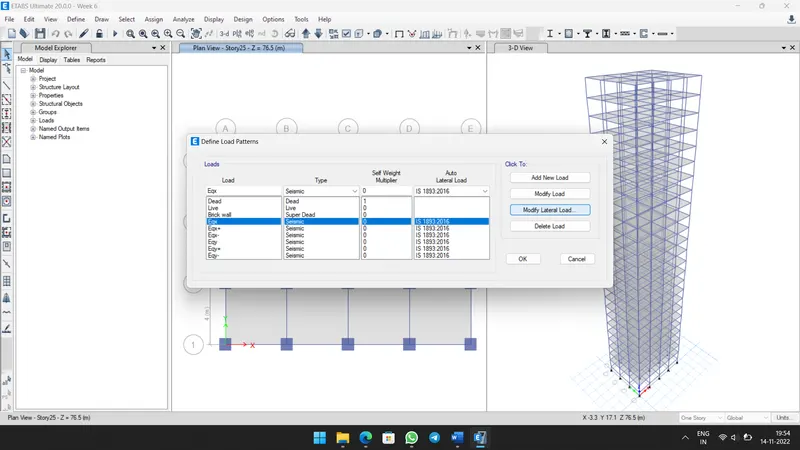
Click on modify lateral load, set range from base to 25th storey, Change Direction and eccentricity, Seismic zone factor as 0.36, Importance factor as 1.25 and Time period as 0.5 seconds.
-
Do the same for all the earthquake loads.
Step 7:-
-
To Assign the loads and select similar stories at the bottom of window.
-
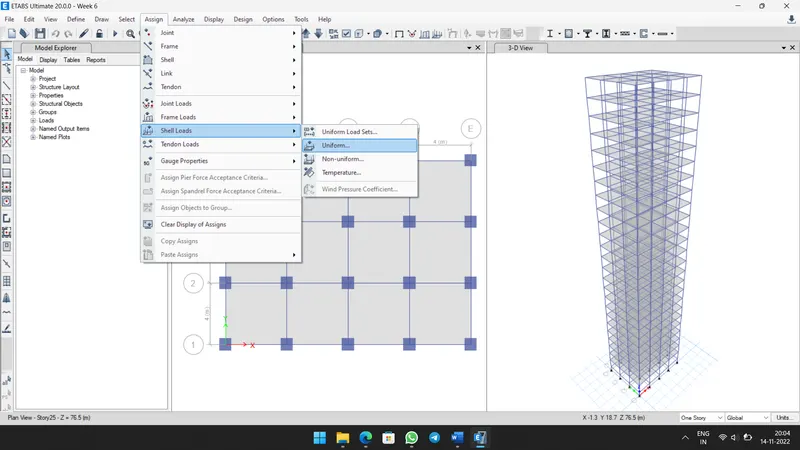
Then select all the members and Go to Assign tab -> Shell Loads -> Uniform.
-
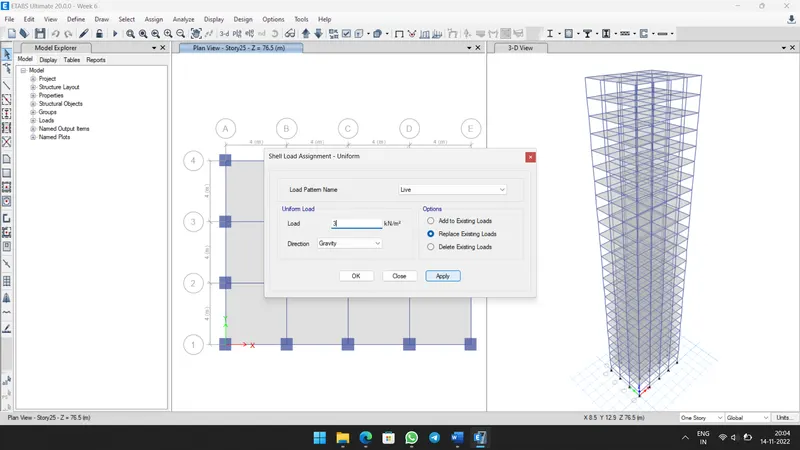
A new pop-up windows, in that select Live load and give value as 3 kN/m2.
-
Click on apply.
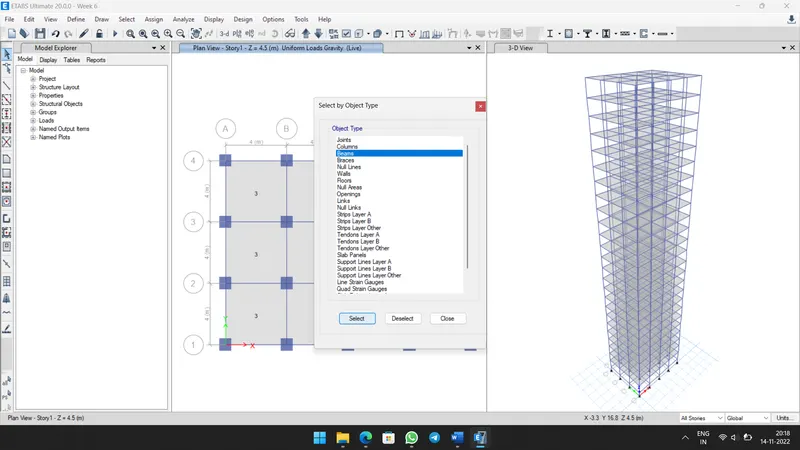
- Then Select All Stories at the bottom of window and select all beams by clicking Object types - Beams under Select tab.
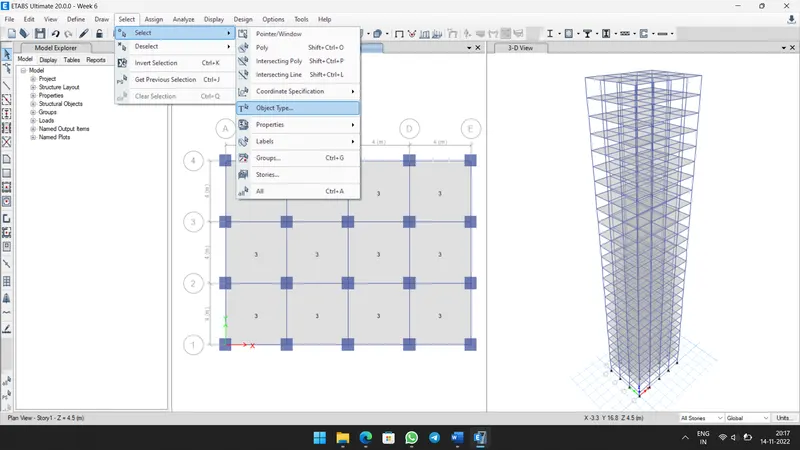
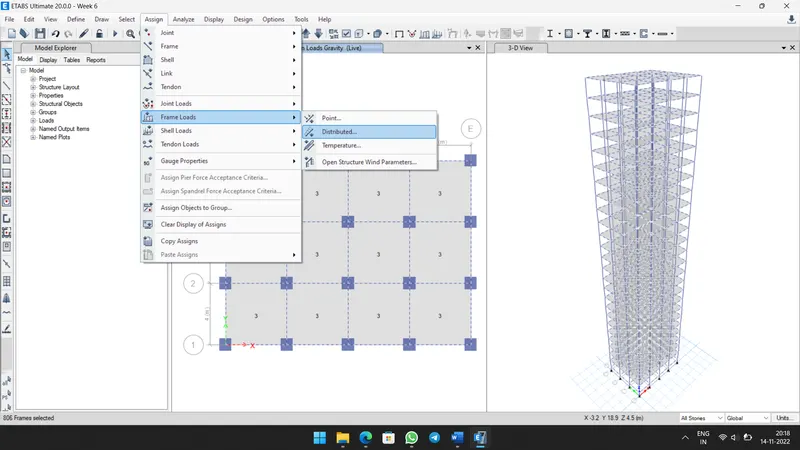
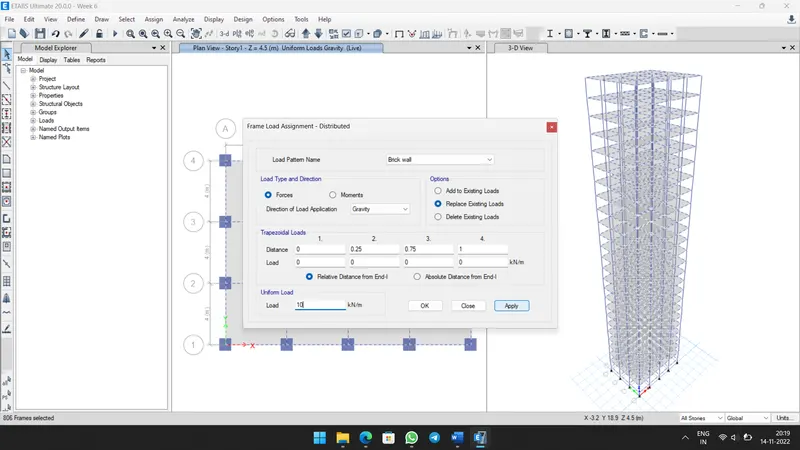
- Go to the frame load and click on the distributed load and enter the value as 10 kN/m.
-
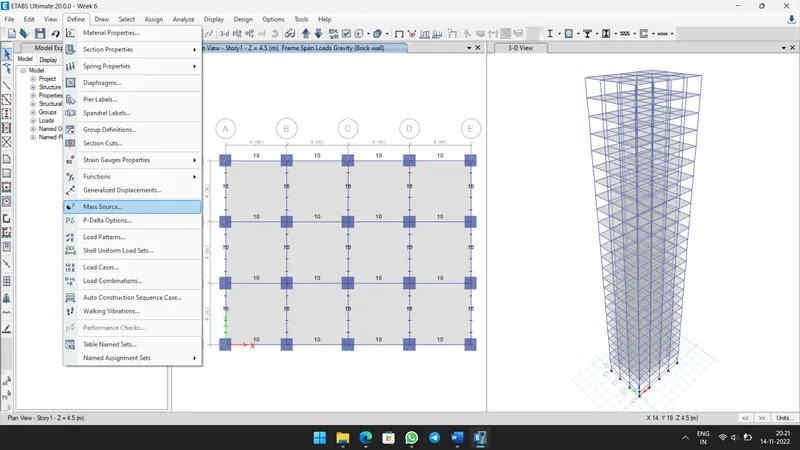
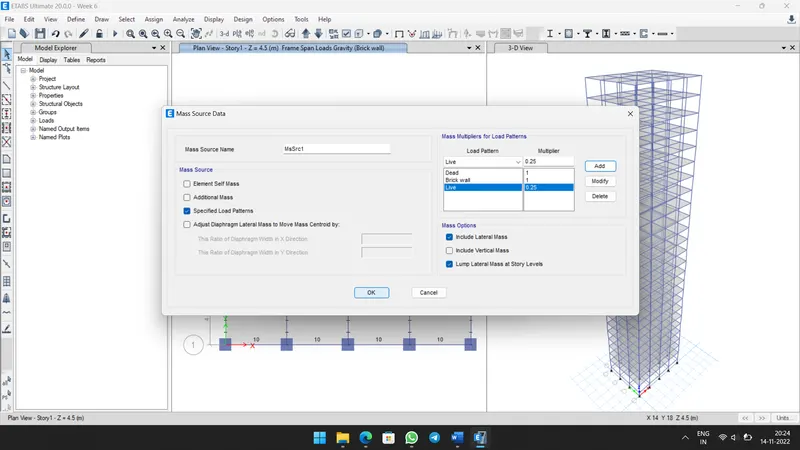
Now go to mass source from the define tab.
-
Modify the mass source and check the Specify load pattern.
-
Add load patterns and assign to the model.
Step 8:-
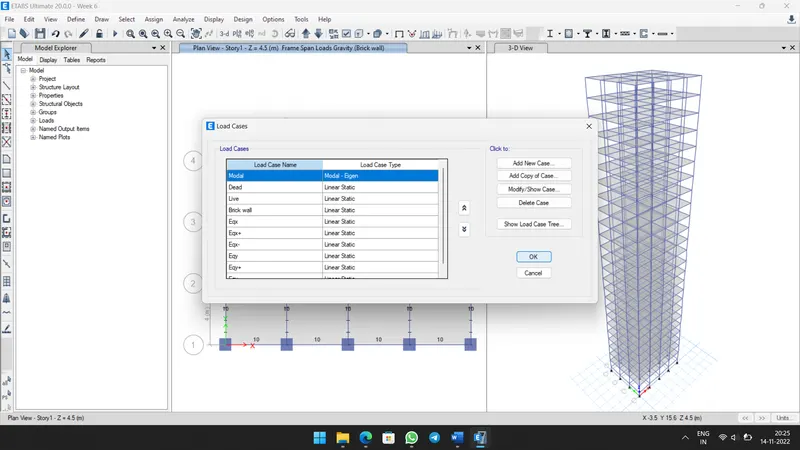
- Define the load cases.
-
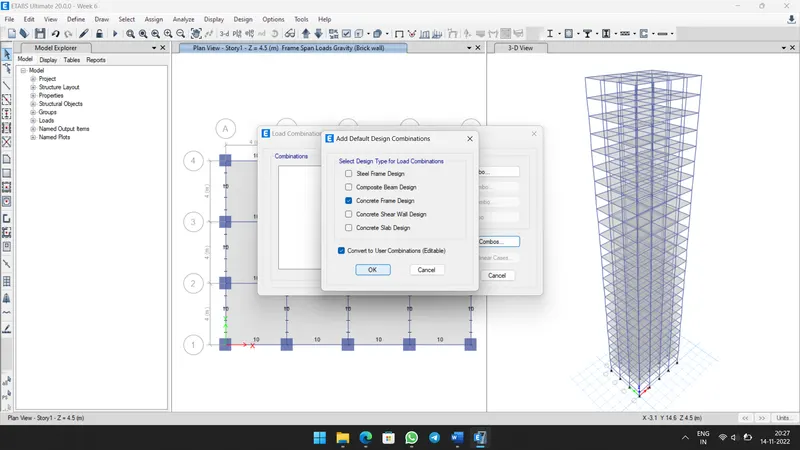
Click on the load combinations
-
Click on the add default design combos and select the Concrete Frame design.
-
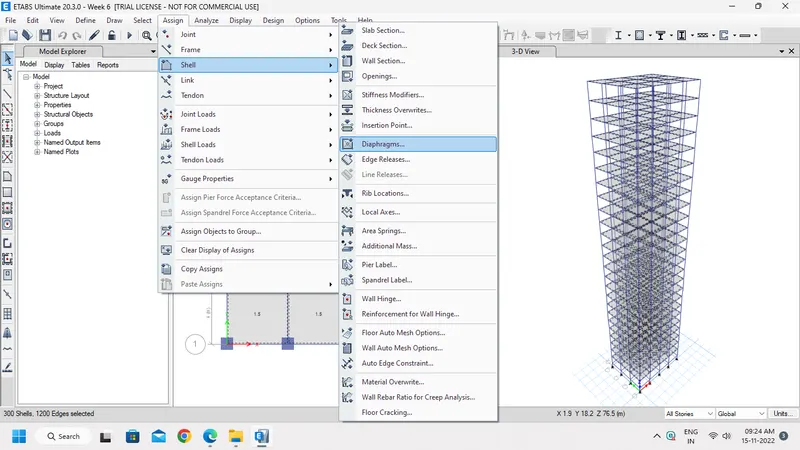
Go to assign tab, select shell and click on diaphragm. Then diaphragm created successfully.
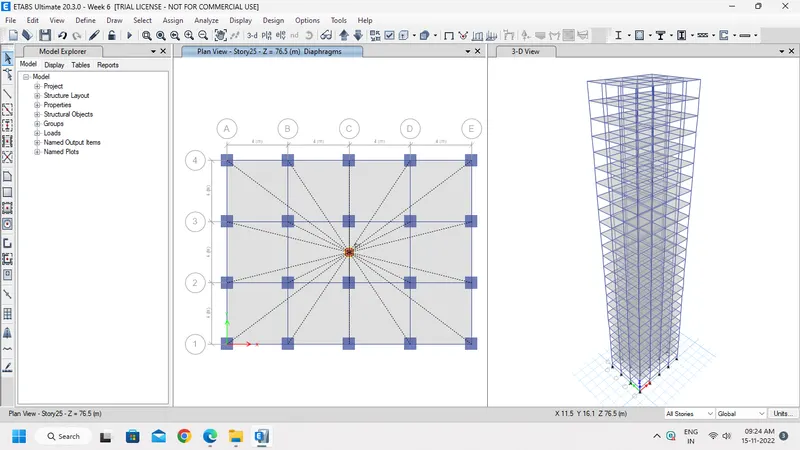
-
Analyze the model using analyze option then click on check model the modelled structure is verified without errors and warnings.
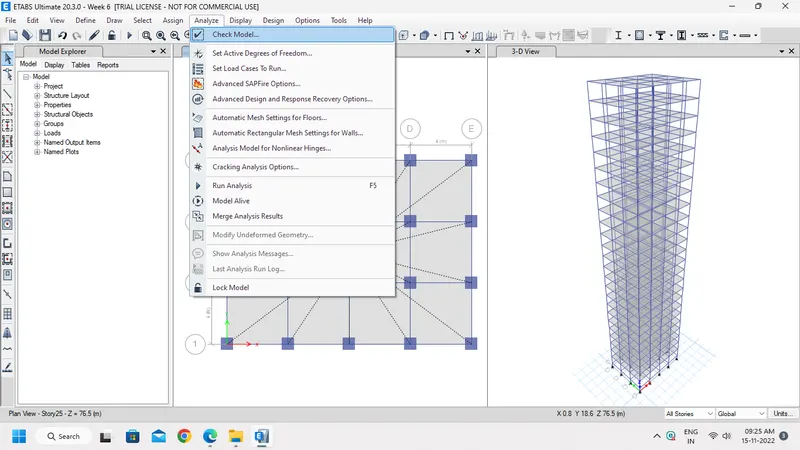
-
Using analyze > run analysis, the model is analyzed and deflection patterns, BMD/SFD patterns are cross checked logically.
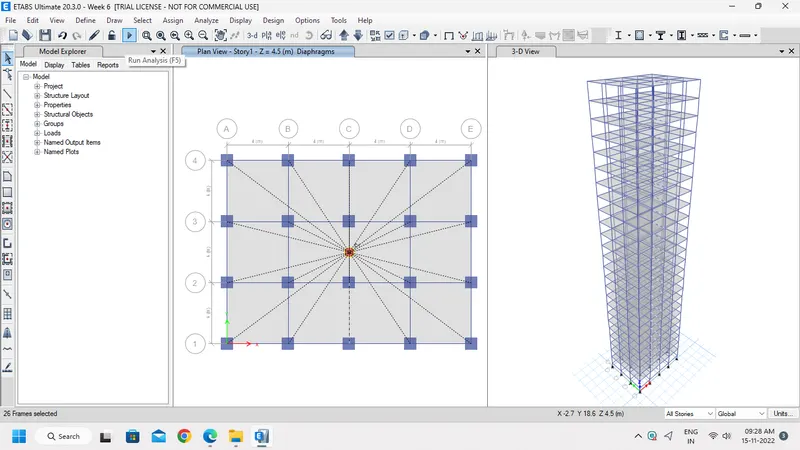
Result:-
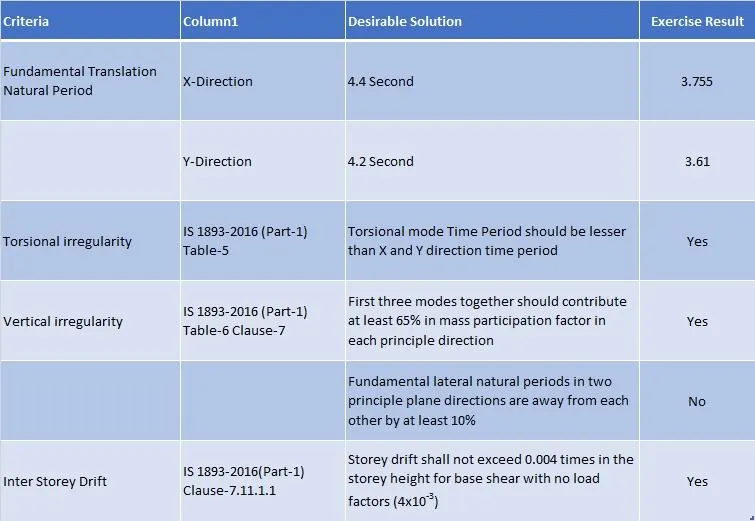
- Now click on Display-show tables Analysis results structure output Modal Information-modal periods and frequencies.
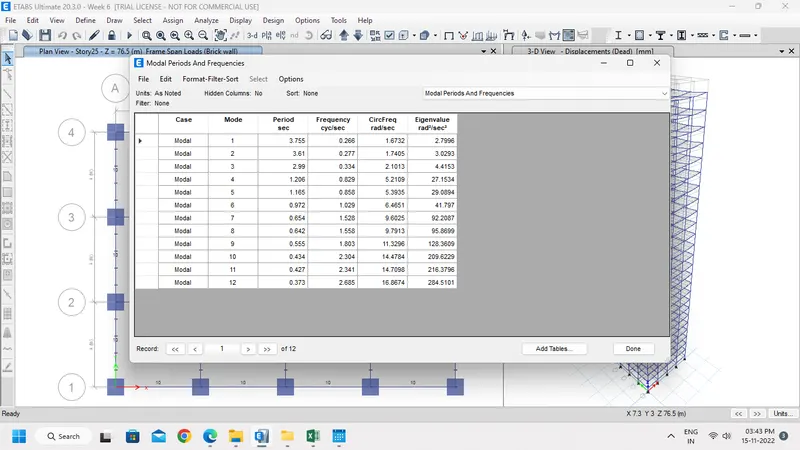
- The time periods for fundamental mode-ly direction and fundamental Mode -1 direction are noted from the table and are as follows.
-
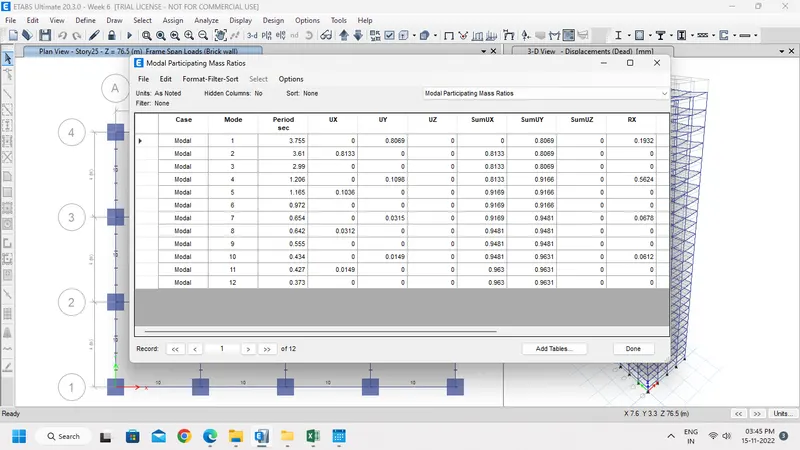
Display show tables analysis results structure output-modal information-modal participation mass ratios.
-
From the table the natural time period for mode-l and torsional DOF are noted as follow.
-
So, from the results it is clear that the torsional time period is less than two translational time period as required by IS 1893-2016 provision table 5
-
When we add the three-mode mass ratios we get 0.90 which means first three modes of seismic oscillation contribute more than 65% of building weight as per ETABS analysis
-
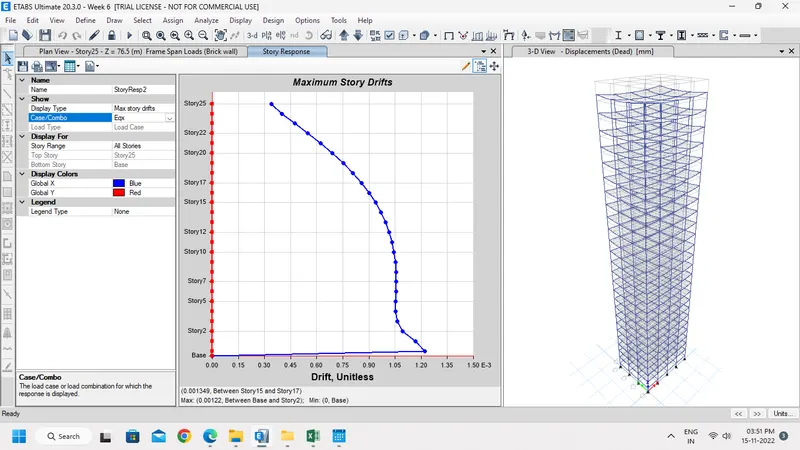
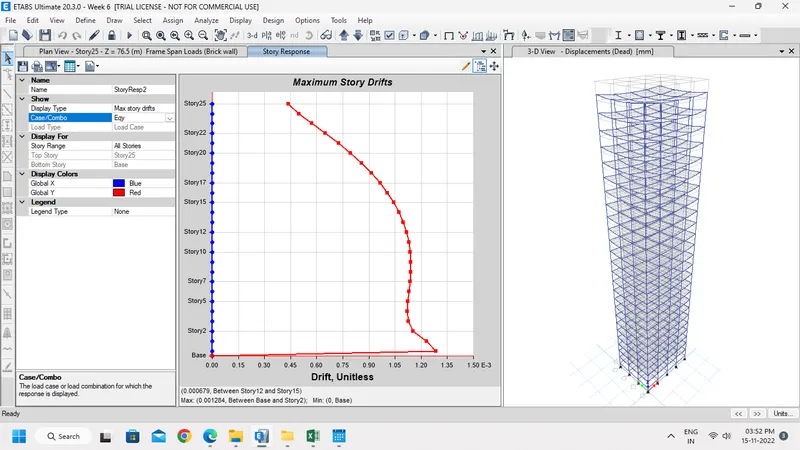
The storey drift for serviceability Base shear case (EQX or EQY) is tabulated from the following tool path.
-
Go to display Storey response plot.
-
Keeping load case to EQY and switching to max story drift the maximum drift value noted is 0.004.
-
So as per the clause 7.11.1.1, the maximum inter storey drift is milited to 0.004 for each storey height. But our value is 0.0020 which is within the code limits.
Conclusion:-
- Hence, the modelling is completed and analyses in ETABS. The results are within given ranges.