Introduction to REVIT concepts
AIM-1&2: From the file menu, create a new project (Structural / Architectural / Construction template ) and name the project appropriately. Save the new project file. Close and open using icons from file toolbar.
INTRADUCTION:Revit is a building information modeling software used across many professions, including architects, structural engineers, designers, and contractors. As an Autodesk product, Revit makes working with important AutoCAD drawings simple and easy.
PROCEDURE:
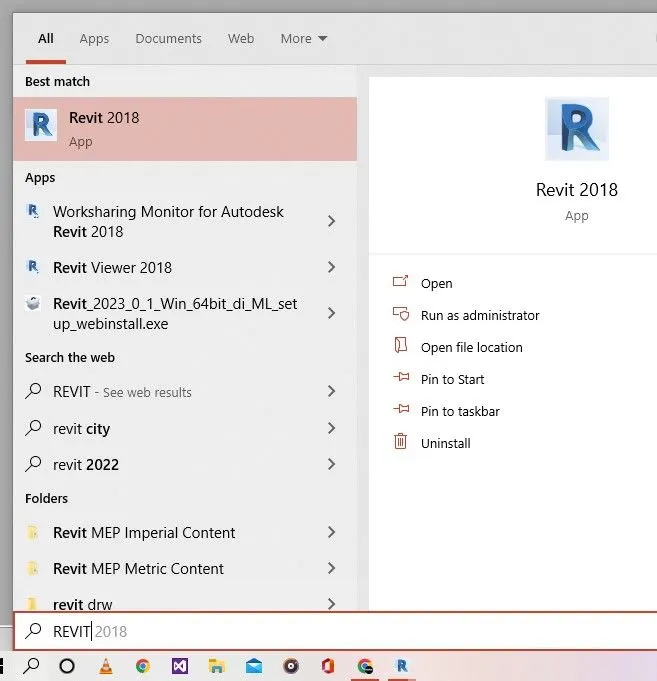
- Click on the revit ico from a desktop are from window bottion to search it and click it.

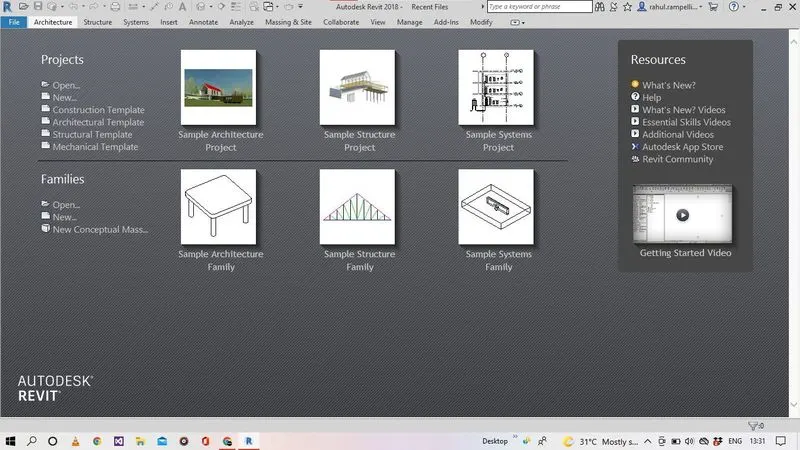
- we get a applicaion interface with multiple options included sample files, recent drawings before we saved and option regarding new,open,constraction template,architectural template,starctural template and mechanical template.
- if click on the new file we get a pop-up window
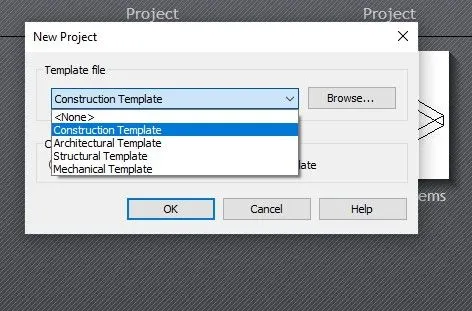
- IN that window we multiple options regarding our project related to select and click on the ok buttion to that file open.
- we are project constraction then we go with constraction template.
- after open the application working window we click on left corner file tab to open a rolling titles regarding the actions require click on save to save a file.
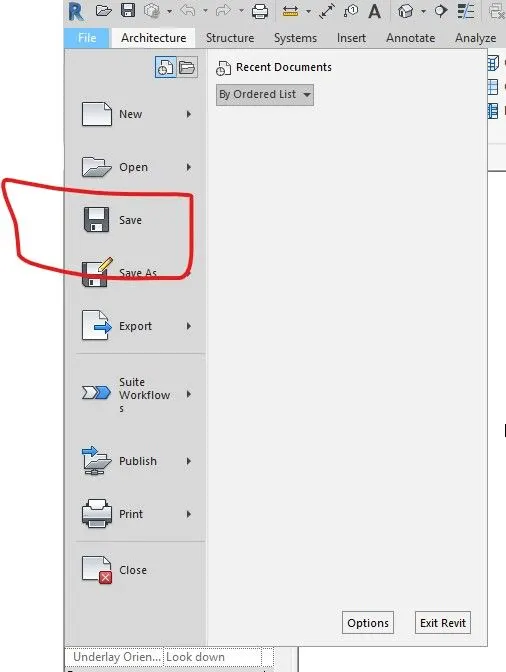
- we get pop-up window regarding select the destination of file to be saved.
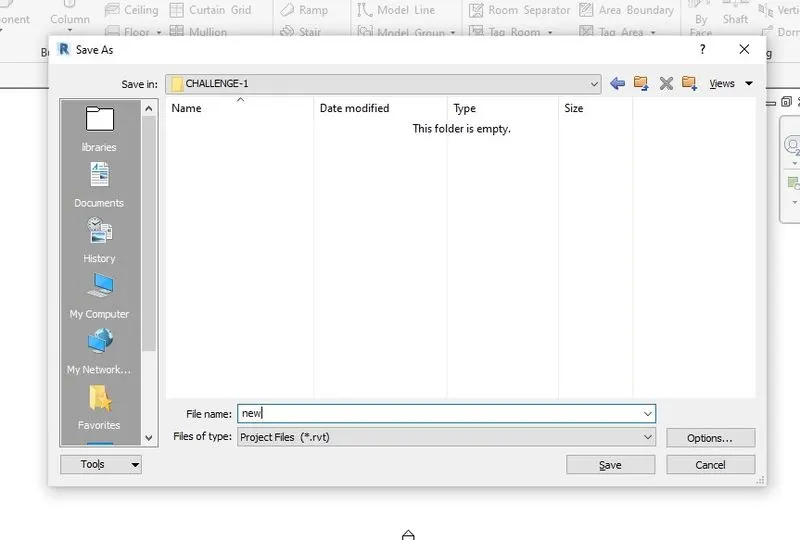
- set the destination, enter the name of project and click save.
- some shortcut also availabile for save and open file that action buttions are given in the upper left corner of diplay window of revit.
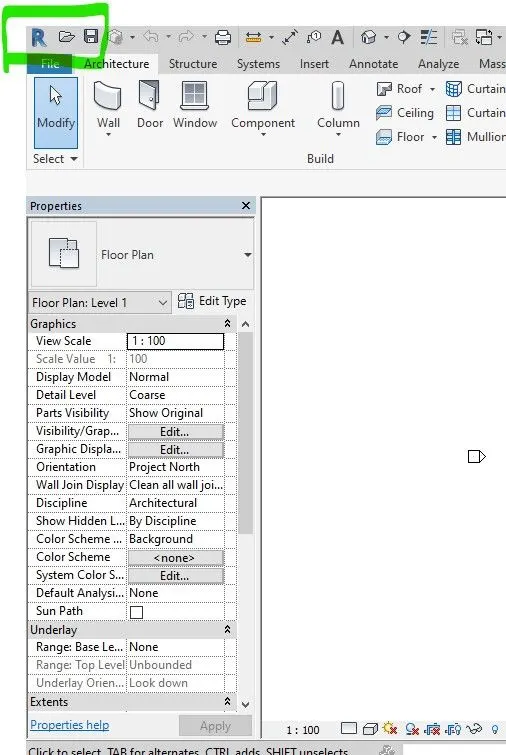
RESULTS: results of every action required in aim shown apperently upper demonstartion.
AIM-3: From the architecture/ structure toolbar familiarize with options to draw a wall. Create a rectangular layout of walls of about 40’-0” X 35’-0”.
NTRADUCTION:Revit is a building information modeling software used across many professions, including architects, structural engineers, designers, and contractors. As an Autodesk product, Revit makes working with important AutoCAD drawings simple and easy.
PROCEDURE:
- Click on the revit ico from a desktop are from window bottion to search it and click it.
- we get a applicaion interface with multiple options included sample files, recent drawings before we saved and option regarding new,open,constraction template,architectural template,starctural template and mechanical template.
- if click on the new file we get a pop-up window
- we get a application display appers where we work
- click o the wall icon left corner upper side of display after that select the
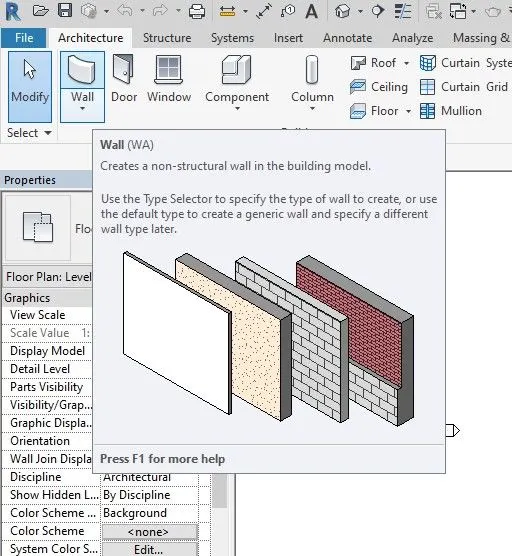
- 1st point enter value we want 40' enter
- thent enter 2nd point 35' enter like this our required rectangle created.
RESULTS:
AIM-4&5:From the Annotate toolbar use the aligned option to add dimensions to the layout
5. Use the properties browser to switch to different wall types
INTRADUCTION:Revit is a building information modeling software used across many professions, including architects, structural engineers, designers, and contractors. As an Autodesk product, Revit makes working with important AutoCAD drawings simple and easy.
PROCEDURE:
- Click on the revit ico from a desktop are from window bottion to search it and click it.
- we get a applicaion interface with multiple options included sample files, recent drawings before we saved and option regarding new,open,constraction template,architectural template,starctural template and mechanical template.
- if click on the new file we get a pop-up window
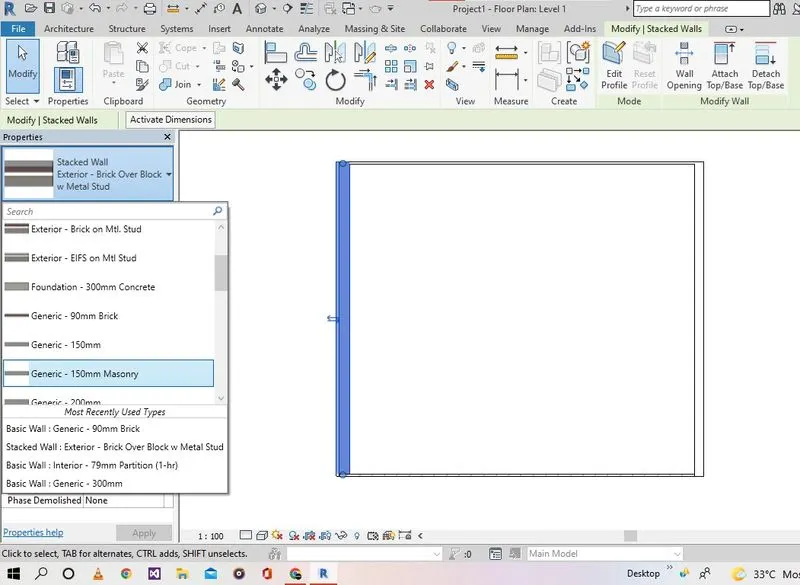
- if select the wall we get details appered in propertiy brower.
- from where we change settings and matrials ,wall type,thickness and height can manage.
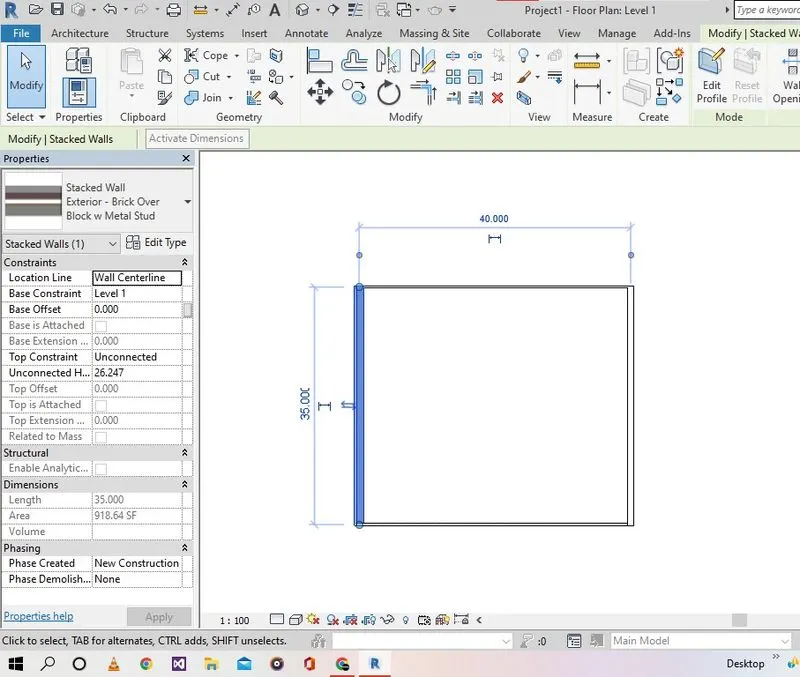
- in that browser properties we change the material and type of wall can change like this
- from annotation buttion in riddion bar click it and select aligned or linear dimetion then select the perticuler point to point place the curser point to require dimetion elements
- from that property brower we change the type exterier,interier and foundation wall like this.

- select point distance required
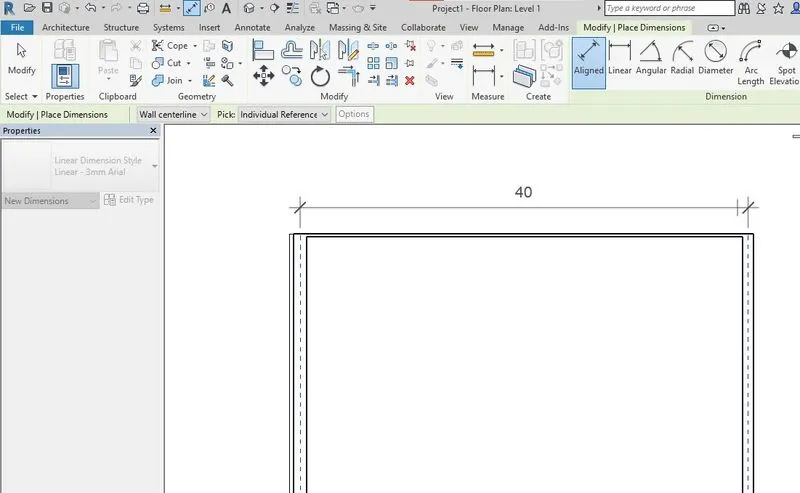
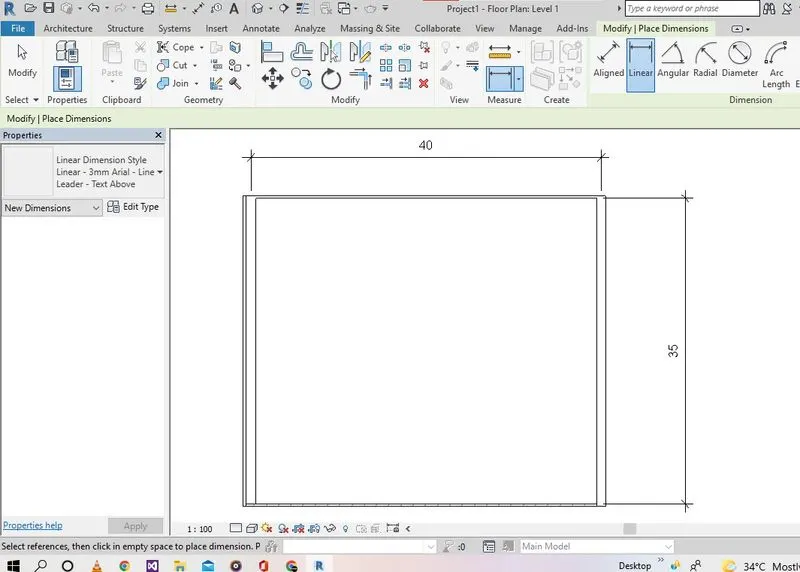
RESULTS: results of every action required in aim shown apperently upper demonstartion.
AIM-6: Create a 3D view from the view toolbar and save the view with the appropriate name
INTRADUCTION:Revit is a building information modeling software used across many professions, including architects, structural engineers, designers, and contractors. As an Autodesk product, Revit makes working with important AutoCAD drawings simple and easy.
PROCEDURE:
- Click on the revit ico from a desktop are from window bottion to search it and click it.
- we get a applicaion interface with multiple options included sample files, recent drawings before we saved and option regarding new,open,constraction template,architectural template,starctural template and mechanical template.
- Open the previous project by using open buttion from tooibar upper left corner
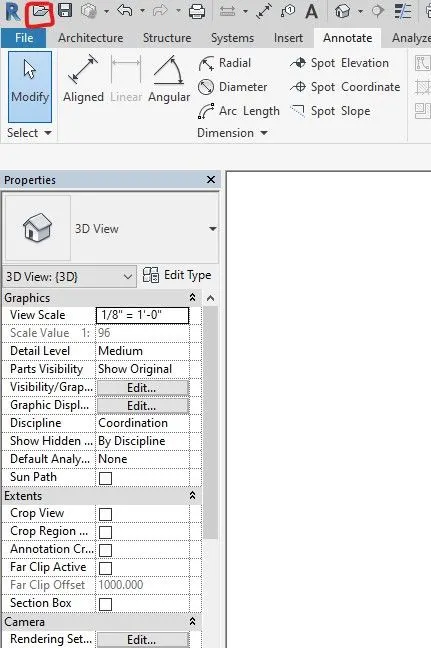
- defult 3d view home bttio placed in top toolbar click on that
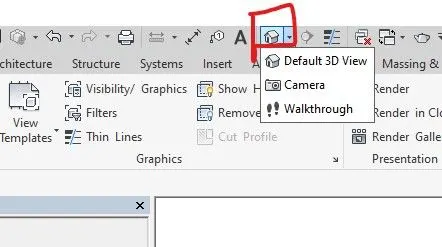
- after that we get 3d view of element is displayed on working display in right corner of working display we get view cube icon
- we place a mouse pointer in where we want and right click we get rolled titles that we click where save.
- THEN WE GET A POP-UP WINDOW OPEN FOR NAME THE VIEW
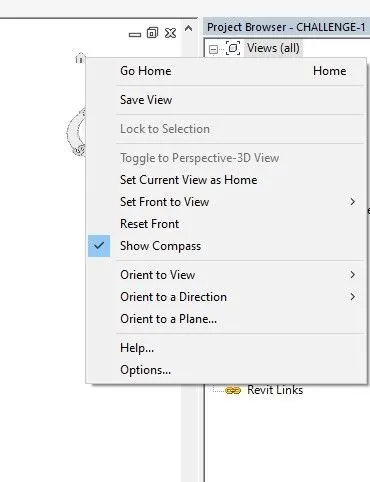
RESULTS:
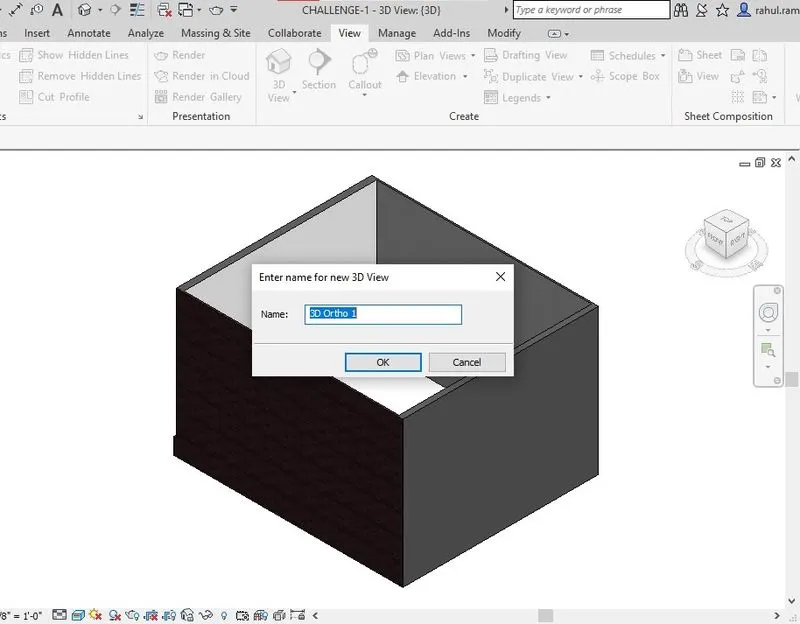
click ok to save the view.
AIM-7: Navigate through the 3D model using the view cube. Orbit/pan through the model layout created
INTRADUCTION:Revit is a building information modeling software used across many professions, including architects, structural engineers, designers, and contractors. As an Autodesk product, Revit makes working with important AutoCAD drawings simple and easy.
PROCEDURE:
- Click on the revit ico from a desktop are from window bottion to search it and click it.
- Open the previous project go to navigation bar right side of the working display if is it not displayed go to view tab in tool bar click on the user interface click the check box of navigation bar.
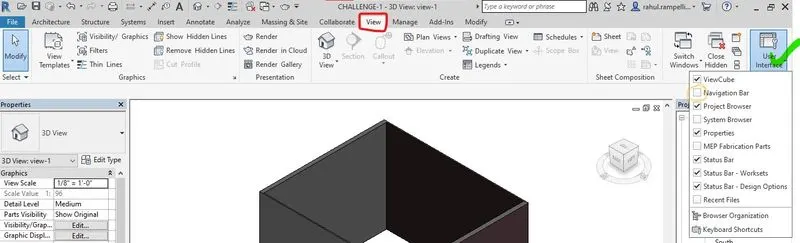
- Go to navigation bar and click on the navigation wheel open multile options like orbit,pan,walk,zoom in zoom ot and rewind etc. click on the orbit buttion to rotate drawing element which side we want.
RESULTS: click on the pan to move drawing element which side we want.
AIM-8: Use the visibility settings option below to switch model to shaded, realistic, hidden lines options
INTRADUCTION:Revit is a building information modeling software used across many professions, including architects, structural engineers, designers, and contractors. As an Autodesk product, Revit makes working with important AutoCAD drawings simple and easy.
PROCEDURE:
- Open the previous drawing element we get click on the visibulity style icon placed in working display of of revit left bottiom corner.
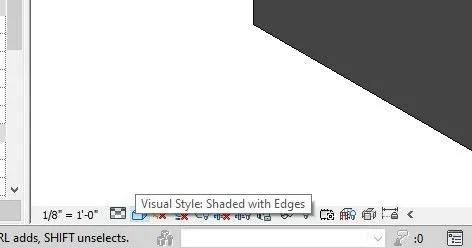
- click on that icon we get multiple option of styles like realastic,shaded,wirframe, and hiden etc weselect which we want
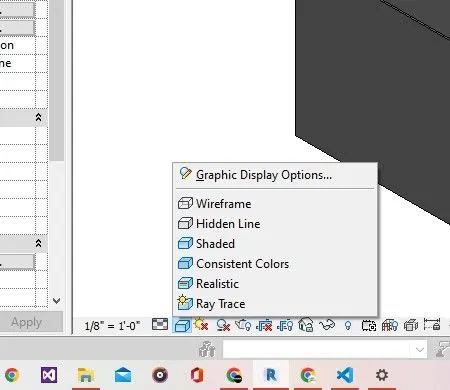
RESULTS:
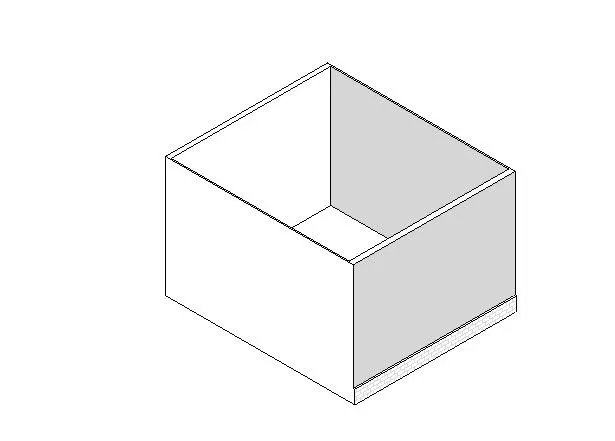
- if switch drawing in shaded
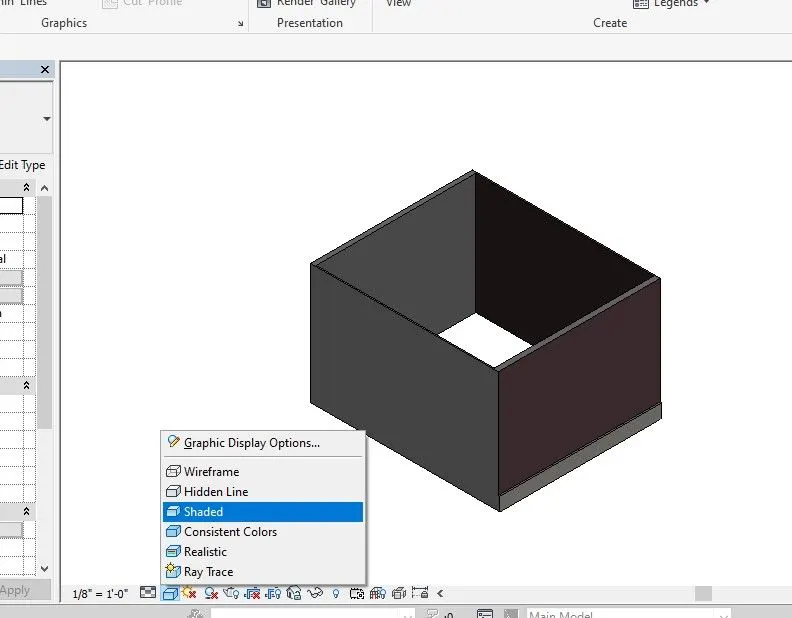
- switch to realastic
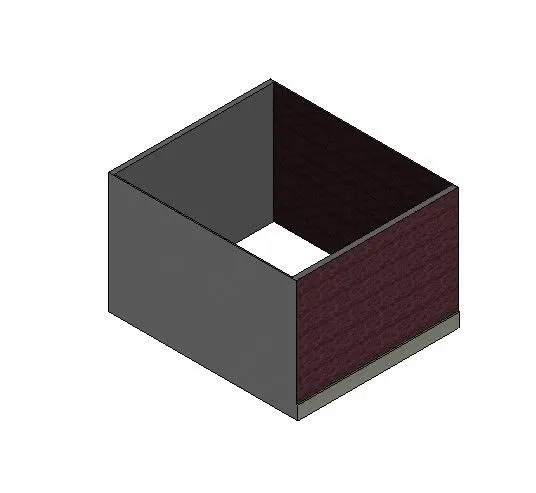
- switch to hiden lines
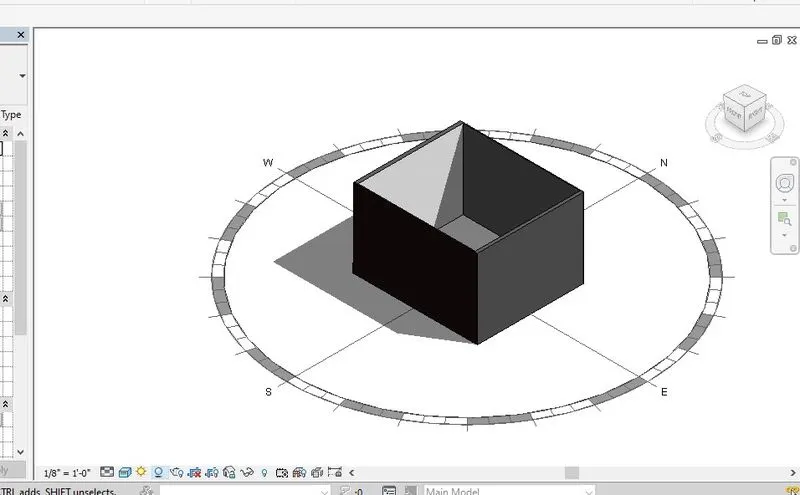
AIM-9: Turn the sun path on and off to view shadings in the layout created
INTRADUCTION:Revit is a building information modeling software used across many professions, including architects, structural engineers, designers, and contractors. As an Autodesk product, Revit makes working with important AutoCAD drawings simple and easy.
PROCEDURE:
- Open already existed drawing
- we dedicated icon for sun path bottom left corner
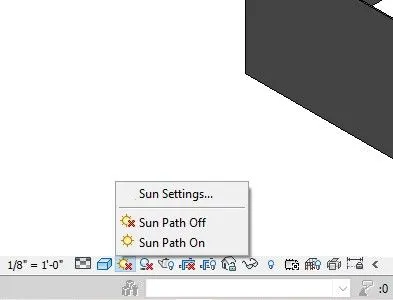
- we have chane to off it are on it through that buttions. if on
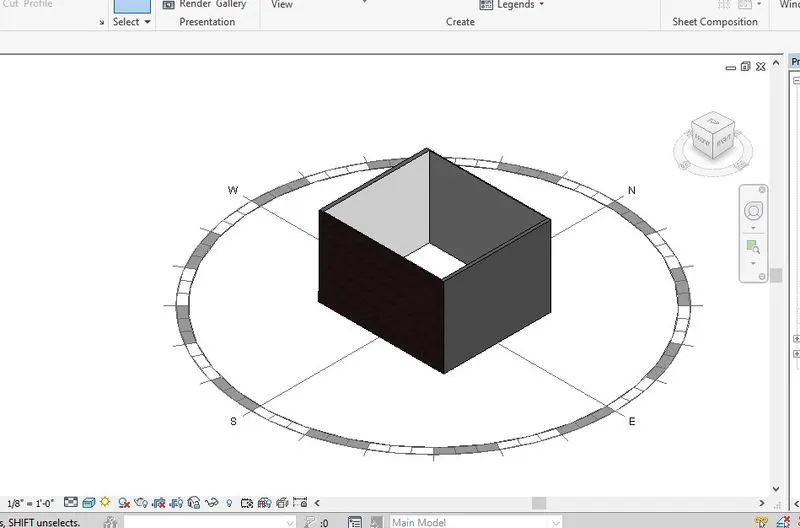
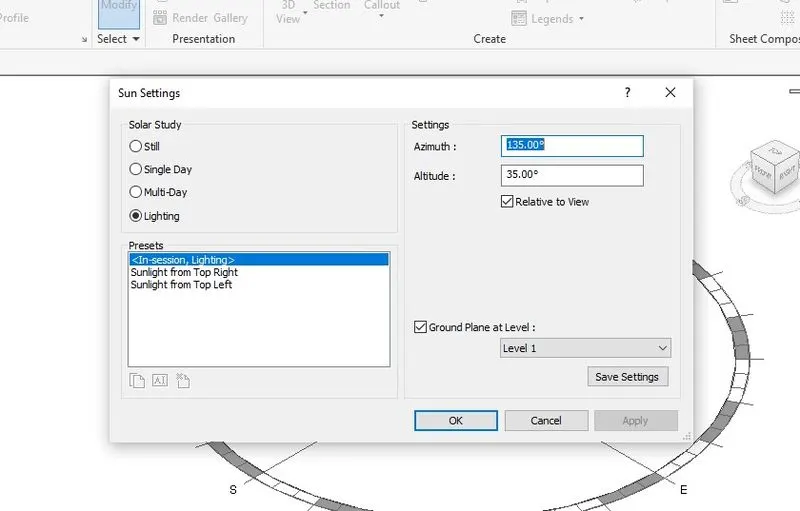
- we do any custom settings in sun path we have a option in that setings in sunpath icon
- similerly shadows also we dedicated button in beside of sunpath icon for onit are off it.
RESULTS:
AIM-10: Use the Manage toolbar to enter project settings, project name, and project issue date (choose according to your convenience).
INTRADUCTION:Revit is a building information modeling software used across many professions, including architects, structural engineers, designers, and contractors. As an Autodesk product, Revit makes working with important AutoCAD drawings simple and easy.
PROCEDURE:
- Go to the manage tool bar and select project information icon.
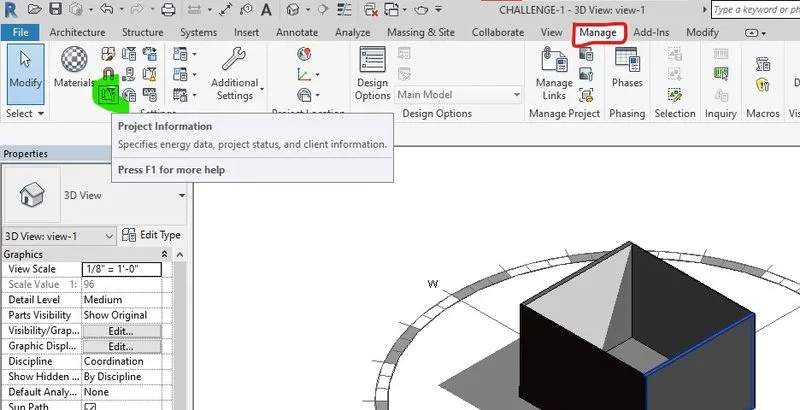
- we get pop-up window related project information to fill
RESULTS:
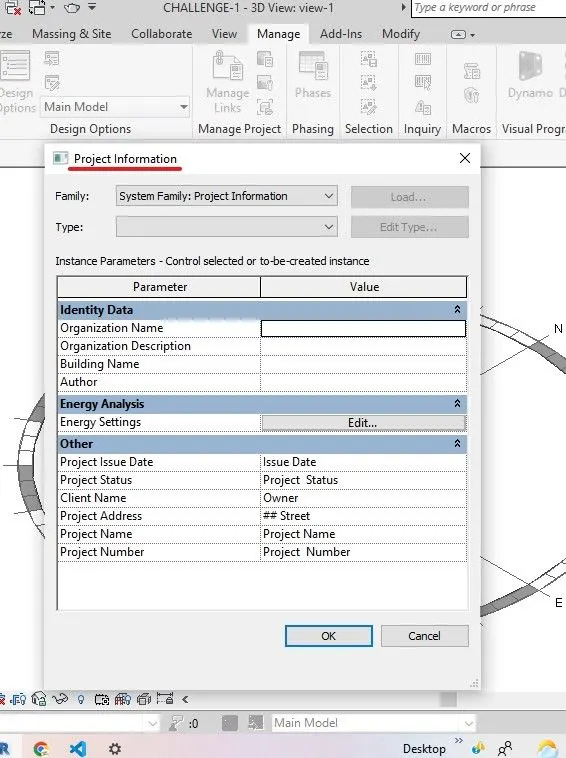
- enter details of project related like project date, project issued date.
AIM-11: What is the Analyze toolbar used in Revit? How it is beneficial for design and modeling
INTRADUCTION:Revit is a building information modeling software used across many professions, including architects, structural engineers, designers, and contractors. As an Autodesk product, Revit makes working with important AutoCAD drawings simple and easy.
DETAILS:
- analyze tool bar is a stractural tool bar it use for the stractural analyse building
- it is usefull for apply the loads and adjust loads
- apply the boundary conditions to building what we design
- analyzing tool bar included the

- boundary conditions
- loads
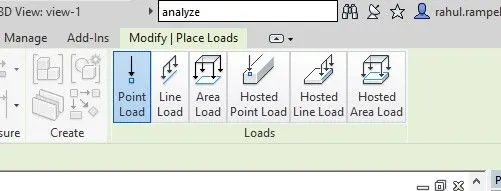
- load cases
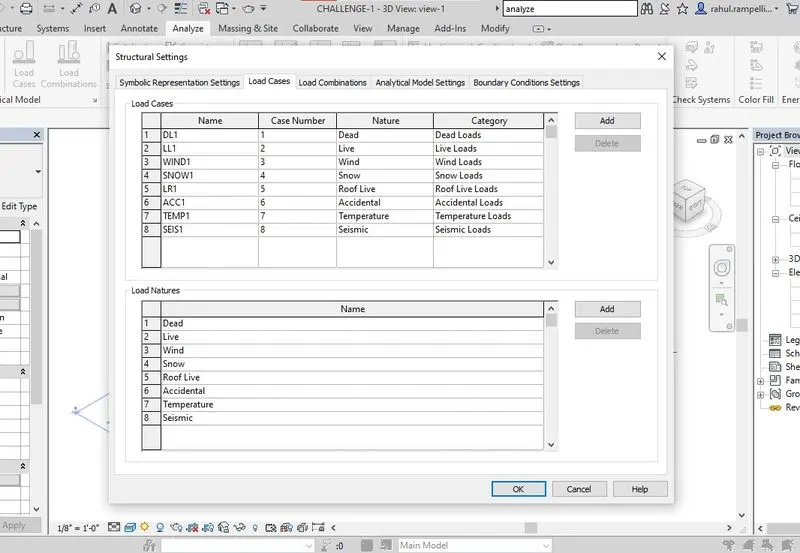
- load combinations
AIM-12: What are the links that Revit supports to be linked to the model
INTRADUCTION:Revit is a building information modeling software used across many professions, including architects, structural engineers, designers, and contractors. As an Autodesk product, Revit makes working with important AutoCAD drawings simple and easy.
DETAILS:
REVIT LINK:
- Link another revit model to the current model.
- you can limk models together to specify the relateive locations of individual buildings on a compus or to co-ordinate efforts across disciline (architectural,stractural, and engineering)
LINK IFC:
- Links an ifc file to the current project to reference its information for additional design work.
- if you later make change to the orginal ifc file and reload the link the project update to reflect the ifc file changes
- before linking an ifc file use open ifc options to specify the project template to use and to load a file that maps ifc classes to revit categories.
LINK CAD:
- links a cad file to the currwet revit project linking is simkiler to having an xref in autocad when the original linked file file changes these changes are reflected in the file when you reloaded the project.
AIM-13: Why do you need the Collaborate tab in Revit? How it supports modeling and its efficiency
INTRADUCTION:Revit is a building information modeling software used across many professions, including architects, structural engineers, designers, and contractors. As an Autodesk product, Revit makes working with important AutoCAD drawings simple and easy.
DETAILS:
collaboration tab in revit enables the work shareing. through work sharing uses on same local area network together in a same revit model . so this is how we need to collaborate option in revit
COLLABORATE
- work together
- cloud sharing
- work shareing
- central model.