Hood design
Objective :
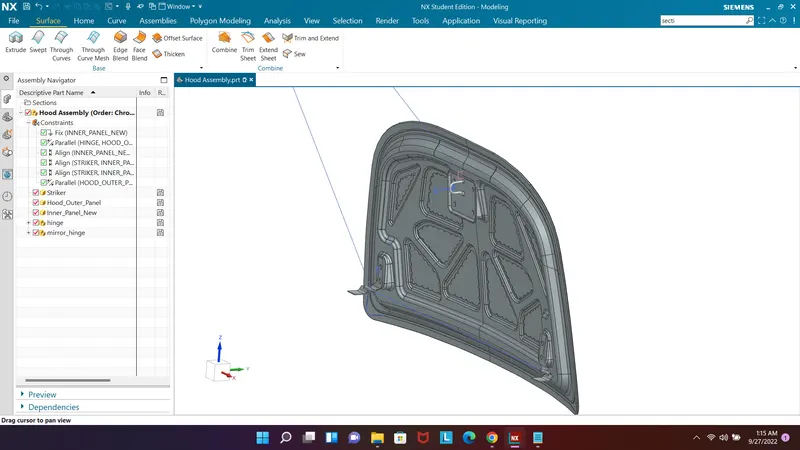
To create the inner panel and outer panel of the car hood with reference to the given Class A surface of the outer pane of the hood and to assemble the both the panels with the help of hemming. Also to assemble the relative components such as hinges, striker and reinforcements required.
WHAT IS HOOD
A car hood, also referred to as a bonnet in some other countries, is the hinged cover that rests over the engine of a front-engine vehicle. Its purpose is to provide access to the engine for repair and maintenance. A concealed latch is typically used to hold down the hood. On vehicles with an aftermarket hood and on racecars, hood pins may be used to hold down the car hood. Hoods sometimes also contain a hood scoop, wiper jets, power bulge, and/or hood ornament. Car hoods are typically constructed from steel and sometimes from aluminum. Aftermarket car hoods may be constructed from various other materials, including carbon fiber, fiberglass, or dry carbon. The hood design may vary from one make and model to another
Purpose of Hood Design:
- Save and safety of purposes inside the car.
- Cover all engine parts and radiators.
- Reduce the Air effect due to design aerodynamic shape.
- provide access to the engine for repair and maintenance.
- reduces engine noise, providing you with a quieter drive.
- It can also help keep the paint underhood last longer.
- it can give motorists more time to get out of the car before the fire blazes out of the hood.
Functional requirements
functional requirements normally associated with closures such as passenger safety, air tightness, low cycle fatigue strength etc.
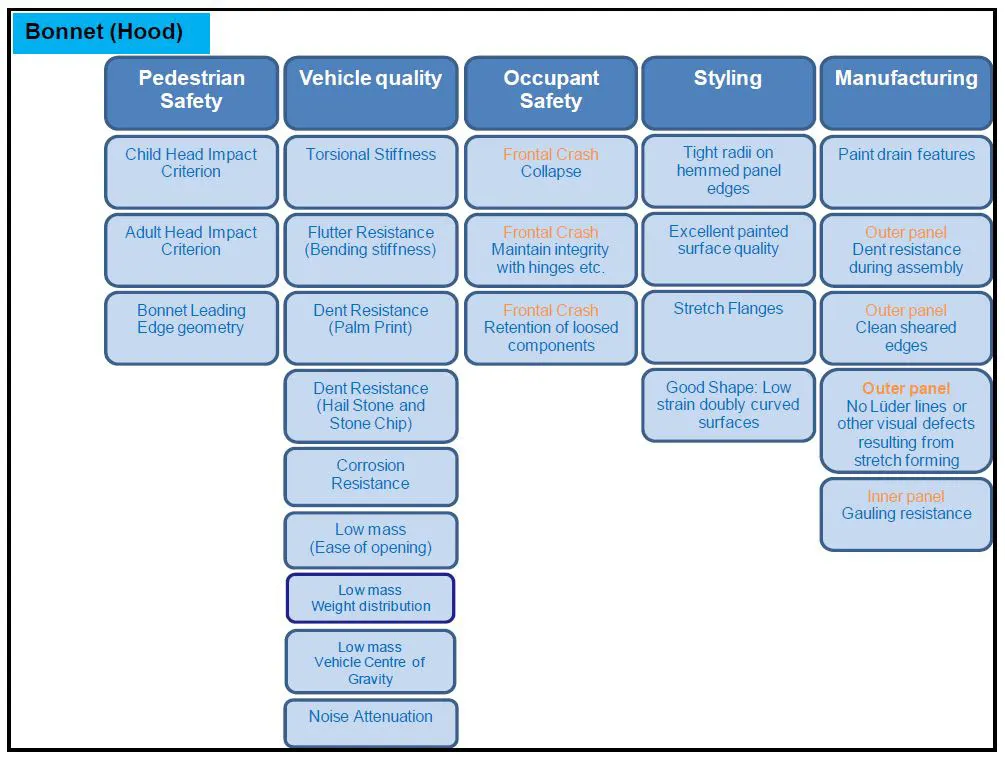
The design of the hood should meet the following functionalities :-
- Pedestrian safety - Child impact criterion, adult impact criterion and bonnet leading edge geometry.
- Vehicle quality - torsional stiffness, flutter resistance (bending stiffness), dent resistance, corrosion resistance, low mass, low mass weight distribution, low mass vehicle center of gravity and noise attenuation.
- Occupant safety - Frontal crash collapse, maintain integrity with hinges and retention of loosed components.
- Styling - Tight radii on hemmed panel edges, excellent painted surface quality, stretch flanges and good shape (low strain doubly curved surfaces)
- Manufacturing - Paint drain features, Dent resistance of outer panel during assembly, clean sheared edges of outer panel, no visual defects on the outer panel resulting from stretch forming and gauling resistance of inner panel
Purpose of Blanking and piercing:
- Reduce the Body of weight.
- Improve the Strenght of the Body.
- Distribute Impact Force.
- Improve Mileage of Car.
- No sharp corners inside the panel.
- No negative draft.
- Provide appropriate corner relief on the area of curvature.
- Outer Panel Thickness = 0.75mm.
- Inner Panel Thickness = 0.75mm.
- Reinforcement Thickness = 1.5mm.
- Minimum Filet Radius = 0.3mm+thickness(Example,thickness of outer/inner panel),0.3+0.75=3.75mm.
Design procedure
By following the master section
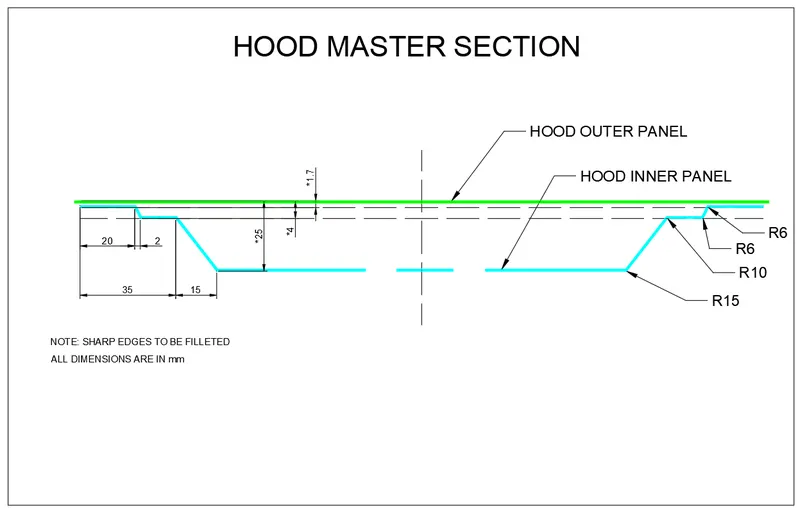
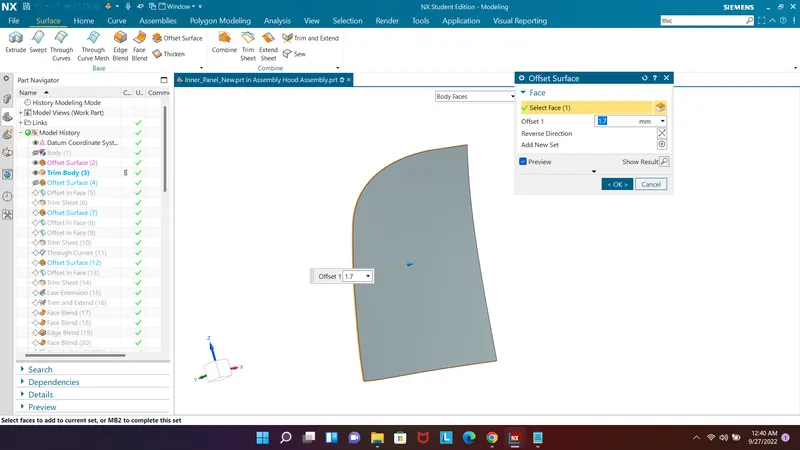
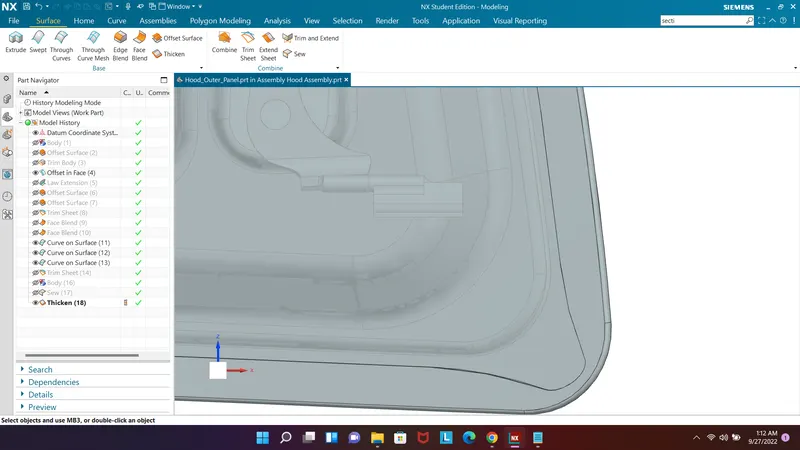
Offset a surface at 1.7mm and create the 'offset curve in face' for a distance of 20 mm as shown in the picture. Use fillet sharp corner to ensure that sharp corners are replaced by the best fit fillets (30 mm). Trim the working surface with this offset curve to create the outer flange.
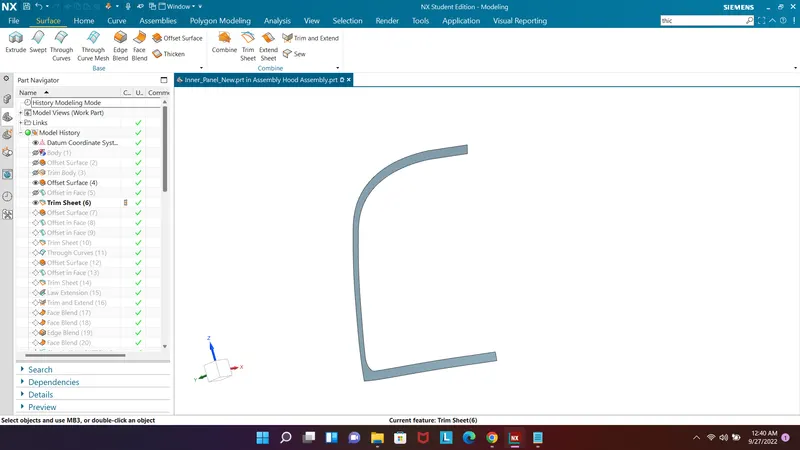
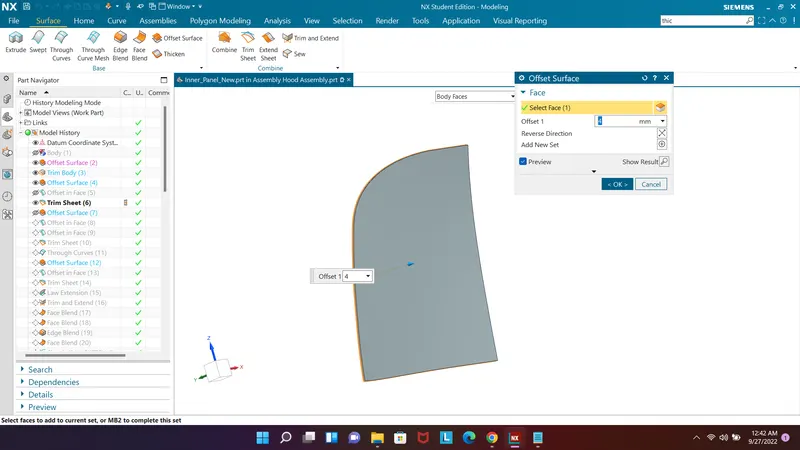
Now again offset to a 4 mm as per master section and "offset curve on face" with 22mm and 35 and trim inner region
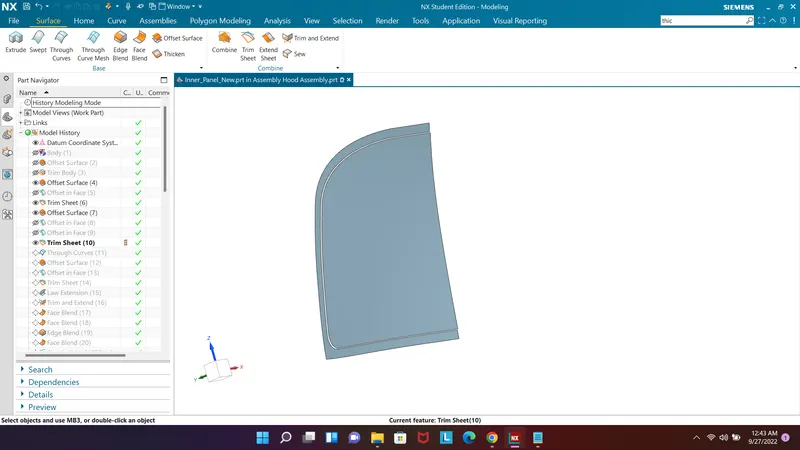
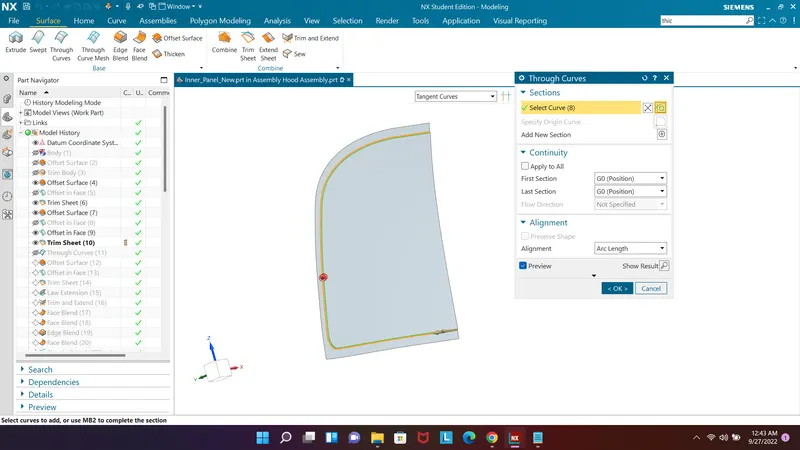
Use through curve and join the sections
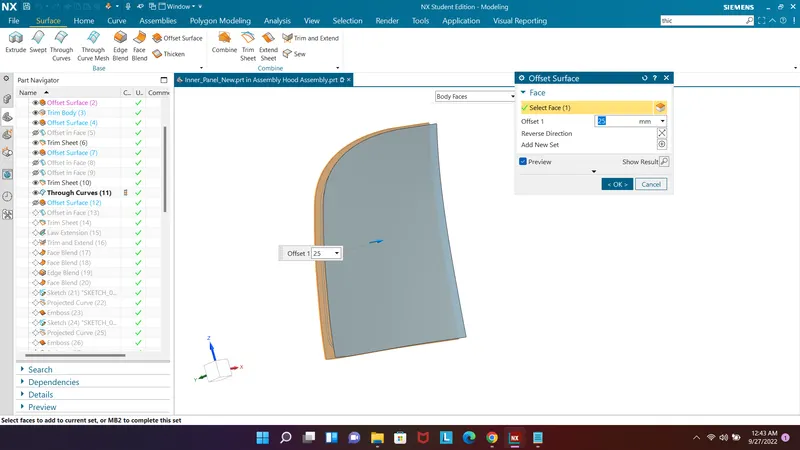
Again offset surace to a 25mm and offset ciurve on the surgace with 50 mm and trim the inner region
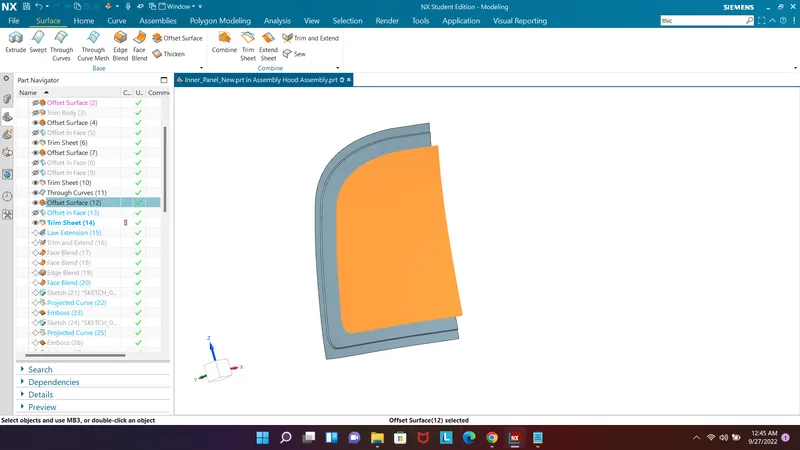
Use law extension and extend surface and use trim and extendt to get neccesary design
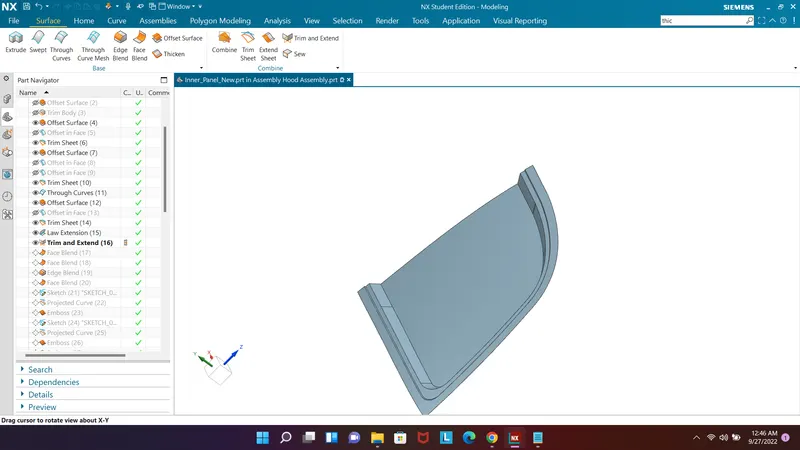
Use face blend and edge blend to join the sheet with radius and follow fillet per the master section
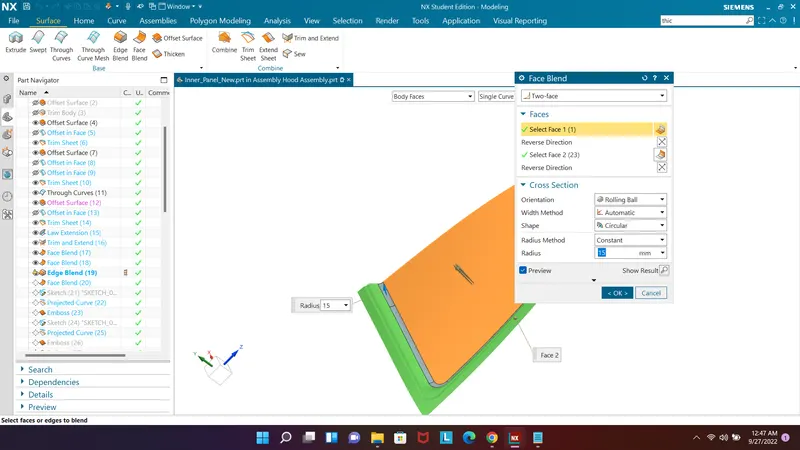
Now to make emboss at inner region make sketch and project on the body and use emboss option to create neceesary emboss
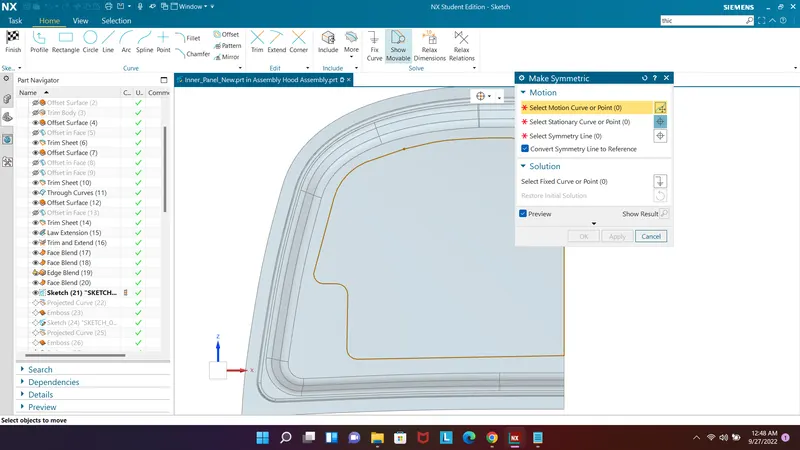
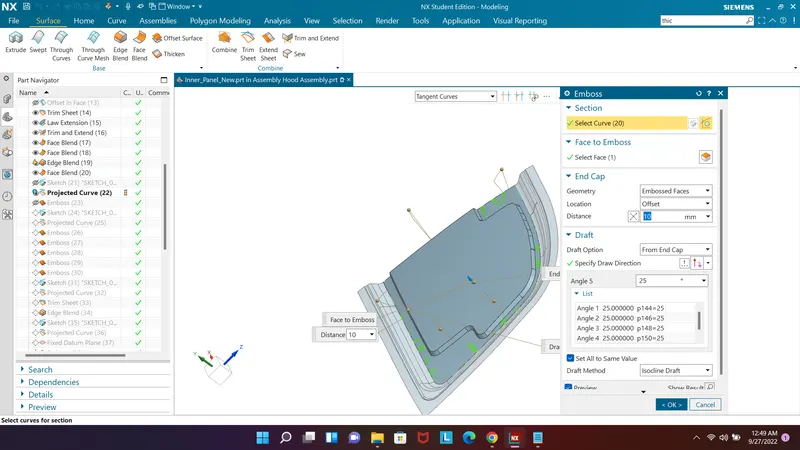
Follow the same method and make emboss innside again
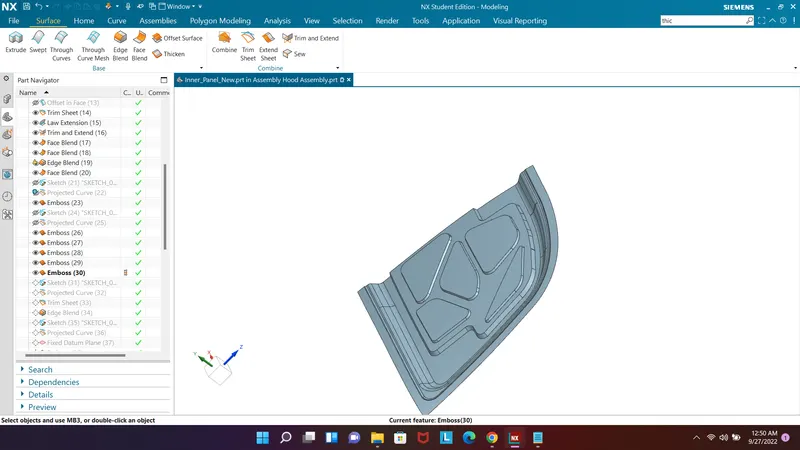
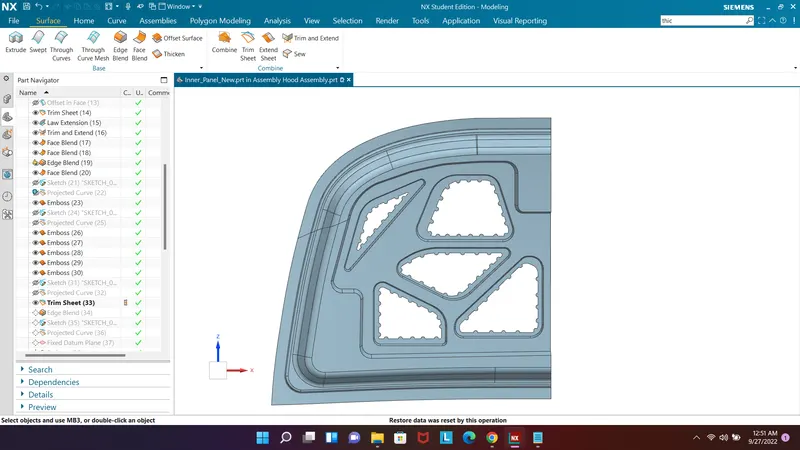
Now to make cut out and mastic region make sketch by offset above shape and make mastic and project the curve on body then we can simply use trim sheet and cut inner part - By cut out inner part it can LOCALLY STREGTHEN the area
By creating plane parallel to xc plane and using the plane as emboss plane we can create emboss for the Hinges - BY CREATING FLAT SURFACE WE CAN EASILY MOUNT THE HUNGES TO THE EMBOSS
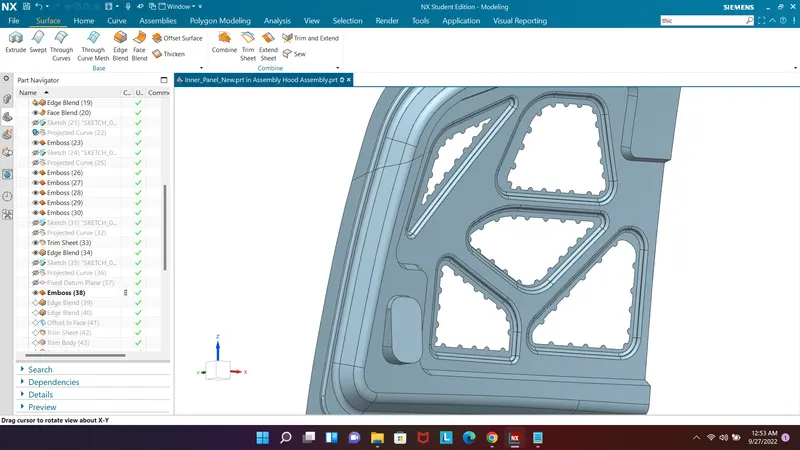
Now blend all sharp corner- WE CAN USE FILLET AS 3+THICHKNESS
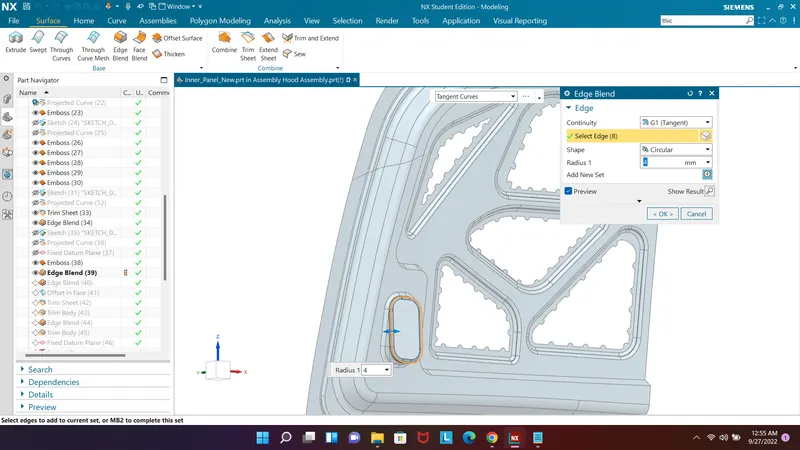
To satify the hemming we can offset and trim 2 mm of the panel
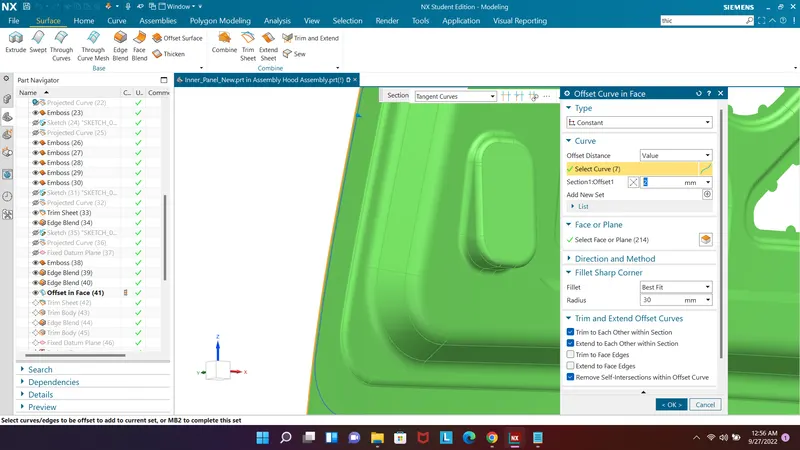
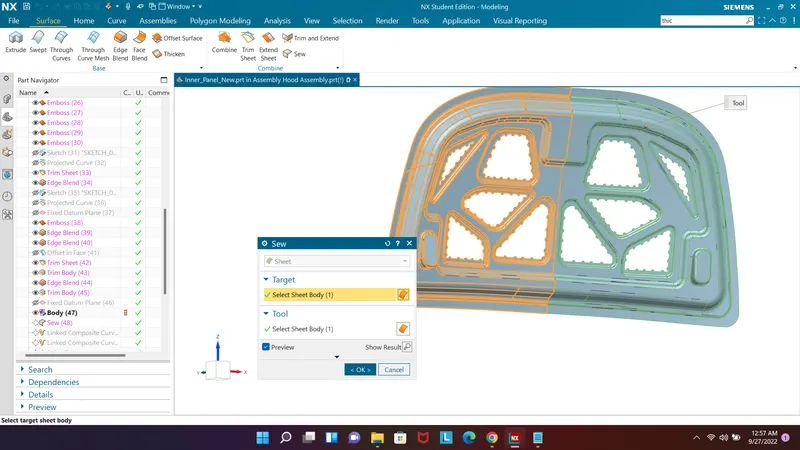
Then trim thr body and mirrir geometry to crate rest part and sew them
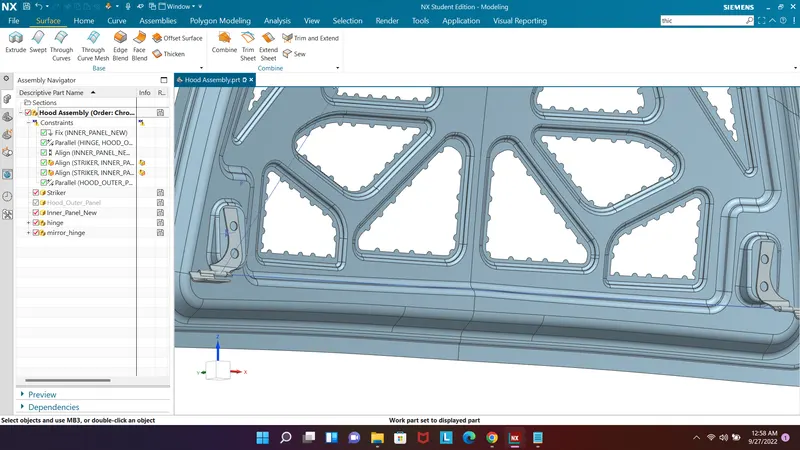
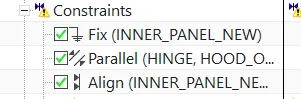
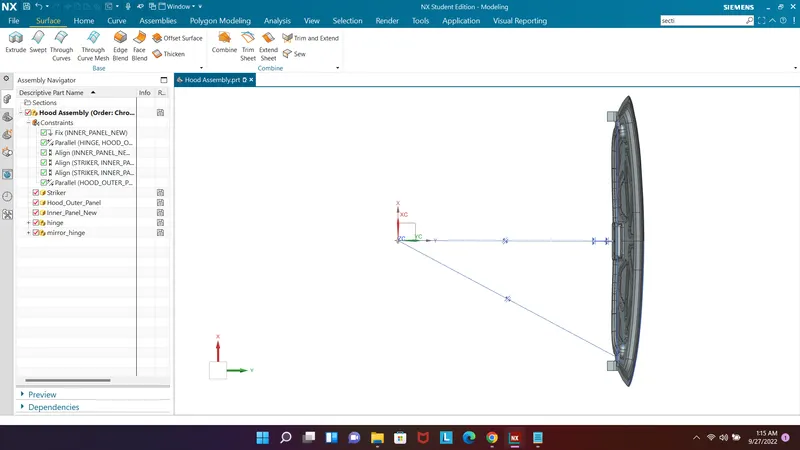
To fix the hinges follow the step
- Move the hinge near to emboss
- fix the inner panel
- make relation to hinge axis to x axis
- use touch constraint and make the emboss face and hinge face touch
- use mirror assembly to mirror the hinges
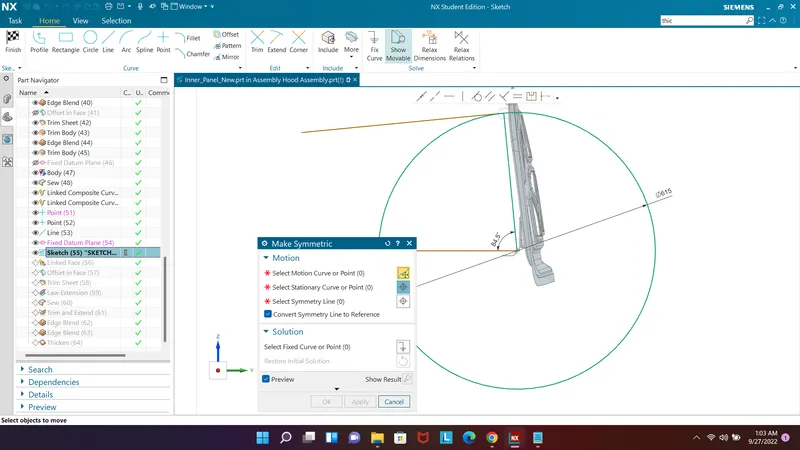
By positin the hinges and join by line create a cirle and 3 line vertical,incline and tangent
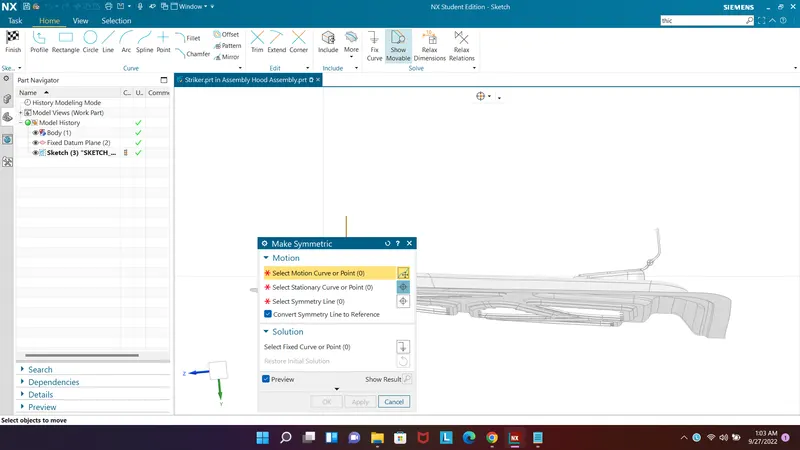
Also create sketch on the striker
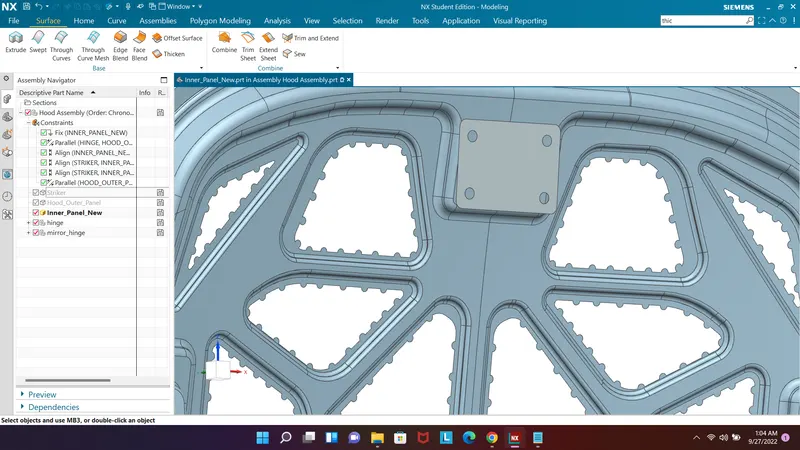
Extract the face of striker and make emboss with it
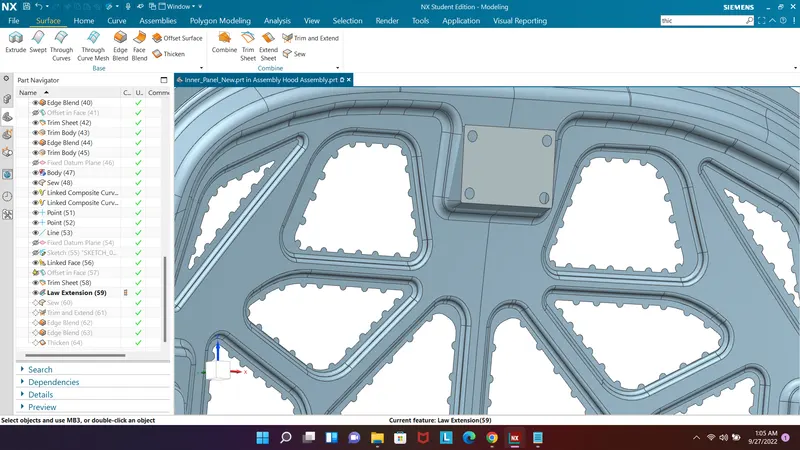
Use trim and extend and blend to finalise the process
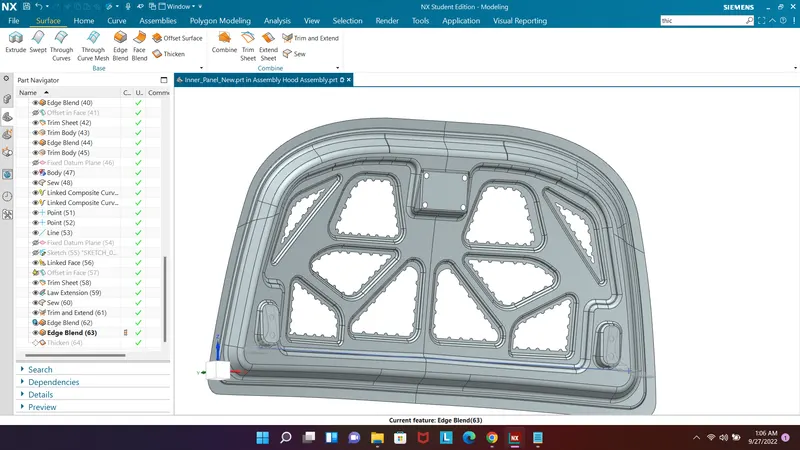
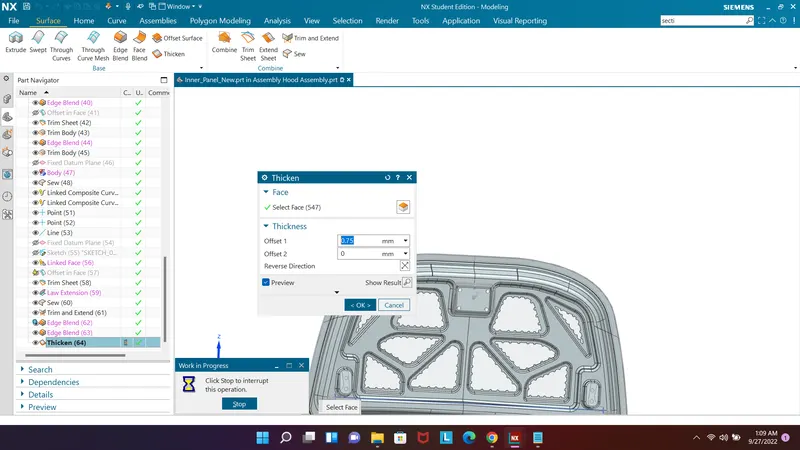
And thicken with .75mm
Now we can move to make the hemming
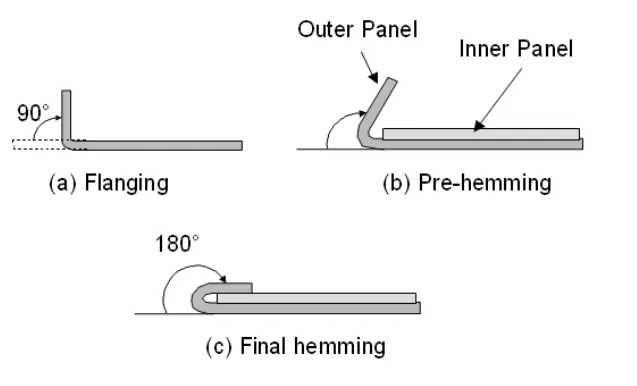
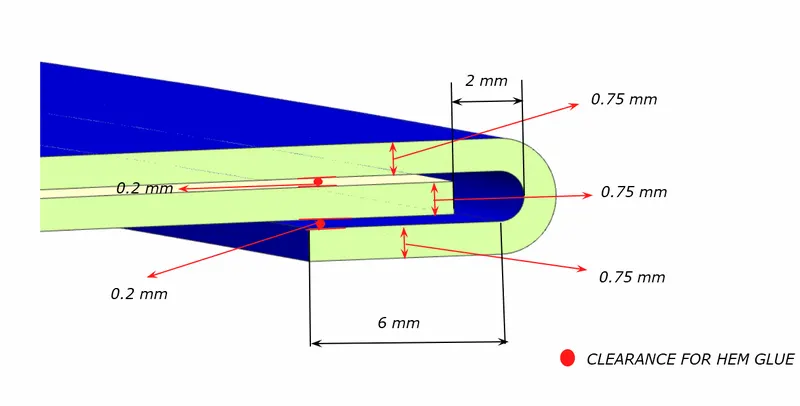
In automobile industry, the panels which are visible outside are joined with the inner panels or supports with the help of the hemming process. Hemming is comes into for outer panels because thermal joining processes leave the residual marks which are acceptable on the aesthetic surfaces.
Hemming is the technology used in the automotive industry to join inner and outer closure panels together. It is the process of bending/folding the flange of the outer panel over the inner one. The accuracy of the operation affects significantly the appearance of the car's outer surfaces, and is therefore a critical factor in the final quality of a finished vehicle.
Hemming is performed in order to achieve a better final geometry in the vehicle's part and add resistance and rigidity to the part. Also, to allow a safe handling of the part.
By following givesn master section.
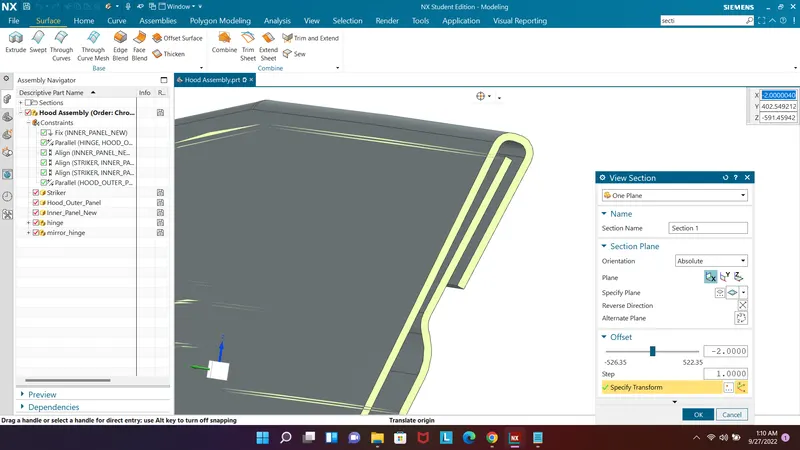
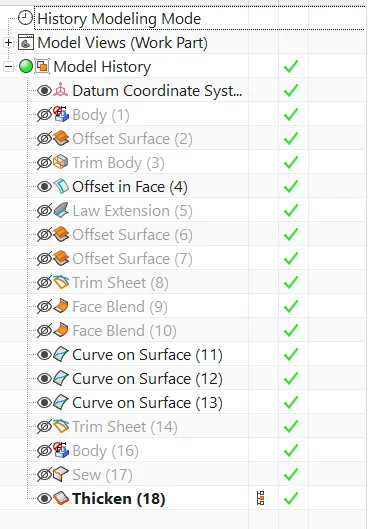
Part tree
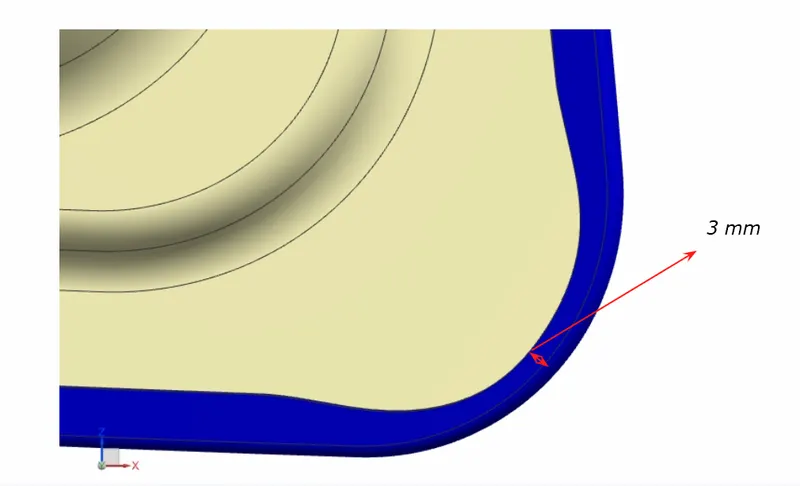
Relives also made
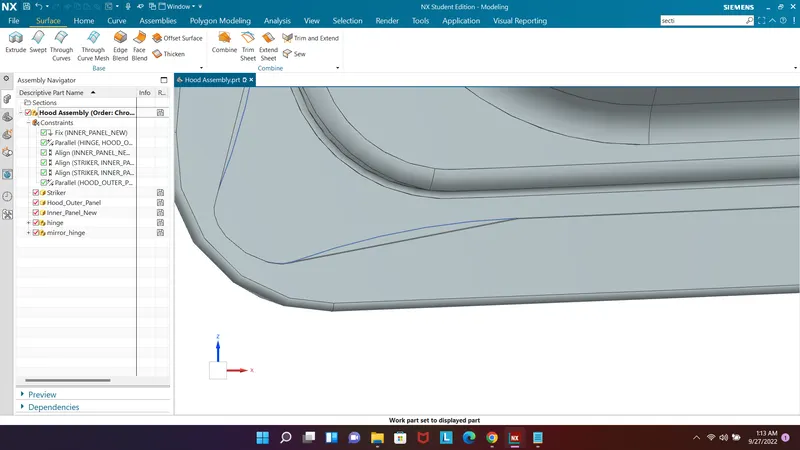
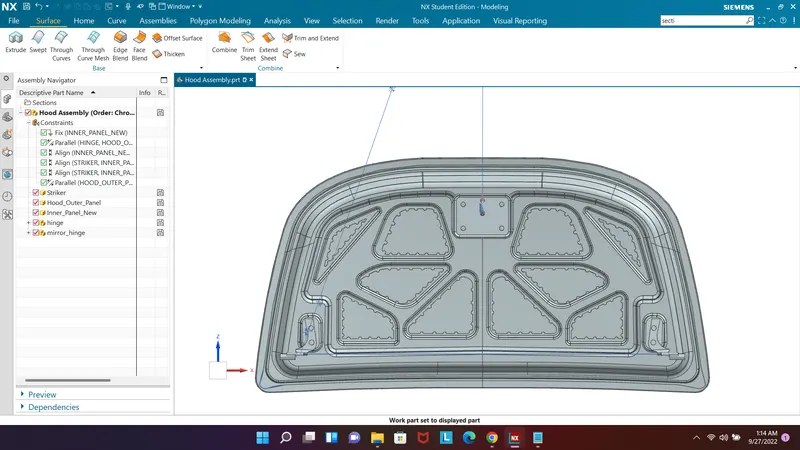
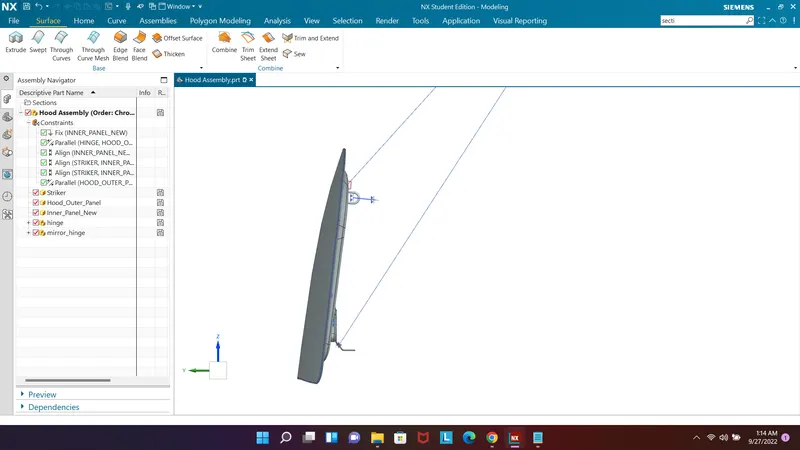
Final views
Conclusion :
Finally in this project, we have created the inner panel and outer panel of the car hood with reference to the given Class A surface of the outer panel of the hood. Both the panels are assembled with the help of hemming. Also assembly of the relative components such as hinges, striker and reinforcements is made.