Hood design-Week 2
DESIGN OF CAR HOOD/BONNET:-
A Hood or Bonnet is a part of the automotive vehicle which gives the aesthetic look to the automobile and also helps as an enclosure to the various engine components and sensors and it is an airtight cover that protects the internal components. The bonnet system is an access panel to the engine compartment to enable maintenance of the power train, drive belts, batteries, fluid levels, and lamp units. It is fundamentally a reinforced skin panel with many safety and quality requirements.
The design of the hood consists of the following parts:-
- a) Internal hood Panel structure
- b) Outside Hood panel
- c) Engine body and hood hinge reinforcements
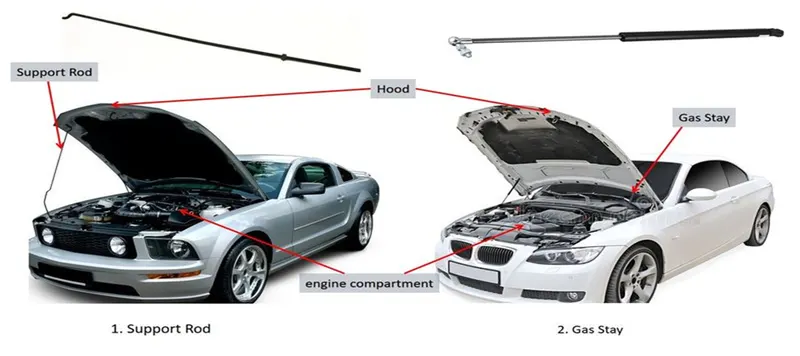
- d) Support Rod ( Support Rod 2. Gas Stay)
Bonnet is the front end of the moving vehicle hence the design of the Bonnet's internal and outer panels involves both the aerodynamic and mechanical strength characteristics and during a hazardous accidental situation, the first hitting part in the vehicle is its front end i.e. the Hood.
Design and Boundary conditions for Bonnet:-
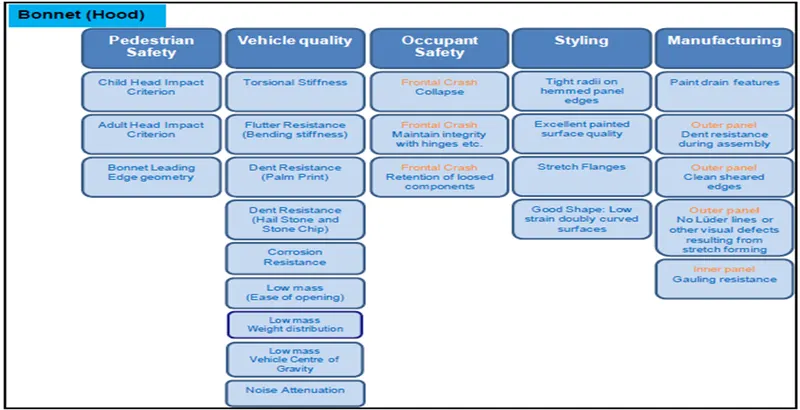
Evaluation of pedestrian safety:-
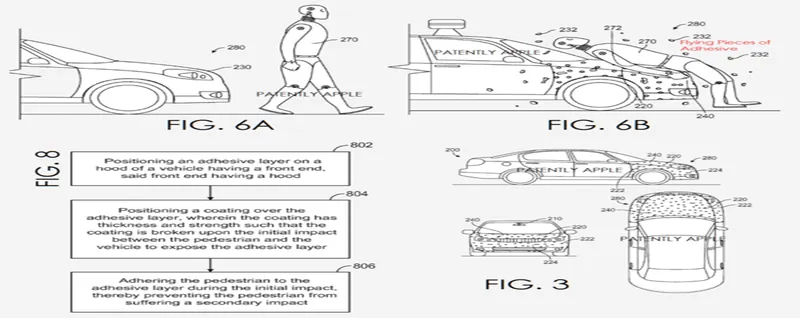
The height, weight, and age of the pedestrian all play a role in the kinematics of the event and in his ability to survive. Most fatalities for the younger population are related to brain damage caused by head impact on the bonnet. For older people, additional risks include rupture of arteries in the lower limbs and pelvis from bumper and bonnet leading edges.
All major insurance and regulating authorities have studied this topic in order to put in place a range of measures to reduce mortality rates and the severity of injury resulting from pedestrian impacts. These studies have produced test procedures and systems to rank and regulate vehicles for pedestrian safety
Evaluation of pedestrian safety for a bonnet must be carried out in the context of its surrounding elements:
- a)Vehicle styling, size (wrap around distance “WAD”), and under-bonnet clearance to other elements (considered as hard points).
- b)Local bonnet stiffness is influenced by mounting point stiffness such as hinges, bump stops, and latches.
- c)This is better understood by superimposing the kinematics of a dummy onto the test conditions
Mastic points & Seals:-
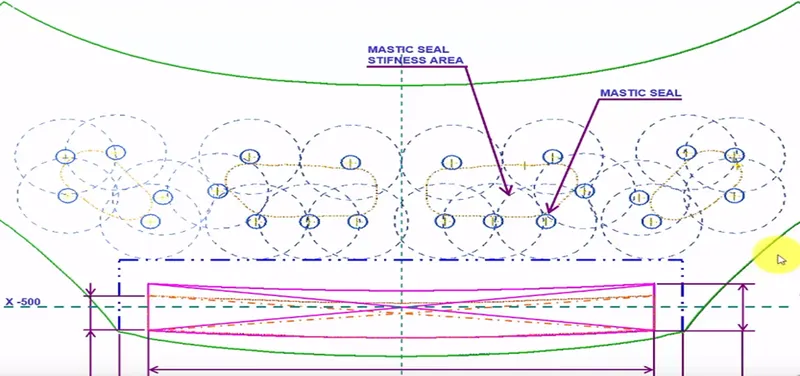
Overall bonnet stiffness is derived from the inner and outer panels and their local reinforcements and hinges. Considering the bonnet alone, the inner panel contributes most to the stiffness from its section properties. Both the outer and the inner panels are joined together with the help of the Hemming process and airtight glue is applied at the mastic points as shown in the picture
Mastic Seals place b/w Inner and outer panel to reduce Noise, vibration, and harshness. Every Mastic will have an effect of 80mm Dia locally. shown in the fig . Inner and outer panel gap is 2 to 5mm.
Emboss:-
Sheet metal embossing is a stamping process for producing raised or sunken designs or relief in sheet metal. This process can be made by means of matched male and female roller dies, or by passing sheet or a strip of metal between rolls of the desired pattern. It is often combined with foil stamping to create a shiny, 3D effect.
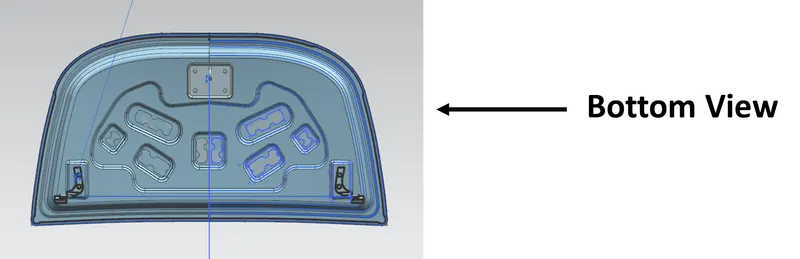
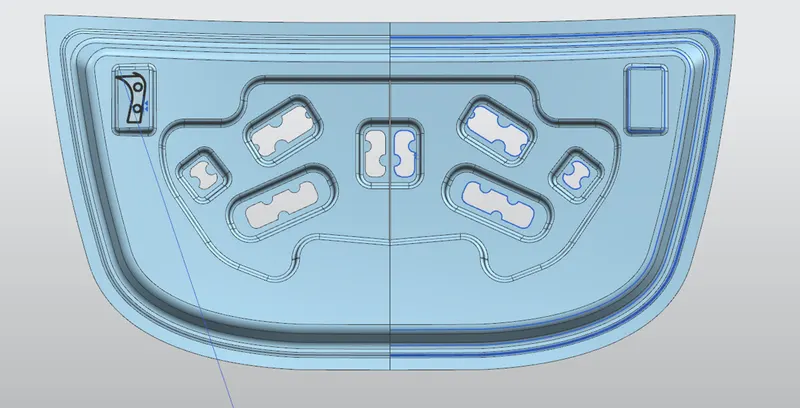
Emboss are provided in the inner panel of the hood assembly. This helps in weight reduction of the hood and also to dissipate the force during collision. Force dissipate is shown in the fig. this project design.
Deep drawing:-
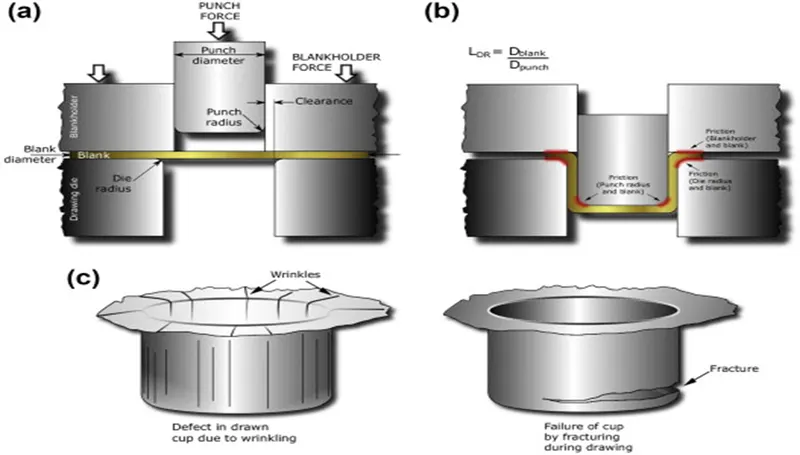
Deep drawing is a sheet metal forming process in which a sheet metal blank is radially drawn into a forming die by the mechanical action of a punch. It is thus a shape transformation process with material retention. The process is considered "deep" drawing when the depth of the drawn part exceeds its diameter. This is achieved by redrawing the part through a series of dies. The flange region (sheet metal in the die shoulder area) experiences a radial drawing stress and tangential compressive stress due to the material retention property. These compressive stresses (hoop stresses) result in flange wrinkles (wrinkles of the first order). Wrinkles can be prevented by using a blank holder, the function of which is to facilitate controlled material flow into the die radius.
Besides this deep drawing, the manufacturing of the hood involves various other manufacturing processes like
- Blanking
- Stretch forming
- Trimming and punching
- Deburring
- Welding
- Grinding
- Painting
- Baking
- Polishing and waxing, and
- Coating
Hemming:-
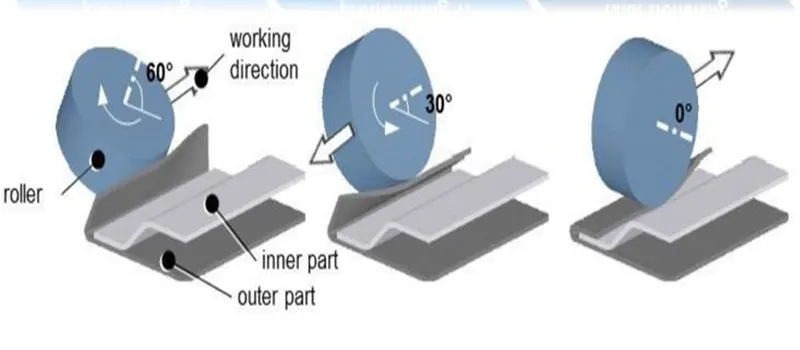
Hemming is a forming operation in which the edges of the sheet are folded or folded over another part in order to achieve a tight fit. Normally hemming operations are used to connect parts together, to improve the appearance of a part and to reinforce part edges.
Design Methodology & Given data for Hood:-
Master Section:-
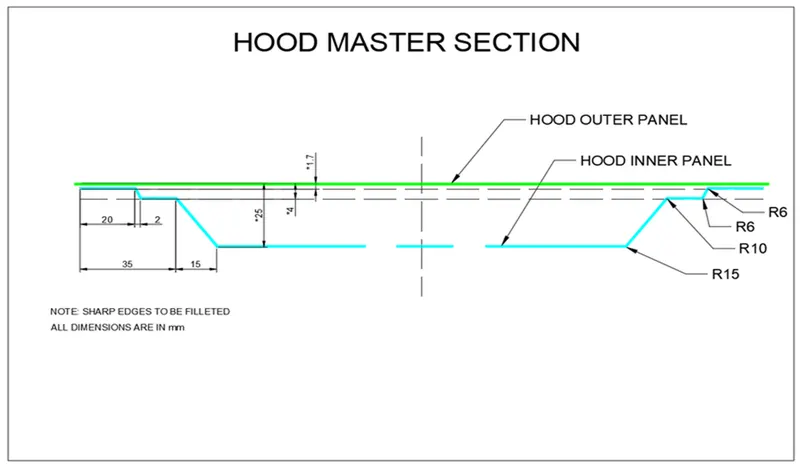
It has played very important role as it has every general design information considered for a hood. It shows general dimensions and structural shape of general hood design.
Hood Thickness Information
• Outer Panel Thickness = 0.75mm
• Inner Panel Thickness = 0.75mm
• Reinforcement Thickness = 1.5mm
Design Methodology:-
- Develop the inner panel with
- Embossing (with minimum 7 Degrees Draft)
- Mastic Points
- Develop the Outer Panel with Inner Panel
- Hemming
- Positioning the reinforcements
- Hinges
- Striker for Latch
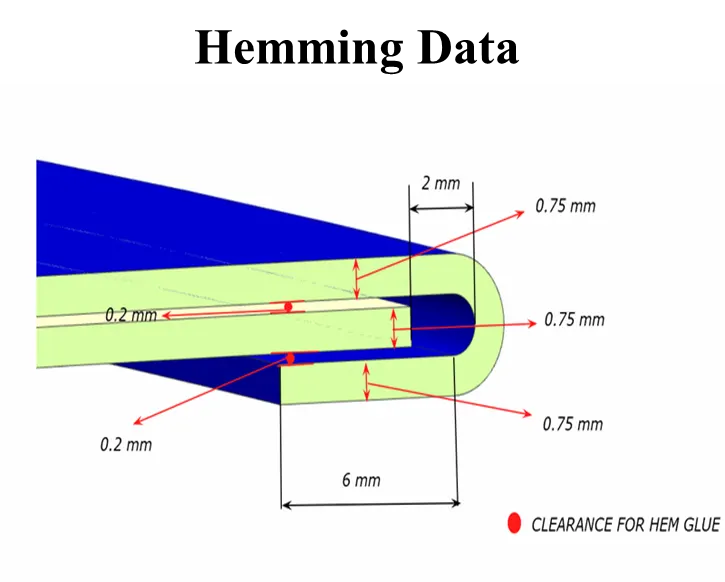
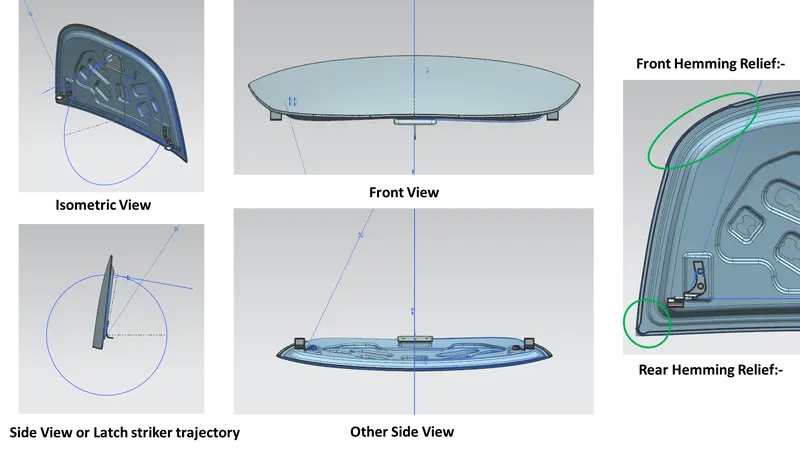
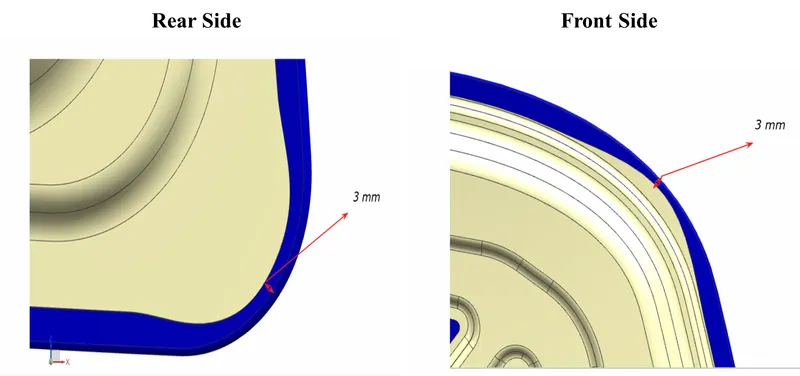
Hemming Relief data:-
Design Procedure in NX CAD:-
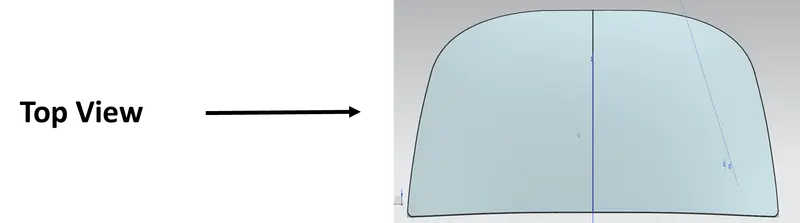
Outer Hood Panel:- Import From Screen data provided from Challenge section Create Hemming area as per below tree.
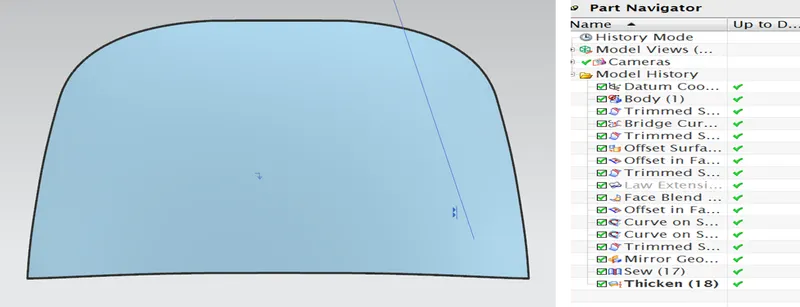
Inner Hood Panel:- Copy Outer Hood Panel Skin Data in Same Folder and rename with Inner Hood panel
- Spilt the outer hood panel Class A into half and copy it in the newly created geometrical set ‘Inner Hood’.
- Create surfaces using offset, spilt options as per Master Section given for inner hood panel
- Use Edge Fillet option by joining the surfaces, to minimize the errors.
- Use Boundary option for any discontinuity around the surfaces.
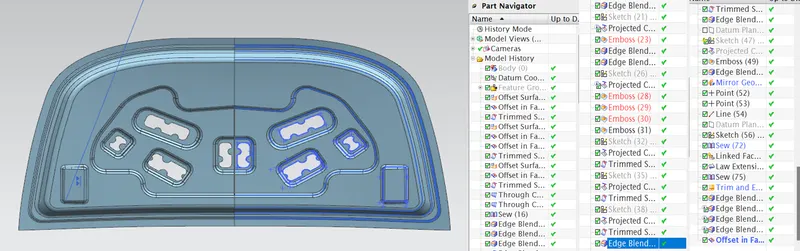
Embossments:
Embossments are created on the inner hood panel as it gives strength and also reduces production cost. As the outer panel has a thin layer sheet, it has less strength. Holes are made in between because of pedestrians safety.
- Design a new sketch and project it on the surface using the Projection option.
- Sweep the projected curve with a 7degrees draft angle in draft direction.
- Offset the extracted surface to the required embossment length.
- Trim the unwanted surface and join all the surfaces.
- Repeat the same steps for required embossment shapes.
- After completion of creating embossments, Join all the surfaces and Mirror it.
- Use the Boundary option for the perfect inner hood panel.
- Thicken the entire surface in the new body created.
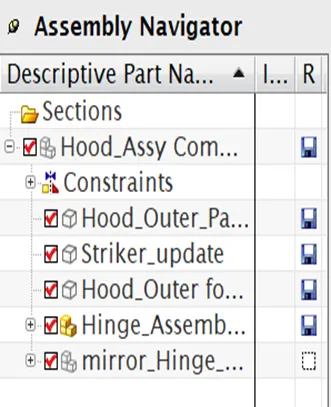
Hinge Assembly & Striker:- Import design data from Challenge section and follow below trees.
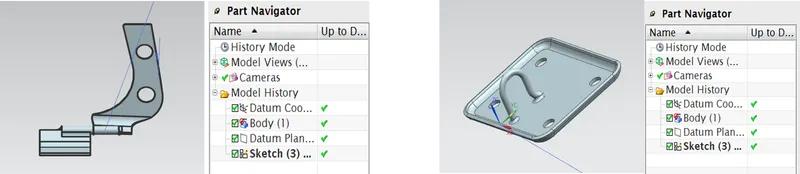
Final Assembly:-
1.First of all Assemble Hinge one side through Assembly Constraints Touch & Align.
2.Parallel hinge axis with X-axis through Parallel assembly constraints.
3.Mirror Assembly for other side Hinge.
4.Create point on Axis of Hinge and create line through points
5.Draw a Circle and tangent line for Latch trajectory and Striker alignment.
6.Take datum plan on curve and go to sketch to a line in middle of striker Hook.
7.Wave geometry emboss on Inner panel for Striker Emboss through Law Extension & Trim and Extend.
8.Align circle tangent line and Striker line.
Final Results:-