Hood design-Week 2
AIM:Design Hood Outer Panel, Inner Panel and the necessary reinforcements by following the Master Section mentioned with the Design parameters explained in the videos.
What is a Car Hood?
A car hood, also referred to as a bonnet in some other countries, is the hinged cover that rests over the engine of a front-engine vehicle. Its purpose is to provide access to the engine for repair and maintenance. A concealed latch is typically used to hold down the hood. On vehicles with an aftermarket hood and on racecars, hood pins may be used to hold down the car hood. Hoods sometimes also contain a hood scoop, wiper jets, power bulge, and/or hood ornament. Car hoods are typically constructed from steel and sometimes from aluminum. Aftermarket car hoods may be constructed from various other materials, including carbon fiber, fiberglass, or dry carbon. The hood design may vary from one make and model to another, including SUV, truck, minivan and passenger-car models.
Its component
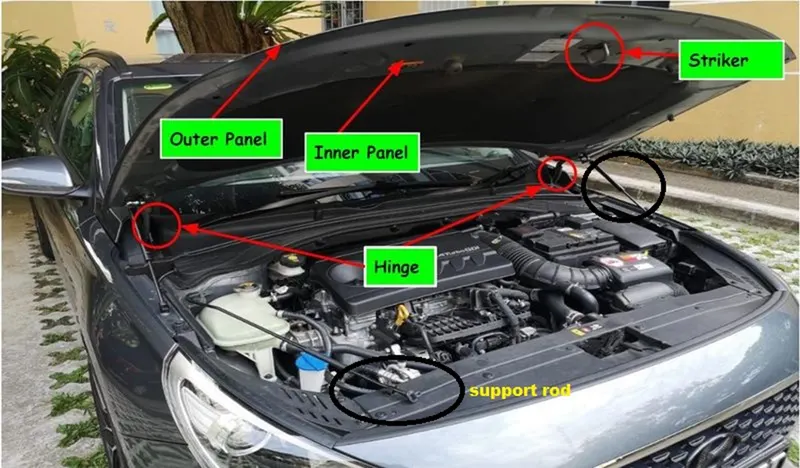
Striker, Hinge, Support rod
In the above figure you can see the arrangement of hinge which is used to open and close the hood.
Stricker which is used to lock the hood at stationary position.
Support rod or can use actuator type supporter (hydraulic or pneumatic) this is used when we use hood in open state support rod is to be manually set the whole weight of the good around 10kg which is to be hold by it.
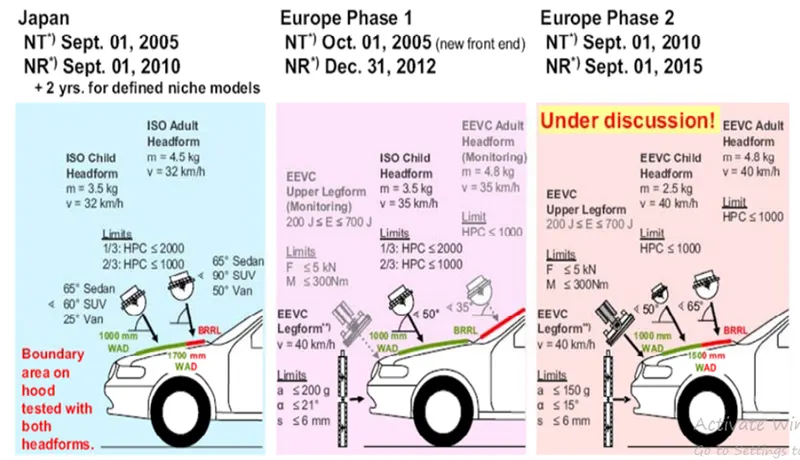
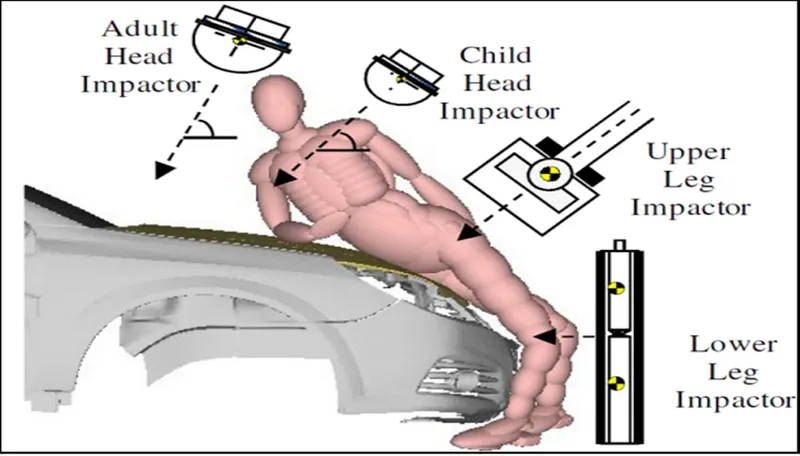
Hood specification for safety requirements
what is Emboss ?
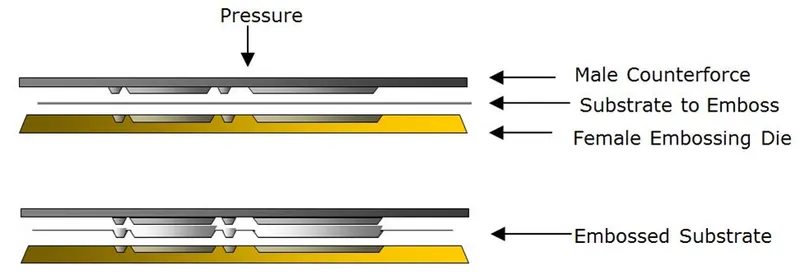
An Embossing is created by pressing a female Die into a male Counterforce with the substrate to be embossed between the two. The Die and its matching Counterforce are aligned in registration and the substrate positioned so that it is located in registration (the correct position). Then the Die and its Counterforce are brought together under huge pressure, distorting the substrate and forcing it to conform to the contours of the Die. The resulting sculptured effect on the substrate adds a new dimension to it.
What is Deep Drawing?
Deep drawing is one of the most widely used processes in sheet metal forming. Apart from its use in many other sectors, it is applied in the automotive industry for the manufacturing of car body parts.
Process definition:
The deep drawing process is a forming process which occurs under a combination of tensile and compressive conditions. A flat sheet metal blank is formed into a hollow body open on one side or a hollow body is formed into a hollow body with a smaller cross-section. [DIN 8584]
Deep drawing processes are divided into three types:
Deep drawing with tools
Deep drawing with active means
Deep drawing with active energy
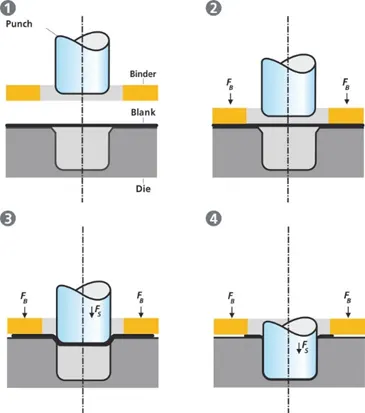
Emboss and deep drawing are same process.
What is Hemming?
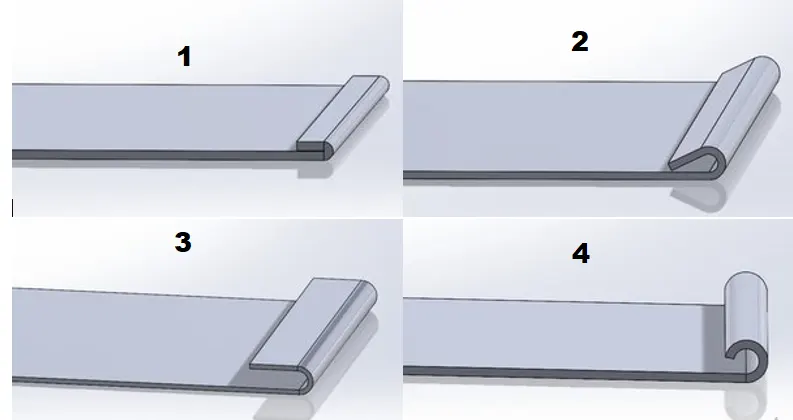
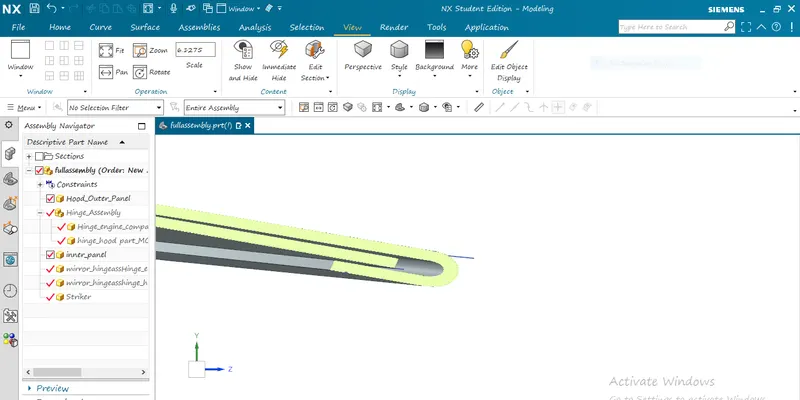
Hemming is a forming operation in which the edges of the sheet are folded or folded over another part in order to achieve a tight fit. Normally hemming operations are used to connect parts together, to improve the appearance of a part and to reinforce part edges.In car part production, hemming is used in assembly as a secondary operation after deep drawing, trimming and flanging operations to join two sheet metal parts (outer and inner) together. Typical parts for this type of assembly are hoods, doors, trunk lids and fenders.
Common Types of Sheet Metal Hemming
1] Closed hem
Also known as a crushed hem, a closed hem is completely flush (as opposed to an open hem, which allows for a bit of space in the bend). Closed hems are the most popular type of hemming because they’re so easy to make: the sheet metal is simply flattened onto itself. There are, however, some material limitations. This type of hem works best with material thicknesses of .040”-.125”. We try to avoid forming material over .125” because the sheet metal is likely to fracture. The flat length of the hem must also be a minimum of 4x the material thickness so that it doesn’t break. We shape our closed hems by forming sheet metal to 145 degrees, then flattening the material onto itself with a press brake. As a rule, we don’t use closed hems for aluminum, as this type of material is highly susceptible to cracks and fractures.
2] Teardrop hem
A tear drop hem is a flange that has been bent more than 180 degrees. We use teardrop hems for materials that lack the flexibility required of closed hems. This type of hem is perfect for aluminum and other fragile metals.
3] Open hem
An open hem features a soft, curved outer edge and an air pocket in its bend. It’s ideal for handles and other applications that come into contact with people. Like a closed hem, an open hem works best with material thicknesses of .040”-.125” and a flat length that’s a minimum of 4x the material thickness. We shape our open hems by forming sheet metal to 145 degrees, then inserting a shim and flattening the material onto itself with the shim in place. Common gap sizes are 060”, .090”, .125”, .187”, and .250”.
4] Rolled hem
The purpose of a rolled hem is to eliminate raw sheet metal edges from a part. This type of hem is common for door and figure edges. Rolled hems provide a nice clean look and a safe-to-handle part.
STEPS TO CREATE INNER PANEL
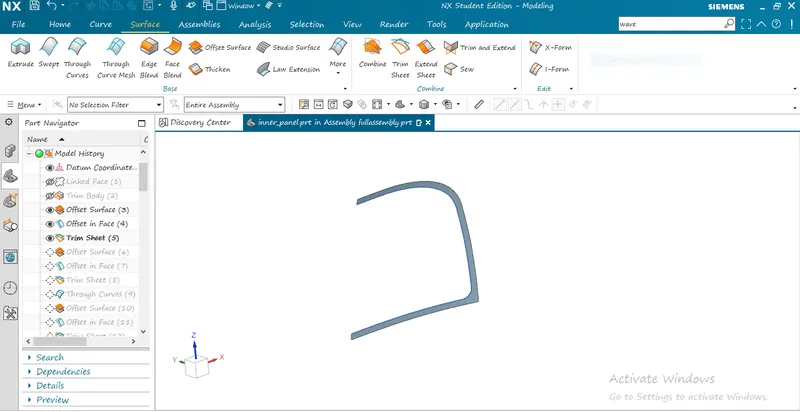
createan assembly file and then add the outer panel ,hinges , stricker.we are not having inner pane to create that open new component in assembly create an new model and then use wave geometry linker and click on outer hood panel here we are copying the outer panel as an iner panel then save the new model as inner panel.
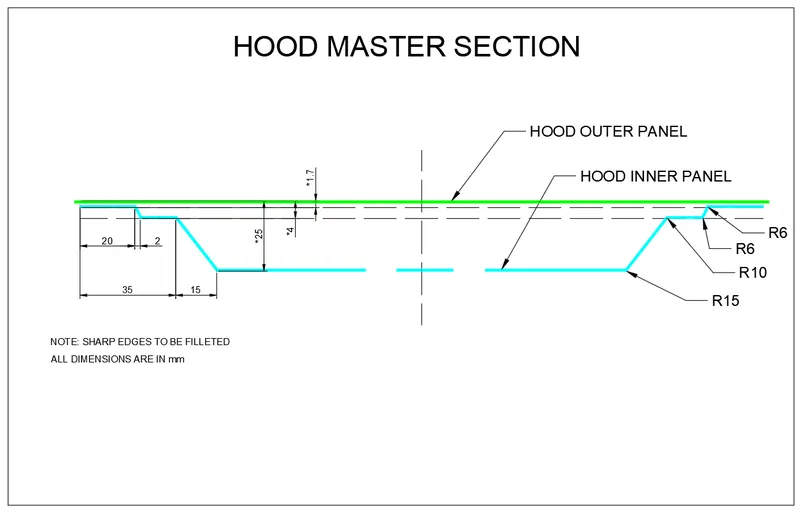
- according to the master section first take offset of the inner panelf 1.7 mm and then use offset on face command aand make an off set of 20 mm and then use trim comand to trimm that sheet.
- then take the main innerpanel and use offset surface of 4 mm, then use offset on face command and make an off set of 22 mm . then use trim command to trim that sheet. and keep the middle part.
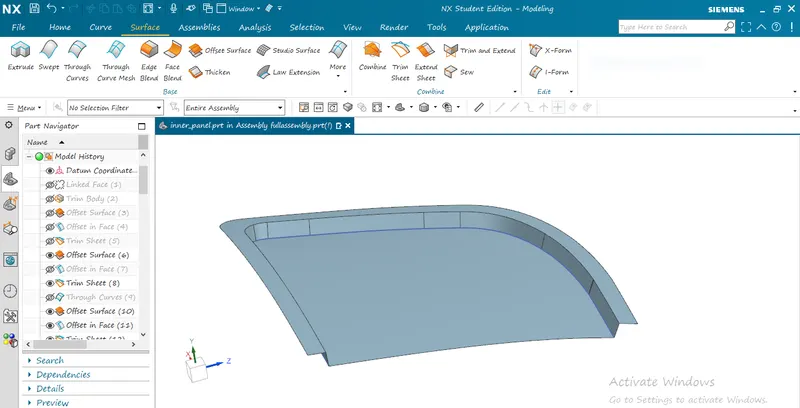
- the take an offset of 25 mm ,and take an offset on face of 50mm and use trim comad and keep inner part of it .
use through curve to join 1st and 2nd offset
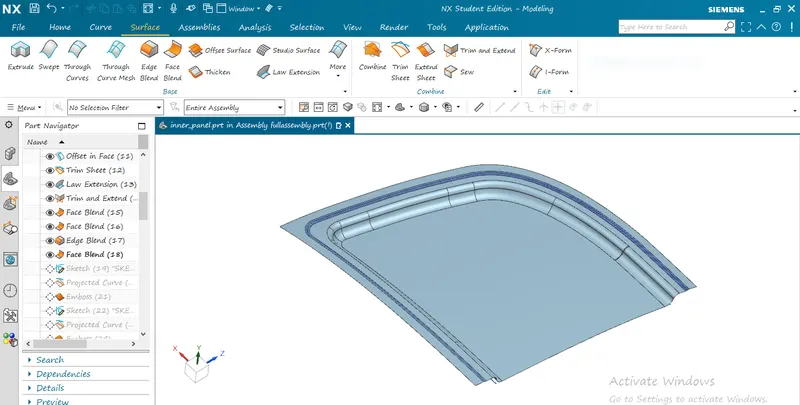
use law extension comand and mearge the 3rd and 2nd offset ,
use de face blend comand and edge blend command to have round edeges.
HOW TO CREATE EMBOSS
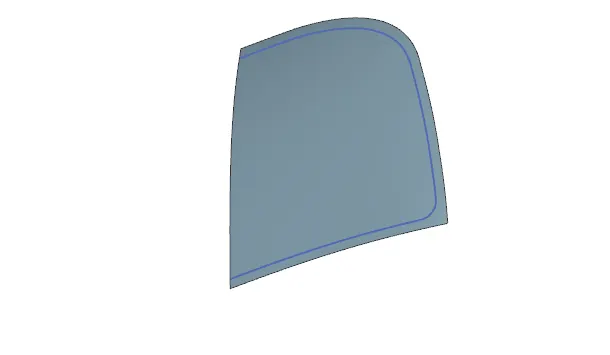
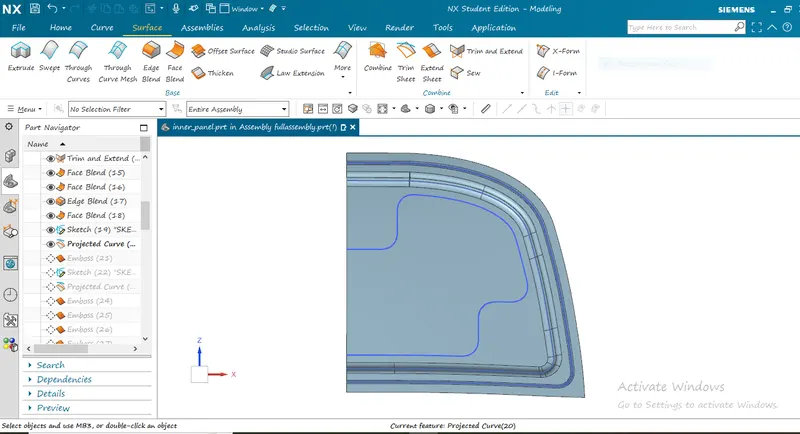
- use sketch to create a design on the outer panel then use project curve to project that design on the inner panel
- then use emboss comand to create the first emboss.
- then again use sketch to create a design on the 1st emboss then use project curve to project that design on the inner panel .
- then use emboss comand to create the 2nd emboss.
- then use sketch comand to create sketch for mastic data stick then use project curve to project that design on the inner panel .
- use trimm sheet command to get that trimmed region.
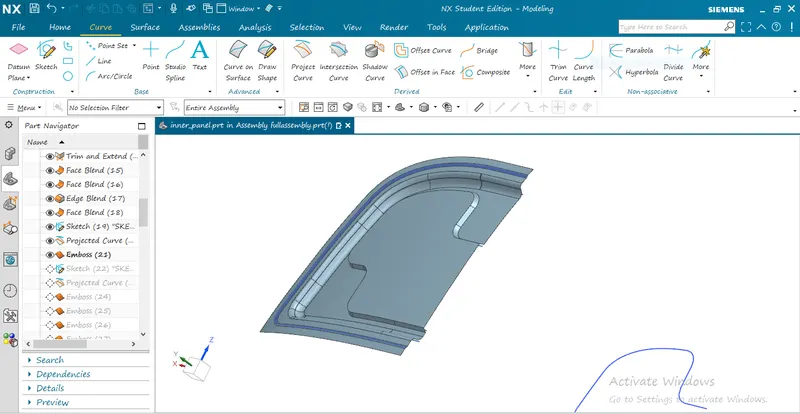
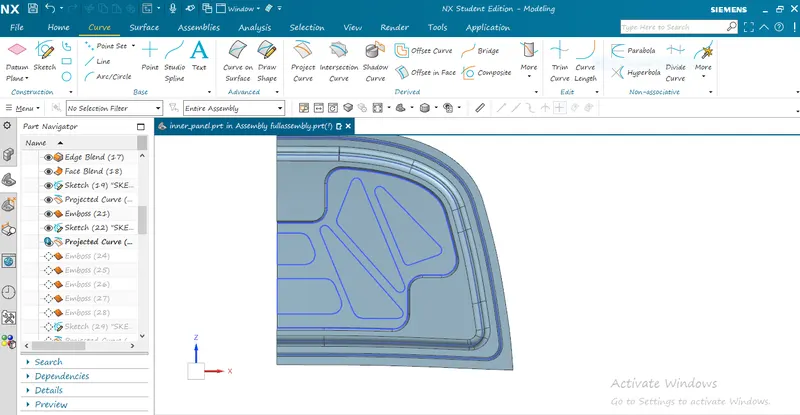
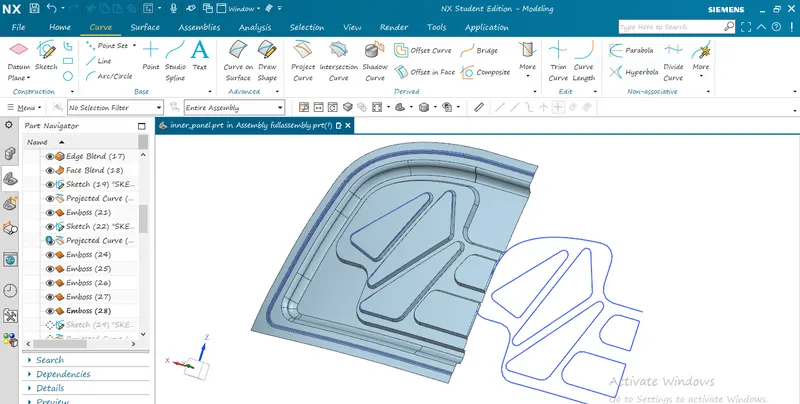
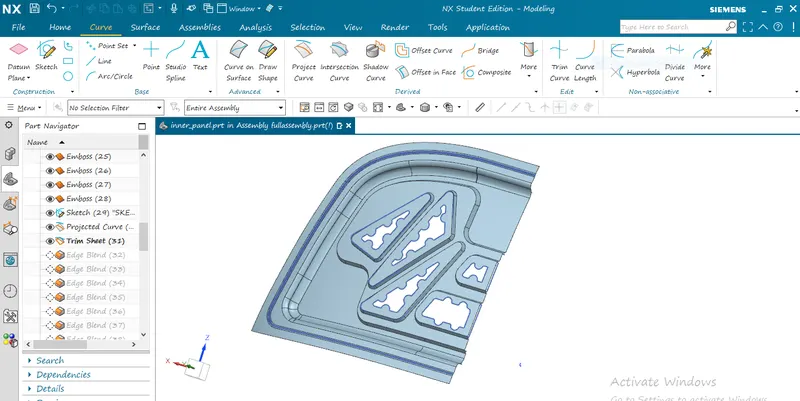
HOW TO GET FULL INNER PANEL
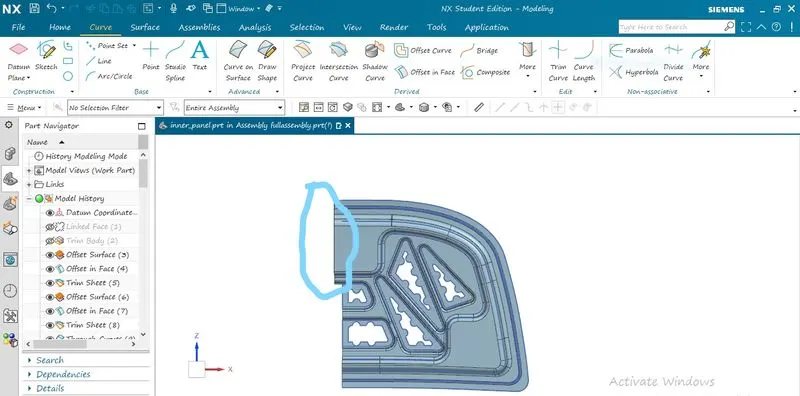
- as till now we were working on half side ofthe which with respective to the datam plane we will facke many difficulty / patches when directly using mirror comand .
- so first use extend command to extend the edge of the sheet with 20 mm to all the edge
- then use trimm comand and select the yplane to trimm with respective with it.
HOW TO MAKE DATUM FOR HINGE
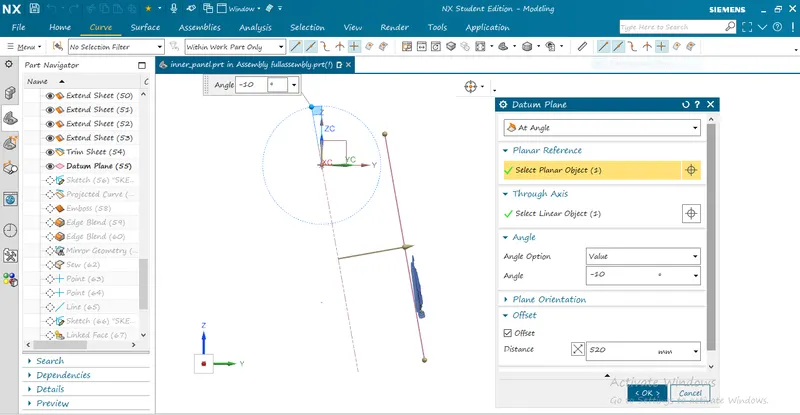
use datum plane comand to create an datum select at angle option and select x plane because x plane is parallel to the inner panel.
the angle must be in negative and the distance should tbe around 520 because it is the nearest value that can be taken .
LATCH TRAJECTORY
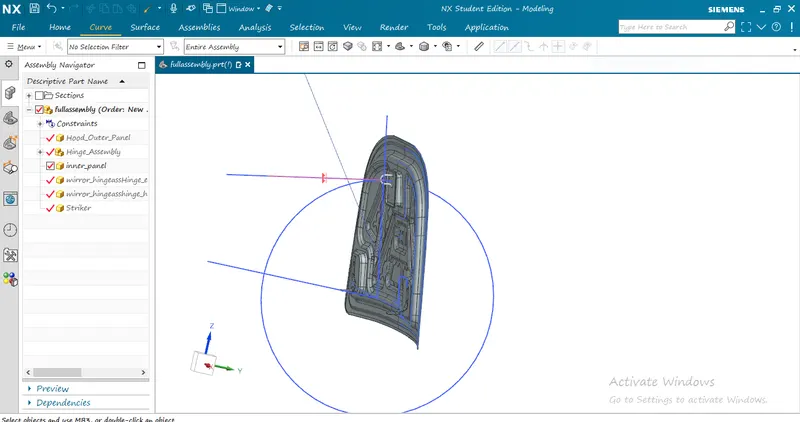
the Latch Trajectory this is created using sletch command this circle means the rotation of the hood, from the center with hinge center point and the tangent line where the stricker should be placed.
hemming part of the outer panel.
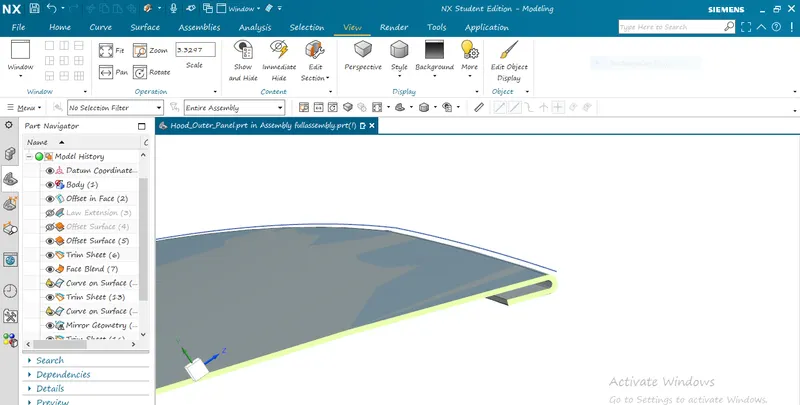
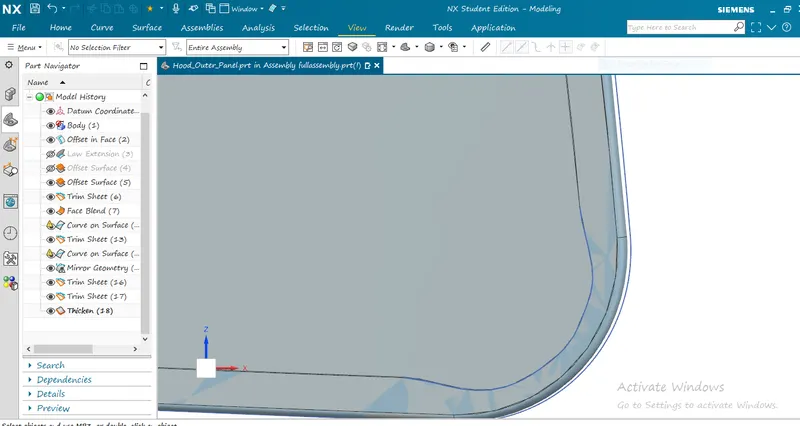
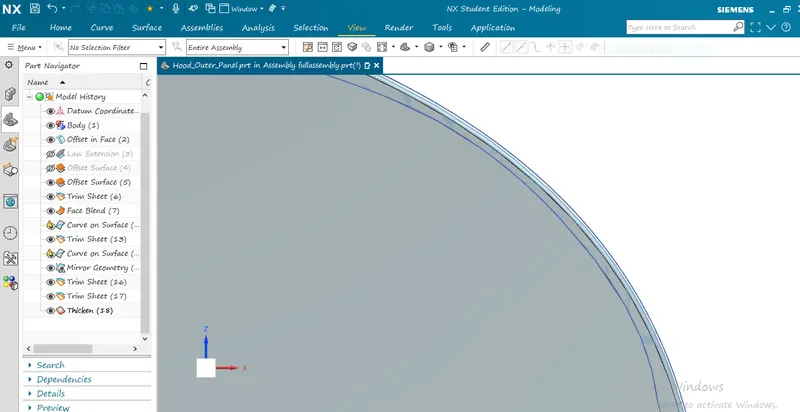
hemming region
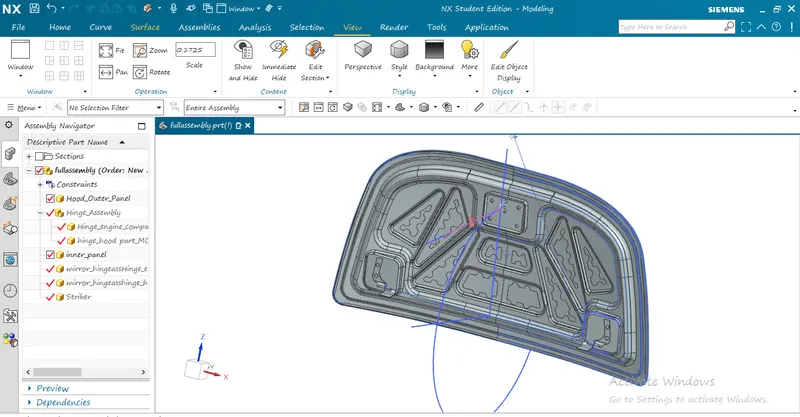
final product
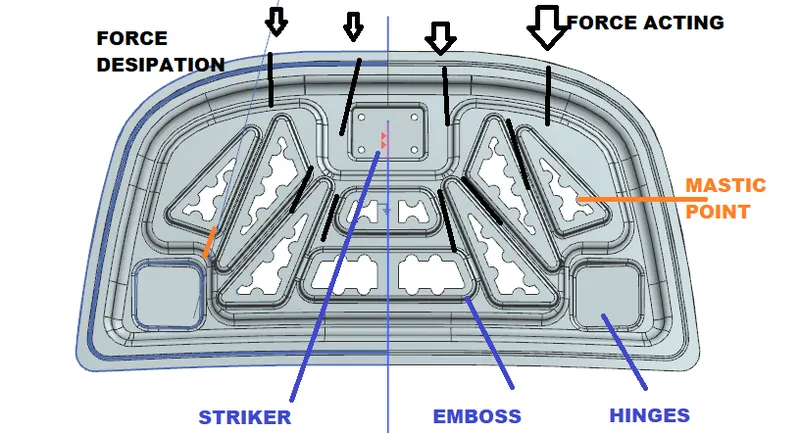
force desipation safety factor for the hood
CONCLUSION
understand how to use the NX CAD software as an beginner level.
understand how to design hood and what is the purpose of hood.
understand the need to the safety requirement to be needed while sesigning the hood.
THANK YOU