Hood design-Week 2
HOOD ASSEMBLY
AIM:
- To understand the design strategy and consideration that goes under designing and developing an automotive hood to achieve maximum safety.
- Design hood outer panel, inner panel and the necessary reinforcements by following the master section mentioned with the design parameter.
- Then submit an assembly of hood outer panel, inner panel, Stricker and hinge.
TOOL USED FOR DESIGNING:
- SEMENS NX CAD – 2020
HOOD:
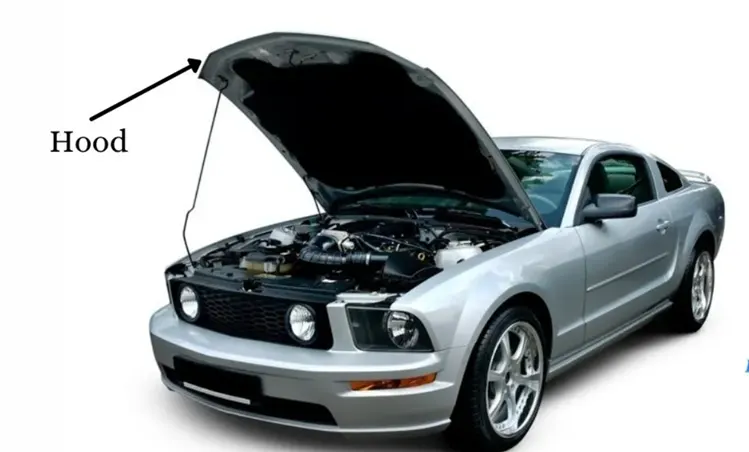
- The hood or bonnet is the hinged cover over the engine of motor vehicles.
- Hoods can open to allow access to the engine compartment for maintenance and repair.
- A concealed latch holding rod is typically used to hold down the hood.
- Car hoods are typically constructed from steel and sometimes from aluminium. Aftermarket car hoods may be constructed from various other materials, including carbon fiber, fiberglass, or dry carbon.
SAFETY REQUIREMENTS:
- Safety is the most important criteria in automobile designs which concentrates an both pedestrian and occupant safety.
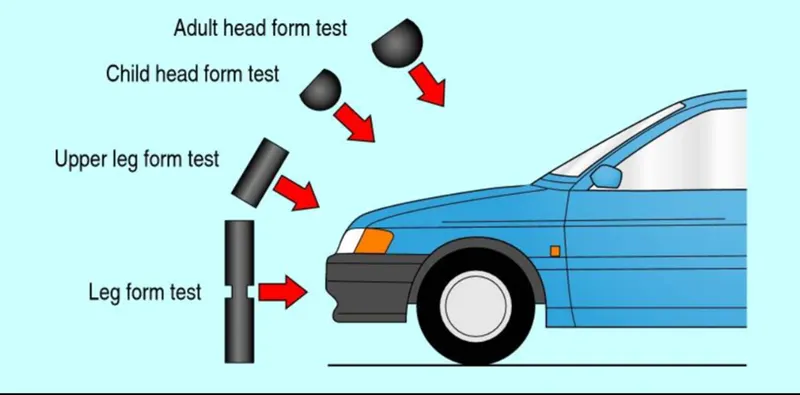
- The major reason for the fatality of the pedestrian in traffic accident is due the head injury resulting from the hard impact of the head against the stiffer hood or the ground.
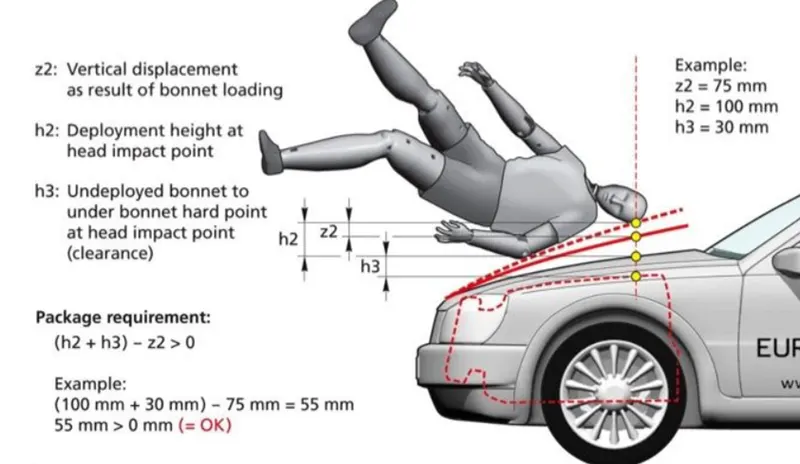
- Due to the head impact analysis on the present hood of the car was done to study the response of the adult head from at two different locations. Structural and model analysis for the same present hood assembly was done to observe the local and global stiffness.
- The design with lesser local stiffness and similer global stiffness compared to the existing hood was finalized.
- The HIC values of the adult head from for two different location are found to be 706 and 948 which meets the safety limitations of the adult head acceration during impact as proposed by EEVC WG17 and EURO NCAP regulations.
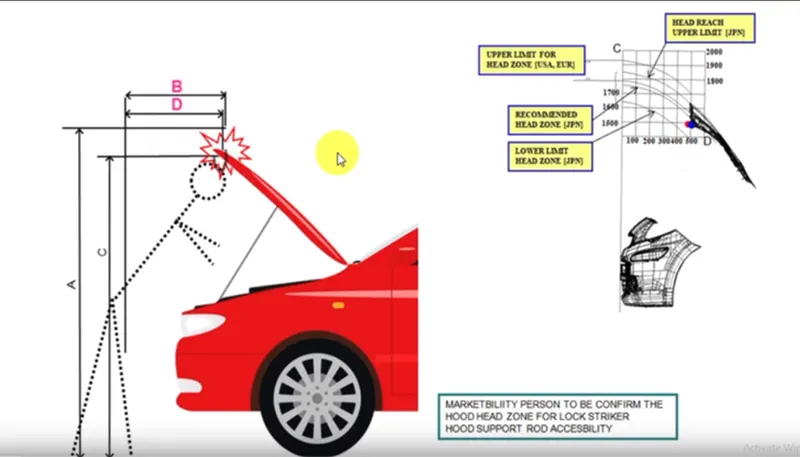
- The first important criterion for designing the hood is the opening angle of the hood, the average height of the human in the region of consideration is 6 feet according to the European countries.
- By varying the length of the support rod the opening angle can be varied on the hood opening.
COMPONENTS USED IN HOOD:
SUPPORT ROD:
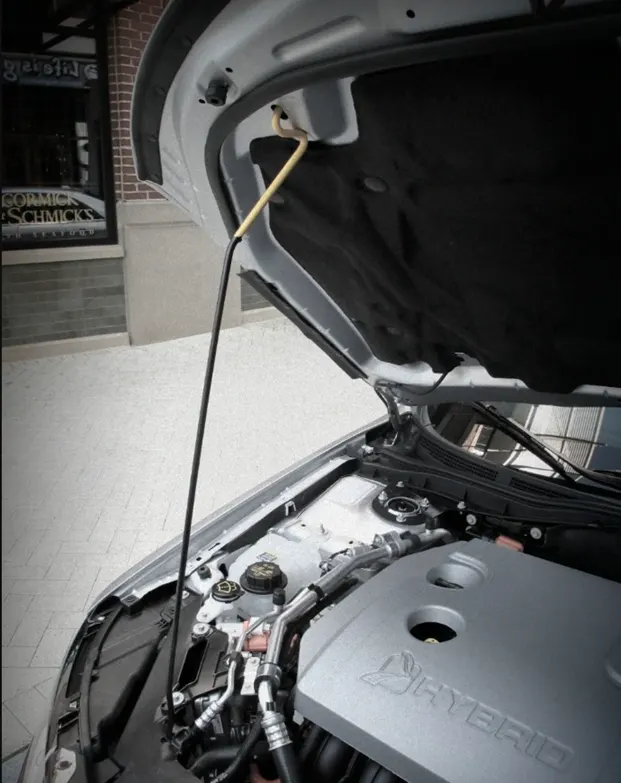
- When we open the hood and keep it in open condition, one end of the support rod attached to the hood and another one end supports it, which is usually inside the engine compartment.
- This support rod has to be fixed manually onto the hood.
- The structure design of the support rod is not linear but it should have some bends to increase the rigidity and strength of the rod.
- The support rod should be mounted on the opposite side of the battery to avoid disturbance while removing the battery from the car.
LATCH AND STICKER:
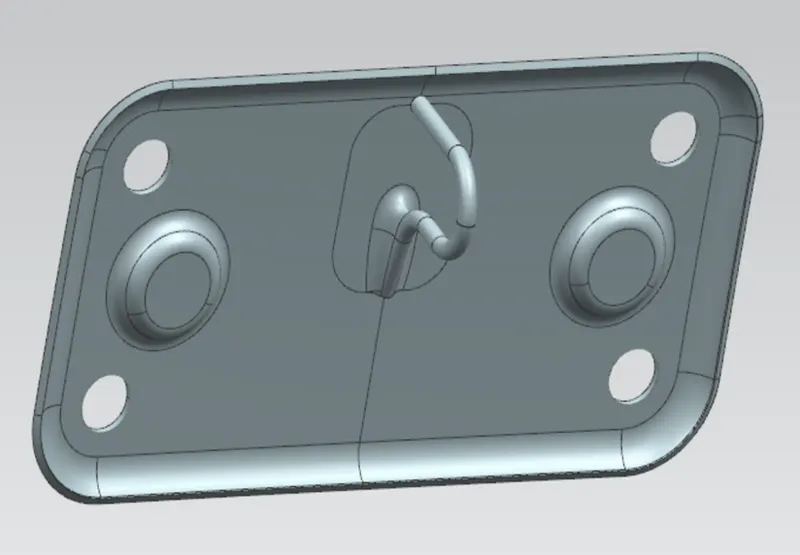
- Latch is the part of the hood that has a trajectory or hook type design used to lock or unlock from the vehicle engine compartment.
- When you open the car door by pulling on the door lever or handle, the latch mechanism releases the jaw and the door opens.
- The jaw is then held in the unlatched position by the latch mechanism. When the door closes the jaw hits the striker and is pushed back into the latched position.
- The striker plate is made of hardened metal that prevents wear when the door is open and shut many times each day.
HINGE ASSEMBLY:
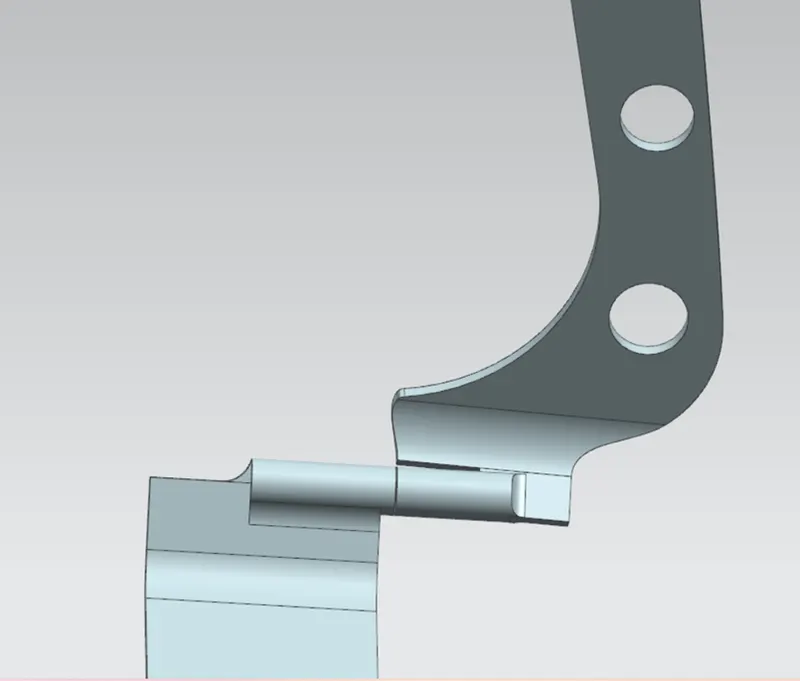
- Drivers can raise and lower their vehicle's hood thanks to the hood hinges that serve as the body panel's pivoting point.
- These hinges also hold the hood closed on their end, and most vehicles have two hood hinges, one for each side.
- A hinge is a mechanical bearing that connects two solid objects, typically allowing only a limited angle of rotation between them for hood open and closing.
HOOD OUTER PANEL:
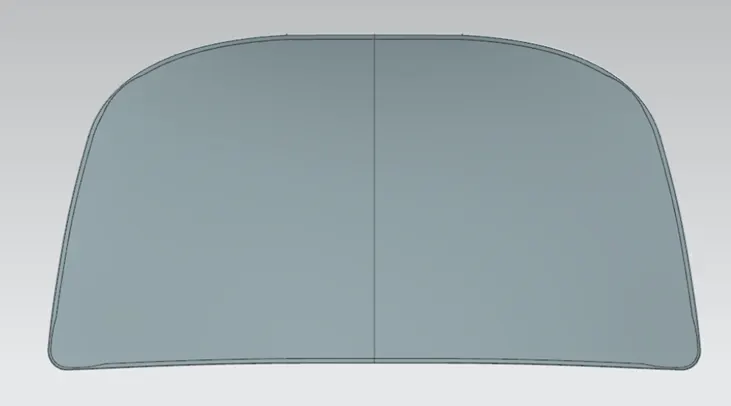
- Outer panel are the aesthetic element of the car, it is the styling team who provides the skin for the outer panel.
- The shape, position and size of the hood should satisfy the safety norms, so while designing the hood we should give more important to pedestrian safety.
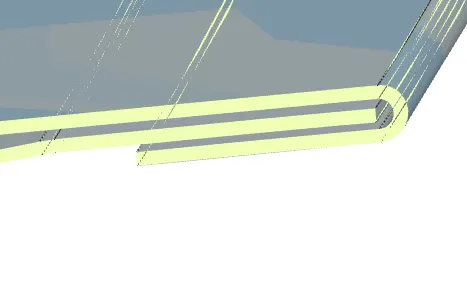
- The outer panel is attached to the inner panel by hemming flange and reliefs for the hemming operation.
- We also provide mastic sealants between outer panel and inner panel to reduce vibration.
HOOD INNER PANEL:
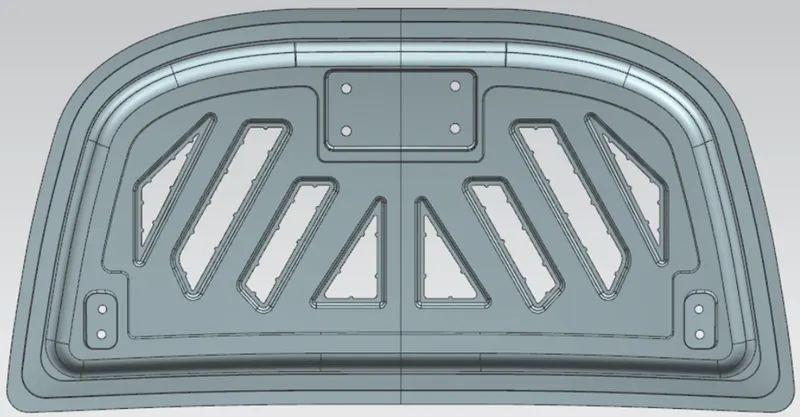
- Hood inner panel is the part that gives strength and rigidity to the outer panel.
- the inner panel is designed in such a way that the force produce during the collision is delivered on the outward direction so that the damage to the passenger and the driver is to be reduced.
- The outer panel is attached to the inner panel by hemming flange and reliefs for the hemming operation.
- We also provide mastic sealants between outer panel and inner panel to reduce vibration.
PROCEDURE:
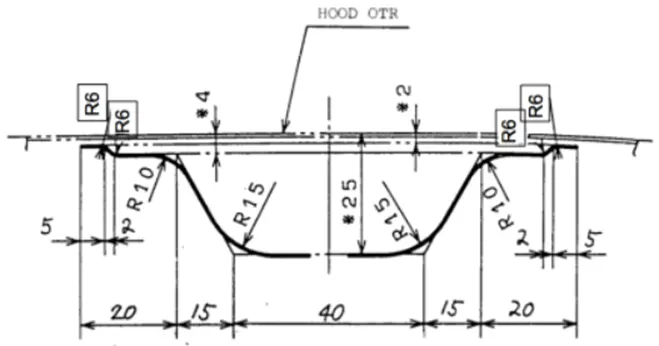
- Master section creation is based on the requirement received from the marketability team and the manufacturing requirement that we saw below.
- Below is the image of the master section used for the design.
DESIGN PARAMETERS:
Hood Thickness Information
- Outer Panel Thickness = 0.75mm
- Inner Panel Thickness = 0.75mm
- Reinforcement Thickness = 1.5mm
Master sketch:
TOOLS USED:
- Offset surface.
- Offset in face.
- Datum plane.
- Law extension.
- Trim sheet.
- Face blend.
- Edge blend.
- Through curves.
- Trim and extend.
- Projected curve.
- Mirror geometry.
GEOMETRY AND EMBOSS CREATION:
- The design geometry is created based on the master section that was provided above.
- The inner panel is primarily developed using the master section, the inner panel is offset of the parent surface of the hood outer panel.
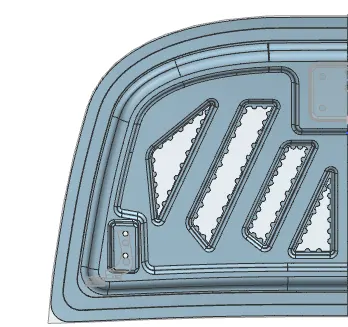
- After offset the profile of inner panel then by adding emboss, we can achieve the force distribution.
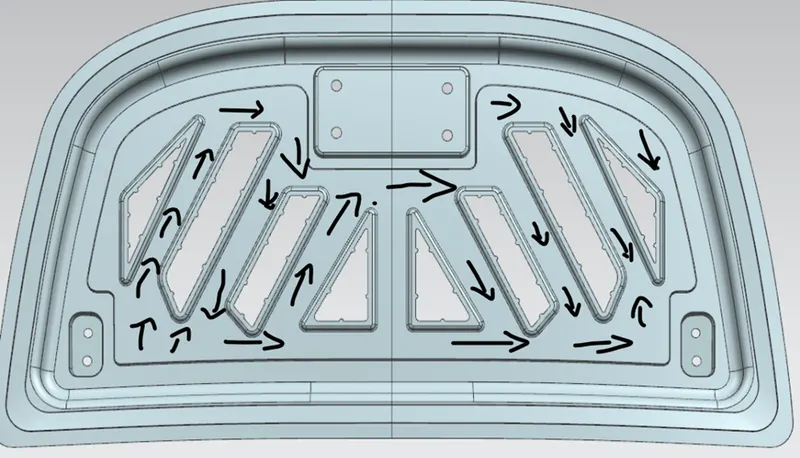
- We will provide local emboss to strengthen the component, it will be strengthened based on the master section.
- When a force impacts the hood from the front, it travels in an upward direction the component is designed in such a way to divert the impact force direction away from the passengers.
- The distance between the outer edges of the emboss should be minimum of 5 mm.
- Draft angle should be a provided to the emboss with 7degree to 9 degrees for the easy removal of the part from the die.
- No sharp corners to be provided in the emboss & the height of the emboss should not be more than 5mm.
HEMMING:
- Hemming is a forming operation in which the edges of the sheet are folded or folded over another part in order to achieve a tight fit.
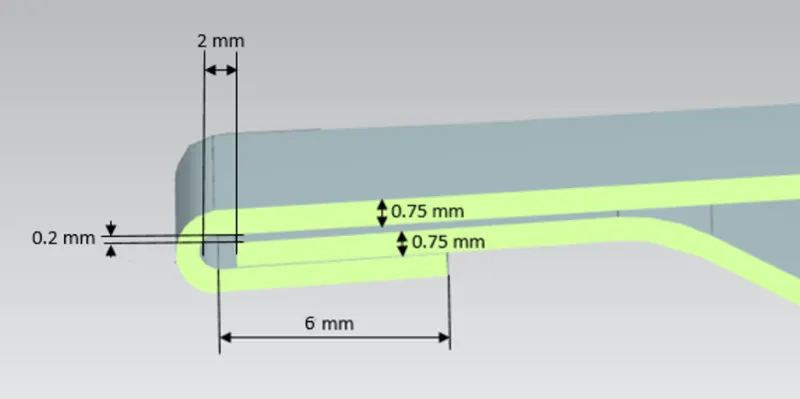
- Hemming operation are used to connect part together to improve the appearance of a part and to reinforce part edges.
- The accuracy of the hemming operation is very important since it affects the appearance of the surface and surface quality.
- Material deformation, which occur during the hemming process, can lead to dimensional variations and other defects in parts. Typical hemming defects are splits or wrinkles in the flange, material overlaps in the corner areas or material roll in
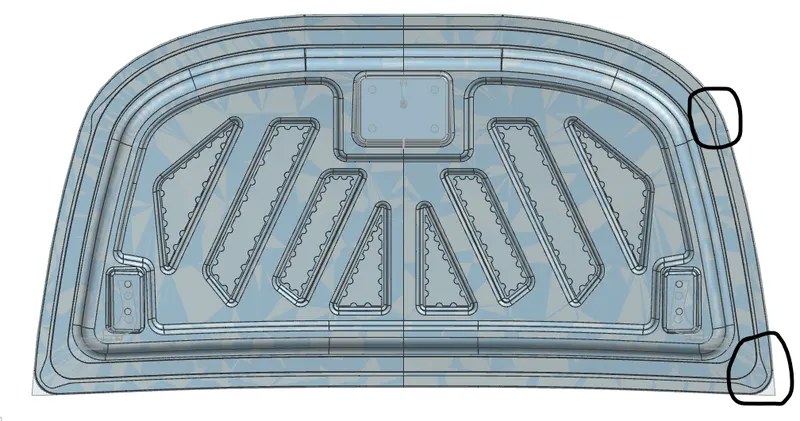
- This is why it is important to provide required reliefs at the corners.by create a curve on the surface and trim the corner created curve as given in the master sketch.
RELIEF AT THE CORNER:
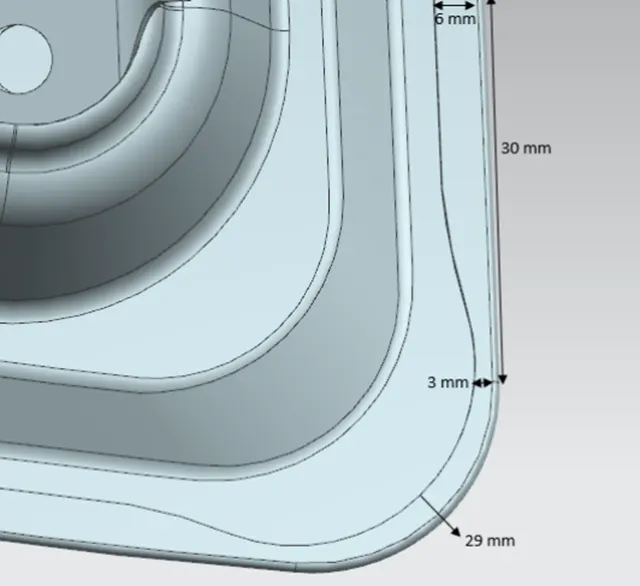
- Material deformation, which occur during the hemming process, can lead to dimensional variations and other defects in parts. Typical hemming defects are splits or wrinkles in the flange, material overlaps in the corner areas or material roll in This is why it is important to provide required reliefs at the corners.by create a curve on the surface and trim the corner created curve as given in the master sketch
REINFORCEMENTS:
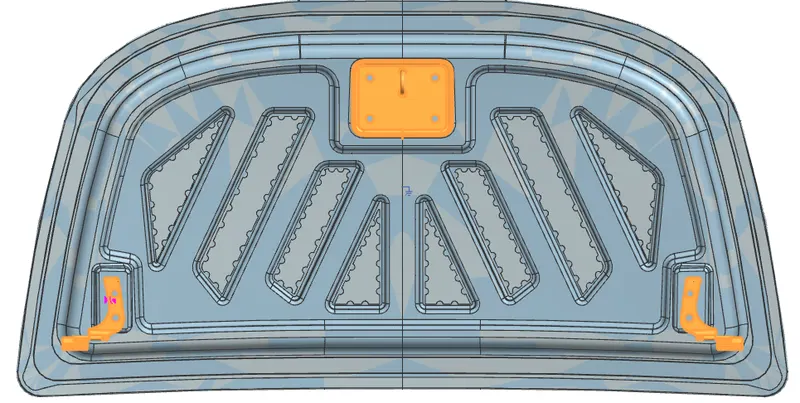
- Whenever there is an addition of material to the component there is a loss of strength locally.in this case the additional material is the Stricker and hinge.
- The thickness of the reinforcement should be in the range of 1.5mm, this parameter can be obtained from the CAE team (carry-over study).
- There is additional reinforcement called a stiffener pad which is attached between the hood inner and outer panel to reduce the noise and vibration during the motion of car.
- Distance between the outer and inner panel should be 5mm where mastic sealant is placed in the mastic sealant point to form a strong bond between them, this also reduces the noise and vibration in the hood in the car.
- the hood inner and outer panel sheet thickness should be 0.75mm.
ASSEMBLY OF HINGE AND STRIKER:
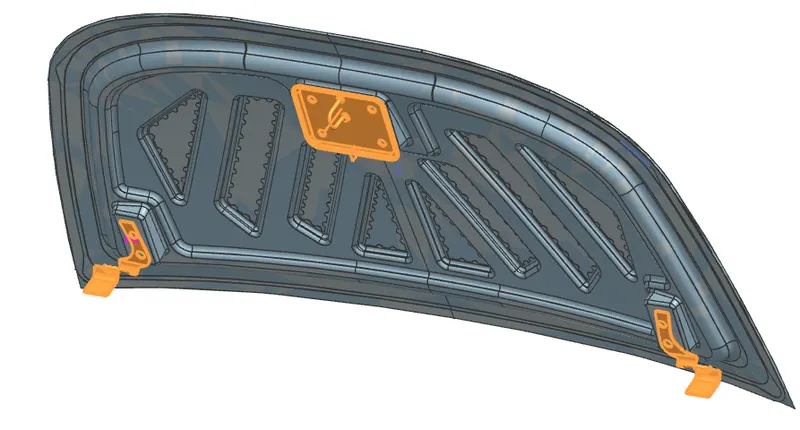
- the hinge should be positioned on the embossed area which is create and offset by a plane to create a flat surface to lie the hinge assembly.
- The position of the hinge can also be decided based on the carry over study and mirror the hinge on the opposite side.
- From the axis of the hinges create a midpoint from that midpoint draw a circle with the radius from that midpoint to the centre of the striker.
- The circle created is called the trajectory circle, with the trajectory circle it is to be checked that the striker is tangent to the trajectory circle if not then the position of the hinge should be moved accordingly such that the striker is tangent to the trajectory circle.
INNER PANEL WITH EMBOSS:
HEMMING;
CORNER RELIEF:
FRONT VIEW:
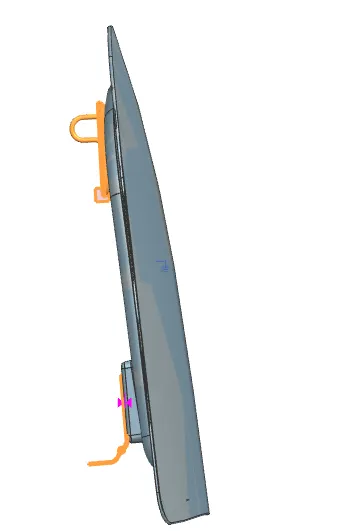
SIDE VIEW:
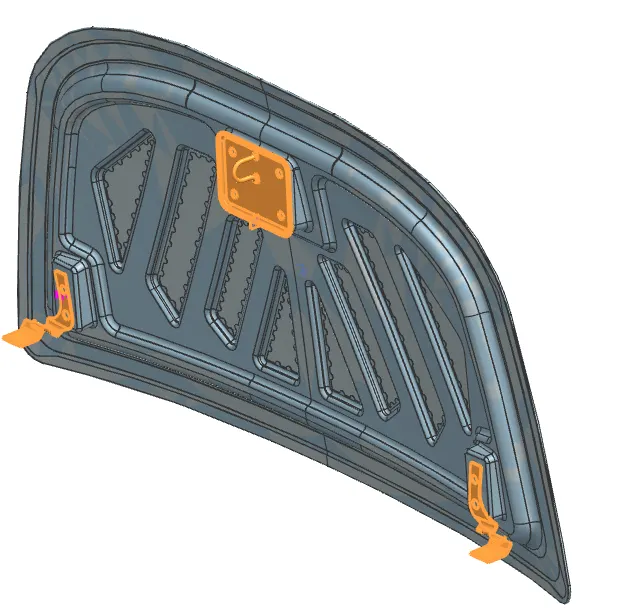
ISOMETRIC VIEW;
CONCLUSION:
- All the component of hood are designed and assembled using assembly section. With all the safety related features are given in the report.
- The latch and the striker position are studied and all the necessary reinforcement were added to the design.
.