Hood design-Week 2
HOOD DESIGN
Objective:
To design and assemble hood outer panel, inner panel, positioning the striker and hinge with their reinforcements by following the design parameters and master section which is provided as input.
Given Data:
Hood thickness information
- Outer panel thickness = 0.75 mm
- Inner panel thickness = 0.75 mm
- Reinforcement thickness = 1.5 mm
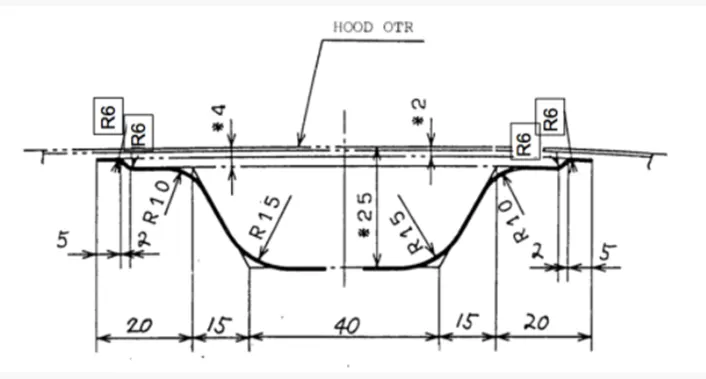
Master sketch
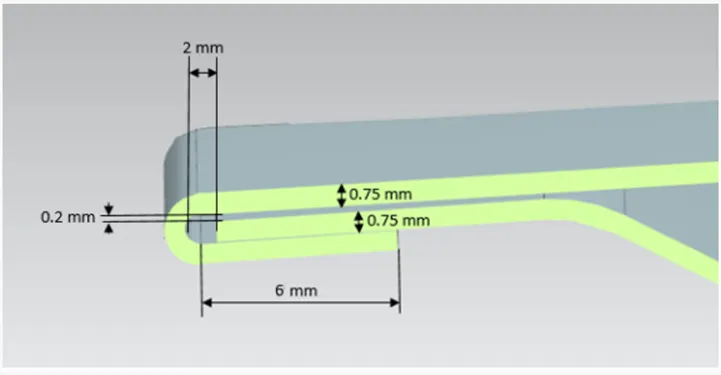
Hemming data
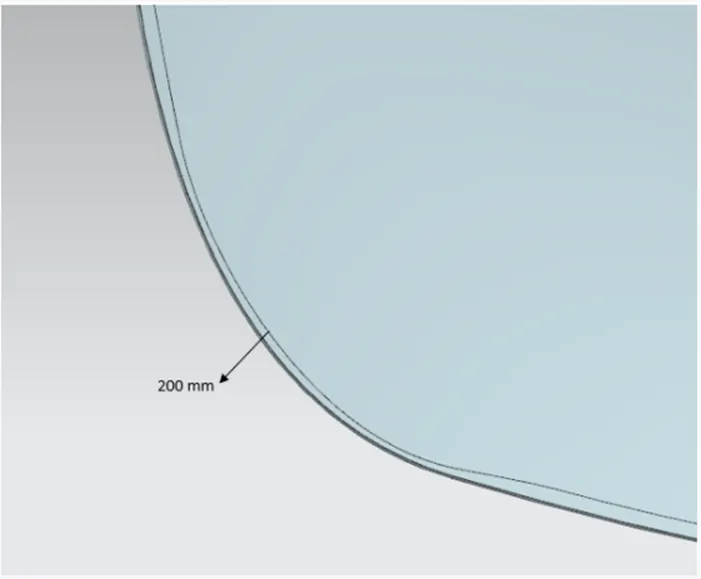
Rear relief
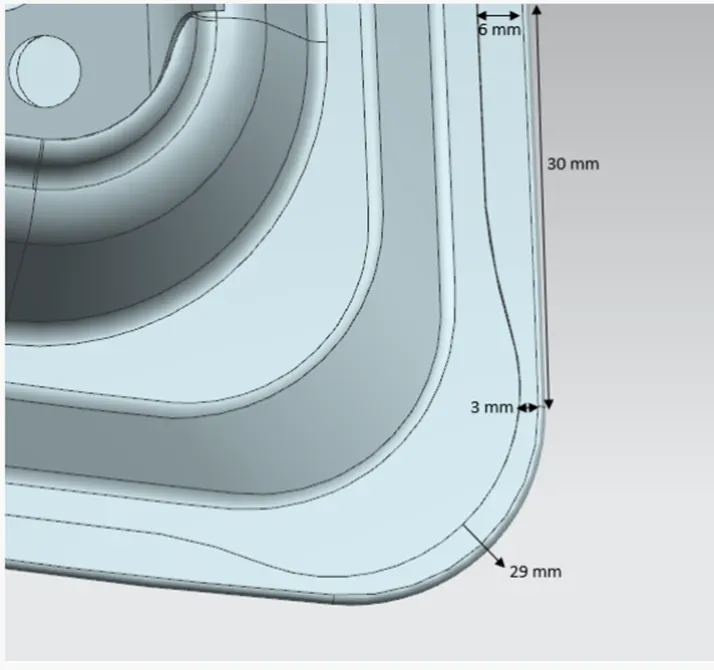
Front relief
Introduction:
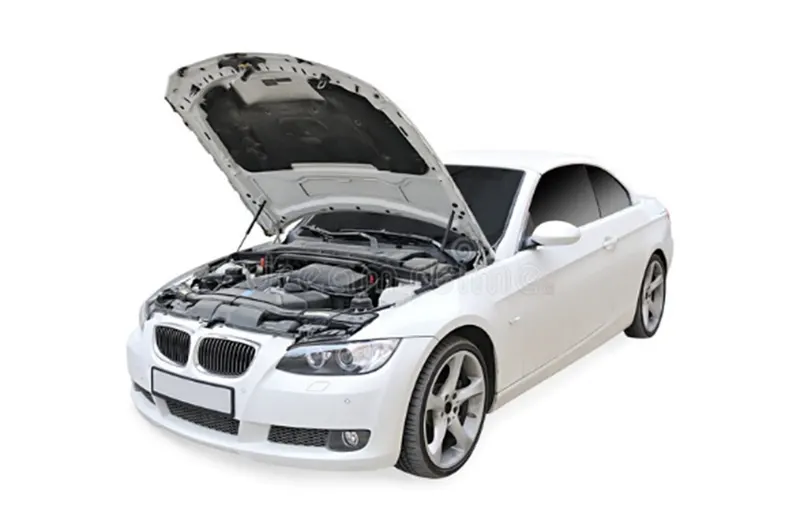
- Hood or bonnet is the hinged cover over the engine of motor vehicles that allows access to the engine compartment for maintenance and repair. In generally for passenger cars, hood may be held down by a concealed latch.
- But in race cars or cars with aftermarket hoods (not use the factory latch system), the hood may be held down by hood pins. A hood may sometimes contain a hood ornament, hood scoop, and/ or wiper jets.
- Hood are typically made out of steel or aluminium, although aftermarket manufacturers may manufacture hoods out of fibre glass, carbon fibre, or dry carbon. Apart from this, the hood or bonnet are also designed to meet several requirements. They serve as a great deal of purpose in protecting the passengers inside the car and the pedestrians in the event of an accident.
- Hood plays a major role in pedestrians’ safety as well as car safety.
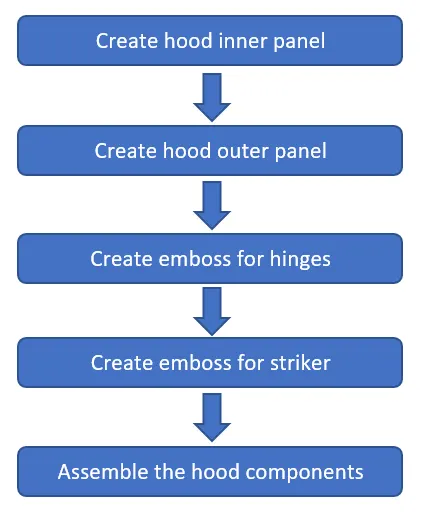
Design Methodology:
Hood components:
1) Hood outer panel
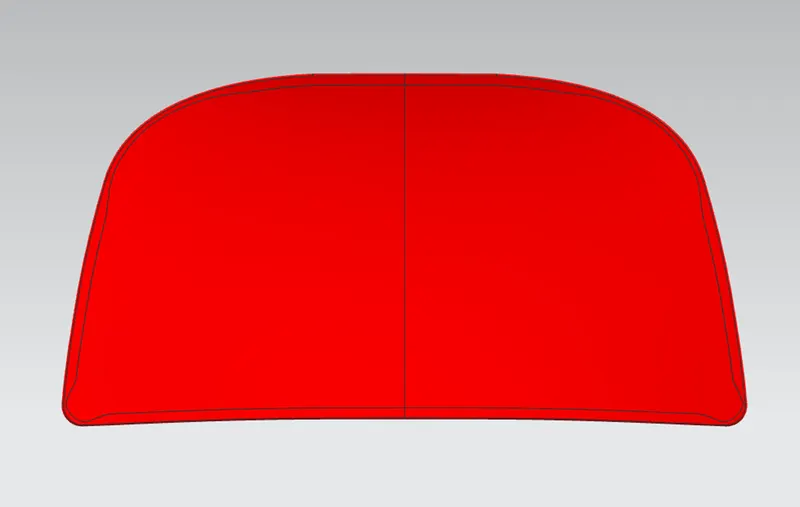
- Outer Panel is the most important part of the hood to makes the car in a very good aesthetic proportion. So that the Outer panel is perfectly made in sense to achieve the aesthetic requirement. So that, the sheet metal operation result which is visible on the outer panel or it reduces the aesthetic value means, those operations are strictly not to be followed to make the outer panel. That's why the hemming process is used to join the outer panel with the inner panel, instead of using welding methods.
- By considering the given Outer Panel thickness (0.75mm) and using the outer panel styling surface the outer panel has been made.
2) Hood inner panel
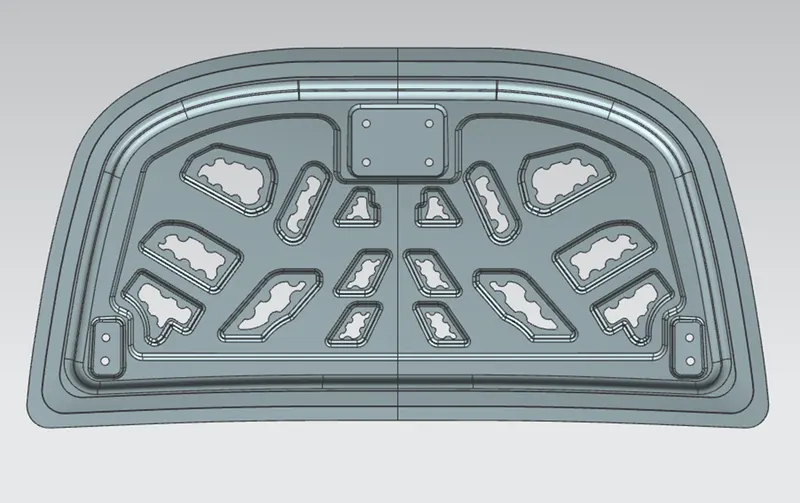
- Inner panel is created by extracting hood outer panel skin provided.
- It is mounted on inner surface of the outer panel. It covers the engine compartment with striker and hinges mounted on it.
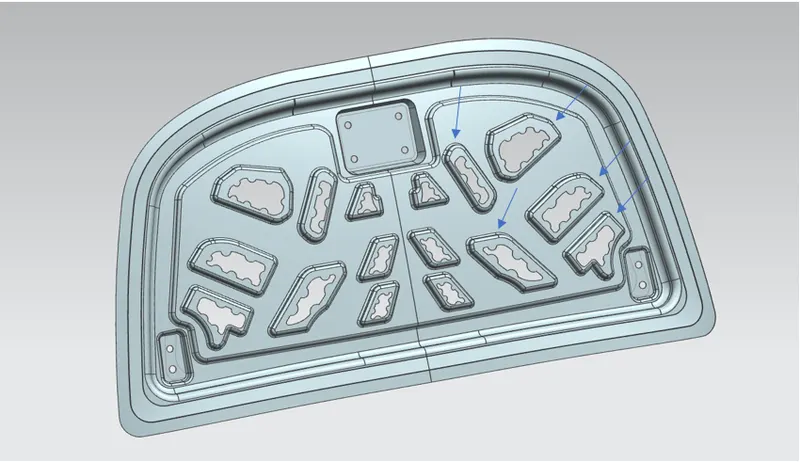
- To decrease the stiffness of the part, holes are created by trimming the sheet metal.
- Considering the safety standards and the head impact criteria the inner panel is provided with embosses and cutouts. The embosses help in improving the strength of the inner panel.
- It is designed to provide strength, rigidity, and when crash happens the impact force will be dispersed evenly all over the hood.
- After the impact between pedestrian and the inner panel, the person colliding should experience the least force and this will reduce the chances of head injury. Also the force which gets inside the cabin reduces gradually and it is a safety feature for the driver and the passengers.
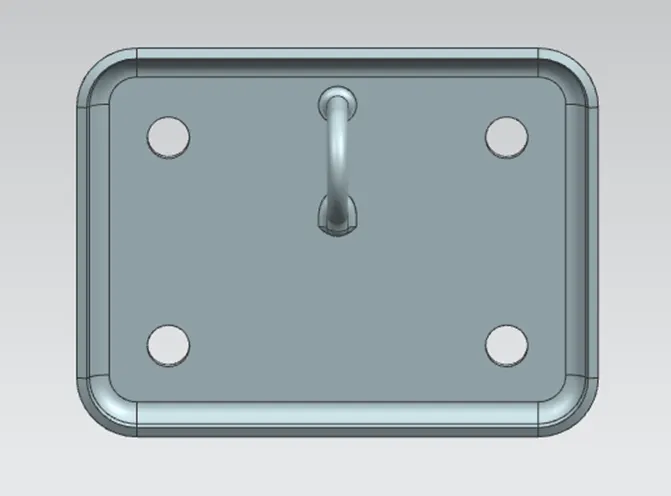
3) Latch and Striker
- A latch is a type of mechanical fastener that joins two or more objects while allowing for their regular separation.
- Striker holds the latch, and is mounted onto the inner panel.
4) Hinge assembly
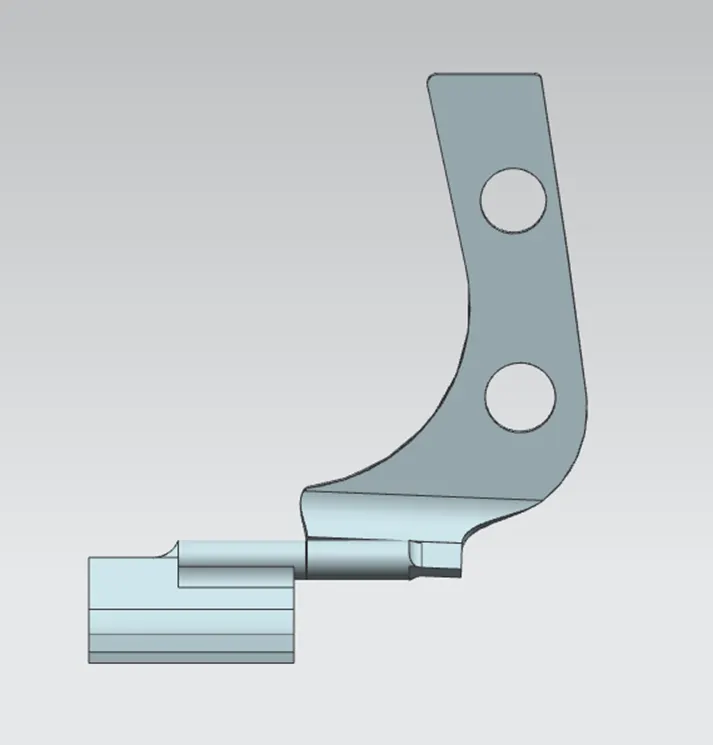
- Hood hinge acts like a door hinge and allows the hood to pivot open and closed.
Latch Trajectory:
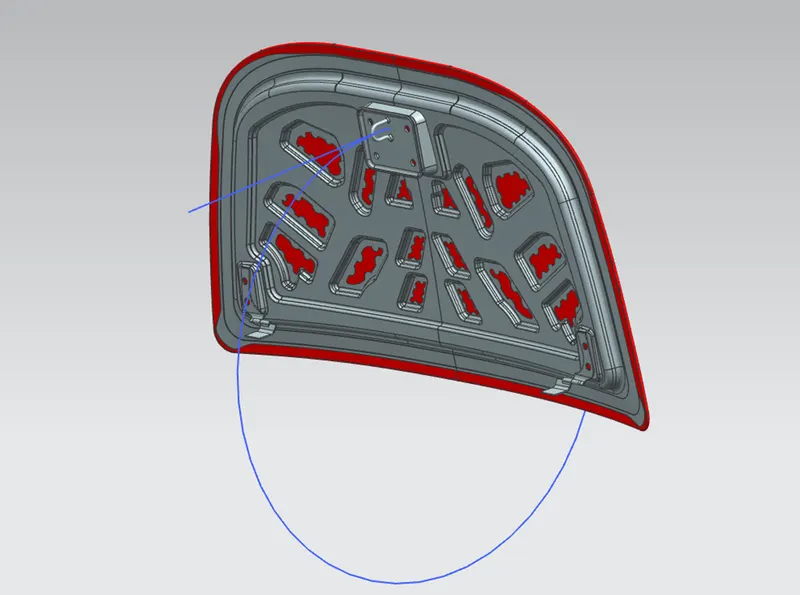
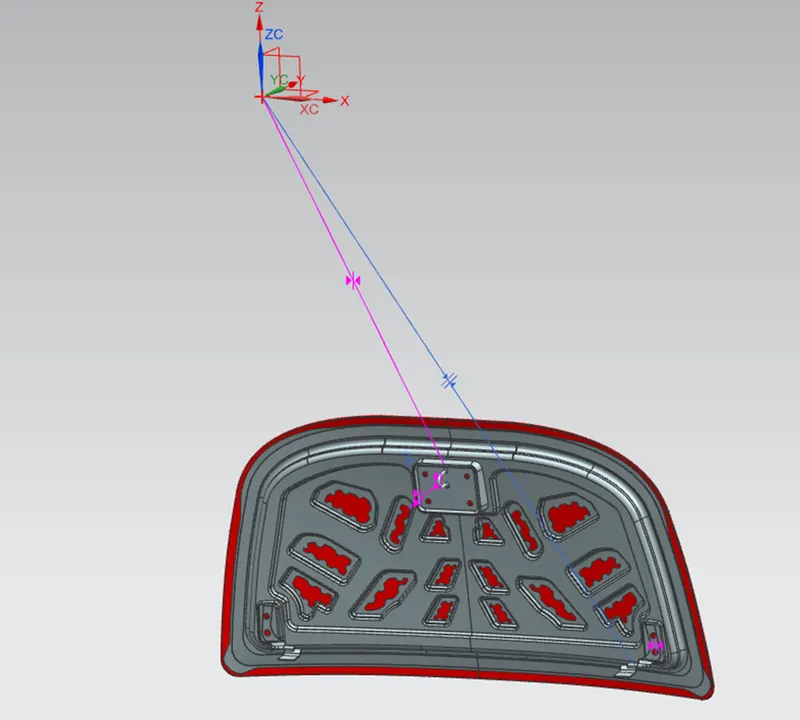
- This trajectory is used to position the striker on the reinforcement in a proper way.
- After both the hinge assemblies are mounted on their respective reinforcements, a line is created along the axis of the two hinges.
- A circle is created taking midpoint of the line as centre, another line is created tangent to this circle. This is the reference line within the circle with a particular angle.
- Then, based on the required striker position the diameter of the circle is altered.
- Now, another line is created which is parallel to the striker hook from the striking point.
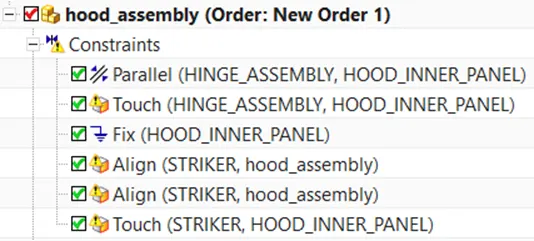
- Using assembly constraints, assemble both lines and fix striker to the striker reinforcement on the inner panel.
Mastic data:
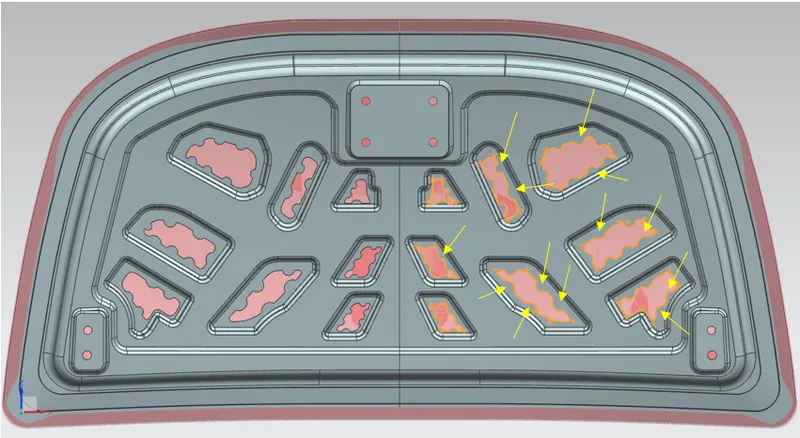
Mastics are the kind of sealant which is used to combine the outer panel of the hood to the inner panel of the hood by applying between them. When in applying condition it is in the form of liquid substance with high viscosity like paste, then it is placed in worm condition, it turn into rubber like solid state. So that it can be the damping resistance and reduces the noises and all.
Assembly Constraints:
Manufacturing process:
1) Hemming
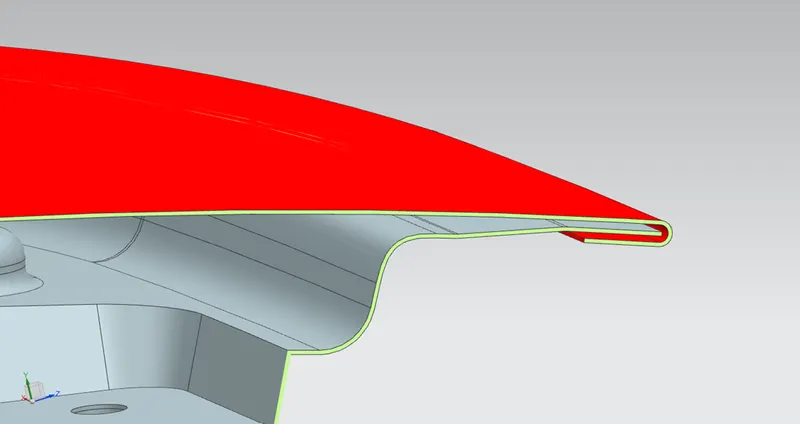
- Hemming is used to fit the parts together. It can be done by the folding edge of one part over the other part to fix within it. This operation is done by using the roller.
- Hoods, Doors, Boot lids of the automobile components are made by the hemming operation.
- There are two types of hemming processes
Conventional die hemming - In this method the hemming process is done by using the hemming die to fold the sheet metal edge by the entire length.
Roll Hemming - In this method Rollers are used to done the process and at the same time two or more rollers are fold the sheet metal from the different location of the sheet metal edge to achieve the hemming which is close to accurate. Most of the automobile manufacturer are following the Roll hemming method due to its easier method when compare to the conventional die hemming.
- In Hood, the outer panel is subjected to the hemming operation which means that the outer panel edge is folded and rolled back to the underneath of the inner panel. The corner of the outer panel edge has to be trimmed, Because while hemming process the roller transfer pressure to the outer panel edge to fold it and roll it back, so that it may cause the problem that the sheet metal may break.
2) Deep drawing
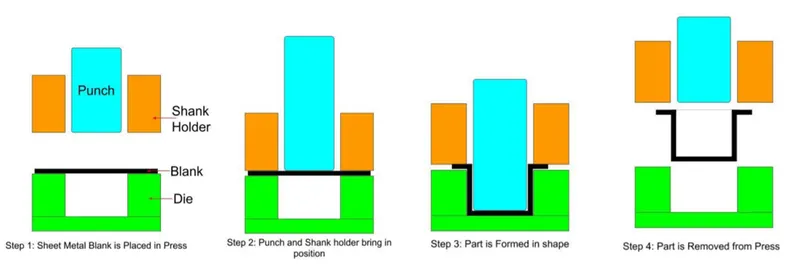
- Deep drawingis a sheet metal forming process in which a sheet metal blank is radially drawn into a forming die by the mechanical action of a punch. It is thus a shape transformation process with material retention.
- The process is considered "deep" drawing when the depth of the drawn part exceeds its diameter. This is achieved by redrawing the part through a series of dies. The flange region (sheet metal in the die shoulder area) experiences a radial drawing stress and a tangential compressive stress due to the material retention property.
- These compressive stresses (hoop stresses) result in flange wrinkles (wrinkles of the first order). Wrinkles can be prevented by using a blank holder, the function of which is to facilitate controlled material flow into the die radius.
3) Embossing
- Embossing is kind of stamping process. It is the process of applying the pressure to the flat sheet metal by the forming tool to create the projection on that sheet metal wherever required.
- In Hood design, the inner panel of the hood has more embosses to improving the strengthening of the panel. Based on the design structure, embosses are created or we can say projected on the inner panel sheet metal.
4) Piercing
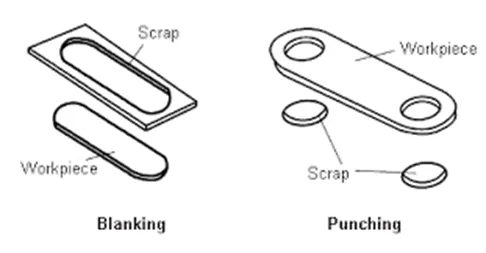
- Blankingand piercing are shearing processes in which a punch and die are used to produce parts from coil or sheet stock. Blanking produces the outside features of the component, while piercing produces internal holes or shapes. The web is created after multiple components have been produced and is considered scrap material.
Features used while designing:
- Offset surface
The offset surface tool creates a copy of the selected surface at a provided distance and direction.
- Offset in face
Use the Offset Face command to offset one or more faces along the face normal. You can offset faces either by positive or negative distances, provided the topology of the body does not change.
- Trim sheet
Use the Trimmed Sheet command to trim sheet bodies to intersecting faces and datum, and projected curves and edges.
- Through curves
Through curves command use to create a body through multiple sections where the shape changes to pass through each section. Sections are curves, points, solid edges, solid faces.
- Law Extension
Use the Law Extension command to extend an existing surface or sheet based on the laws for distance and the angle of the extension. Law Extension creates flanges or extensions when a particular direction is important or when it is necessary to reference the existing face.
- Trim and extend
This option lets you extend and trim one or more surfaces using a set of tool objects composed of edges or surfaces.
- Face Blend
Face Blend is enhanced to provide a dedicated type for blending along intersection edges of bodies combined with a Boolean feature. Face Blend is primarily used to blend between faces of separate bodies. It can also be used to blend between faces of a single body.
- Edge blend
Edge blend command use to round sharp edges between faces. The radius can be constant or variable.
- Emboss
Using any sketch, a punched surface is created. A draft can be provided for the punch from either the end cap or the base surface.
- Sketch
Creates a sketch in the current application. Use the direct sketch tools to add curves, dimensions, constraints, etc.
- Datum plane
Creates a datum plane used to construct other features.
- Wave Geometry Linker
Copies geometry from other parts in the assembly into the work part.
- Extend sheet
Extend a sheet body by distance or to the intersection with another body.
- Mirror geometry
Copies geometries and mirror them across a plane.
- Sew
Sew command use to combine sheet bodies by sewing common edges together, or combines solid bodies by sewing common faces. The selected sheet bodies must not have any gaps larger than the specified tolerance.
- Thicken
Use the Thicken command to offset one or more connected faces or sheets into a solid body. Thickening occurs by offsetting the selected faces along their face normal and then creating sidewalls. The Thicken command is similar to the Offset Face command.
- Curve on surface
Creates a surface spline features directly on face.
- Extract body
Use the Extract Body command to create an associative body by extracting faces from another body.
Views of hood design
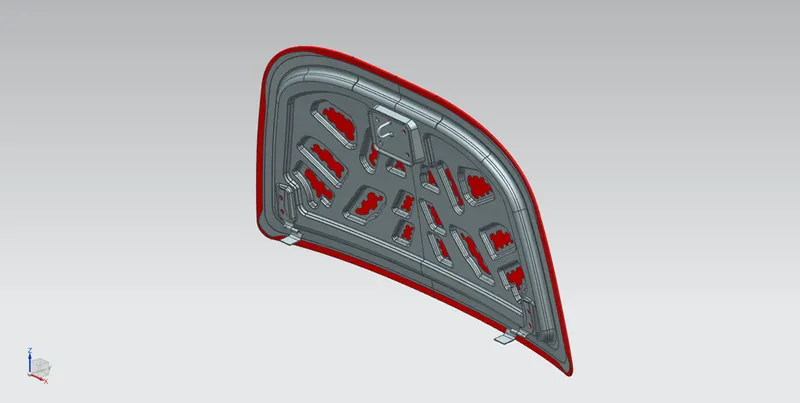
- Isometric view
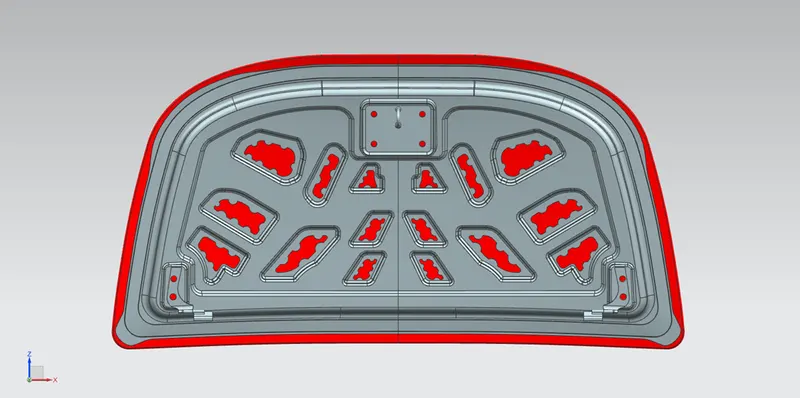
- Front view
- Bottom view
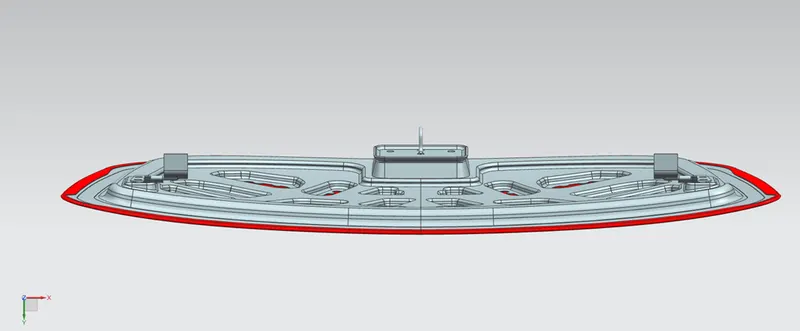
- Back view
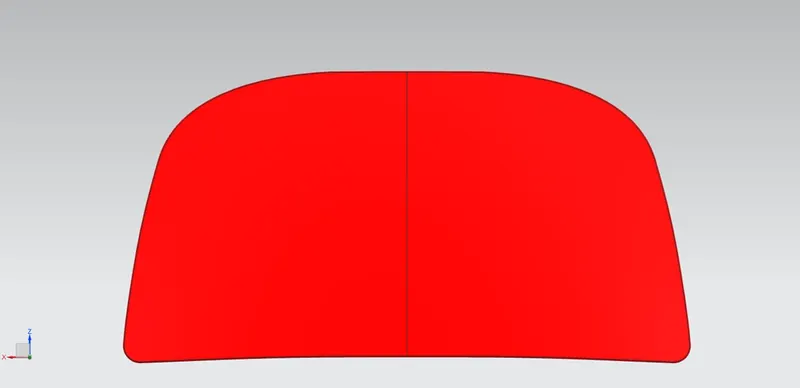
- Side view
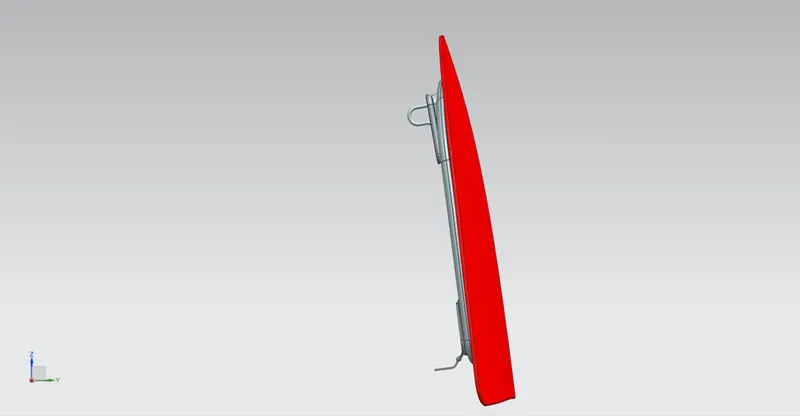
Conclusion
- Hood inner panel is created, by extracting the hood outer panel skin provided.
- All the components of hood are assembled using appropriate constraints.