Hood design-Week 2
HOOD DESIGN
AIM:
Design Hood outer panel, inner panel and the necessary reinforcement. Submit an assembly of Hood inner panel, outer panel, latch, hinge and the reinforcements
INTRODUCTION:
The hood or bonnet is the hinged cover over the engine of motor vehicles. Hoods can open to allow access to the engine compartment.
On front-engine cars, the hood may be hinged at either the front or the rear edge, or in earlier models it may be split into two sections, one each side, each hinged along the centre line. A further variant combines the bonnet and wheel arches into one section and allows the entire front bodywork to tilt forwards around a pivot near the front of the vehicle.
Hoods are typically made out of the same material as the rest of the body work. This may include Steel, Aluminium, Fiberglass or Carbon Fiber. However, some aftermarket companies produce replacements for steel hoods in fiberglass or carbon fiber to make the vehicle lighter.
A hood panel consists of two panels that are hemmed together to form the automotive hood assembly. The inner panel of the hood is not visible to the customer but this is the engineering feature of the outer panel.
- Outer Panel: The Outer Panel of the car has Smooth surface that gives a proper look to the vehicle. It’s a covering to the inner panel. The designing of outer panel depends on the type of vehicle allowing enhancing the performance of the vehicle.
- Inner Panel: The inner panel of the vehicle is fixed to the outer panel which gives strength to the outer panel of the vehicle.
In order to improve the performance of the vehicle, the overall weight of the vehicle should be reduced. While designing the inner panel we have to look after the safety of passengers and pedestrians. The material used in inner panel should be stronger and lighter in weight. Higher thickness material will not be able to form in complex shape too and results in increase in weight of the vehicle. So to overcome from this problems, the concept came into picture called as FIXTURE or BIW FIXTURE.
Here the fixture acts as an inner panel for the outer panel, the fixture design in such a way that have the following functions.
- Its acts an engine unit protector from environmental issues.
- Have to protect the passengers as well as pedestrians from frontal crash.
- Should have less weight in order to improve the performance of a vehicle.
- Finally should pass the NCAP crash test.
GIVEN DATA
Hood Thickness Information
- Outer Panel Thickness = 0.75mm
- Inner Panel Thickness = 0.75mm
- Reinforcement Thickness = 1.5m
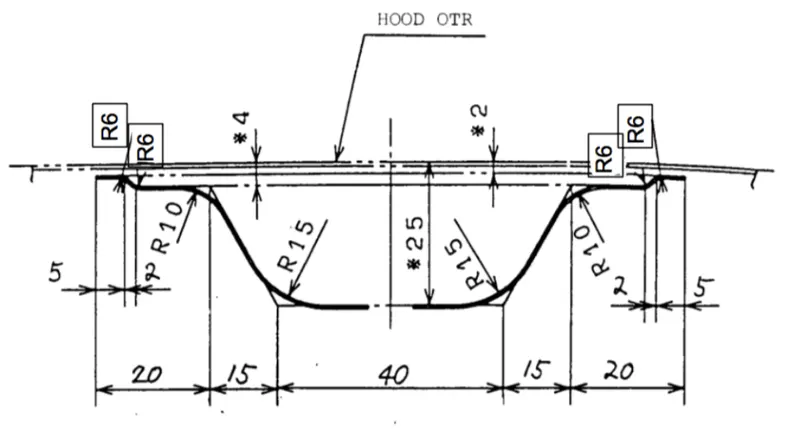
Master sketch:
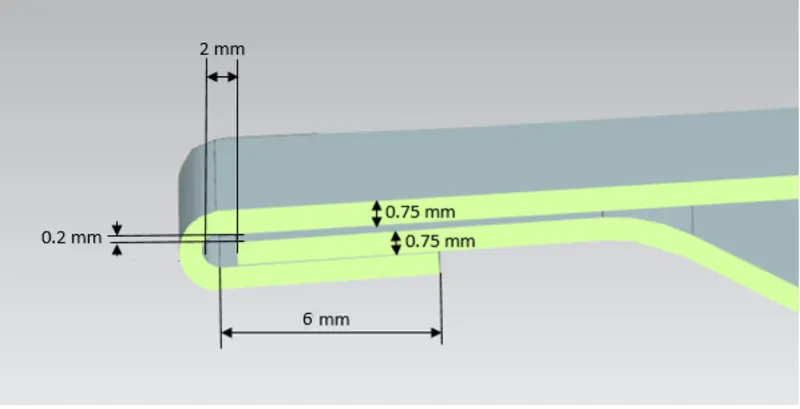
Hemming Data:
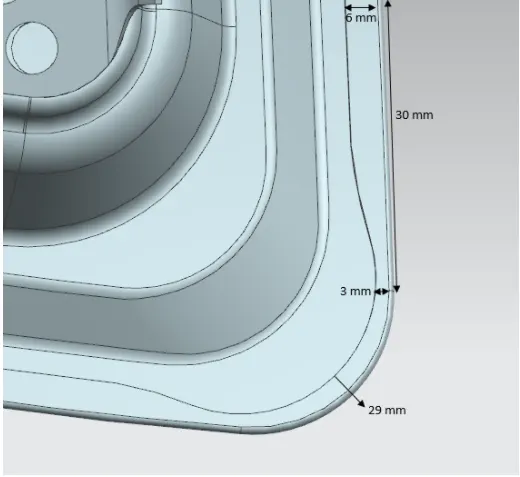
Relief rear section:
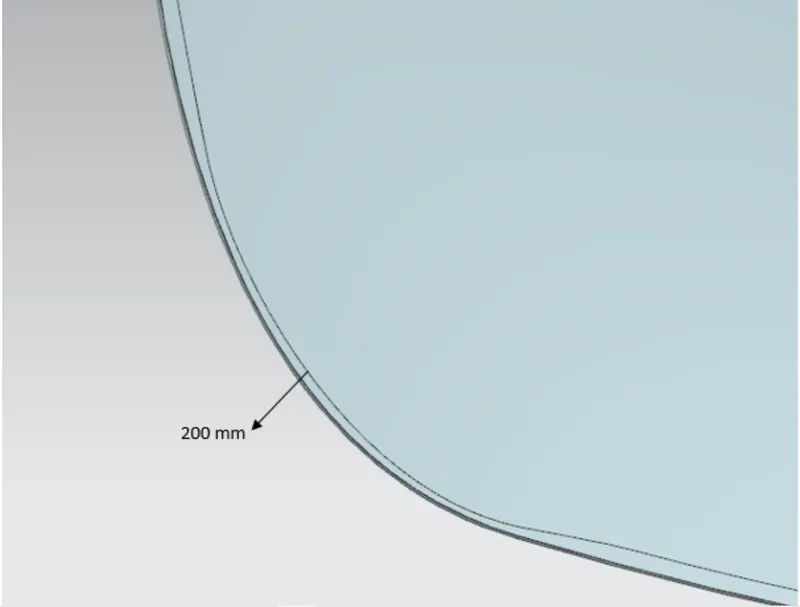
Front relief:
IMPORTANT COMPONENTS USED
- Offset Surface: The feature is used to create another body at an offset distance from the original body.
- Offset in Face: To create a curve on the selected face this feature is used.
- Trim Sheet: This Feature is used to trim the extra or unwanted sheet for the work part.
- Through Curve: Create a body through multiple section where the shape changes to pass through each section.
- Law Extension: This feature is used to create a law controlled extension from a base sheet, dynamically of based on law for distance and angle.
- Trim and extend: This is used to trim or extend a set of edges or face to the intersection with another set of edges or face.
- Face Blend: This feature is used give smother faces.
- Edge Blend: The sharp edges of the face are converted to smooth edges.
- Bridge Curve: This feature is used to create tangent blend curve between two curves which are not connected to each other.
- Emboss: This feature is very important feature as it modifies a body faces made by projecting a section along a vector, with option for end cap location and shape.
- Projected Curve: As we cannot draw a sketch on the surface, so by drawing a sketch on the plane parallel to the give surface and used project curve it will project the curve on the face.
- Trim Body: Trims off the extra portion of the body.
- Extend Sheet: It is used to extend the sheet body by distance or to the intersection with another body.
- Datum plane: This is mostly used feature which helps to create a plane that is used to construct other sketches.
- Wave Geometry Linker: This feature is used to copy geometry from other part in the assembly into the work part.
- Mirror Geometry: It mirrors the entire geometry along the plane.
- Sew: This feature is used to combine the sheet bodies by sewing common edges together, or combines solid bodies by sewing common faces.
- Thicken: This feature is used to add a thickness to the set of faces.
The components include in the hood are given below.
- Latch and striker trajectory: - This is the part of hood which has to be locked inside the engine compartment.
- Hinged Assembly: - As we know the hood is used to protect an engine compartment, so whenever there is any problem inside the engine we need to open the hood. Hinged are placed on the hood to give rollover action to tilt up or tilt down the hood.
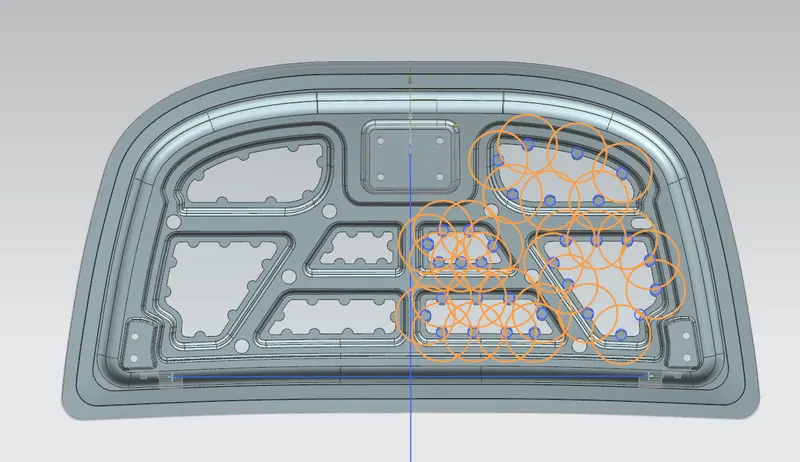
- Mastic seal: - This seal used to attach the inner and outer panel instead of welding (welding gives spots on the surface which give aesthetic look on the surface, that's why the mastic seal was introduced). Each mastic points in the fixture covers over 80mm diameter to stick together between inner and outer panel.
Euro NCAP standards followed:
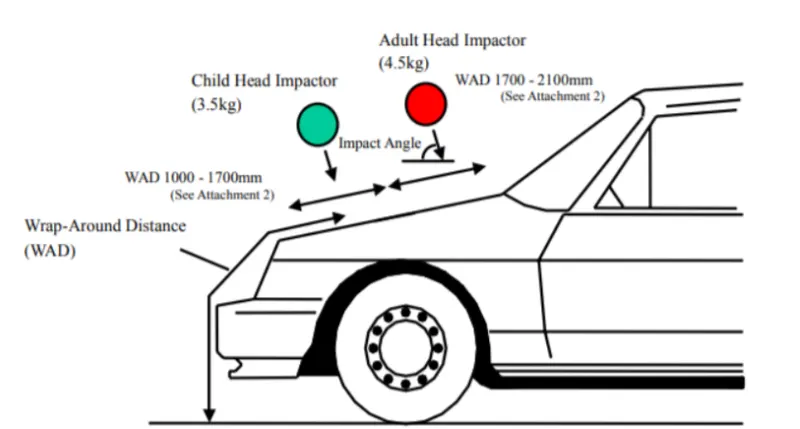
We design the hood panel for the safety of the passengers inside the cars but at the same time, we have to protect the pedestrian walking on the road. This is what improves the standard and quality of the car. Whenever the car hits a pedestrian it should cause minimum damage to the pedestrian. For this, we have to remove material from the inner panel at specific portions.
Wrap Around Distance (WAD):
When a car crashes on the pedestrian, the whole human body wraps around the front shape of the car and the head impacts on the bonnet or the windscreen. The distance on which the head impacts on the car from the ground is called as the Wrap around Distance (WAD).
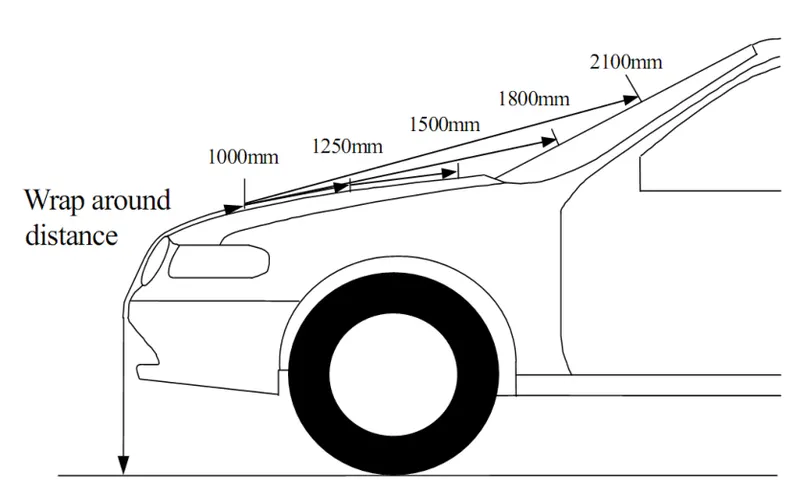
To be specific the Wrap around Distance is a measurement of distance from the ground to the head impact zone over the outer surface of the car. The wrap around distance is measured longitudinally in the centre of the vehicle from the ground.
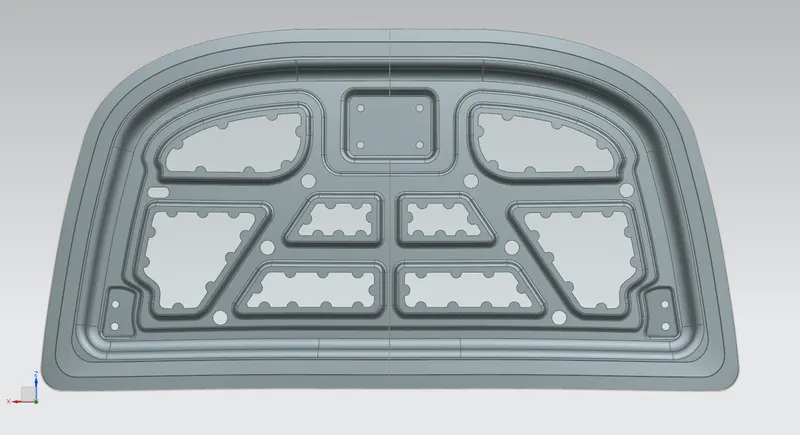
We design the embosses on the inner-panel to reduce the material from the areas which lie on the Adult Head Impact Zone and Child Heat Impact Zone. By removing the material from these areas, we intend to weaken it, anything that hits the bonnet on these positions will experience minimum impact possible. This improves the safety of the pedestrian in an unfortunate event.
Mastic Points:
Mastic points are areas where the inner hood panel is joined with the outer panel hem using a mastic glue. This mastic glue keeps the inner panel stuck to the outer panel.
The main purpose of the outer panel is for the aesthetic looks. Thus we cannot use bolts or welding. This has to be done with the help of the hemming and mastic sealants. Mastic sealants are elastic compound that behaves like the rubber. It is placed between the outer and inner panel. Initially is it in paste form, but after the hot furnace bath it gets hardened thus joining the outer and inner panel. Mastic sealant has the tendency to increase the strength of the panel and has influence of 80mm diameter.
PROS
- One positive characteristic of mastic sealant is that it has a very smooth exterior while keeping its rigid form underneath.
- Surfaces do not have to be primed when using this type of sealant, and although applied thick, it adheres smoothly to any surface. It is important that the area to be joined or sealed be clean and dry, just like any other sealant on the market.
- Mastic sealant may be used outdoors as well because of its waterproof quality. It can be applied on rain duct leaks outdoors, for example.
- It is also favoured for areas under high or low temperatures such as heater vents or drier vents and contains ultraviolet inhibitors to make sure that it is protected from damaging effects of the sun that will often weaken other types of sealants. That makes it a good choice for use on roofs, or any surface that is constantly exposed to sunlight. Most mastic sealants will also work well with metal because they do not corrode over time.
- It functions well in areas with mild vibration and heat, like heating ducts.
CONS
- Mastic sealant is not recommended for areas that have too much joint movement, or anything that will be moved a long length.
- It works well with constant pressure on it, but not constant movement.
- It also works best when applied thickly and is not recommended if only a thin layer is needed such as touch ups. Another sealant is a better choice for those types of repairs
EMBOSSING:
Embossing is a metal forming process for producing raised or sunken designs or relief in sheet material by means of matched male and female roller dies, theoretically with no change in metal thickness, or by passing sheet or a strip of metal between rolls of the desired pattern. Metal sheet is drawn through the male and female roller dies producing a pattern or design on the metal sheet. Depending on the roller dies used, different patterns can be produced on the metal sheet. Emboss should be in 7 degree to 25 degree incline in angle and it should not be in 90 degree angle, why because when we do stamping in manufacturing the stamping tool fits the sheet metal hence it will not come out of that sheet metal, So this is the main reason why the emboss face is in angle.
DESIGN FOR MANUFACTURING:
Whenever we design a particular component it is very important to consider the manufacturing process. If we design a component that is not manufacturer then it is a waste of time. Design engineering is about bringing ideas into life. As this is a sheet metal component, it is manufactured by a deep drawing process. For the deep drawing process to take place we need to ensure that the inner-panel has an angle of a minimum of 5 degrees as the tool will come out easily after the drawing process.
DEEP DRAWING:
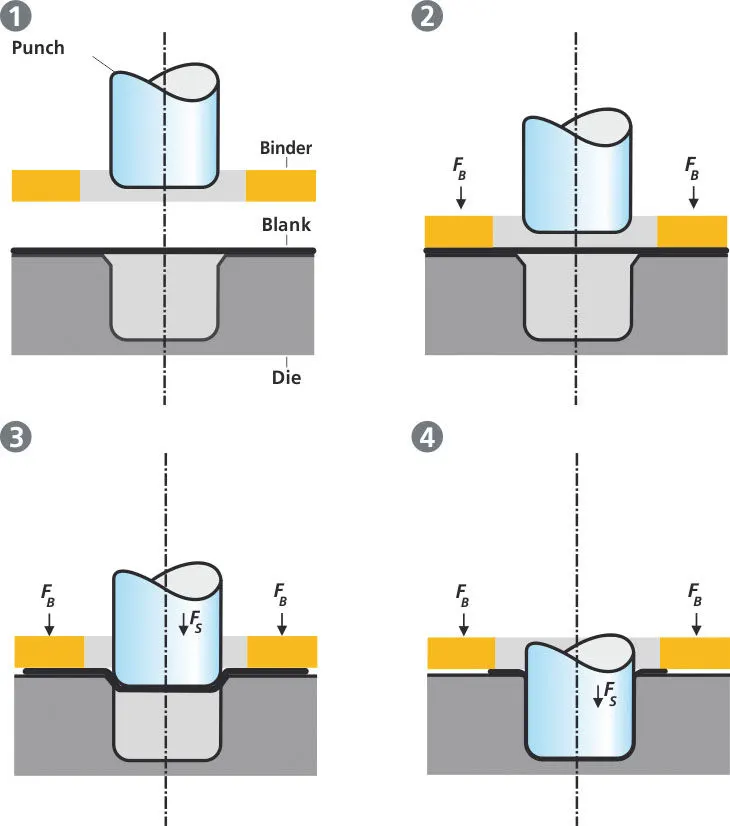
Deep drawing is a sheet metal forming process in which a sheet metal blank is radially drawn into a forming die by the mechanical action of a punch. It is thus a shape transformation process with material retention. The process is considered "deep" drawing when the depth of the drawn part exceeds its diameter.
We give a positive draft or an angle for better drawing process.
The deep drawing process is a forming process which occurs under a combination of tensile and compressive conditions. A flat sheet metal blank is formed into a hollow body open on one side or a hollow body is formed into a hollow body with a smaller cross-section.
Deep drawing processes are divided into three types:
- Deep drawing with tools
- Deep drawing with active means
- Deep drawing with active energy
In the automotive industry, deep drawing is usually carried out using rigid tools.
HEMMING PROCESS:
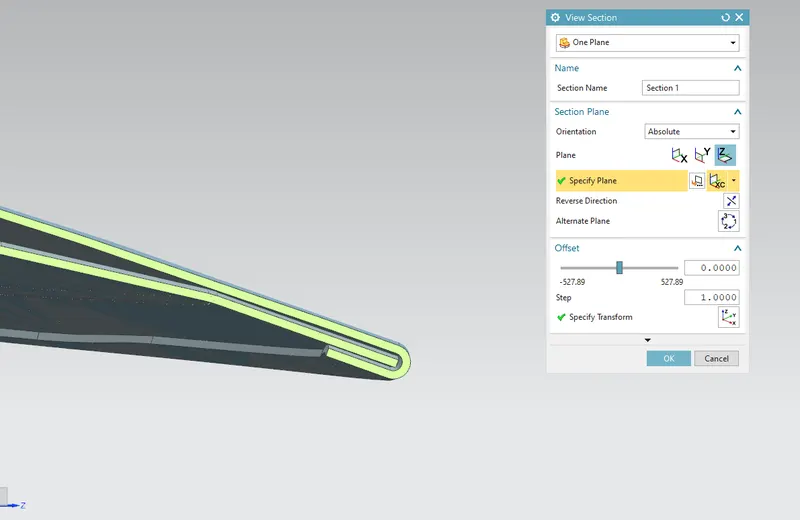
Hemming is a forming operation in which the edges of the sheet are folded or folded over another part in order to achieve a tight fit. Normally hemming operations are used to connect parts together, to improve the appearance of a part and to reinforce part edges. Conventional die hemming.
- Hemming is the process in which the edge is rolled flush to itself, while a seam joins the edges of two materials. Normally hemming operations are used to connect parts together, to improve the appearance of a part and to reinforce part edges. In hood design, hemming is used in assembly as a secondary operation after deep drawing, trimming and flanging operations to join two sheet metal parts (outer and inner) together. Dimensions of hemming are given below.
Image
- In between the outer panel and inner panel there will be gluing after or before hemming process because to reduce NVH and also sticking the two panels.
RELIEF CORNER:
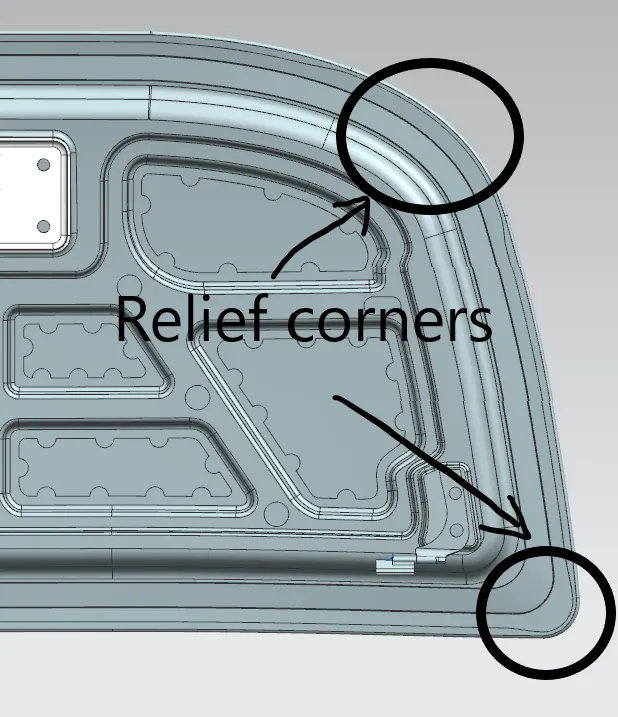
Relief is provided onto the part or component in order to remove any stresses developed in a particular area i.e. sharp corners that takes place during the hemming process is carried out. Thus corners are rounded or chamfered.
LATCH AND STRIKER POSITION CHECK:
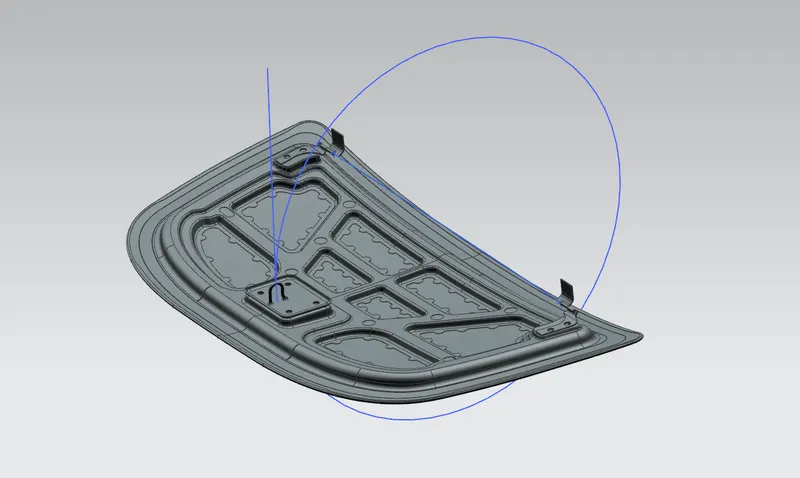
Checking the position of the latch and striker assembly:
To check we need to create an axis from the hinge assembly. Tentatively we have to position the hinges and extract the axis. On the axis, a point is placed at the centre of the axis and a circle is drawn taking the point as the centre. To check for the correct position of the hinge it has to be tangent to the circle. This study is conducted to check the location for the latch and striker mechanism to make the hood manufacture.
DIFFERENT VIEWS OF HOOD DESIGN:
ISOMETRIC VIEW:
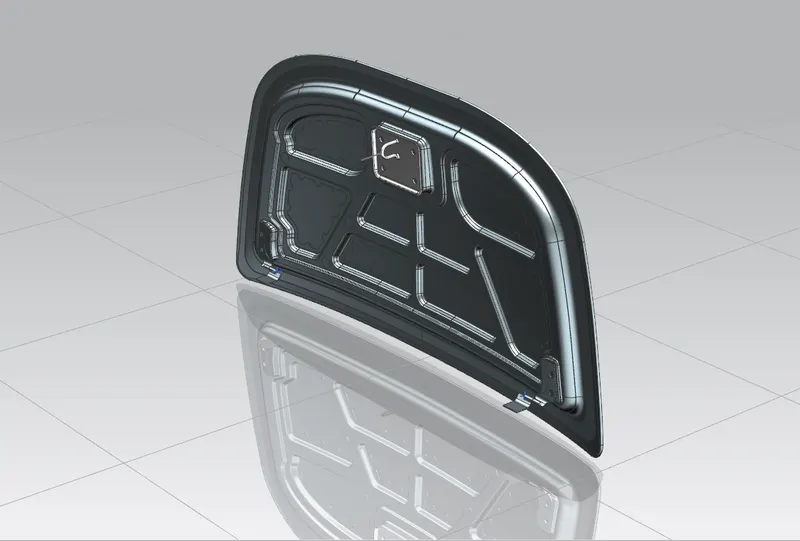
FRONT VIEW:
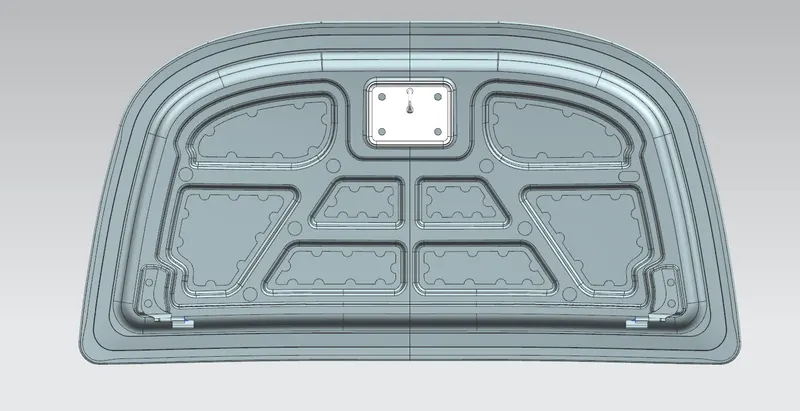
BACK VIEW:
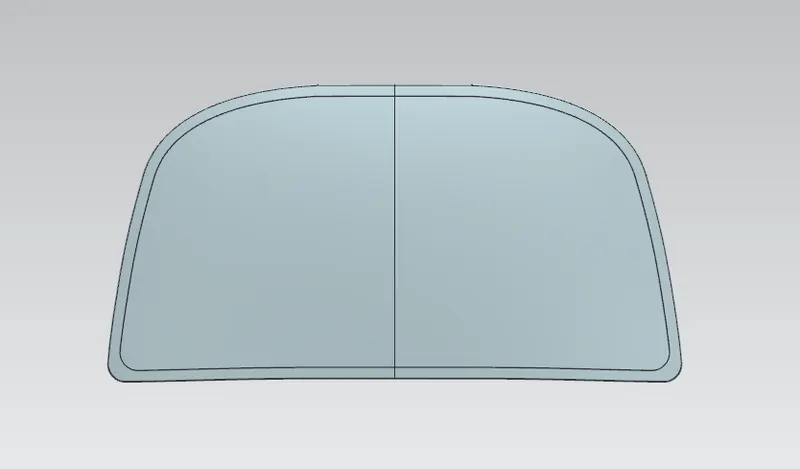
TOP VIEW:
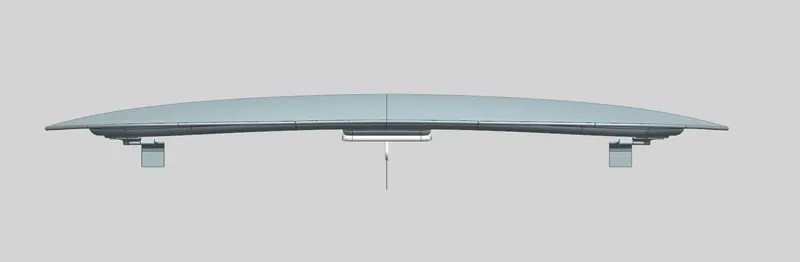
BOTTOM VIEW:
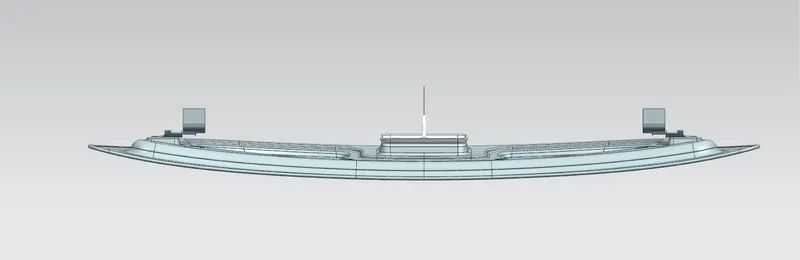
SIDE VIEW:
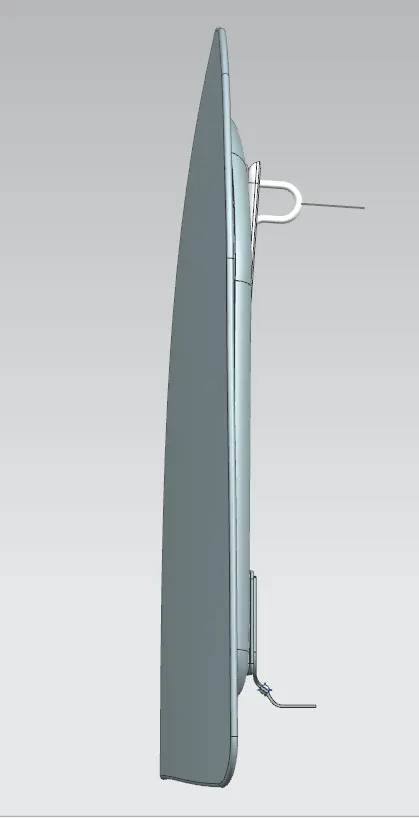
CONCLUSION:
1. All the components of hood are designed and assembled using assembly Section.
2. All the safety related features are given in the report.
3.The latch and stricker position are studied.
4.All the neccessary Reinforcements were added to the design.