Hood design-Week 2
AIM: - To design the front driving car's hood or bonnet utilising the master section and standard process utilised by OEM manufacturers.
GIVEN MASTER SECTION and DATA
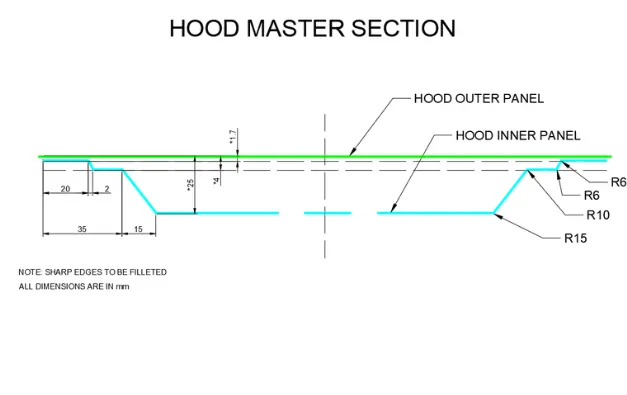
- Outer Panel thickness=0.75
- Inner panel thickness-0.75
- Reinforcement thickness =1.5
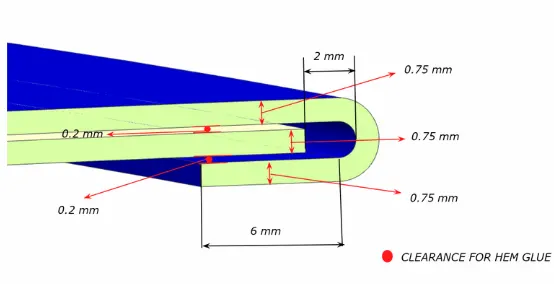
Hemming Data:
INTRODUCTION
The hood is the engine cover that is hinged to the body of the car (front-engine automobile). It allows you access to the vehicle's engine and is also critical for the vehicle's safety in the event of a frontal collision. The hinged cover that covers the engine of a motor vehicle is known as the hood (North American English) or bonnet (Commonwealth English).
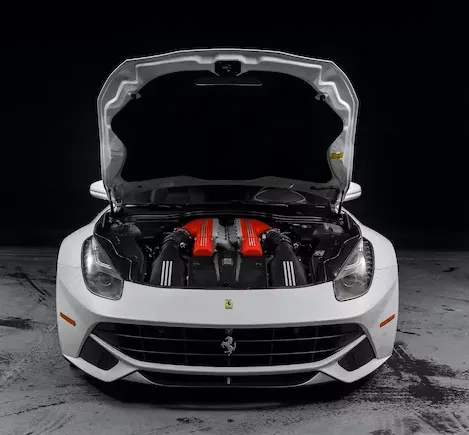
On rear-engine and some mid-engine cars, hoods can be opened to gain access to the engine compartment or trunk for maintenance and repair. In most cases, the passenger car hood can be kept down by a hidden Latch. However, in a race car or aftermarket vehicle, the hoods may be kept down by a hood pin. Hoods may also include a hood scoop, wiper jets, a power bulge, and/or a hood ornament. Car hoods are normally made of steel and, in certain cases, aluminium. Other materials, including carbon fibre, fibreglass, or dry carbon, can be used to make aftermarket automobile hoods. The hood design may differ from one make and model to the next. The hood is also intended to meet a variety of needs. A car hood is designed to protect your vehicle's performance components, especially the engine, while also allowing simple access for repairs and maintenance. They play an important role in safeguarding both the passenger inside the automobile and the pedestrian in the case of an accident. The hood might also sustain damage.
Types of support provided to the Hood: -
- Support Rod
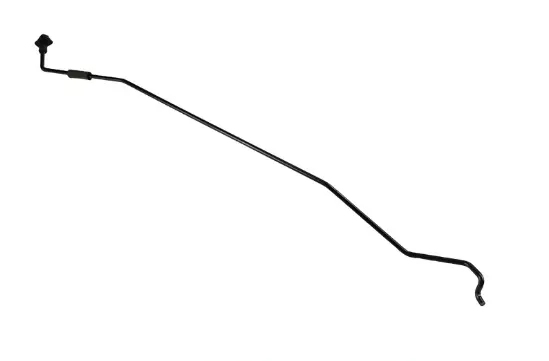
A hood rod is used to keep your hood propped up when working in your car's engine area. When utilised, it must be securely fastened to guarantee a tight grip on the hood. Meanwhile, while it is not in use, it must be kept steady and not moved. That function is allocated to the hood rod clip. This clip fits onto the rod and holds it securely in place while not in use. It prevents the rod from sliding around beneath the hood and producing issues.
- Gas Stay
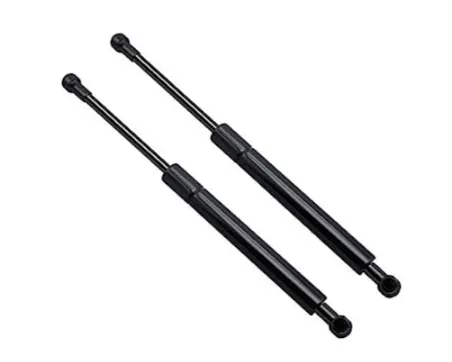
Gas Stay is a device that uses a gas-activated actuator to maintain the engine hood of a motor vehicle in its open position. When the automobile hood is hefty, this is generally utilised. There is no need for men's power in this. Spring stays are intended for use on upward-lifting doors; once the door is slightly open, the spring will push it to the fully open position. Depending on the door size, Euro Fittings has a variety of spring sizes.
Design constraints to be followed: -
- Passenger safety
- Pedestrian safety
- Manufacturing feasibility
- Position the striker along the Trajectory of the centre of the hinge axis.
- Joining techniques of the inner and outer panels.
Sheet Metal Operation to be used in manufacturing the Car Hood
Hemming:-
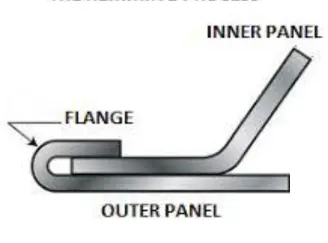
Hemming is the procedure of uniting the hood's outer and inner panels by bending their corner curvature sections to 180 degrees. There is also some corner relief provided for the sheet to be stationed so that the rollers that execute sheet hemming may roll suitably in the needed region. Hemming is a sheet metal procedure that is commonly utilised in the automobile industry since welding or joining cannot be done on styling sections without affecting the car's looks.
Mastic Points:-
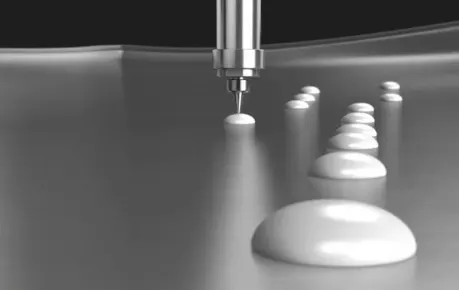
These are the locations where the inner and outer panels of the hood are bonded or glued together using mastic adhesive. If bolting, riveting, or welding are employed to secure the outer panel, it will lose all of its attractiveness. As a result, mastic sealer is utilised, which is an elastic material that functions like rubber. It is sandwiched between the two panels. It is initially in paste form, but following a high furnace treatment, it solidifies and strengthens the panels together. Normally, one spot has power over a diameter of 80 mm.
Deep Drawing:-
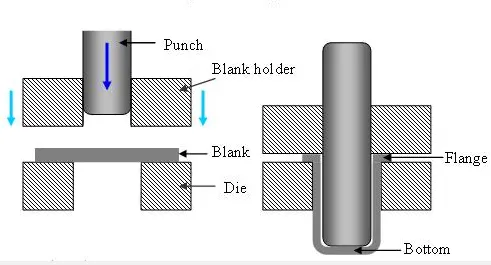
A sheet is tugged into the proper form in this company using a punch and pass-on device. The sheet is delineated in the condition that the punch is driven down on it. The sides of the sheet are held near folios to prevent the sheet from wrinkling. Deep drawing is often performed in the automobile sector with hard tools.
Embossing:-
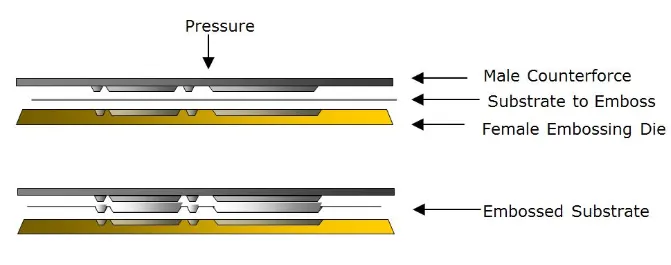
Sheet metal embossing is a stamping technique used to create raised or sunken motifs or relief on sheet metal. This procedure can be carried out using matching male and female roller dies, or by passing a sheet or a strip of metal between the desired pattern's rollers.
Blanking and Piercing:-
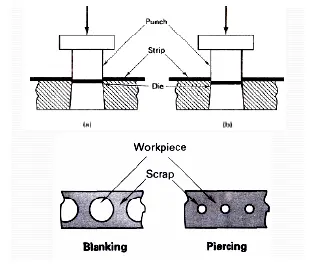
Blanking and piercing are shearing procedures that employ a punch and a die to manufacture pieces from coil or sheet stock. Blanking creates the component's external characteristics, whereas piercing creates inside holes or forms. The web is formed after the production of several components and is considered junk material. The "slugs" formed by piercing interior features are also garbage. The words "piercing" and "punching" are interchangeable.
Parts of a Hood/Bonnet :
- Hood Outer Panel
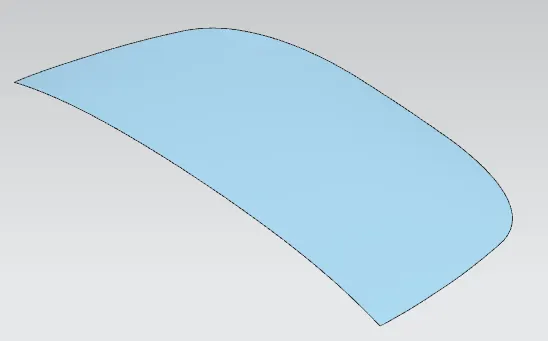
One of the most essential components of the BIW (body in white) is the Car Hood Panel, which is regarded as the closing sheet-metal component. The outside panel has an attractive appearance, however, it is exceedingly fragile and incapable of withstanding force during a collision. The majority of automotive hood outer panels are constructed of classic steel plates, which do not match the criteria of lightweight development. As a result, it is required to achieve lightweight effects through the use of automotive aluminium sheets. Deformed aluminium alloys 6111, 6016, and 5182 are the most often utilised automotive aluminium alloys in the market. Blanking, deep drawing, trimming, turnup, and side turn-up are all part of the hood's production process. Deep drawing is a critical procedure for ensuring component quality.
- Hood Inner Panel
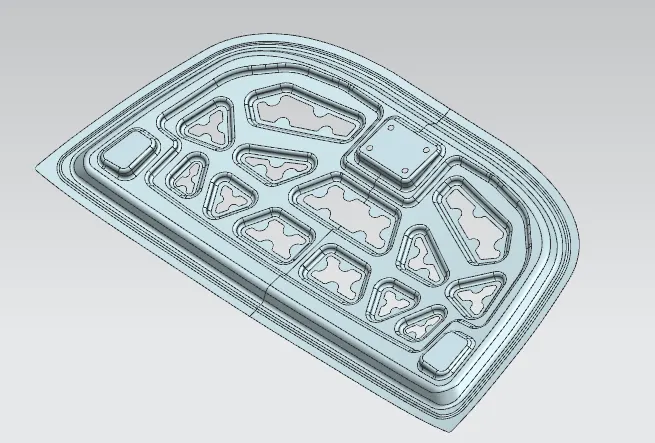
The client cannot see the inner panel of the hood, although this is a technical feature of the exterior panel. To improve energy absorption capacity, the hood panel must have a strong initial response force against the impact placed on the hood. The hood must also minimise the reduction of a response force caused by deformation in a collision. A hood inner panel according to the invention includes an inner panel main body that is part of a vehicle's hood, a front bead that is provided on the inner panel main body and extends along a vehicle width direction, and a rear bead that is provided on the inner panel main body and extends along the vehicle width direction. The front bead has a curved centre portion in the vehicle width direction that is located in front of each end portion in the vehicle width direction, and the rear bead has a curved centre portion in the vehicle width direction that is located behind each end portion in the vehicle width direction.
- Hinge
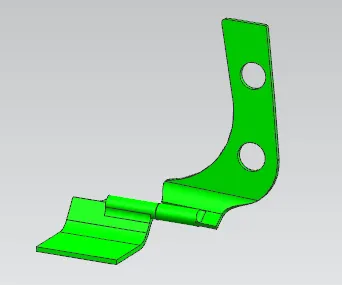
A hinge is a machine component that joins two bodies by permitting angular movement along a set axis of rotation but restricting translations and rotations on the other two axes. A hinge is a journal bearing with only one degree of freedom in which a shaft rotates in a hole. Hinges can only rotate in one direction: yawing (the most frequent), pitching, or rolling. Hinges are flexible and jointed devices that are connected to any swinging element. Hinges are mechanical bearings that link two swinging objects or points and allow them to move relative to one another. Hinges have restricted mobility, allowing the joint to move just at one angle and constraining other swinging parts' motions.
- Striker or Latch
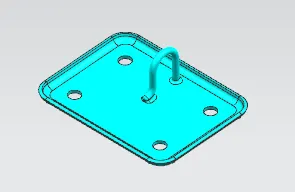
Latches are mechanical components that allow for the temporary connecting of pieces that move relative to one another. They are triggered to separate the two halves by releasing the connection. Latches are commonly seen on doors and enclosure openings. They're also found in seat belts, clamps, restraints, and things having retractable sections. Different designs use varied actuation, holding, and mounting mechanisms. The hood latch is fairly straightforward. When the hood is closed, the latch moves over a catch, and the spring covers the latch to lock it in place. When we pull the hood latch cable inside the automobile to open the hood, the latch opens, enabling it to skip the catch and open.
First of all, we will design Hood Inner Panel.
Designing of Hood Inner Panel
- As the outer panel surface is given. We will use that surface for our inner panel and project the surface by using the Wave linkage Command. And trim that surface in half.
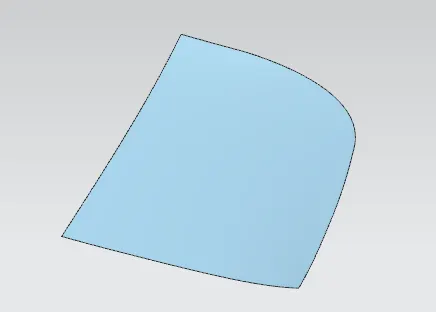
- Before, going further we draw the tooling axis by using a perpendicular bisector as below.
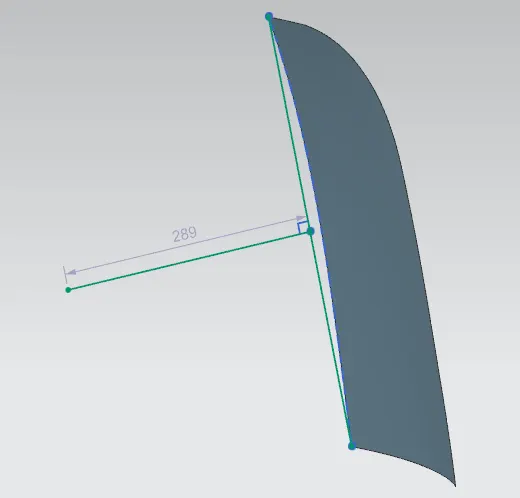
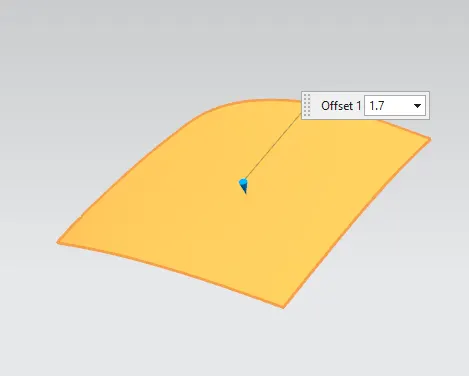
- As given in the master section, we will offset the surface by 1.7mm to make flanges.
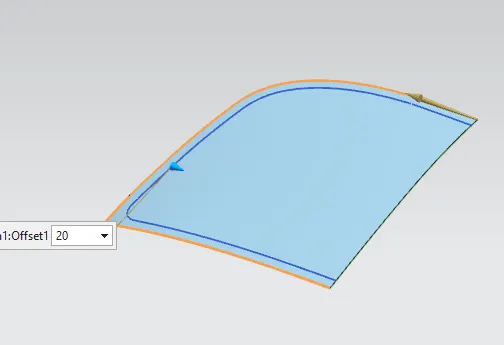
- Now, offset the edges of the offset surface by 20mm and trim the sheet and here we get our first flange. By following the same procedure, with the help of the given distance in the master section make other flanges.
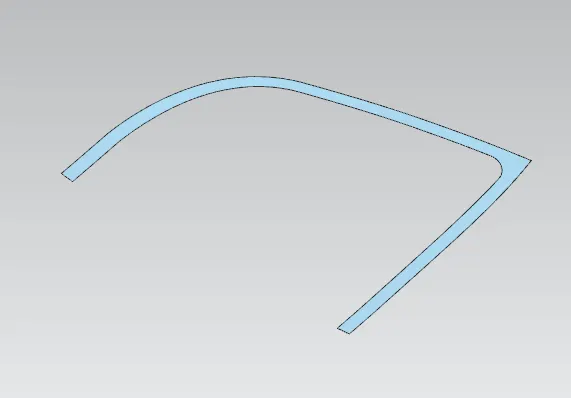
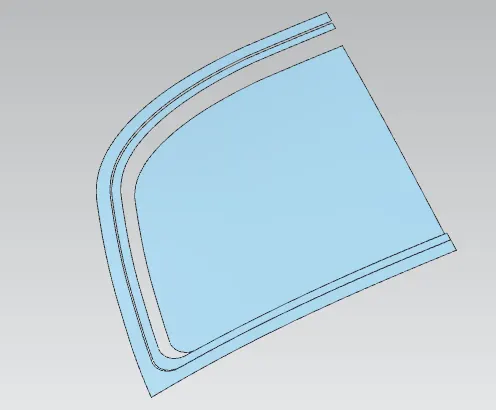
- Now, by using through curves join the flanges.
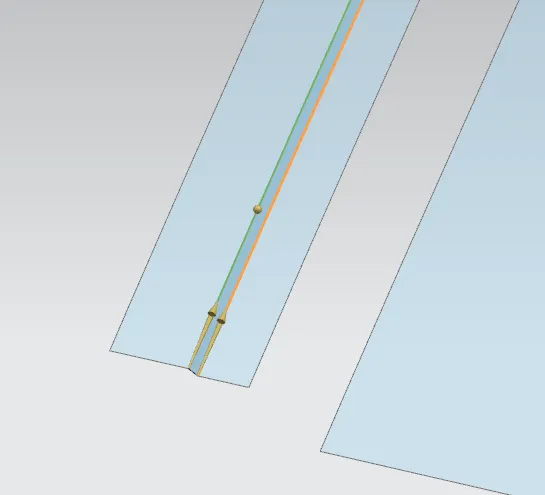
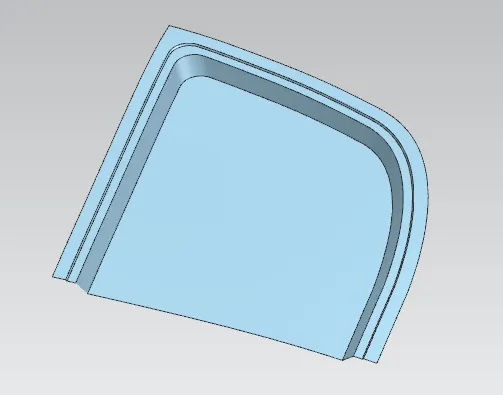
- We will remove the edges by using Face Blend Command.
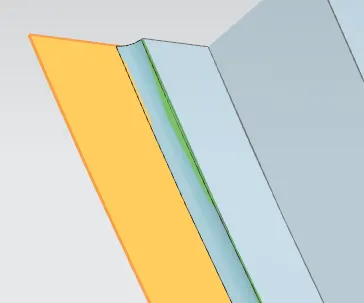
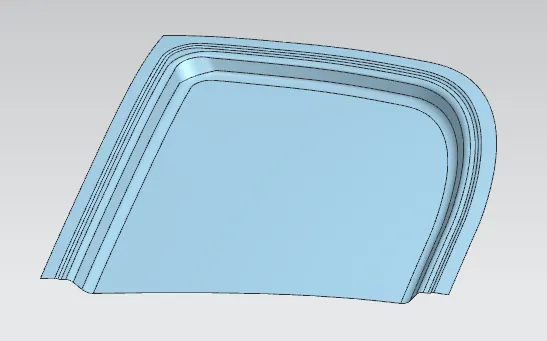
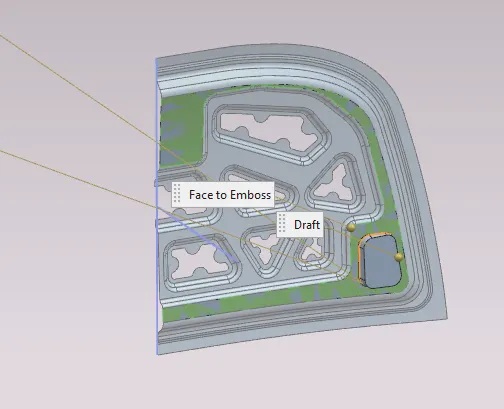
- Now, to create emboss draw a sketch and provide clearance for the hinge and striker. And project the curve on the surface.
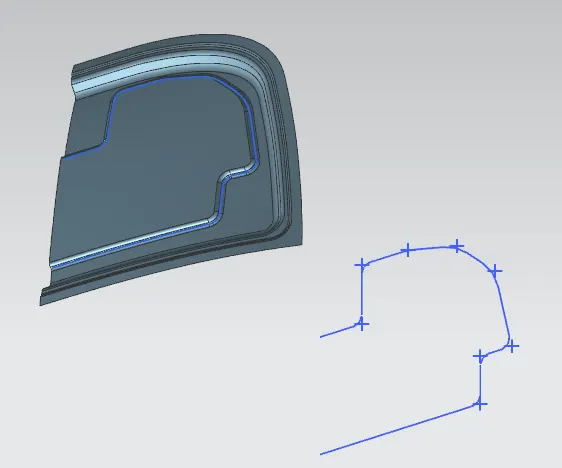
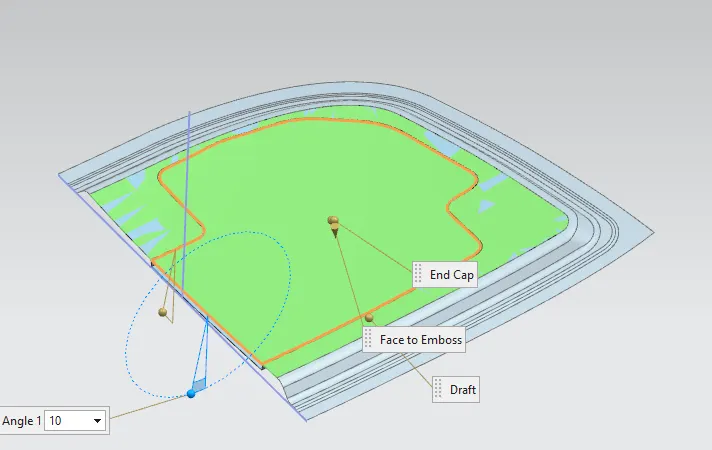
- Now, by emboss command we will create emboss with the help of a projected curve and tooling axis with a draft angle of 10 degrees.
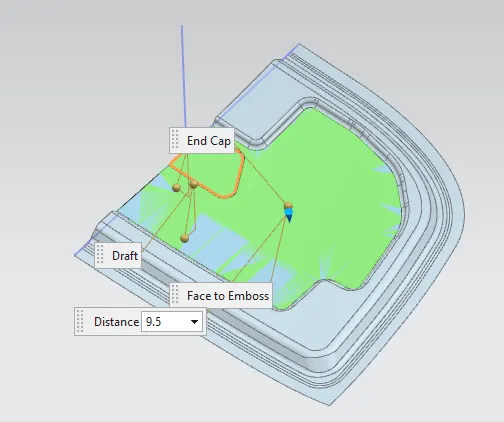
- Now, following the same procedures as above we create embosses with a distance of 9.5 and a draft angle of 12 degrees.
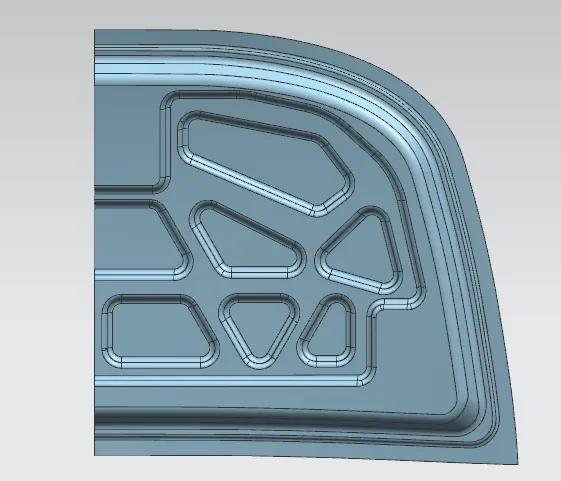
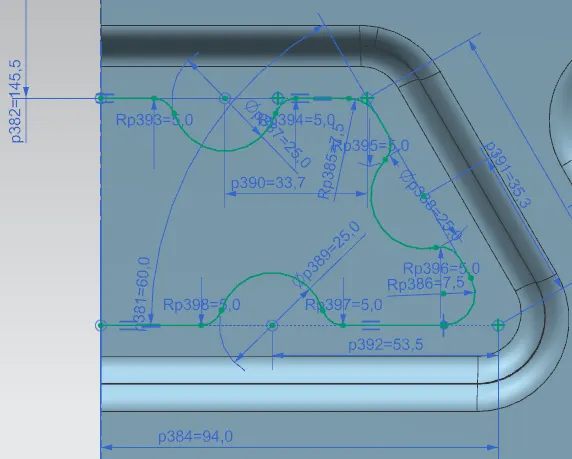
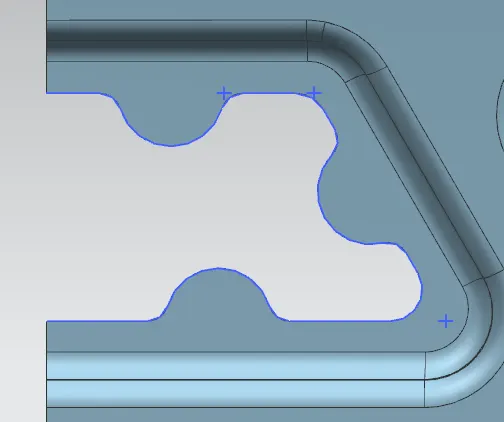
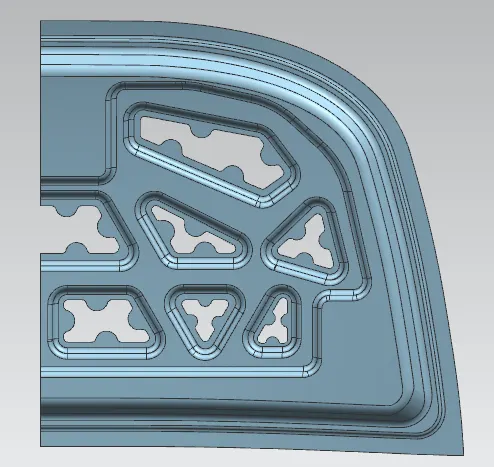
- Now, for every emboss we will create cutouts. First of all, draw the sketch and then trim the sheet by using the trim sheet command.
Assembly of Hing
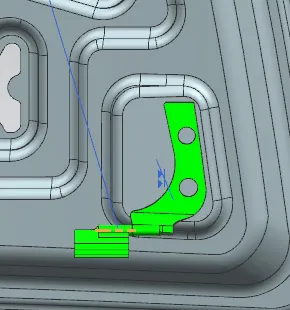
- Create Datum Plane for flatting the embossed surface of the hinge at an angle of -7 degrees.
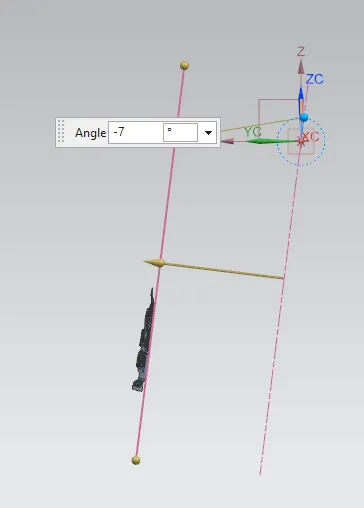
- Now, draw a sketch, project the sketch on the surface and apply emboss command to it. Use the datum plane as an End Cap.
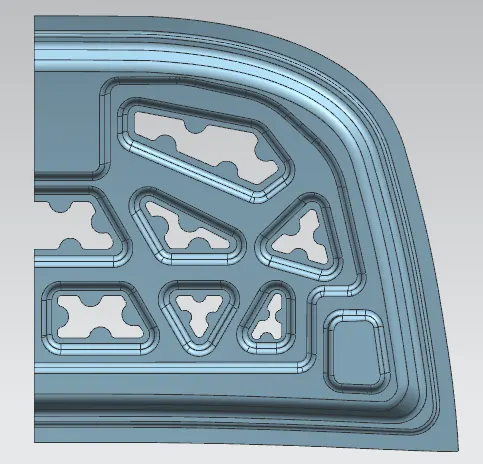
- Now, before mirroring extend the sheet so that no gaps should be present. Mirror the sheet and sew them.
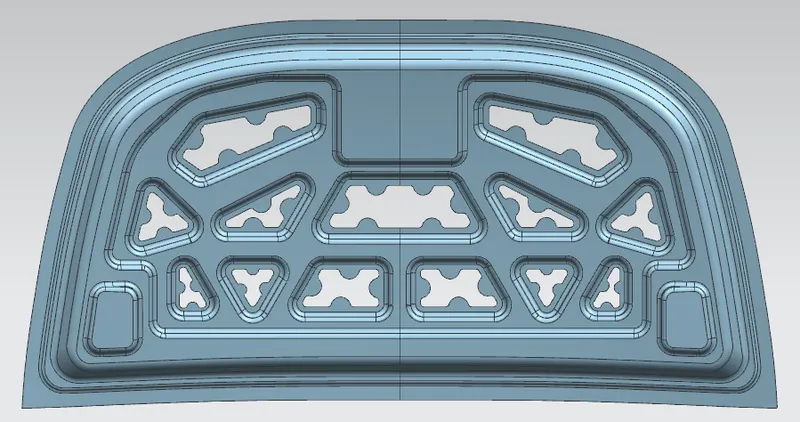
- Apply assembly constraints like face-to-face constraints, and parallel axis constraints and move the hinge to the desired position. And mirror the hinge to the other side by using Mirror Geometry Command.
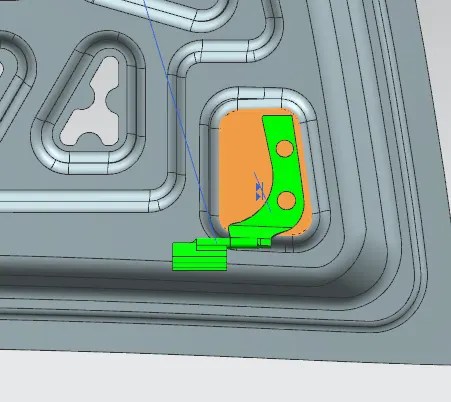
Assembly of Striker
- For assembling the striker, First of all, we have to create a datum plane between the two hinges. So that, we can draw Latch Trajectory.
- To do this, we shall draw a line or an axis around which the hinge will spin. We'll connect another line from the middle to the striker's placement line. The line from the midway will produce an angle with the verticle plane, and we will use that intersection point to build a circle, which is nothing more than the striker's route.
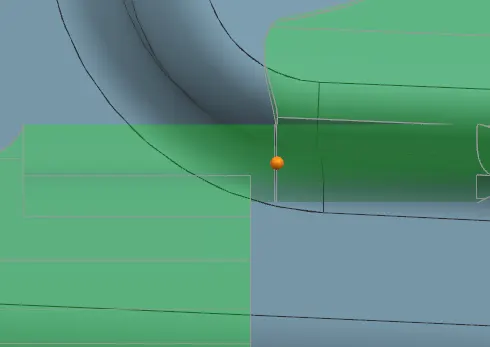
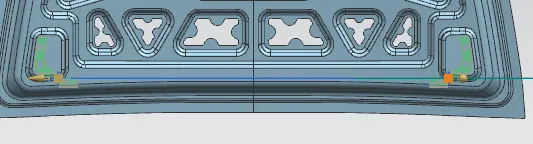
- Now, Create a datum plane on the line at the midpoint.
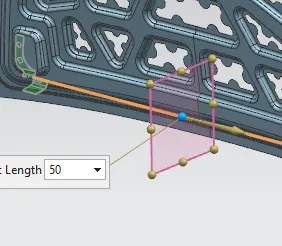
- Draw a sketch by using the datum plane as below.
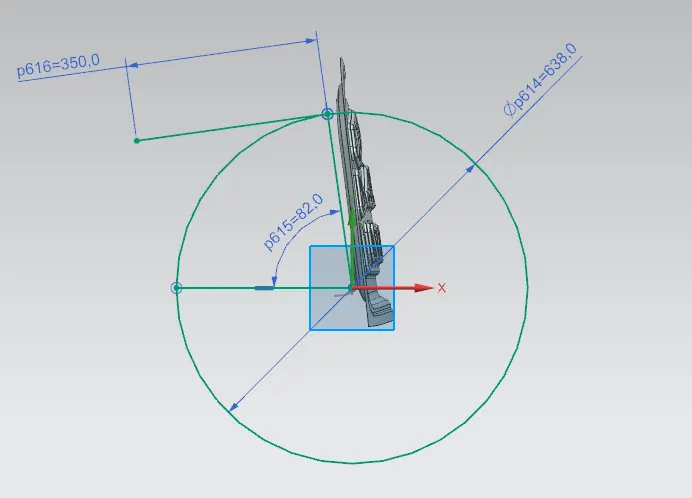
- Now, Create a datum plane on the striker edge and draw the line so that we can give assembly constraints.
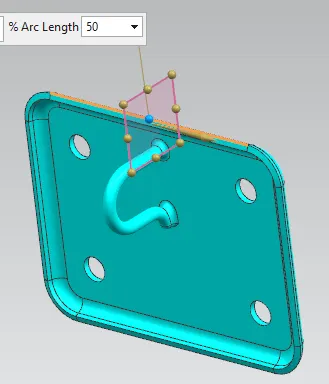
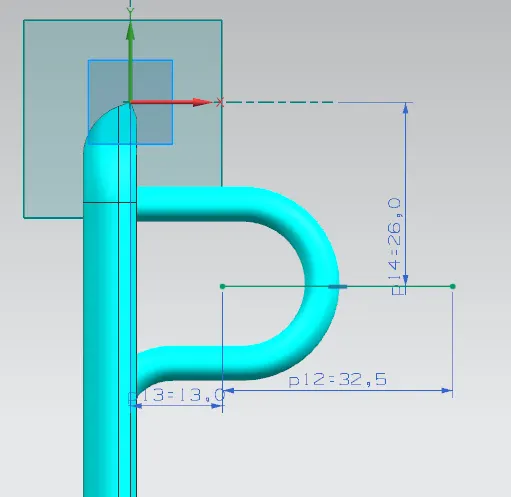
- Now, apply assembly constraints between the hood inner panel and striker (datum plane align and line constraint).
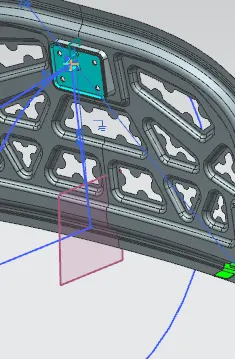
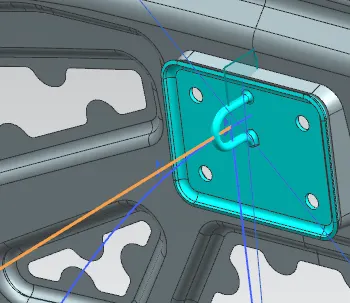
- Now, project the striker's face so that we can create a flat surface to give touch constraints between the inner panel and the striker.
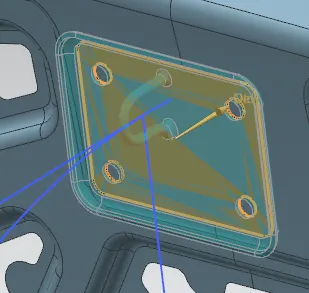
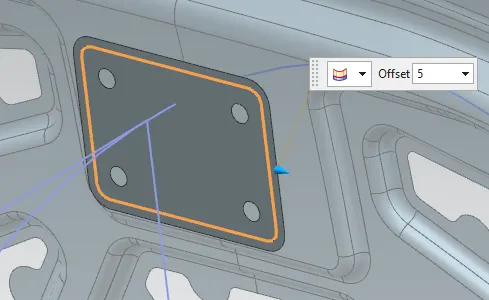
- Offset the edge by 5 mm, apply the law extension command and sew them.
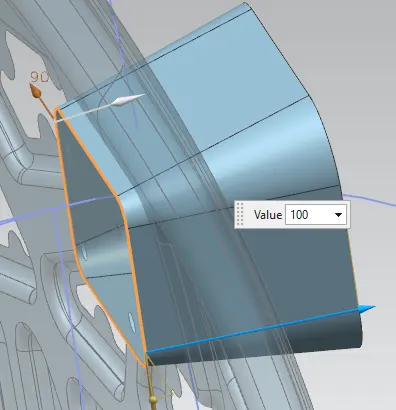
- By using the Trim and Extend command surface is created and apply assembly constraints between the inner panel and the striker.
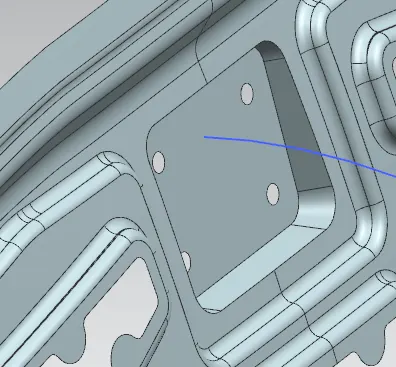
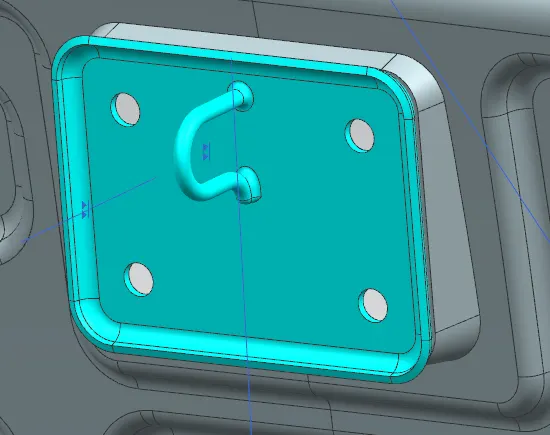
- Apply bride curves to the corners as below and apply the mirror command.
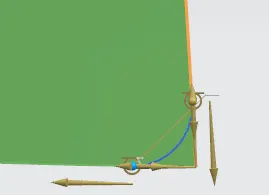
- Our inner panel looks as below and thickens about 0.75mm.
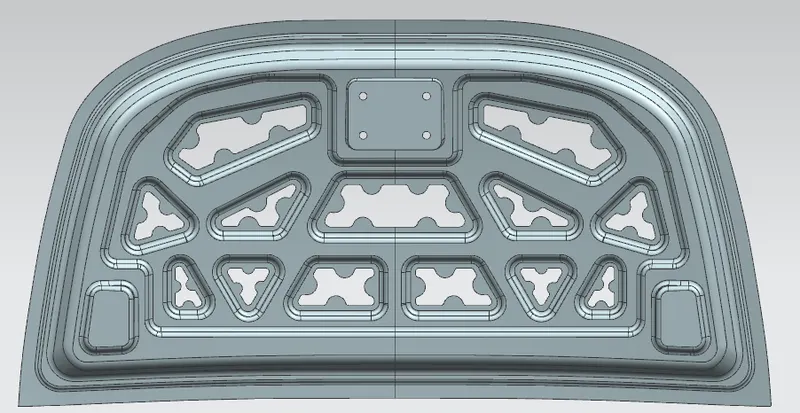
- Here is our Inner Panel design completed.
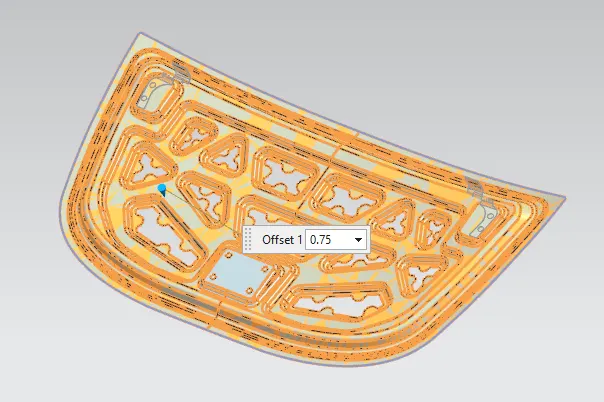
Designing of Hood Outer Panel
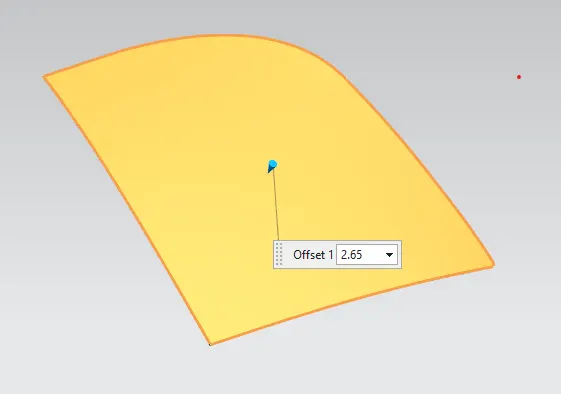
- Now we'll go on to the next stage of creating the outside panel. So we start with the same body as before and cut it in half. Then offset the surface by 2.65mm.
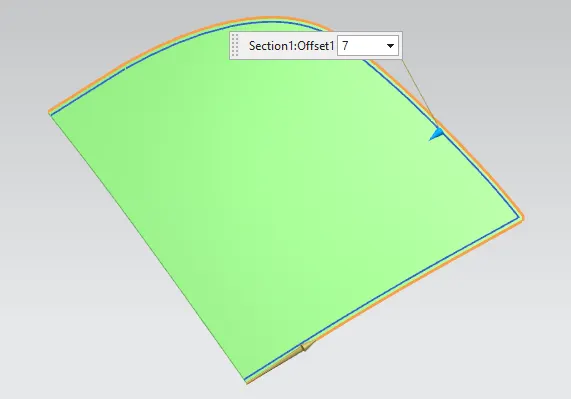
- After you've obtained the workpiece, use a curve offset by 7mm and trim the sheet.
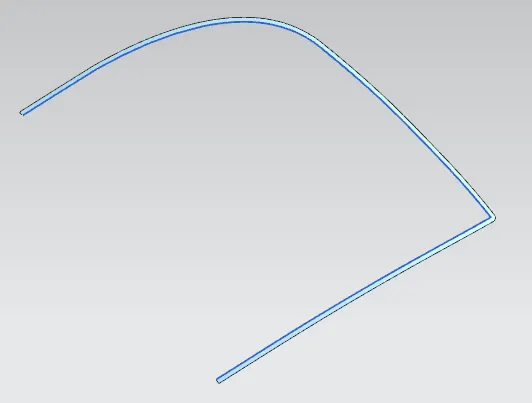
- Now, use a curve offset the component by 0.1mm for Law Extension.
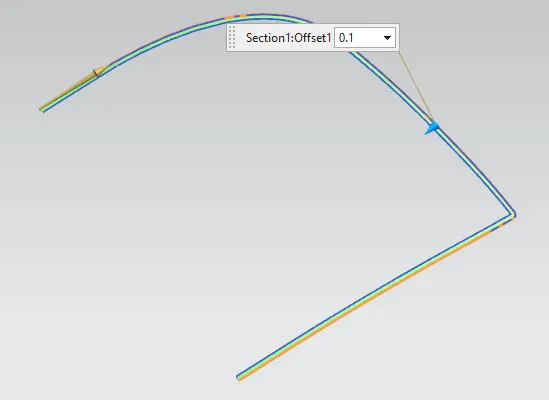
- Apply Law Extension Command by using the offset curve created earlier at a height of 5mm.
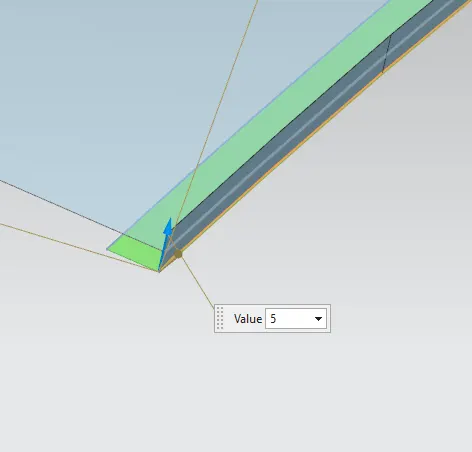
- We'll make a face blend between three faces. The vector direction for the upper surface is downward, the bottom one is upward, and the side ones are inward.
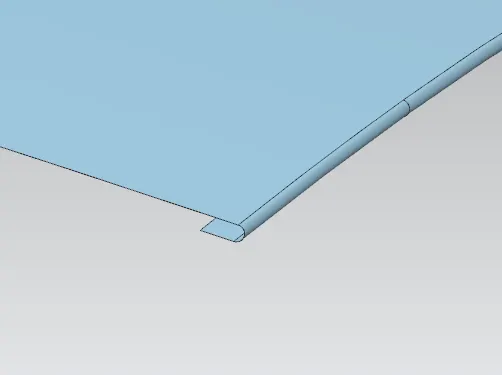
- We maintain some relief of 3mm at the back and front ends for the hemming.
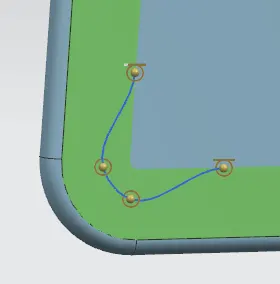
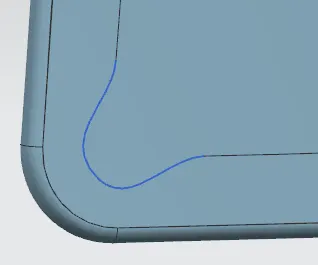
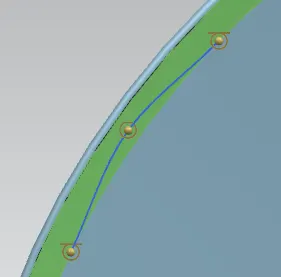
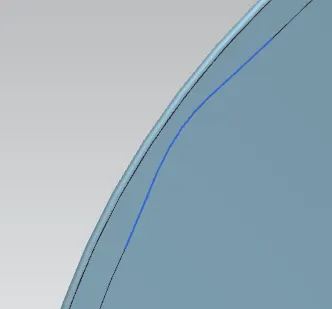
- We can now sew the component to the plane after mirroring it.
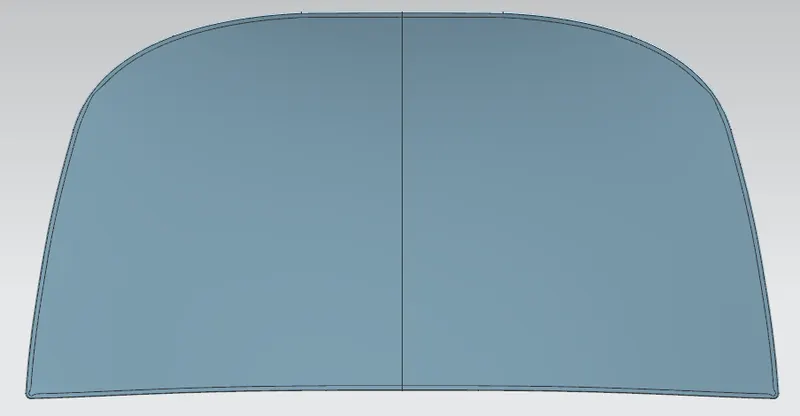
- Give the component a thickness of 0.75mm. In this case, the direction is downward and Hood Outer Panel design is completed.
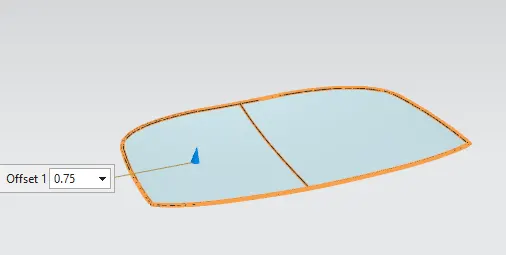
- Here our Hood design is completed and the final component is below.
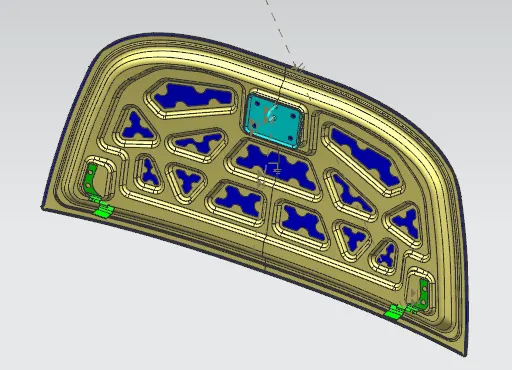
Screenshot of Hood after Assembly
FRONT VIEW
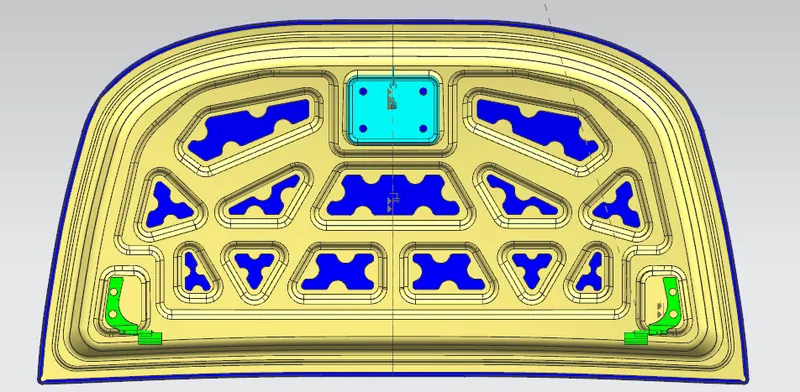
RIGHT-HAND SIDE VIEW
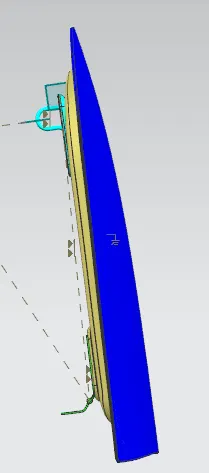
LEFT-HAND SIDE VIEW
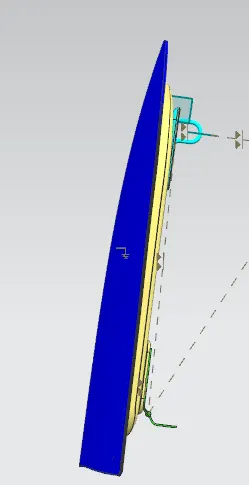
TOP VIEW
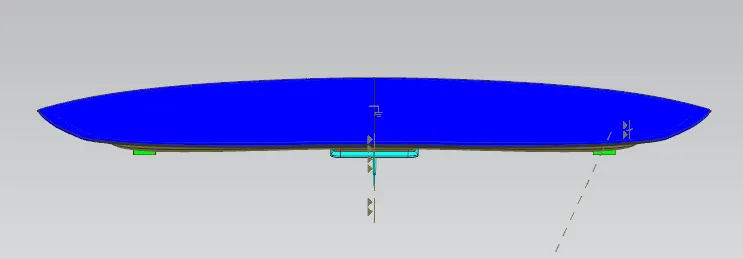
ISOMETRIC VIEW
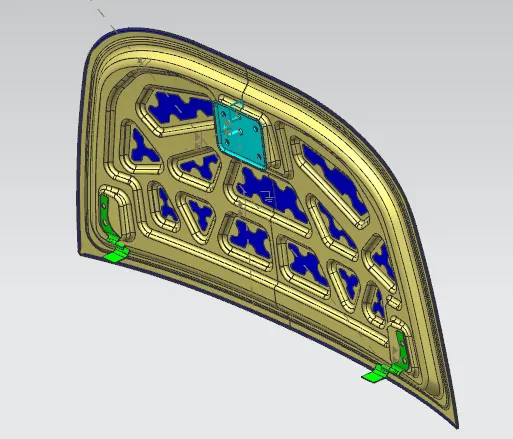
Conclusion:-
Finally, the hood design was finalised by taking into account the requirements, measurements, methods, and standards. This design process taught me about hood mountings, and sheet metal processes including hemming, embossing, deep drawing, piercing, Pedestrian safety and its ratings.