Hood design-Week 2
AIM :
Design Hood Outer Panel, Inner Panel and the necessary reinforcements by following the Master Section.
OBJECTIVE:
Designing the Hood BIW component as per the mastersection. Assembly the Hood with its Stricker , outer surface , inner surface , Stricker Latch along with it.
And also providing the detail report about the Hood and its manufacturing process. In the project the deep drawn method and hemming method are followed while designing it.
Hood:
A car hood, also referred to as a “bonnet” in some countries, is the hinged cover that rests over the engine bay of a front-engine vehicle. The car hood protects the engine and connected parts from the elements while providing easy access for repairs and maintenance.It is an important part of the car's exterior design, and manufacturers
Hood Functionality
- Protection: The primary function of a car hood is to protect the engine and other vital components from damage caused by external elements such as debris, dust, and rocks. It also protects the passenger compartment from the engine's heat and noise.
- Aerodynamics: The shape of the hood can help reduce air resistance and improve the car's overall aerodynamics, which can lead to better fuel efficiency and performance.
- Access: The hood provides easy access to the engine compartment for routine maintenance and repairs. This allows mechanics to inspect and service the engine and other components without having to disassemble other parts of the car.
- Provide storage space: Some cars have storage compartments or hidden spaces under the hood that can be used to store small items, such as tools or emergency supplies.
- Aesthetics: The design and appearance of the hood can also contribute to the overall look and style of the car, making it more attractive and appealing to potential buyers.
- For example, some cars have a "power bulge" on the hood to indicate that the engine is powerful, while others may have a raised ridge or other decorative elements.
- Safety: The hood also serves as a safety feature in case of a collision or accident. It is designed to crumple and absorb the impact, which helps to protect the occupants of the car from serious injury.
- It helps the impact genereted on the passengers on vehicle by absorbing the major impact strength.
- It also reduces the impact generated on the pedestriants hits accidentaly on running automobile.
- It also plays a major role in safety, as it helps to protect the engine and other components.
- Major hoods are designed to crumple and deform in a controlled in crash or accident to absorb the impact strength.
Hood limitations
- Limited access: While the hood provides easy access to the engine compartment for routine maintenance and repairs, it can also limit access to some components. For example, it may be difficult to reach components that are located deep within the engine or under other parts of the car.
- Heavy weight: The hood is usually made of heavy materials, such as steel or aluminum, which can add weight to the car. This extra weight can reduce fuel efficiency and performance.
- Reduced visibility: The hood can obstruct the driver's view of the road, particularly when driving up a hill or over a crest. This can make it more difficult to see hazards or obstacles ahead.
- Design limitations: The design of the hood is often dictated by safety regulations and aerodynamic considerations, which can limit the designer's options for styling and customization.
- Cost: The hood can be expensive to manufacture and replace, especially if it is damaged in a collision or accident.
- Heat management: While the hood provides some insulation to protect the passenger compartment from the engine's heat, it can also trap heat in the engine compartment. This can lead to overheating and reduced engine performance if the cooling system is not functioning properly.
Hood Components:
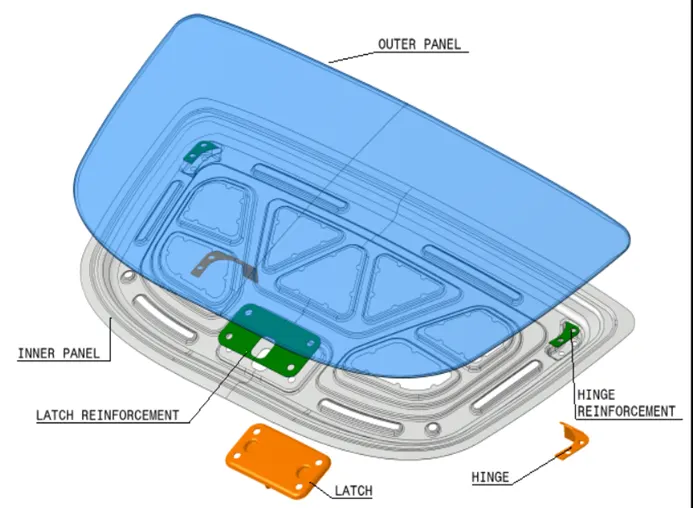
1. Outer frame: The outer skin is the visible part of the hood and is typically made of metal or composite materials.
- It is designed to be aerodynamic and to protect the engine and other components from debris and other external elements.
- It is usually the plain surface that covers the inner pannel of hood and holds the paints , external things to it.
- It also holds the Hood inner frame.
- It is done by the Hemming process. where there will be no welds, fastners , rivets were not used.
2. Inner frame: The inner frame provides support for the outer skin and is typically made of metal or plastic.
- It also helps to absorb impact in the event of a collision. The design of the inner pannel that will absorb the impact energy on collision.
- It is majorly the energy will be despated to the outer side that is towords to the ORM mirrors.
- Embosses are created and some materel is removed to reduce the weight , absorb the energy and pedistrian safety.
- It holds the Hinges and Stricker latch and other components like gas stay or support rod.
- The gap is maintained between the Inner and outer pannels to absorb the impact strength.
3. Insulation: The insulation is a layer of material that is placed between the outer skin and the inner frame.
- It is designed to reduce heat transfer from the engine to the passenger compartment
- It absorb noise and vibration produced in the engine compartment
- Majorly the mastic sealent is applied as to hold the inner and outer frames of hood.
- It covers the 80mm radius and 5-6mm thickness between the inner and outer frame layes.
- Most will be made from foam rather than mass loaded vinyl.
- A good insulated material will gives the good NVH for the automobiles.
4. Hinges: The hinges connect the hood to the car's body and allow it to be opened and closed.
- They are typically made of metal and are designed to be strong and durable.
- There will be two hinges provided eaithr side of to the hood inner frame.
- These are align in the same axis to open the hood properly and freely , majorly it is parllel to the X-Axis of the Automobile
- These are fixed by using the rivets or Fastners easy to replace while damaged.
5. Stricker & Latch: The latch is a mechanism that holds the hood securely in place when it is closed.
- It is typically located in the center of the hood and is operated by a cable or lever from inside the car.
- It is done by the help of the Trajectory projected on it
- It should be alligned properly so that there will be no issues while opening .
- After realising if the Hood from the inside by the releasing the lever or electronically, it will not open completly.
- There will be another lock holding the Hood with gap created on it.
- It is realesed with the help of fingers .
- It is a safety feature that prevents opening the hood accidently or unknowingly.
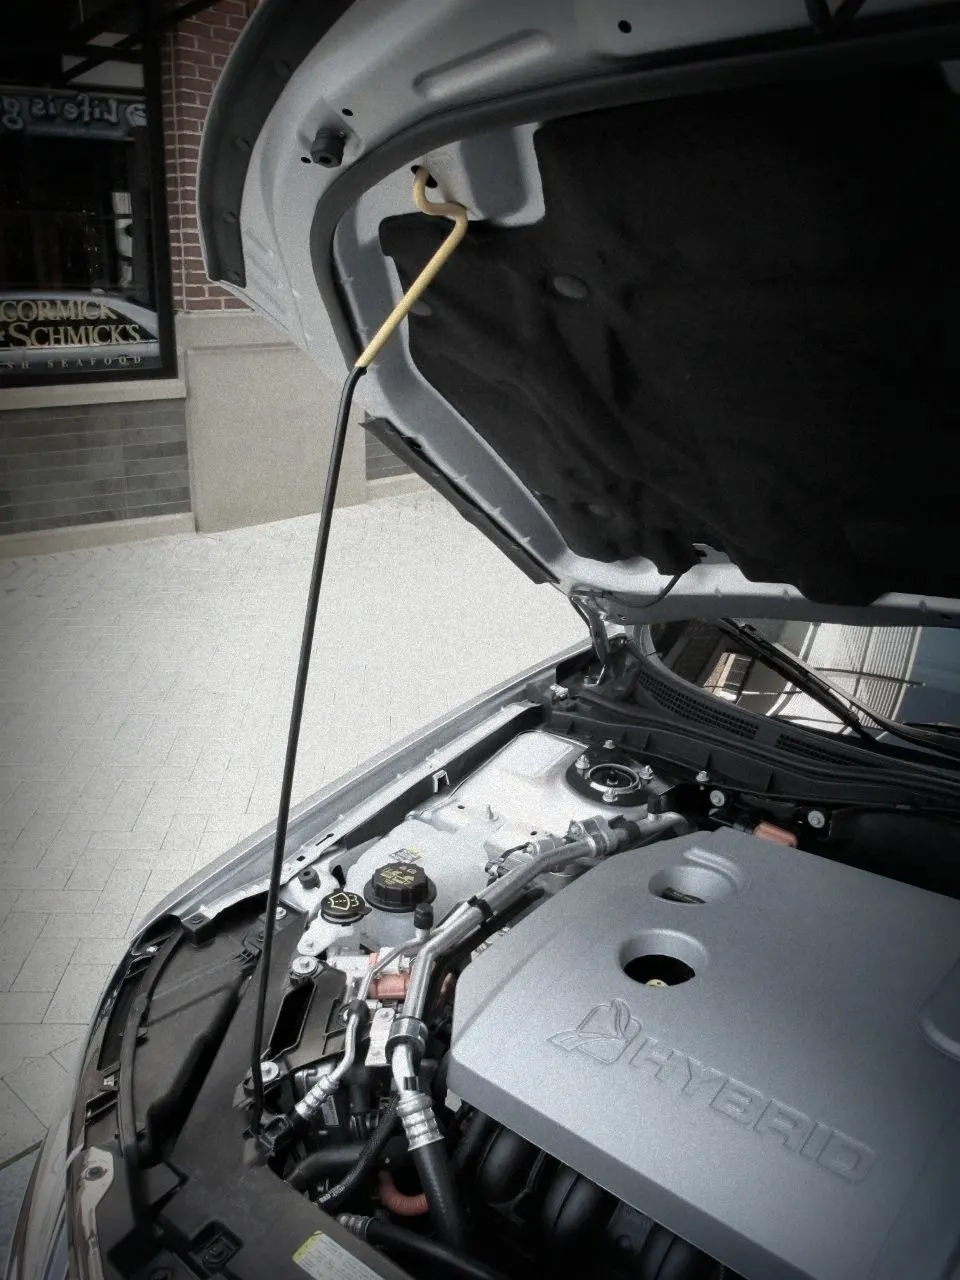
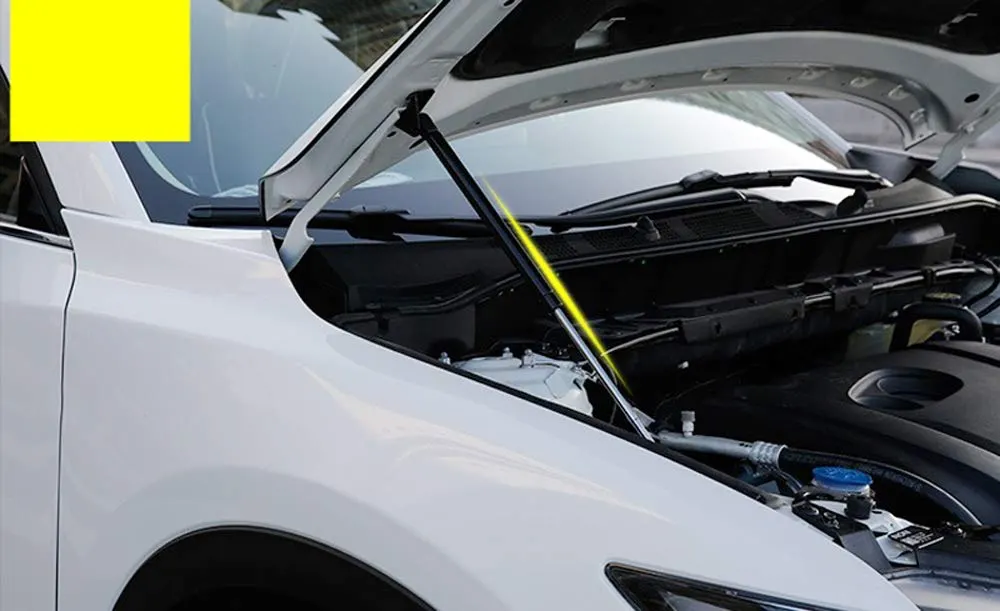
6. Gas struts or support rod: Gas struts are small hydraulic cylinders that are mounted on either side of the hood. They help to support the weight of the hood when it is open and to hold it in the upright position. It can be opened manually and supported with the help of support rod in it.
7. Hood release: The hood release is a mechanism that allows the hood to be opened from inside the car.
- It is typically operated by a lever or button located on the dashboard or on the floor of the car.
- Now a days it can be operetaed by remote or electrical switch also.
8. Reinforcements:
- it gives the local strength to the component
- it is provide behind of the hinges and stricker for additional support
- some time the fastner supports are attached to it by the means of welding to it
- it also prevents the damage in the crash so that hood cannot comes out while crash occurs majorly.
- ususally the thickness of component is double the thickness of inner and outer pannel (1.5mm Average).
Hood Design Requirements
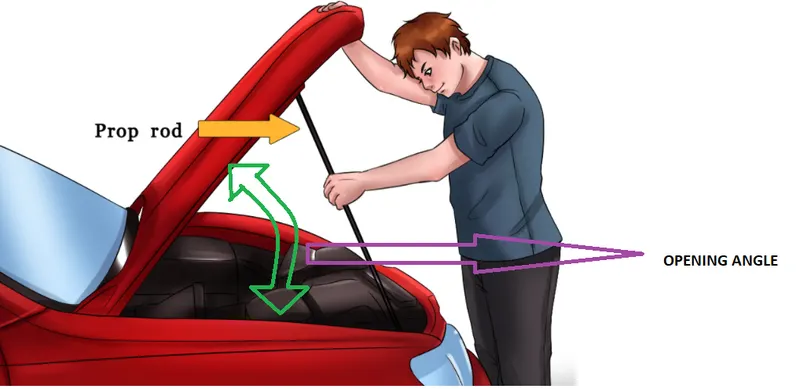
1. Opening Angle:
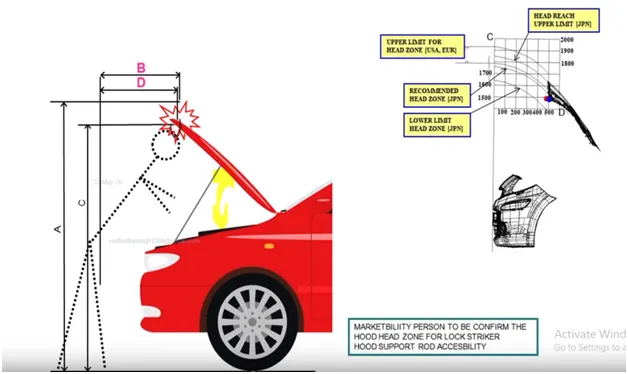
- The hood should be opened enough so that the person easily see into it or work into the car without hiting the head with hood.
- The opening algle varies from country to country or region to region.
- The average height of the Indian is 5.6 - 5.9 feet.
- It should not touch the glass or other components after opening .
- It should also have the stopper after required angle opened not hit or damage the other engine components.
2. Hood lift supporters :
Automobile hood lift supports are a type of hydraulic or gas spring that is designed to support the weight of the hood when it is open and to hold it in the upright position. Here are some key features of automobile hood lift supports:
- Gas-filled cylinder: The lift support consists of a gas-filled cylinder that is attached to the hood and the body of the car. The cylinder contains a pressurized gas, such as nitrogen, that provides the lifting force.
- Piston: The lift support also contains a piston that moves inside the cylinder as the hood is opened or closed. The piston is connected to a rod that is attached to the hood.
- Valves: The lift support contains valves that control the flow of gas between the two sides of the piston. When the hood is opened, gas flows from one side of the piston to the other, which provides the lifting force. When the hood is closed, the gas flows back to its original position.
- Dampening: Some lift supports are designed to provide dampening or resistance to the opening and closing of the hood. This helps to prevent the hood from opening too quickly or slamming shut.
- Types: There are different types of automobile hood lift supports, including single and dual piston designs. Dual piston designs provide more lifting force and are typically used for larger, heavier hoods.
- Maintenance: Over time, automobile hood lift supports may lose pressure or become worn, which can cause them to fail or lose effectiveness. It's important to inspect and replace them as needed to ensure proper operation and safety.
Overall, automobile hood lift supports are an important component that helps to make it easier and safer to open and close the hood, and they are commonly used in modern vehicles. But the automobiles that are coming with the standered support rod as the manually opening and supporting to nit.
Here are the limitation of the Hydraulic or Gas stays vs Support rods.
| Support Rod | Gas or Hydraulic stay | |
|---|---|---|
|
|
|
| Advantages |
|
|
| Limitations |
|
|
support rod and push clips
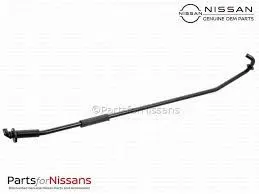
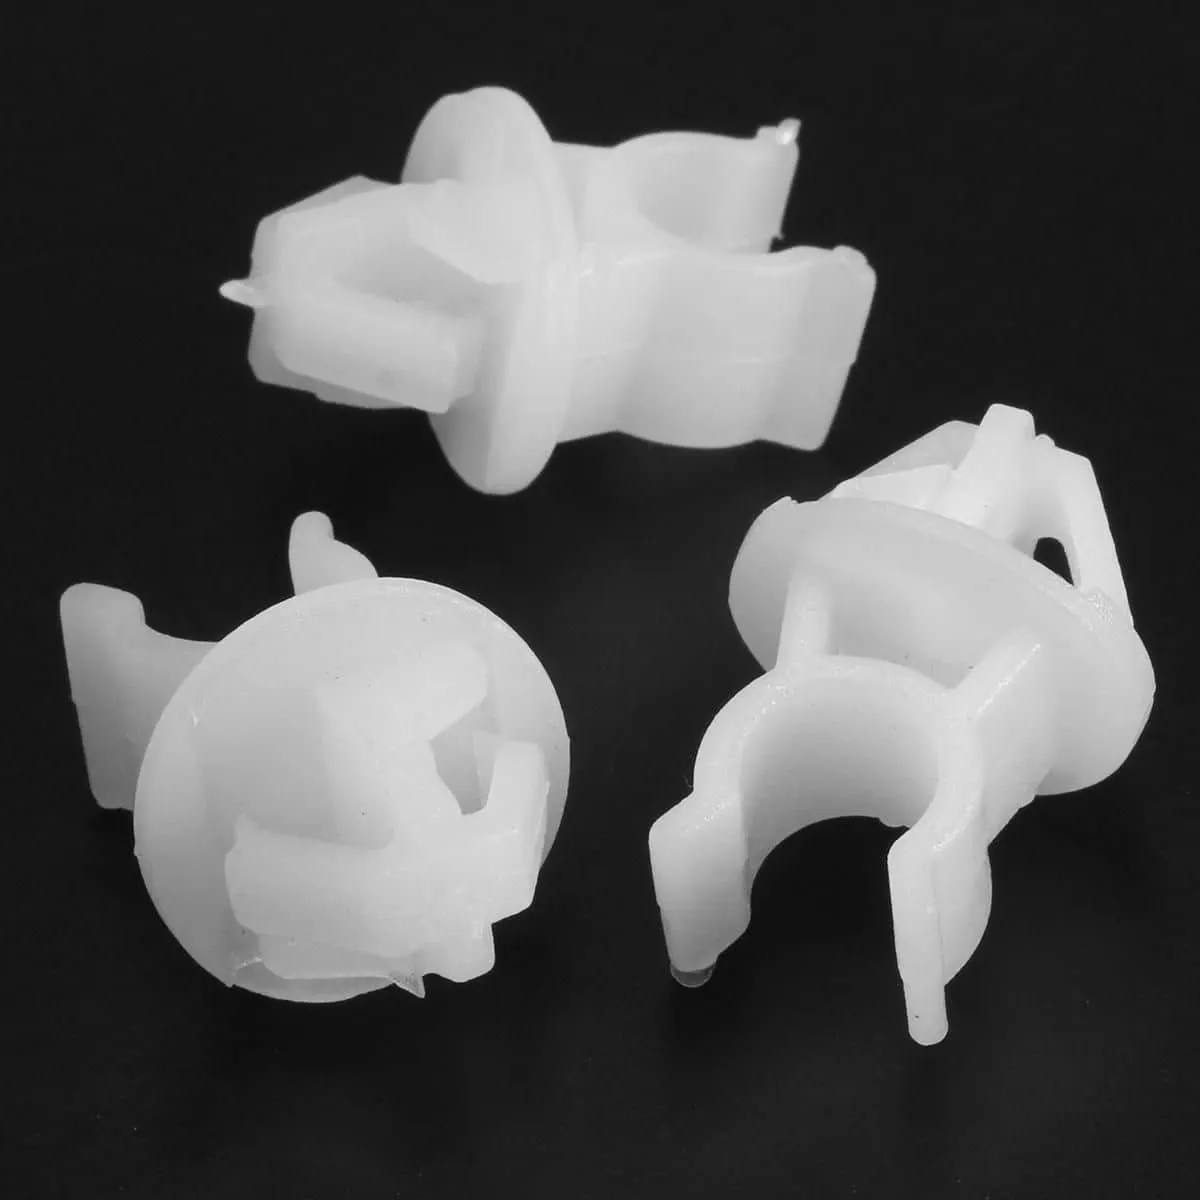
support rod in car hood
Gas Stay
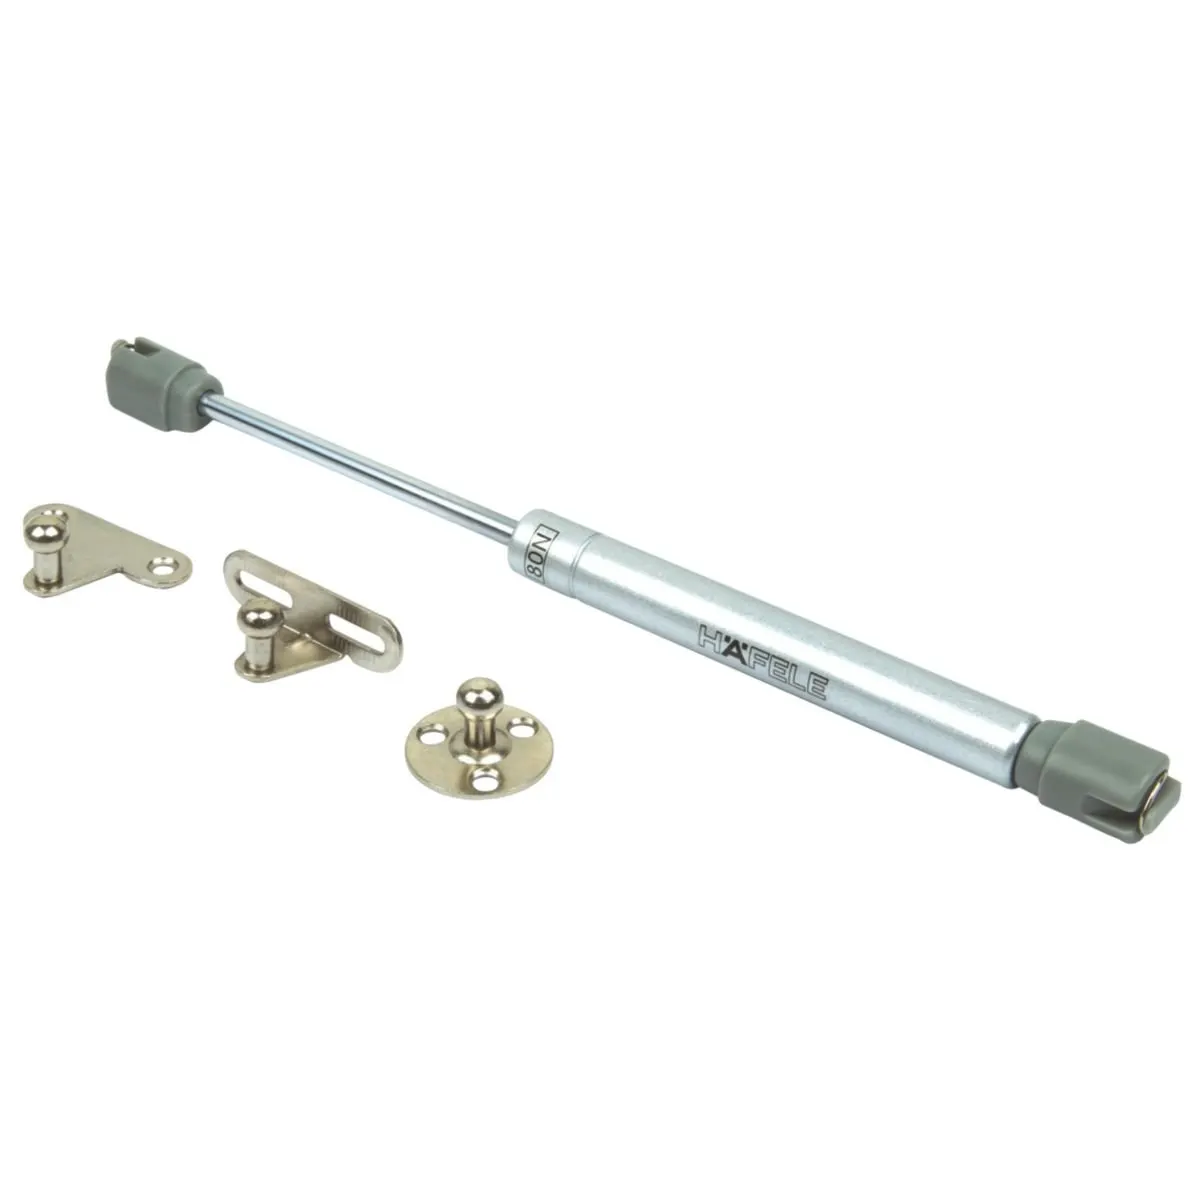
Hydarulic Stay
Hydraulic Stay in the car
3. Hemming process:
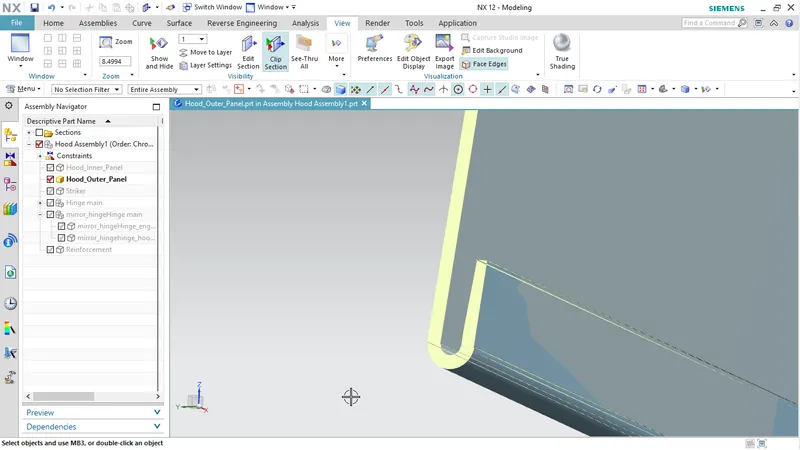
Hemming is a sheet metal forming process in which sheets are joined by bending it to 180°.
- Automotive body panels and automotive parts such as deck-lids, trunk-lids, doors, hoods and tailgates are formed by hemming process.
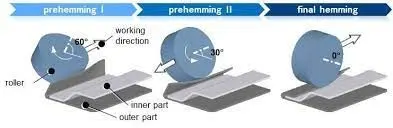
- In this process, usually a sheet is bent with the help of inner sheet in three different stages.
- in the hood pannels we cant weld them, revert or even fastners also not be used due to its asthatic apprearence will damage.
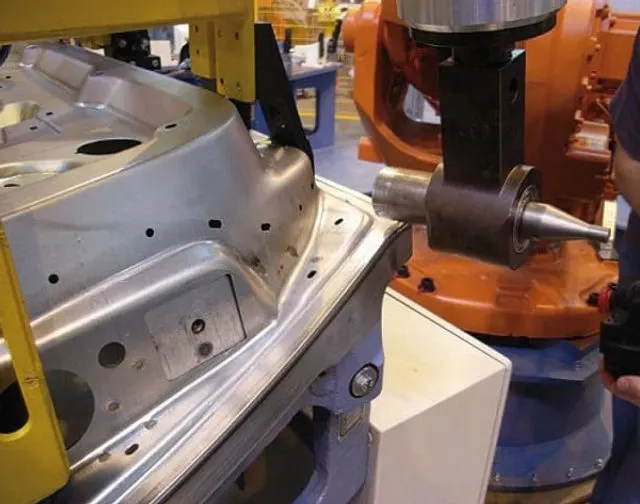
- This process can be formed by the rollers , machine pressing gradually step by step without deform its shape.
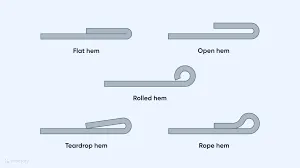
different types of hemming
Process of Hemming by rollers
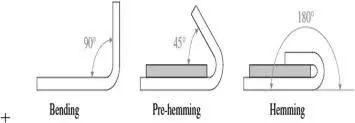
Hemming by the Machine pressing
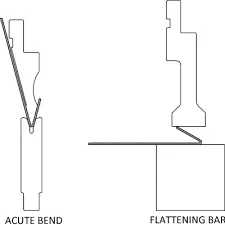
Hemming Process in automotive sheet metal
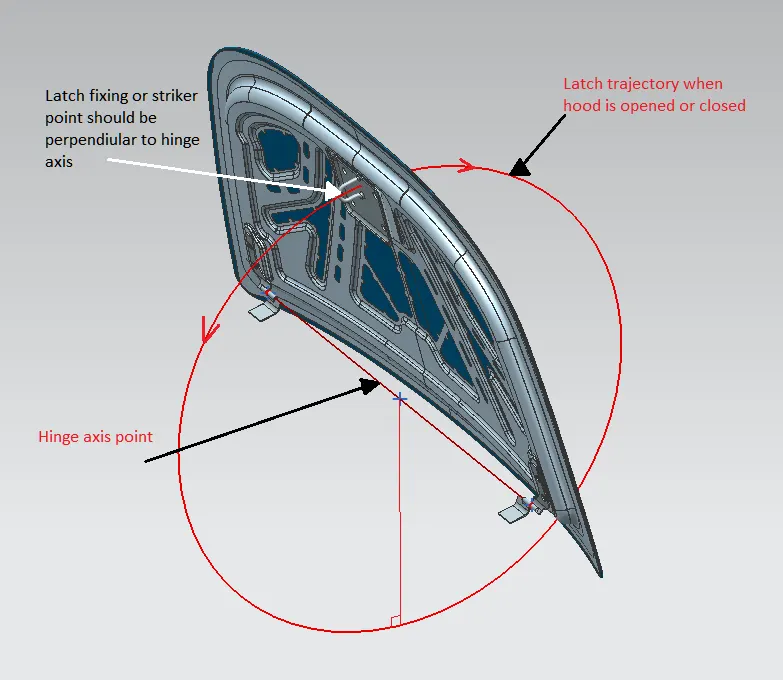
4. Striker Trajectory :
- It refers to the path that a striker takes as it moves from an open to a closed position.
- it is a mechanical component that is used to secure a door, gate, or other closure by catching onto a striking plate or other locking mechanism, here we use for the hood in car
- It consists of a movable bar or bolt that slides into a hole or recess in a striking plate when the hood is closed.
- It can then be held in place by a spring or other mechanism, preventing the hood from being opened without releasing the it.
- It can done by the help of the axis of the hinges and a circle is drawn to it and the tangent line to it.
Inlaid Hood
An inlaid hood in a car refers to a design feature where the hood of the car is recessed or lowered into the body of the car, creating a more streamlined and aerodynamic appearance.
- In contrast to a traditional hood, which sits on top of the body of the car and creates a visible gap between the hood and the fenders, an inlaid hood is flush with the body of the car and creates a seamless, integrated look.
- These hoods are often used in high-end or luxury cars, where aesthetics and performance are important considerations.
- The process of creating hood typically involves redesigning the body of the car to create a recessed area for the hood to sit in.
- This may require modifications to the frame or chassis of the car, as well as changes to the hood itself.
- In some cases, additional structural components such as reinforcement bars or supports may be needed to ensure that the hood is securely mounted and can withstand the stresses of normal driving.

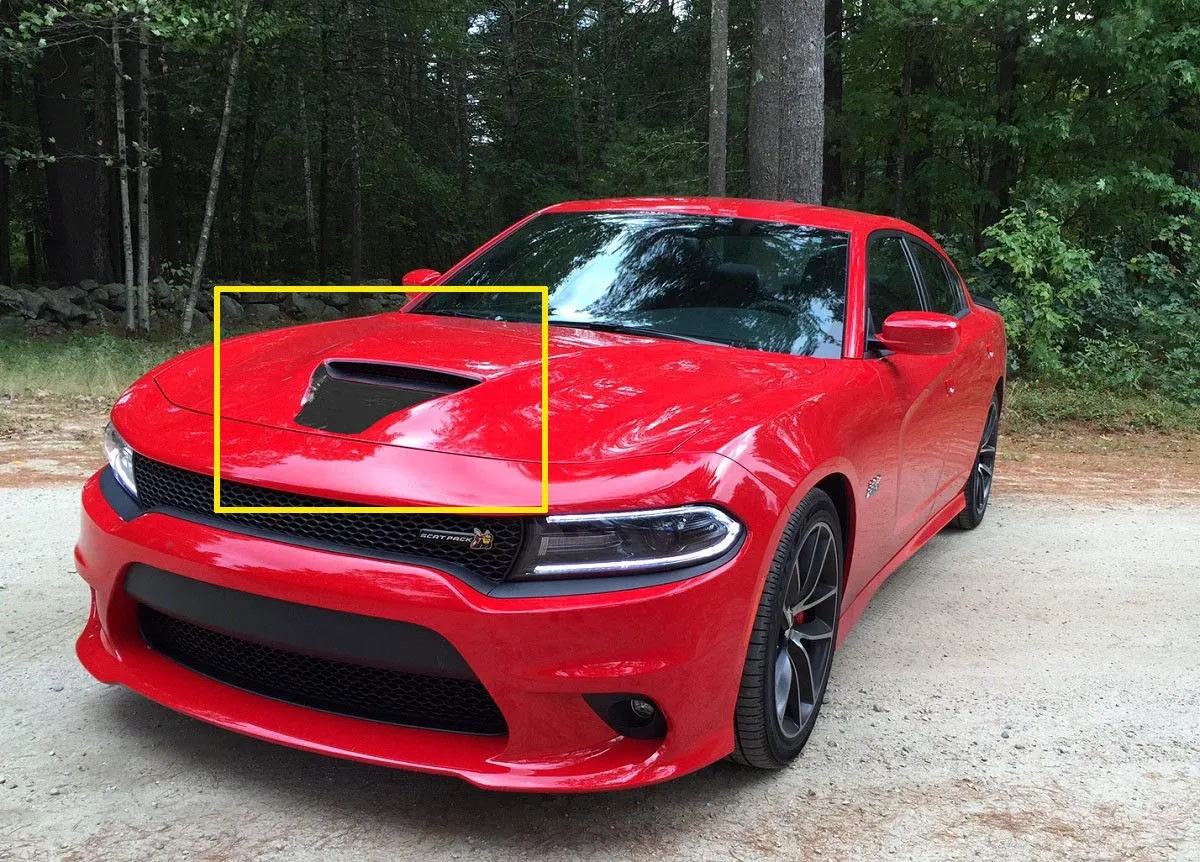
Wrap around Hood
A wrap-around hood in a car refers to a design feature where the hood of the car extends outwards and curves around the sides of the car, creating a more flowing and aerodynamic appearance. This type of hood is sometimes also called a "power dome" or "bulging hood".
- These hood can provide several benefits in terms of both performance and aesthetics. By extending outwards and curving around the sides of the car, a wrap-around hood can create a smoother, more streamlined flow of air over the car's body, reducing drag and improving aerodynamic performance.
- The raised and contoured shape of the hood can give the car a more powerful and muscular appearance, emphasizing its performance capabilities.
- The hood may also need to be reinforced or strengthened to withstand the stresses of driving and ensure that it stays securely in place.
- Wrap-around hoods are often used in sports cars, muscle cars, and other high-performance vehicles, where both aesthetics and performance are important considerations.
- A wrap-around hood is a design feature that can add both style and functionality to a car, and is often a desirable feature for those who value performance and visual impact in their vehicles.
Design of Hood Assembly:
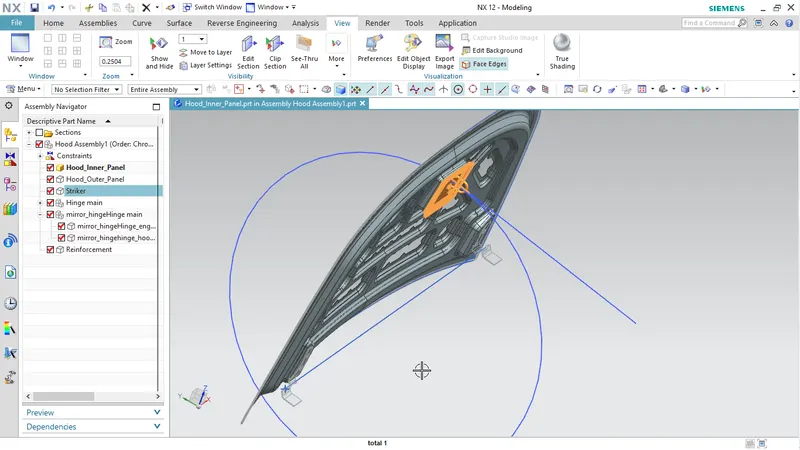
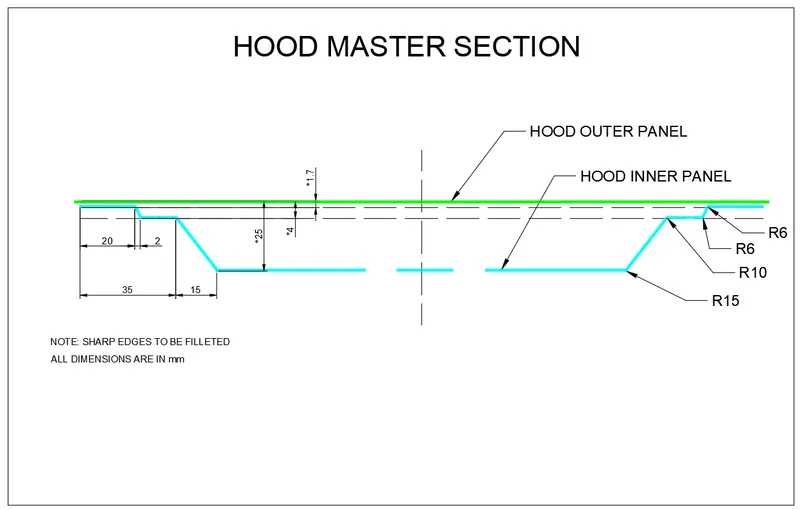
- Opened the inputs given for the Hinge assembly that are the hood outer surface, Stricker, Hinges and images of the mastersection and dimensions required of it.
- Created a Assembly in the Nx cad and oppend the necessary components into it with the datum plane as the orgin
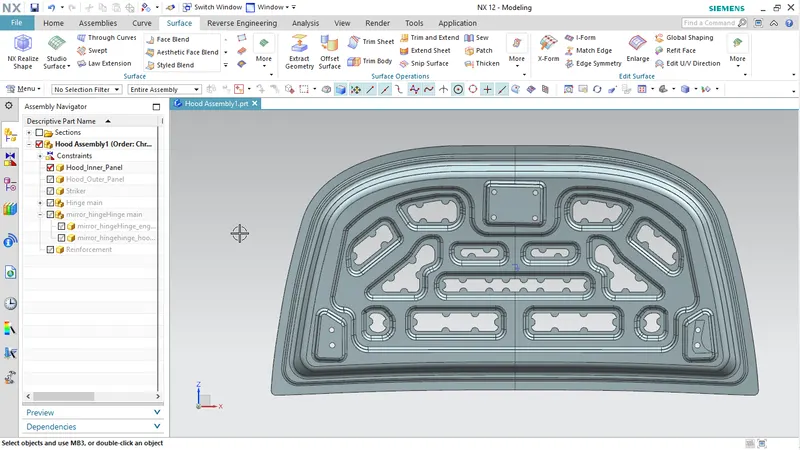
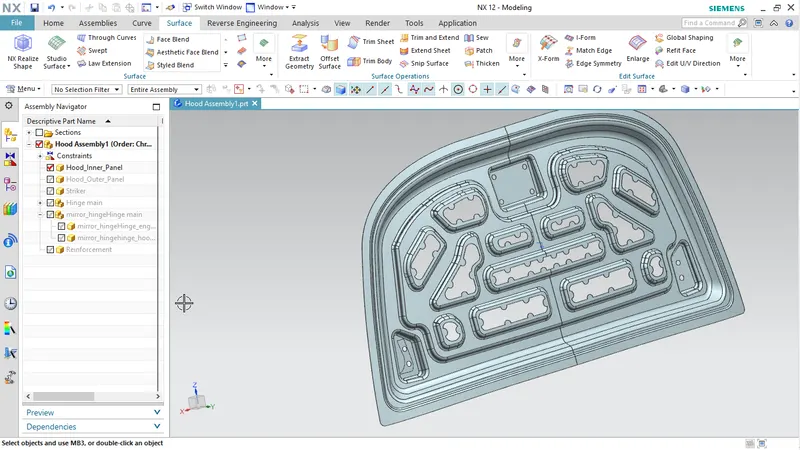
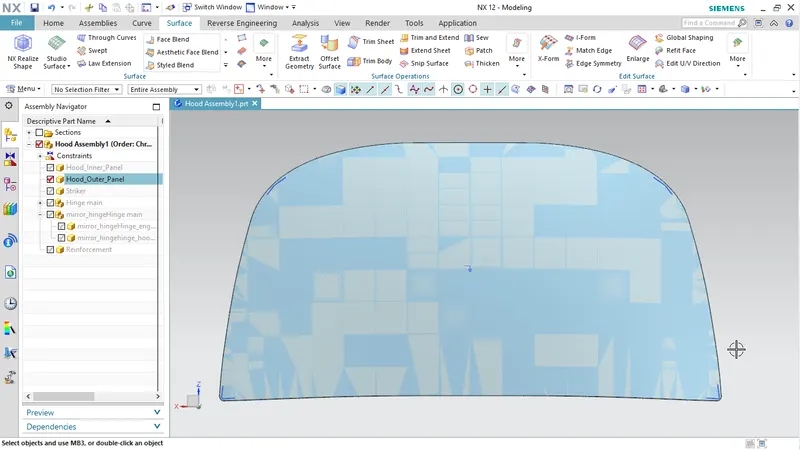
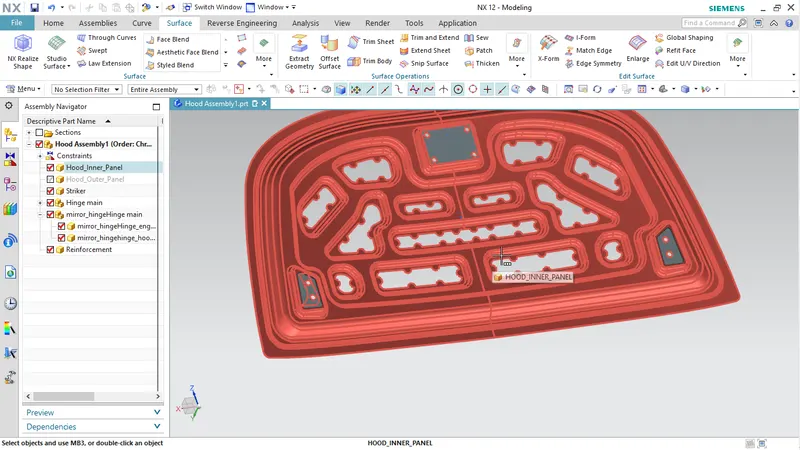
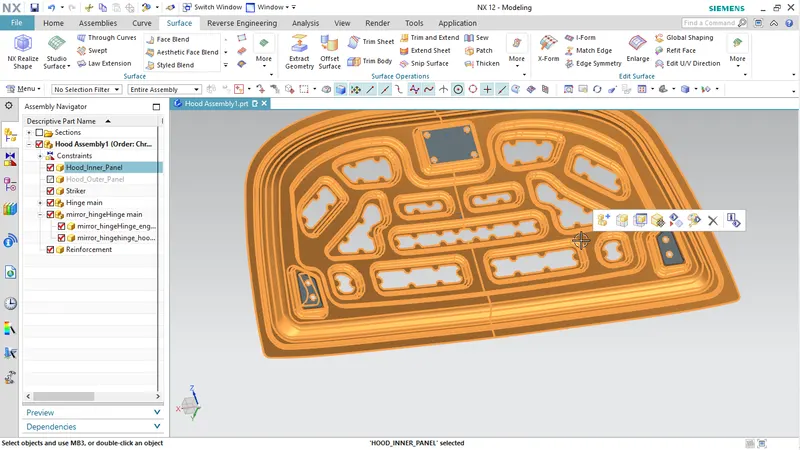
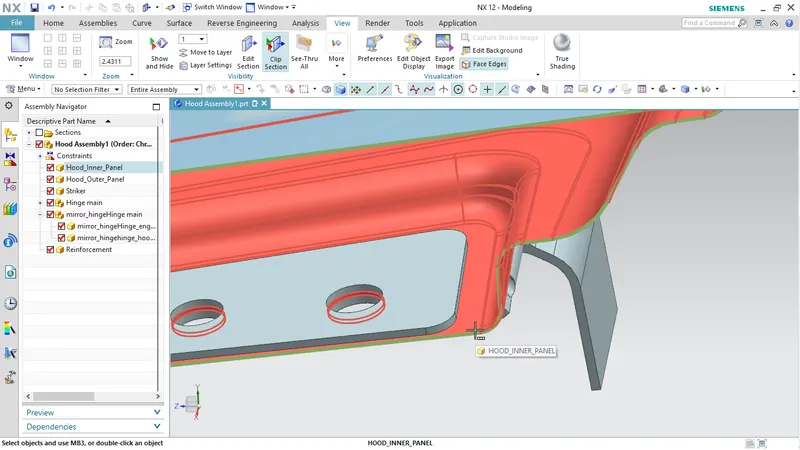
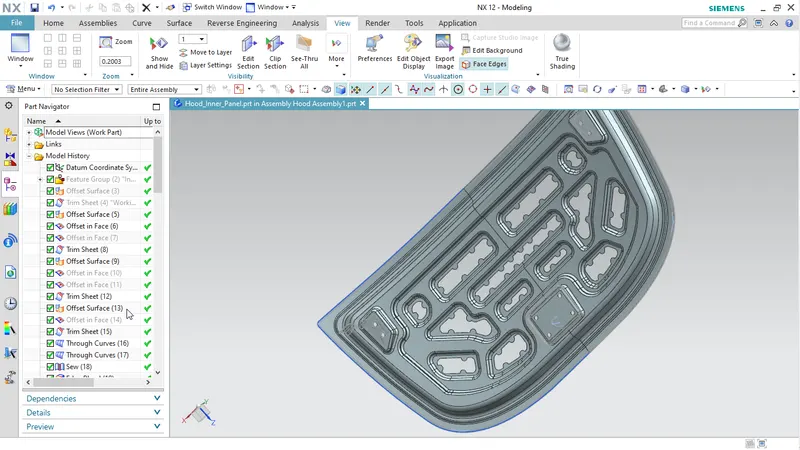
- Created the Inner hood pannel a copy the outer surface.
- As the Hood assembly is symettric on the eaither sides so the surface is trimmed into half and after finishing we can sew it.
- Offset the outer surface as per the master section so that the thickness and gap between is maintained.
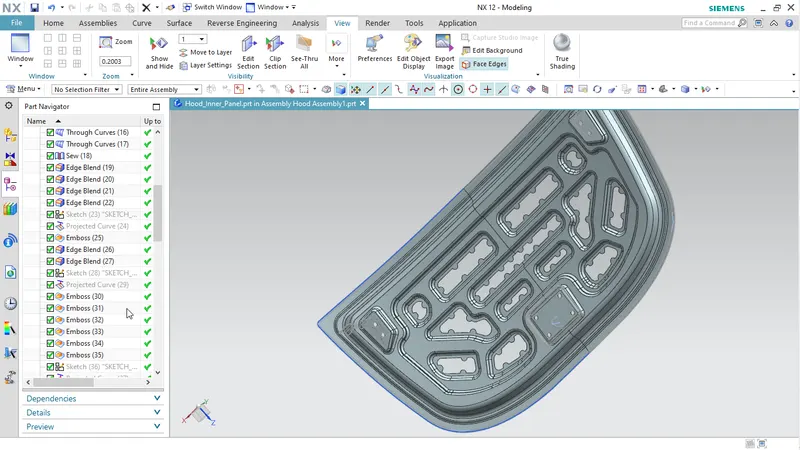
- created the outerprofile as per the mastersection provided and provided the fillets and avoided the sharp edges formed in the components.
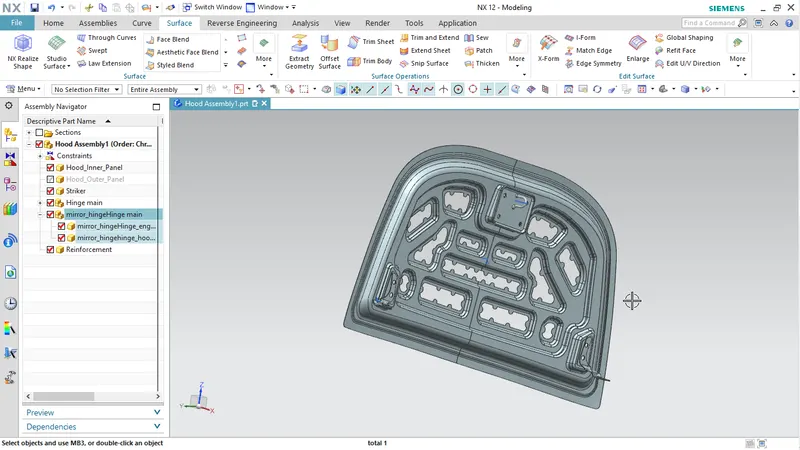
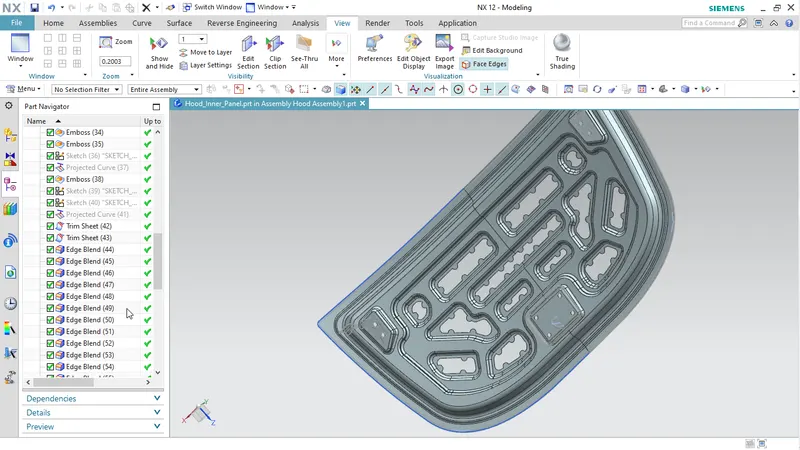
- create the profile for the emboss so that the impact energy is easily gets diapated while acident or crash is happened.
- provide the clearing angle for the emboss creation so that there will bo distortion occured while manufacturing, mostly by deep drawing method.
- maintain the gap so that the mastic sealent should be applied in between the inner and outer pannels.
- remove the some profile part in the emboss and the plain area in order to reduce the weight and absorbs the damping forces,considering it also maintains the strength of it
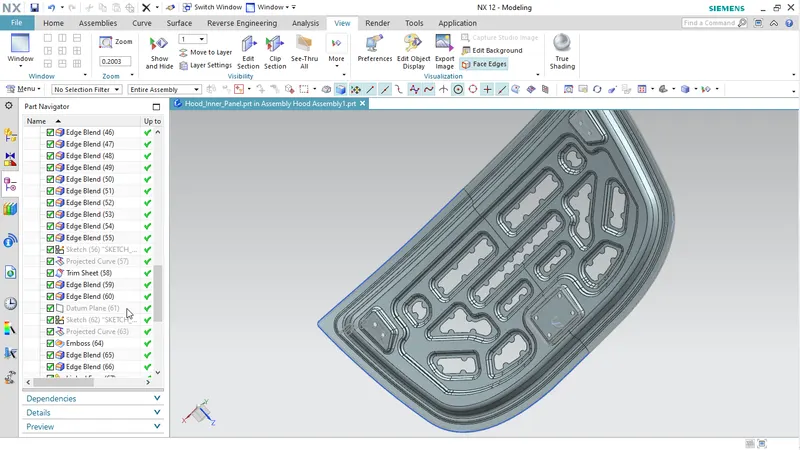
- create a datum plane that is parllel to the component aproximately so that hinges and stricker assembly easily to it
- making the emboss for the stricker and hinges to get assembled into it as the datum plane as the reference
- now extending the surface and trim with the plane and mirrored the component and sew them
- now thicken the component upto the 0.75mm in the correct direction
- constrain the hinges to the surface and along with the X-Axis as its rotation direction.
- now mirror the hinge assembly to the another side and make sure that it is associate with the parent hinge so that it is need not be constrained again
- now create the line that passing through the center axis of the hinge by using the point on the center curve of hinges , make it as the reference line.
- Create a trajectory circle with help of axis line of hinges and project the tangent line on the top for the stricker attachment.
- create the datum plane that intersects the stricker into half and passing through the licking profile.
- make a center line that bisects the lock in that datum plane.
- make the sketches that as the reference lines in the both hood inner pannel and stricker so that visible in assembly section
- make the contrain of the both trajectory tangent line with the center line of the stricker and place it corectly
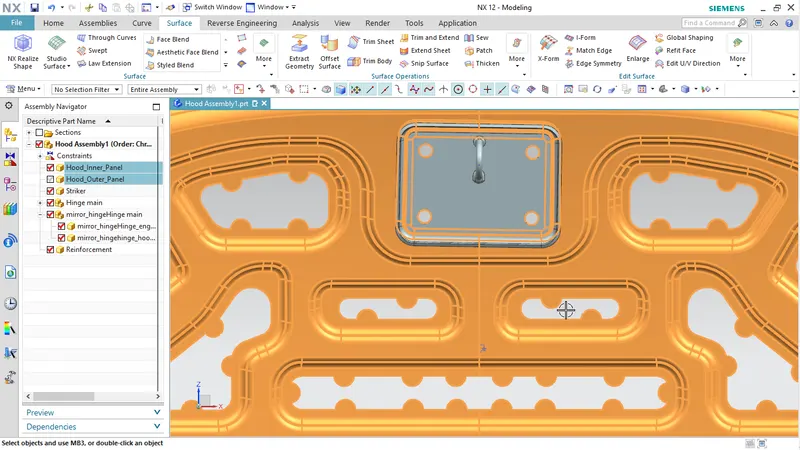
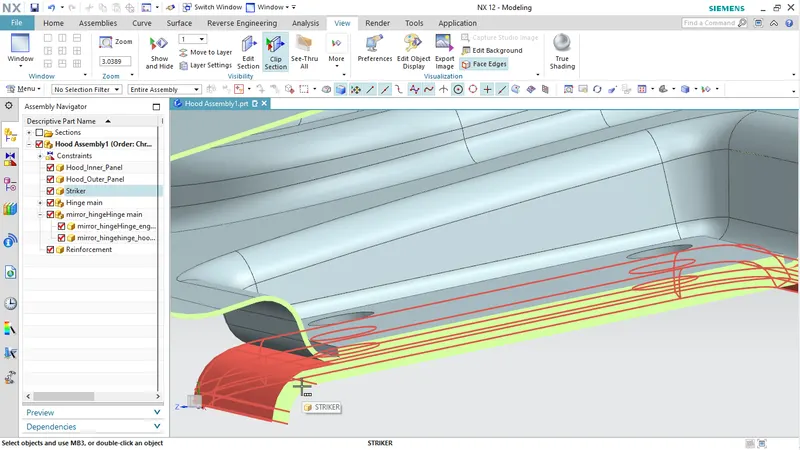
- project the surface of the stricker into the inner pannel by using the wave geometry linckage and make an emboss of it so that stricker will be attached easily with all the surface is contacted with it
- constrain the surface of the stricker of with the inner pannel.
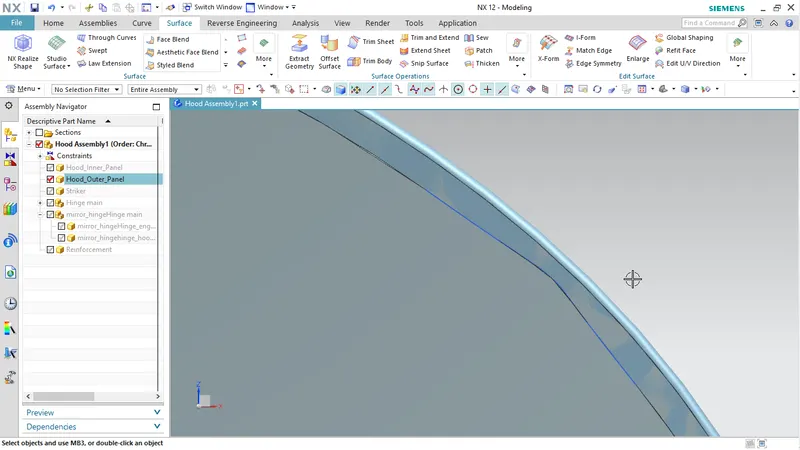
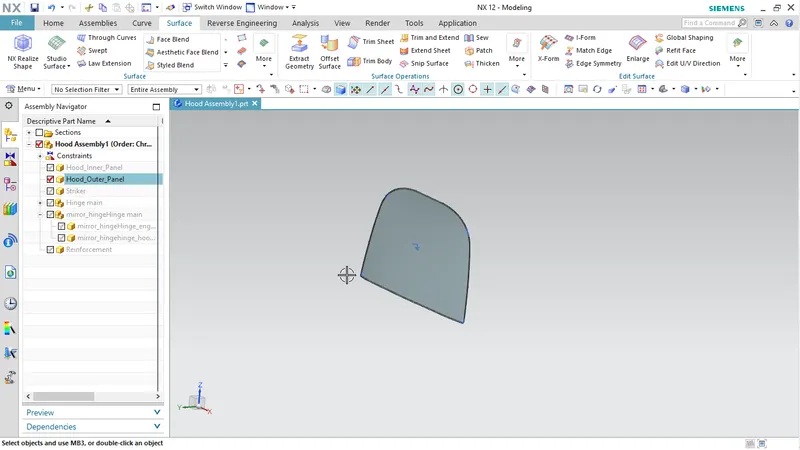
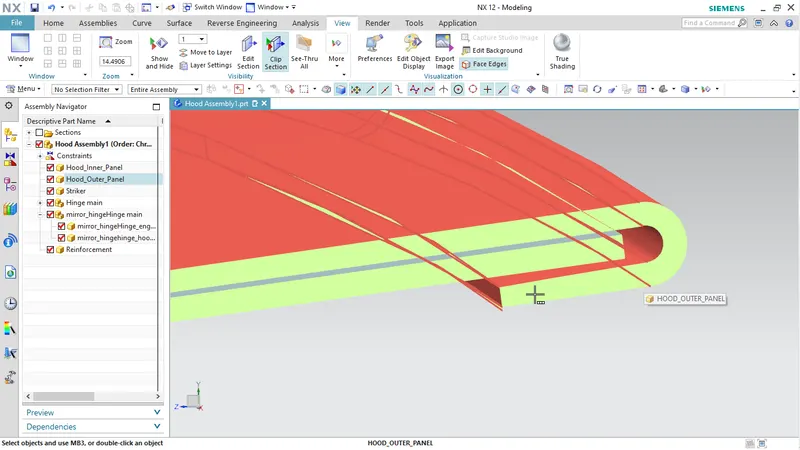
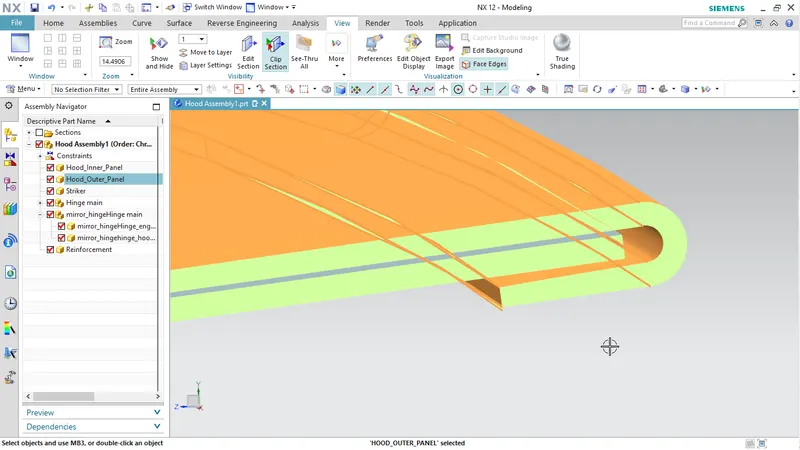
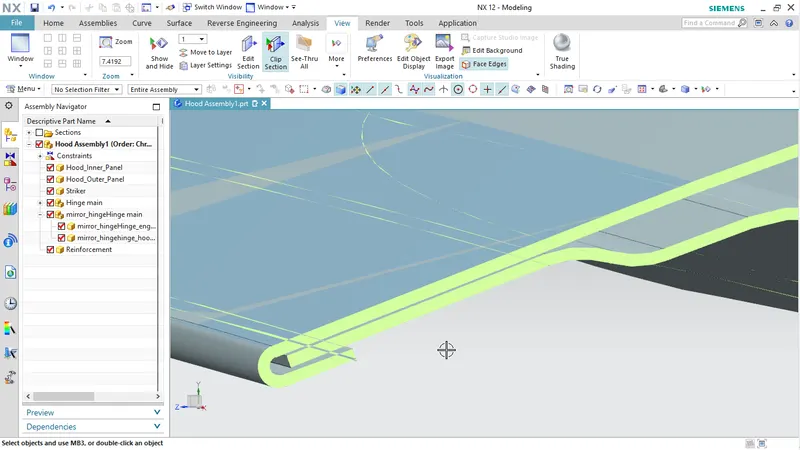
- trim the corner edges of the outerpannel with minimal fillet radius
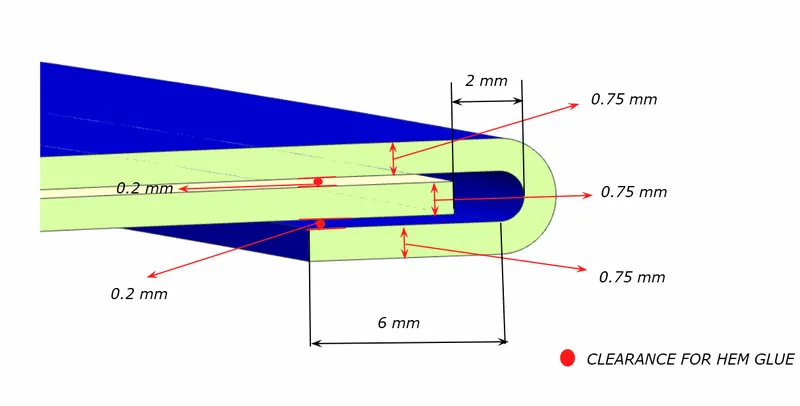
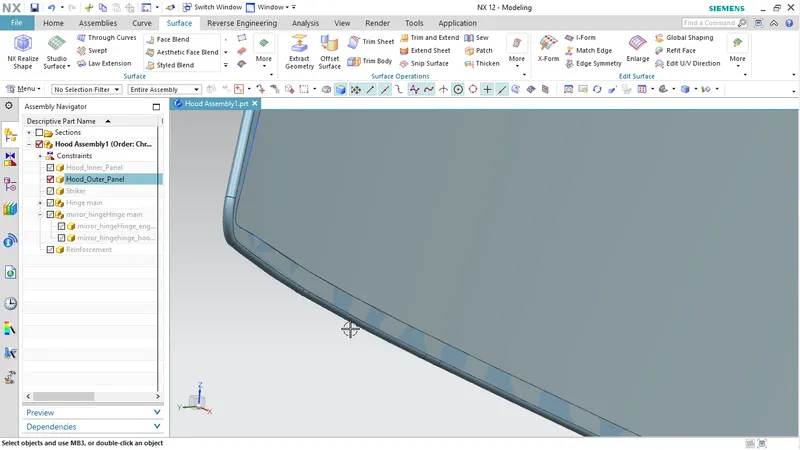
- offset the surface so that the hemming can be done easiy and provide the minimal gap 0.2mm as clearence of it
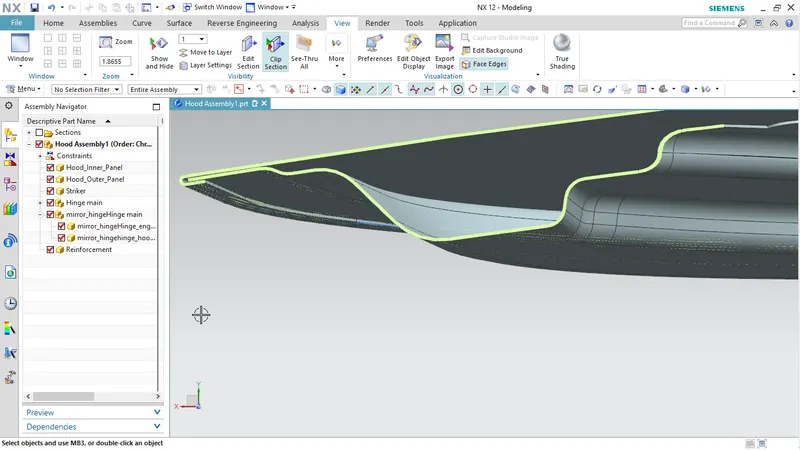
- create side profile by using the law extension method for the rolling method for hemming.
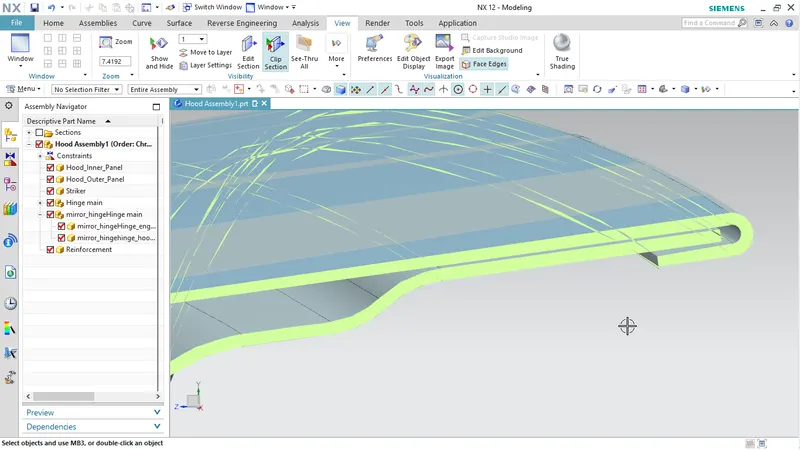
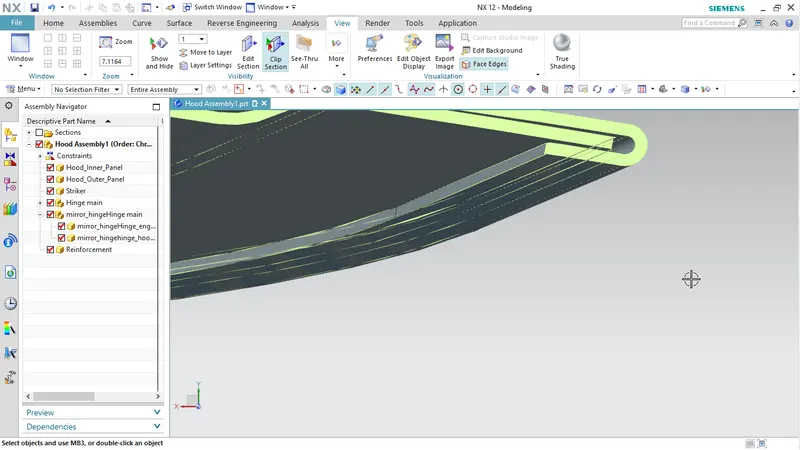
- now face blend the outer pannel with help of three surface by the rolling as the option , make sure that all the surfaces are hemmed properly
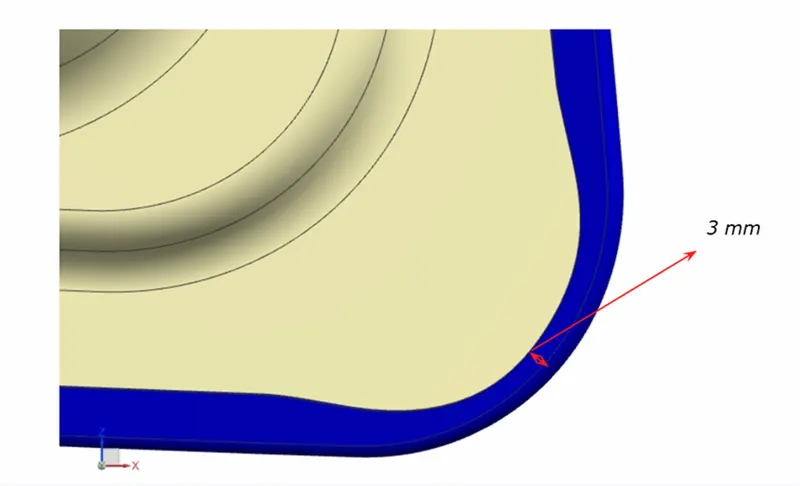
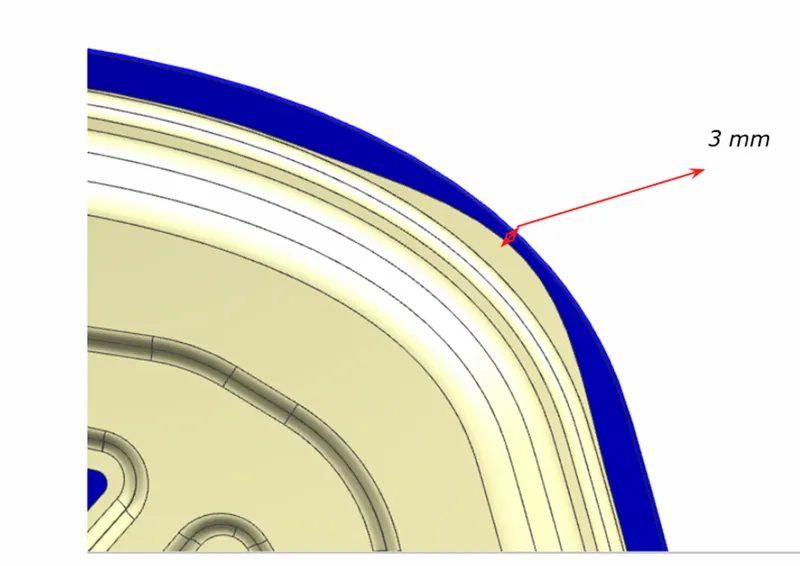
- now remove the some surface at the corners so that the clearence will provided at the hemming, the maximum distance is 3mm so that excess material will not be folded at the corners.
- now thicken the surface with the inner direction with the value of 0.75mm
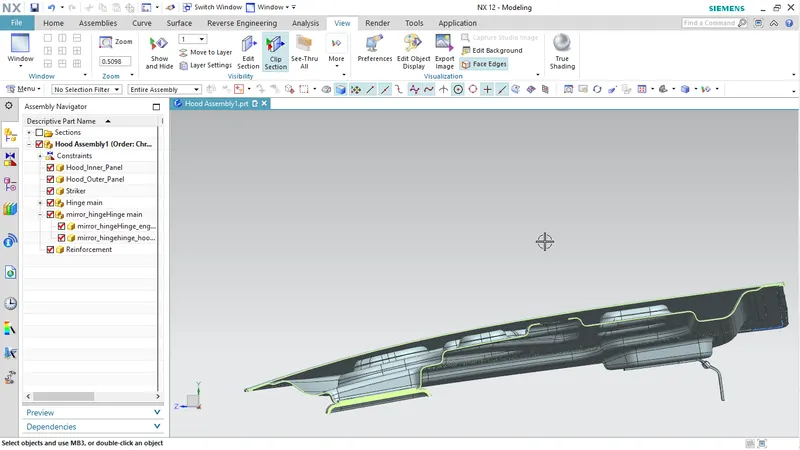
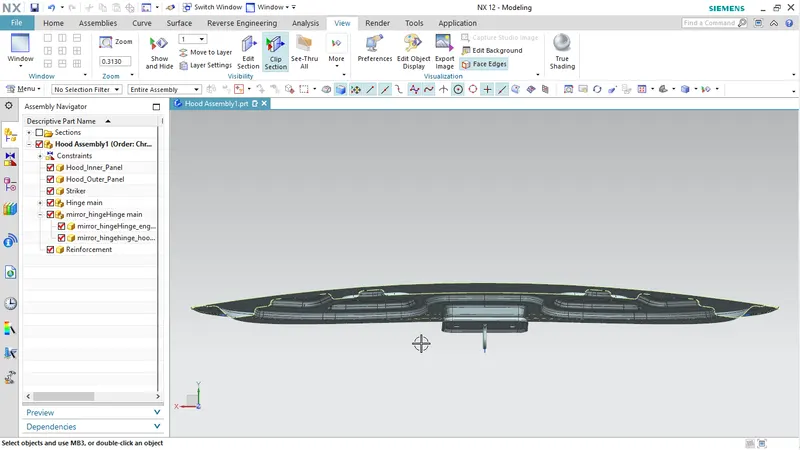
- check the cut section profile for the dimensions that are matching with the mastersection provided.
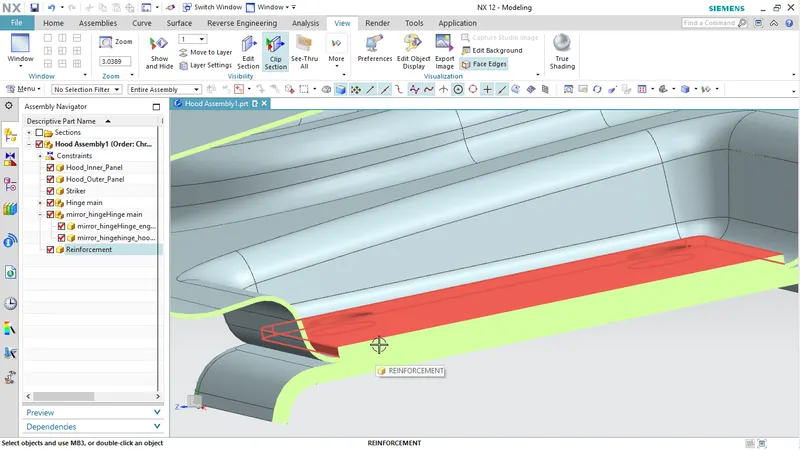
- make a new component for the reinforcements
- reinforcements that will help the components to hold them properly and supports them locally and fastners will also be applied easily
- copy the profile where the stricker and hinges are joined with the inner pannel and project them by wave geometry. make sure it is associated with it
- make the sketch of them and thicken them with 1.5mm outerside , so that it dosent intersect with the innerpannel.
- check the constrains properly.
inputs
Hood Assembly Images along with tree structures
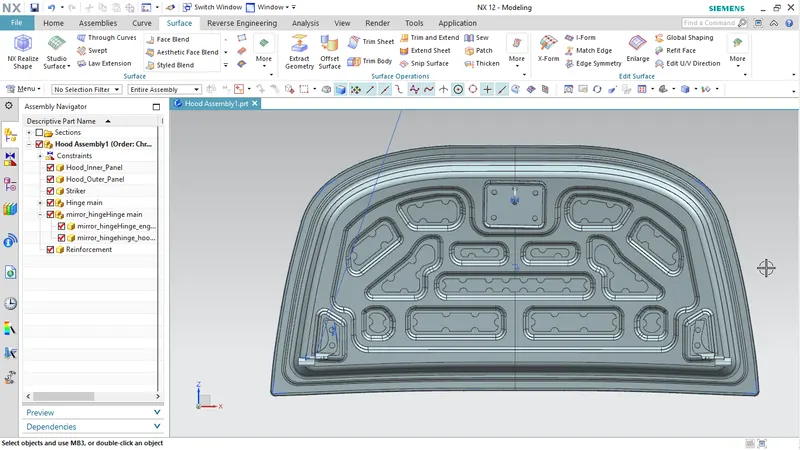
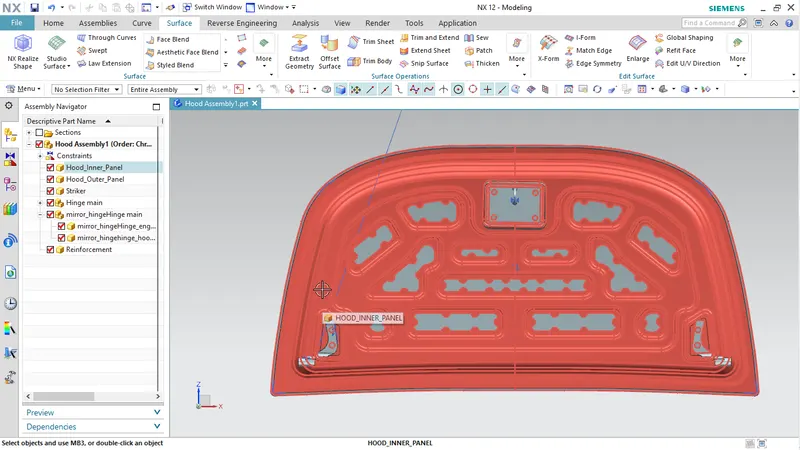
Inner panel
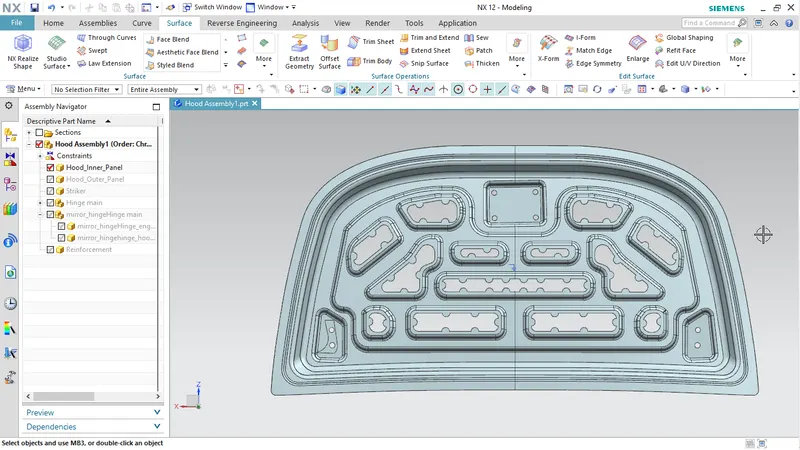
outer pannel
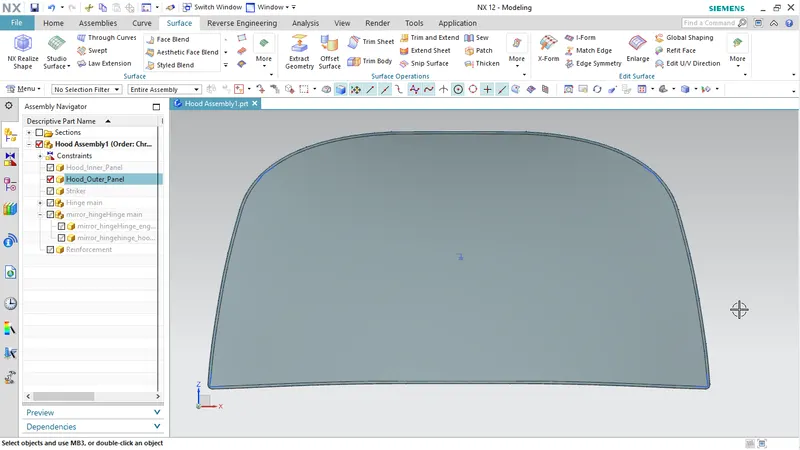
hemming clearence
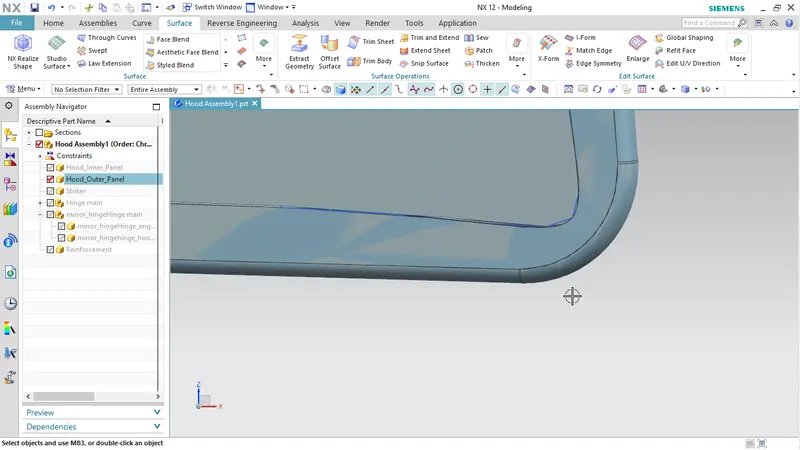
hemming at corners
Reinforcement for Striker
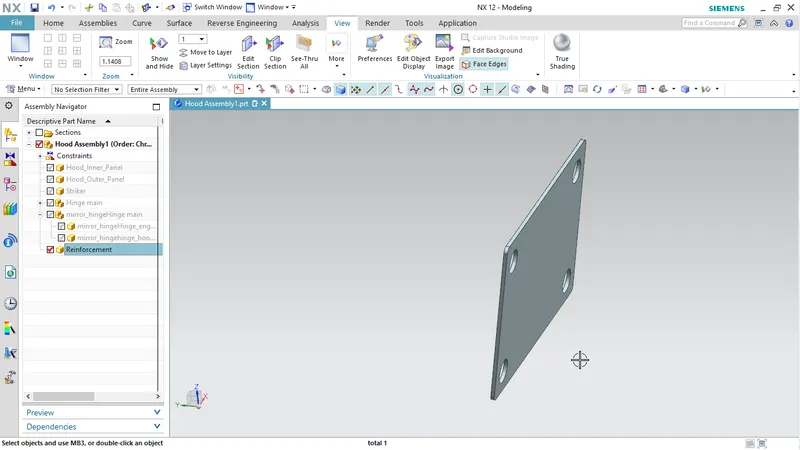
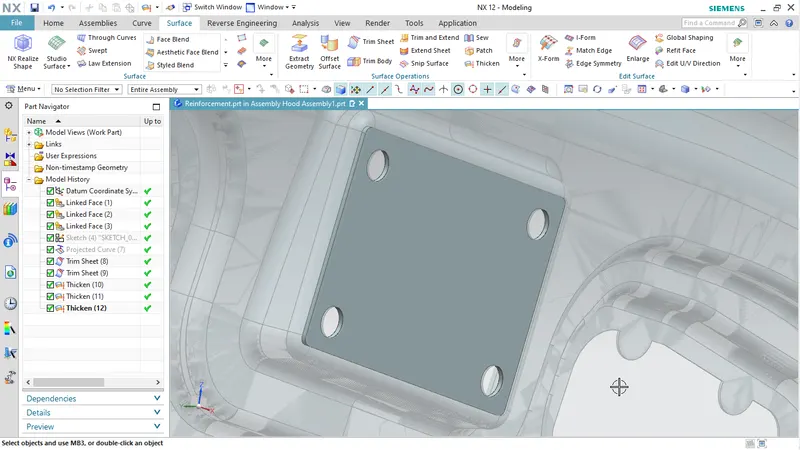
Reinforcement for striker
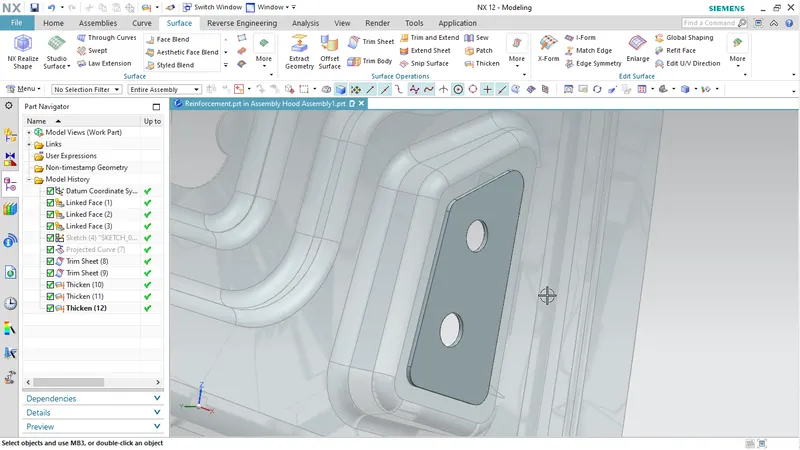
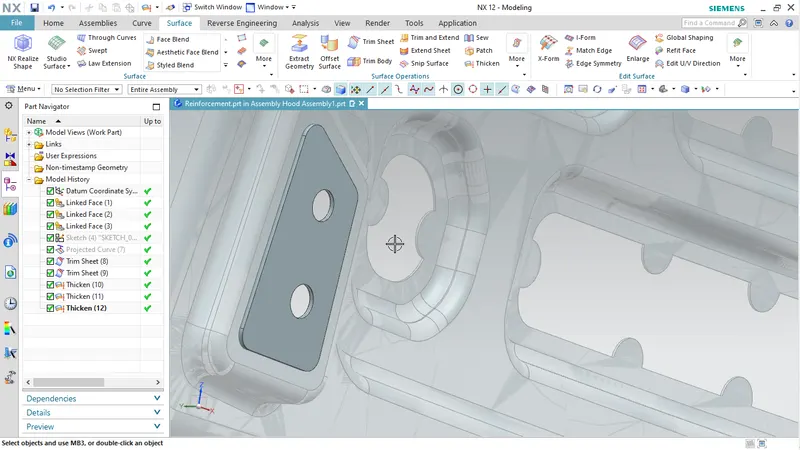
Cut section profile
hemming surfaces
Assembly constraints
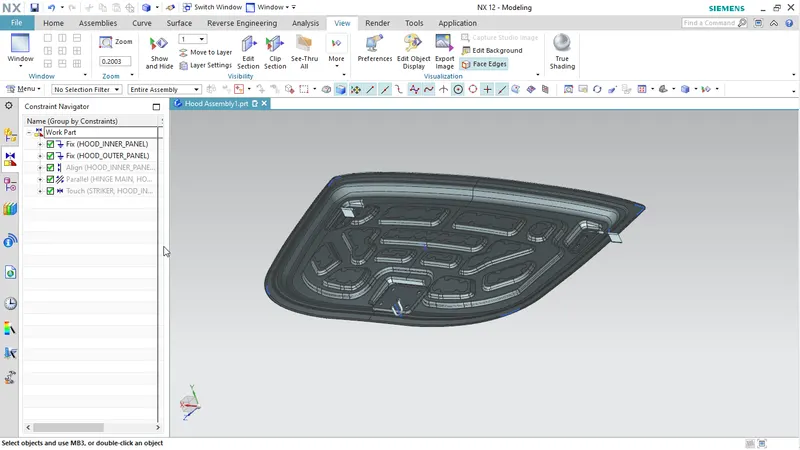
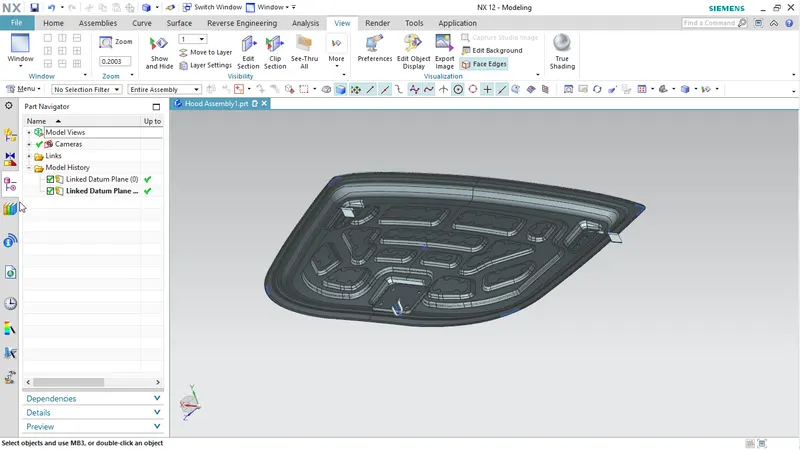
Reinforcement Tree structure
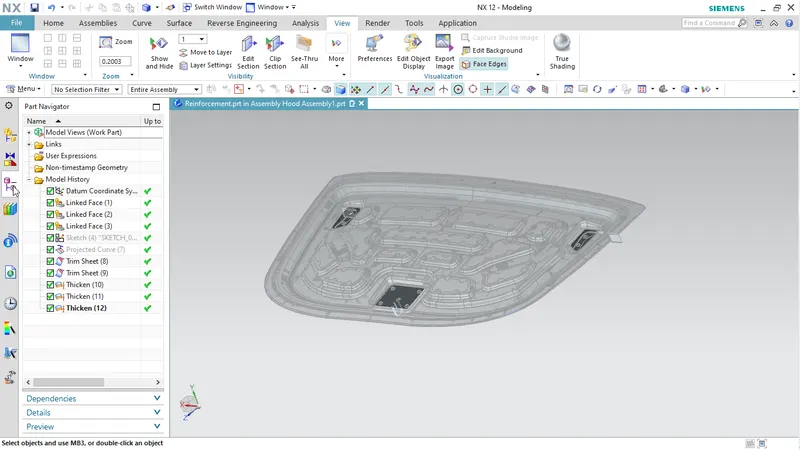
Outer Pannel Tree structure
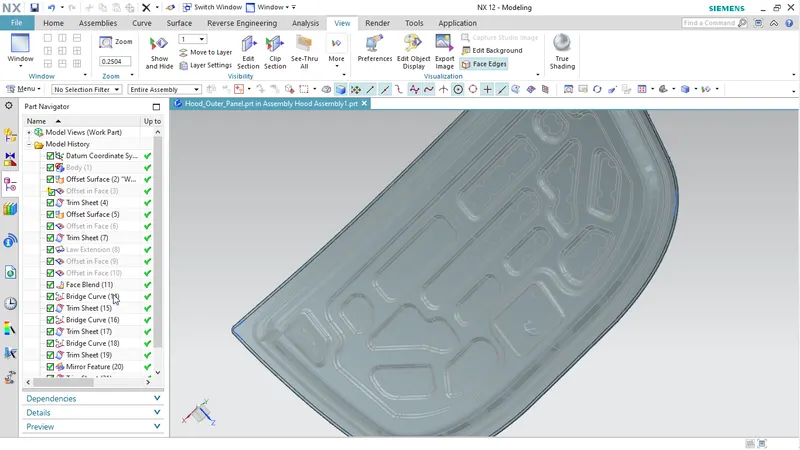
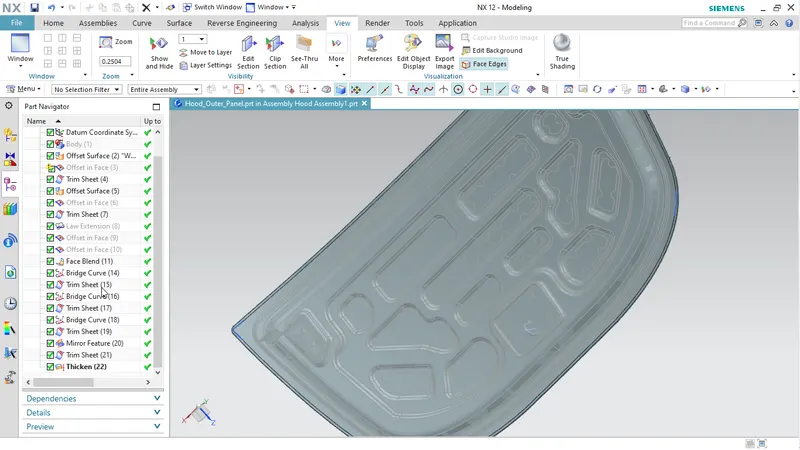
Inner Pannel Tree Structure
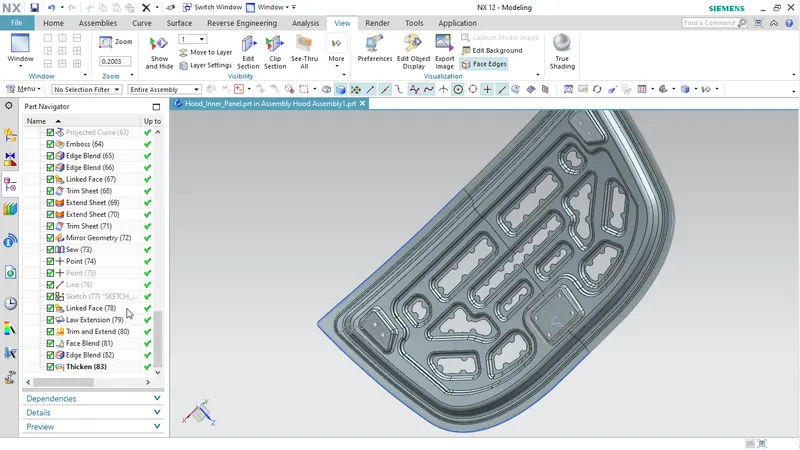
Trajectory Profile
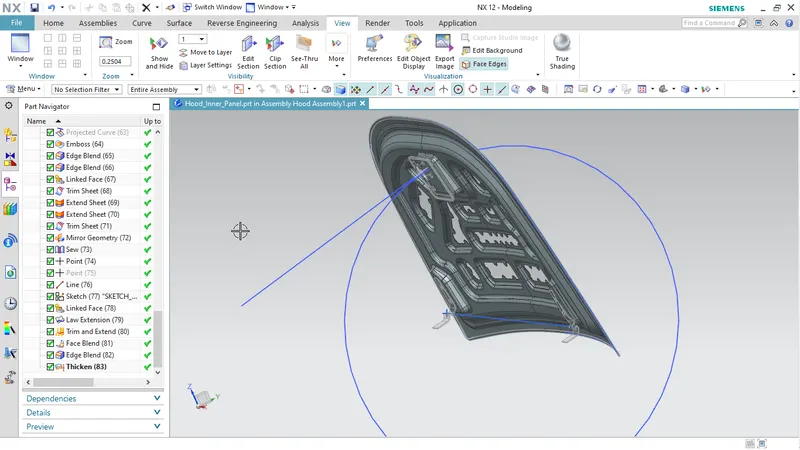
Striker placement along the Trajectory Profile
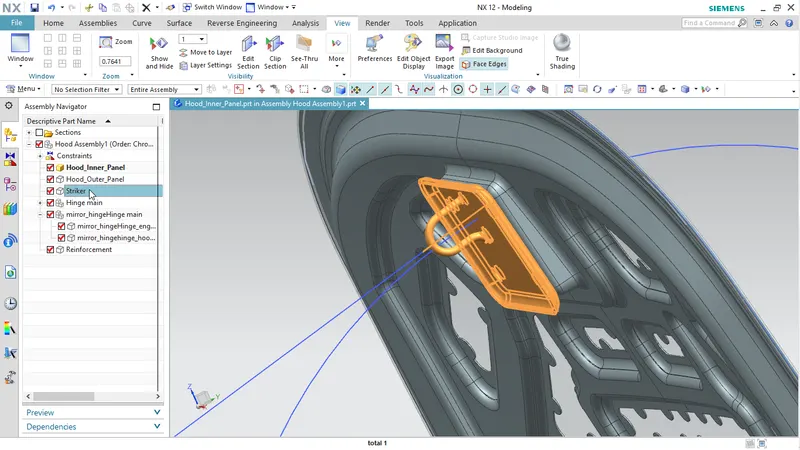
Hinges Axis line