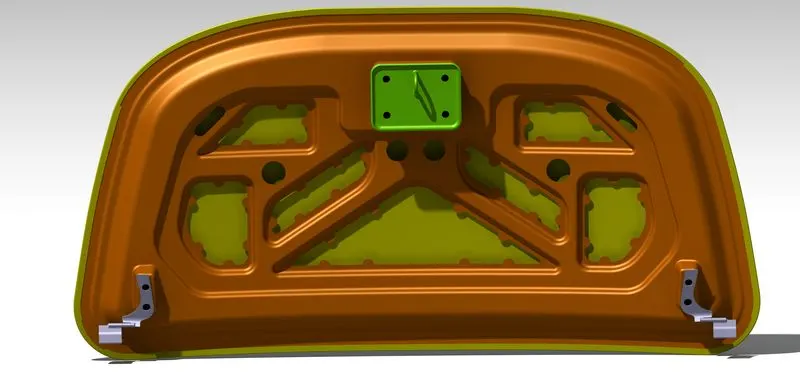
Hood design-Week 2
AIM: To design the car hood and understand the mechanism behind the design of hood, then development& its safety features as per the design consideration.
The following task is performed:
- Design Outer Panel with the Hem.
- Develop the Inner Panel.
- Develop all the Necessary Reinforcements.
- Mirror and position the Hinge & Striker.
- Provide Mastic Data.
- Provide the required Emboss definition.
- Develop a detailed Report for the Mastic position and Embosses you have placed.
THEORY
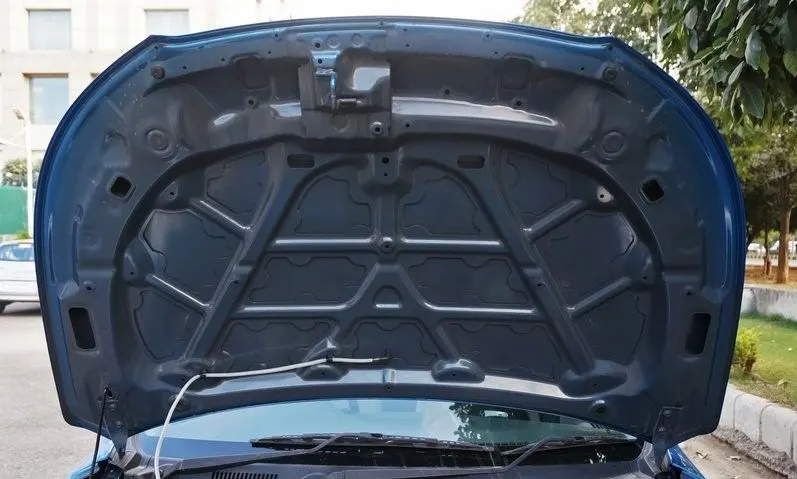
A vehicle hood likewise alluded to as a hat is a pivoted cover that rests over the motor of a vehicle. Its motivation is to give admittance to the motor to fix and support. A hid hook is regularly used to hold down the hood. On vehicles with a secondary selling hood and on racecars, hood pins might be utilized to hold down the vehicle hood.
The following are the guidelines should be considered while designing the hood
- Outer Panel Thickness = 0.75mm
- Inner Panel Thickness = 0.75mm
- Reinforcement Thickness = 1.5mm
- Minimum fillet radius = 3mm+thickness
- No sharp edges
- Provide proper corner relief
- Emboss maximum depth =6-7mm
Hood and it’s Components:
Hood : Vehicle hood/ Bonnet is a pivoted cover that rests over the motor in a front-motor vehicle. A lock is given in the engine to forestall coincidental opening during driving. Motivation behind hood is to give admittance to the motor and battery for fix and support. It likewise safeguards these parts from direct daylight and residue.
COMPONENTS :-
The car hood consists of following components,
1) Hood Outer Panel : The external board functions as a metal cover. It is responsible for aesthetics of the vehicle.
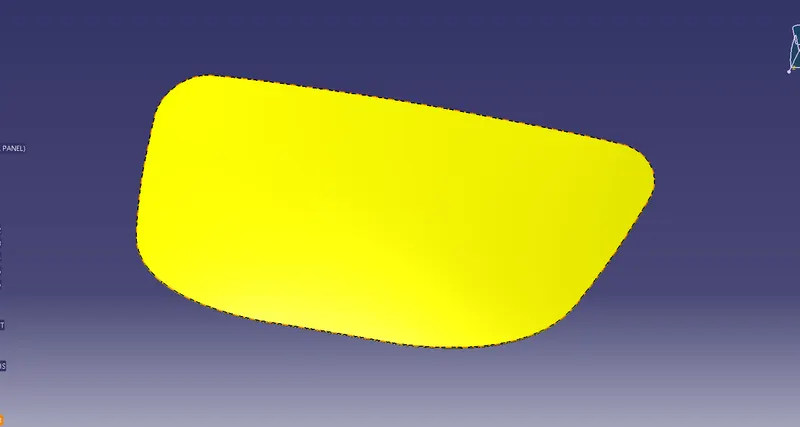
Fig.1 Hood
2) Hood Inner Panel : The inward board gives strength and supports the external board. It is where hood balancer and pivots are appended.
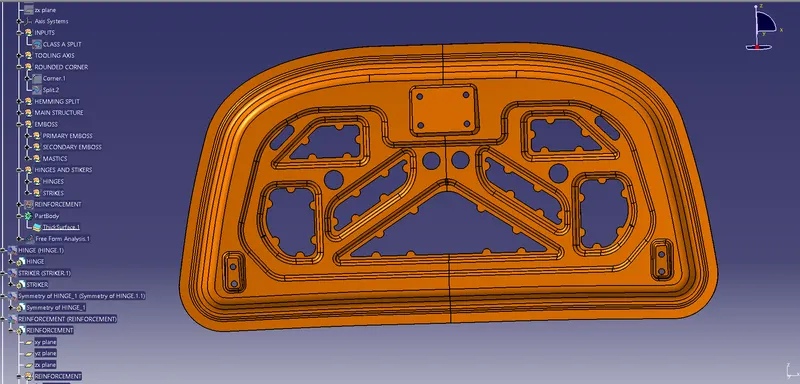
Fig.2 Hood Outer Panel
3) Hinges : Pivots permit the hood to turn around a decent hub for opening and shutting development. One piece of the pivot is fixed with the motor compartment, while other part is associated with hood.
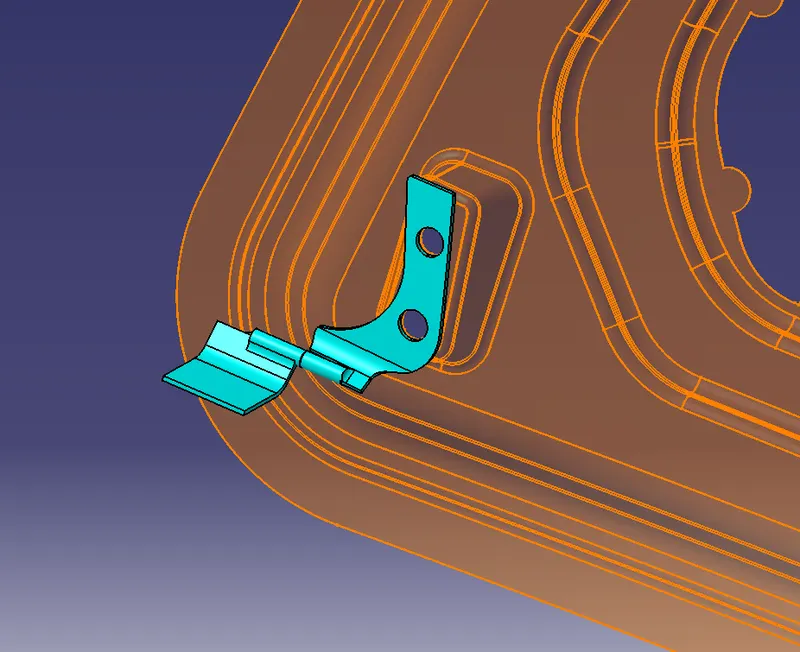
Fig.4 Right Hinge Assembly
4) Striker : Striker component is given to lock the hood, to forestall unplanned opening of the hood during driving. The hook is available on the engine compartment while the striker is connected to internal piece of hood.
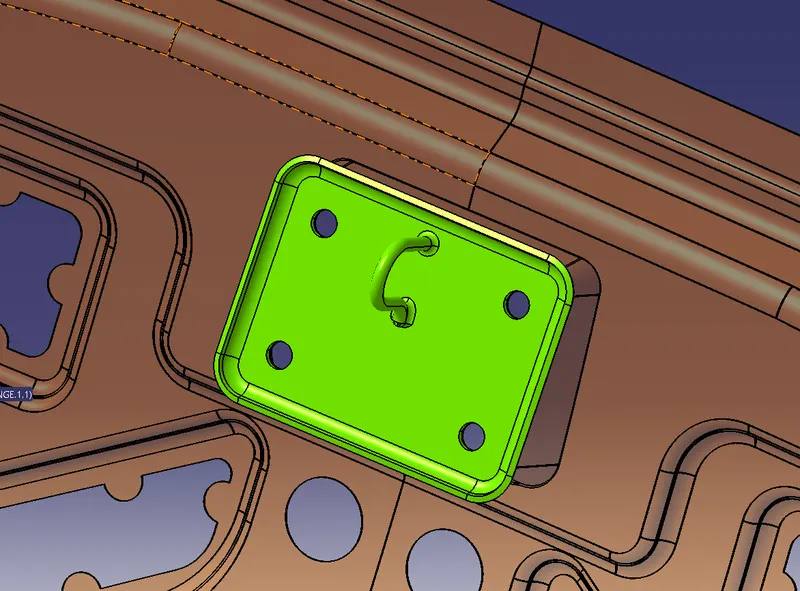
Fig.5 Car Hood Striker
5) Gas Strut : It is a device that supports the hood in open position. It is also called as strut.
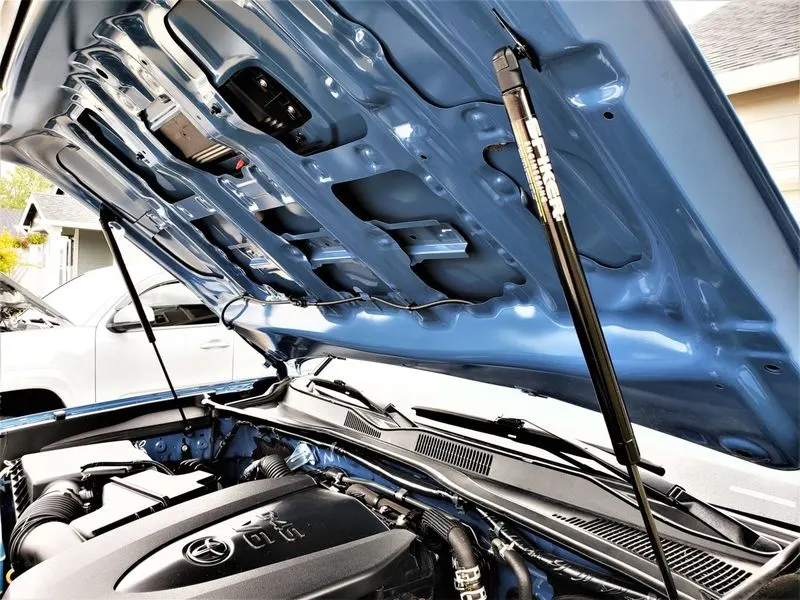
Fig.6 Gas Strut
6) Reinforcements : The reinforcements are provided to add material to the inner panel to provide extra strength to the hood to compensate for loss of strength near component installation regions.
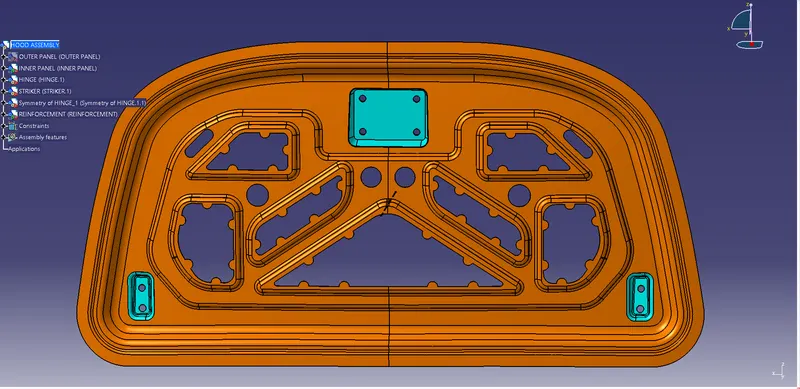
Fig.7 Reinforcement
Latch Trajectory: It is the way along which the hood pivots during opening and shutting development. The striker on the hood follows a specific way while opening or shutting the hood, which is along perimeter of a circle with focus at the pivot hub. This way is only hook direction. It is a vital perspective in hood configuration, to choose pivot, hook and striker establishment focuses.
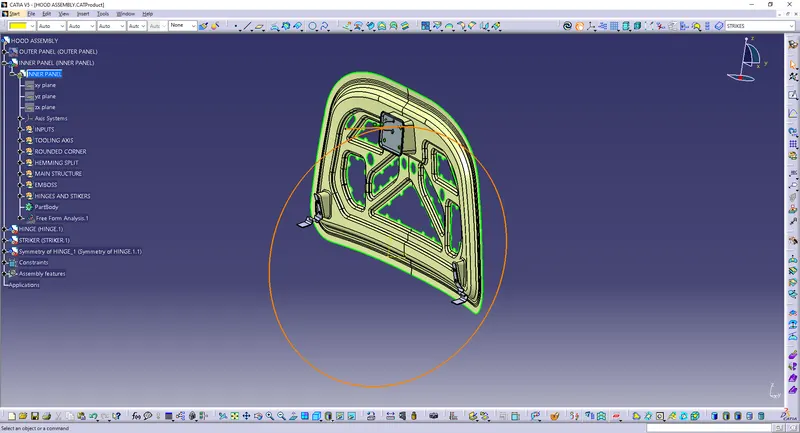
Fig.8 Latch Trajectory
Mastic Sealant: Mastic sealant serves to further develop strength of the hood locally. It is by and large a hard elastic part, which is presented as an in the middle of among internal and external board of the hood, which will get solidified inside the heater. Each mastic sealant direct will have a propensity toward work on the nearby strength in around 80 mm width. Taking into account this, the mastic focuses are situated with the end goal that the greater part of the hood district is covered.
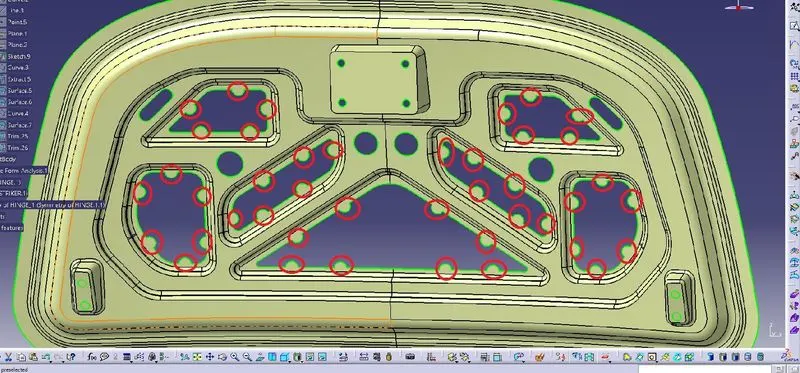
Fig.9 Mastic Sealant Points (highlighted in Red)
Design Methodology:
The procedure followed for designing the hood and its components is as follows,
- First the inner panel is designed from the given master section using the various commands and features. We create the embossing using the offset surface from the original master section. Similarly, we create the cuts on the emboss by sketching and using trim surface option.
- Then the outer panel is designed from the same master section. Here we are supposed to provide the hemming to outer panel. The parameters of hemming are taken as per given values.
- Now, on the inner panel, the embossing for hinge and striker are produced by considering their respective dimensions and assembly positions. First the emboss for hinge is created and then by fixing the hinge into its position, we draw an axis passing through both side hinge axes to form a common axis. And then we position the striker such that it will move along circumference of a circle whose center is at midpoint of the common axis. Thus, position of striker is decided and we can create emboss for the same.
- Using the hinge emboss we created, we can create our hinge reinforcements by creating new parts in the assembly itself.
- Data Povided –
Outer Panel Thickness – 0.75mm
Inner Panel Thickness – 0.75mm
Reinforcement Thickness – 1.5mm
The manufacturing process of Hood Design:
Deep Drawing:
- The deep drawing process is a forming process which occurs under a combination of tensile and compressive conditions.
- A flat sheet of the metal blank is formed into a hollow body open on one side or a hollow body is formed into a hollow body with a smaller cross-section.
- Forming is achieved in stretch forming purely as a result of a decrease in sheet metal thickness. Stretch forming is extensively used for the forming of only slightly curved parts with a low depth of draw.
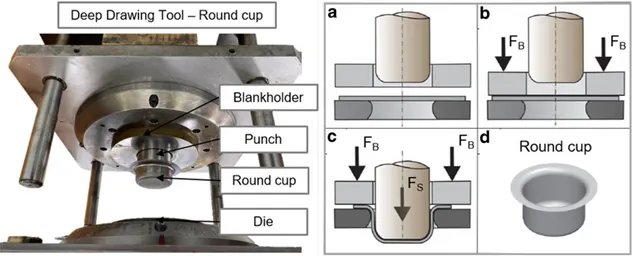
Hemming:
- Hemming is a technology used by the automotive industry to join inner and outer closure panels together (hoods, doors, tailgates, etc.). It is the process of bending/folding the flange of the outer panel over the inner one.
- The accuracy of the operation affects significantly the appearance of the car’s outer surfaces and is, therefore, a critical factor in the final quality of a finished vehicle.
- Hemming is performed to:
- Achieve a better final geometry in the vehicle´s part
- Add resistance and rigidity to the part
- Allow safe handling of the part.
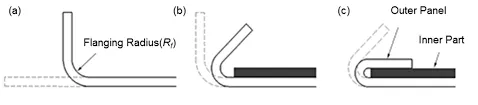
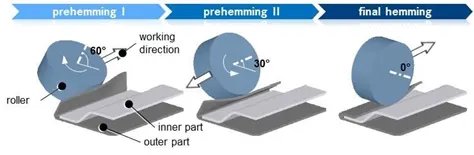
Fig.13 Roller Hemming process in 3 Stages
Embossing:
Embossing by definition is the process of giving a 3-dimensional look to a material or product. Pressure is applied to the surface of the material and results in an image remaining on the surface of the material. ‘Relief’ is another term used to encompass the process of embossing.
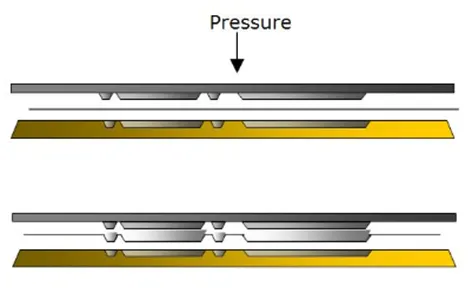
Piercing –
It is a shearing process in which raw sheet metal is pierced with a machining tool, resulting in the creation in a particular shape hole in the sheet. The major difference between blanking and piercing is that in blanking the cut out is the workpiece and outer part is scrap, while in piercing, the cut out is scrap and the outer sheet is the workpiece.
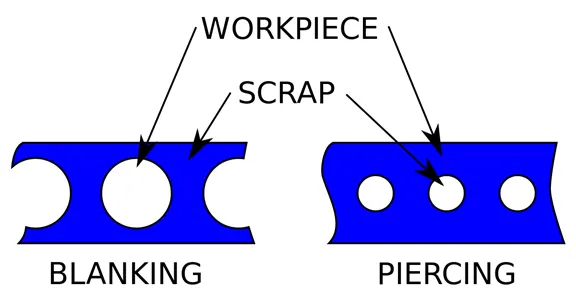
Fig.15 Piercing and Blanking
Features used in designing:
Emboss – Emboss command creates an embossing by modifying a body with faces created by projecting a curve/section along a direction. You can modify the emboss using options like endcap location and draft angle.
Master Section - Master sections are the guides for design requirements which decide the component packaging after technical (Styling, Concept or Class-A).
Mastic sealant : Mastic is a form of sealant or adhesive used to fill the joints or as a bond for different materials and gaps.
DRAFT ANALYSIS OF HOOD INNER PANEL & OUTER PANEL
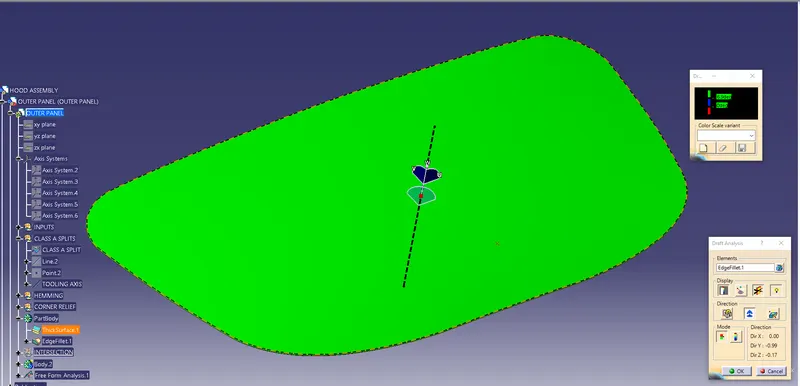
OUTER PANEL
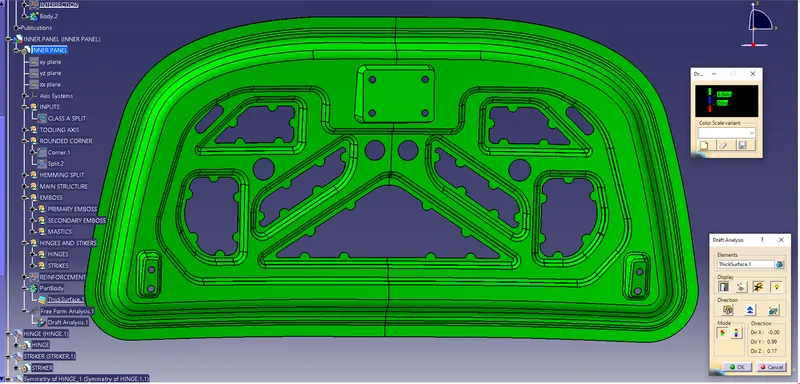
INNER PANEL
ASSEMBLY OF CAR HOOD
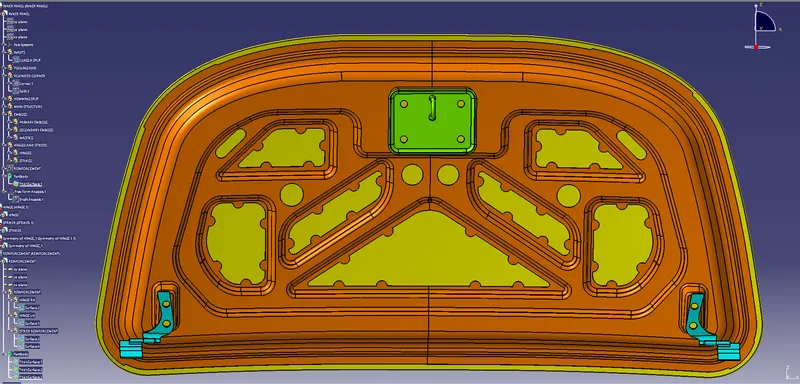
RENDERED IMAGE OF CAR HOOD