Hood design-Week 2
AIM- HOOD DESIGN (Hood Outer Panel, Inner Panel and the necessary reinforcements by following the Master Section)
HOOD
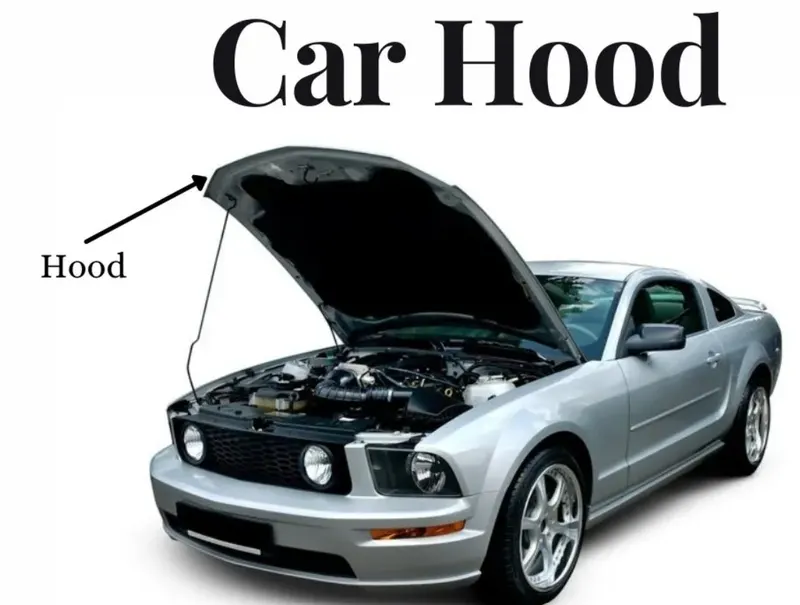
- Hood or bonnet in the car is front part which is used to close engine components.
- It is also consider as another type in the type of door in a vehicle as it consists of outer panel and inner panel.
- Hood is mostly constructed of steel sometime for aluminium.
- Inner panel provide strength while the outer panel function as metal cover.
PURPOSE OF HOOD
- Distribute the force direction away from passenger while collision.
- Pedestrian Safety.
COMPONENT OF HOOD
- OUTER PANEL
- INNER PANEL
- HINGES
- STRICKER
- SUPPORT RODS.
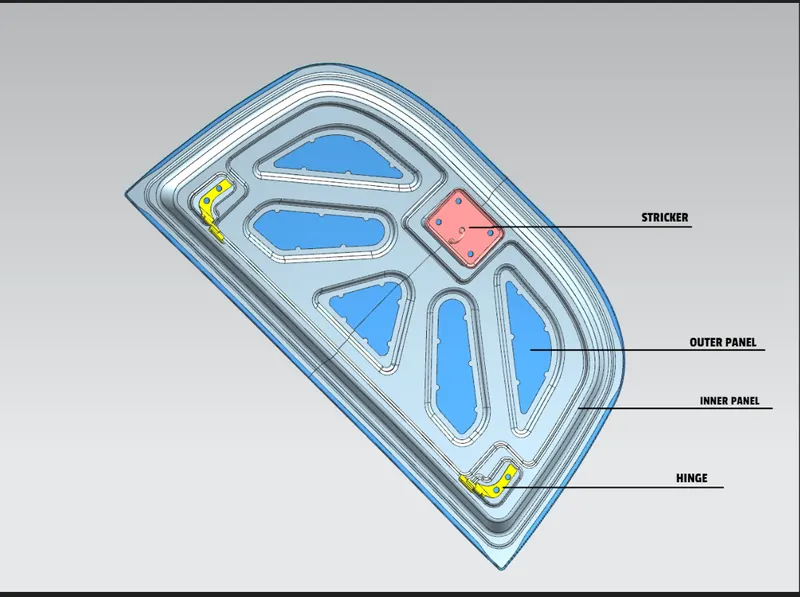
Design Criterion-
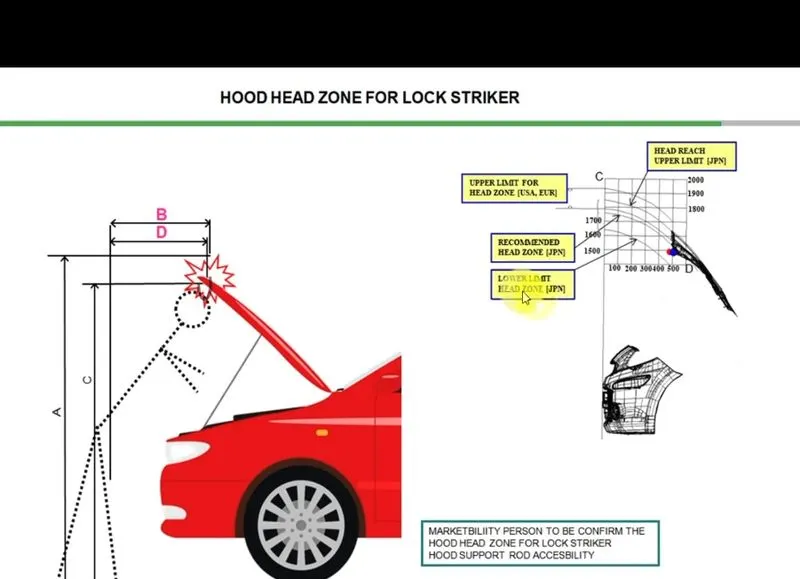
1.Hood Head zone
- When we design hood, we should considered about opening angle of hood.
- Openings angle of hood should be sufficient that if person open the hood its should not collide with the head.
- Height of hood in open condition will vary for different countries because of the average height of person in that country.
2.HOOD STAY(SUPPORTING RODS)
- It is supporting part which helps to hood while it is in open position.
- There are two type of hood - Support rod and Gas stray
- We have to decide the position of Support rod
- This position of rod will define the hood opening angle.
- It's so not be straight, instead provide it some bend , it will provide strength to rod(bend should be less than 35mm).
- It should be mounted on opposite side of battery.
- Gas stay is used to open hood which is automatic process.
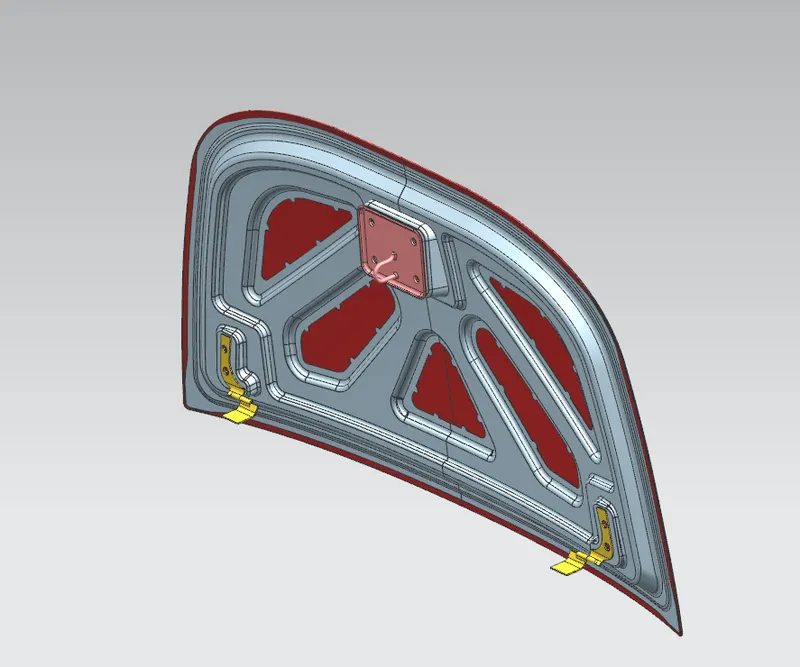
Reinforcement of Hinge and Stricker parts - As we add some weight to material (attaching flanges and Stricker to inner panel), so the inner panel will lost some strength at that location, so in to keep the component strong we will provide some additional thickness. This thickness is called reinforcement.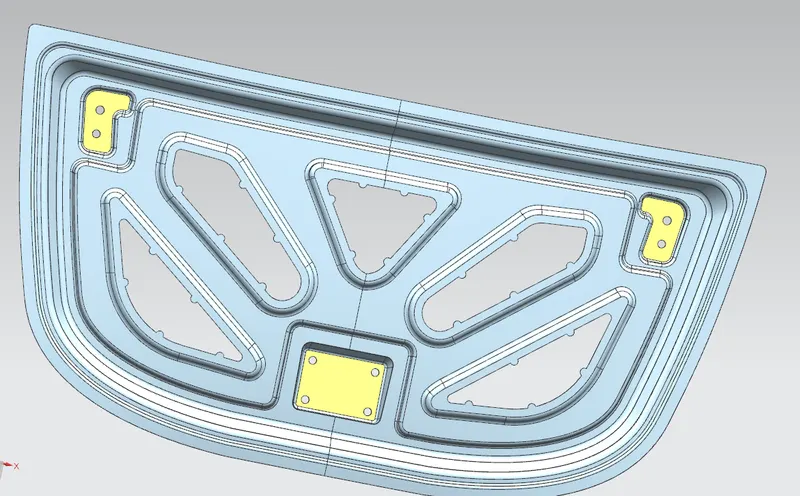
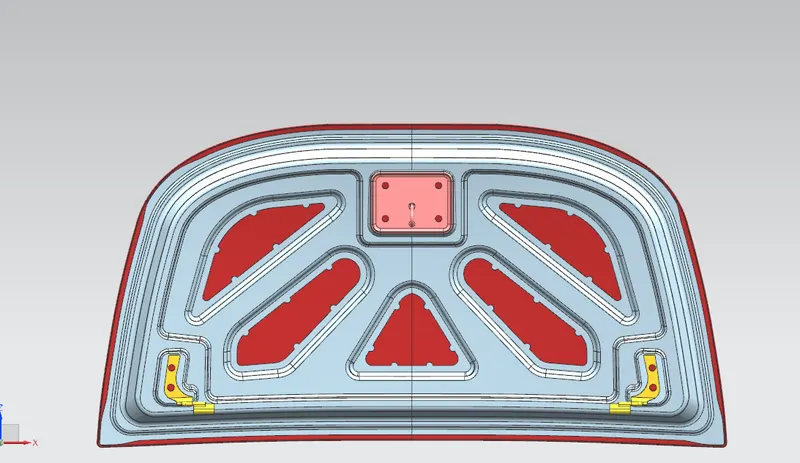
In the above image the yellow part shows reinforcement for hinge and stricker emboss. They will provide strength when hinges and Stricker are mounted to inner panel
3.NVH(Noise vibration harshness)
- We Should focus on reducing noise vibration harshness.
- This can be done by adding stiffner pad between inner and outer panel.
- Mastic sealant are also used to reduce the noise and vibration.
MASTIC SEALANTS
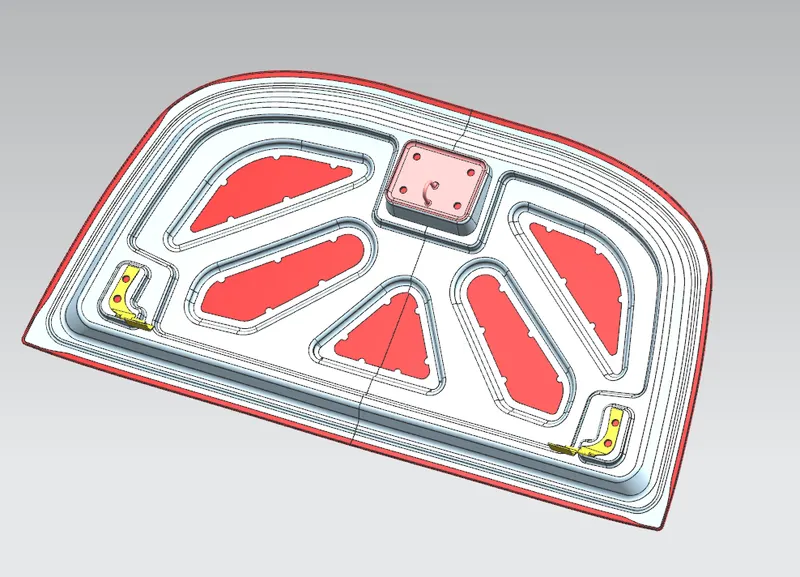
- Mastic sealant is a harder rubber or paste which is between inner and outer panel.
- It can adhere to any material.
- It provide stiffness up to 80 mm diameter.
- The height between inner and outer panel should be about 5 mm we are we are using mastic sealant.
- In below image the semi circular part showns the position of mastic point.
4.Pedestrian safety
- A pedestrian can be defined as a person who is walking in the road, the safety of pedestrian is very important while car accidents.
- As we know most of pedestrian death are due to brain injuries.
- EURO -NCAP Assessment is a team which will analysis all the test and check how much it is safer for pedestrian.
- WAP -the distance on which had impact on the car from the ground is called rap round distance
- So the child head impact zone - 1000 WAD to 1500 WAD.
- And the adult Head impact zone - 1500 WAD to 21000 WAD.
- So after improving inner panel ,the main motive should be to remove the material,than the part will become softer and if the person get hit there the impact will be less.
INPUTS
So we have received master section a class A surface and hinge assembly as well as Stricker.
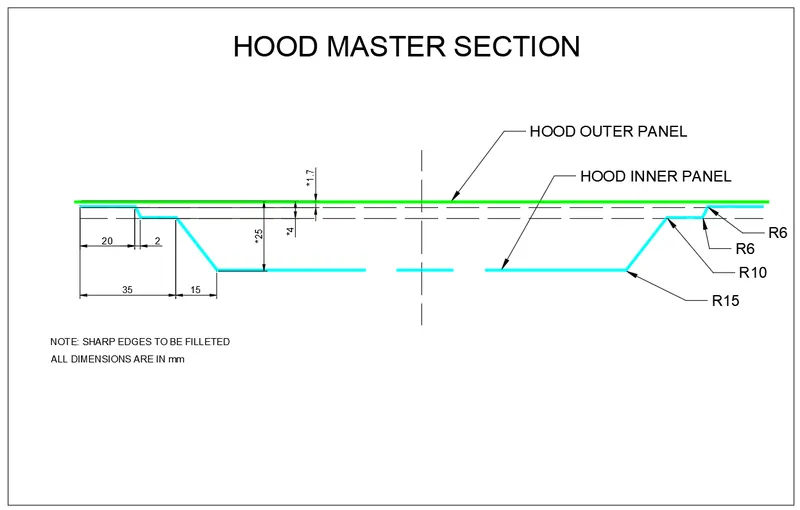
Hood Thickness Information
- Outer Panel Thickness = 0.75mm
- Inner Panel Thickness = 0.75mm
- Reinforcement Thickness = 1.5mm
Design of Hood Inner Panel: So with the help of master section we will first design our inner panel.
Inner panel
- The main purpose of inner panel is to give strength to our hood.
- It consist of emboss which provide stiffness and they are also used to divert force when there is collision from passenger towards Hinges.
- With the help of our input (out panel)we have design our half inner panel.
- And mirror it.
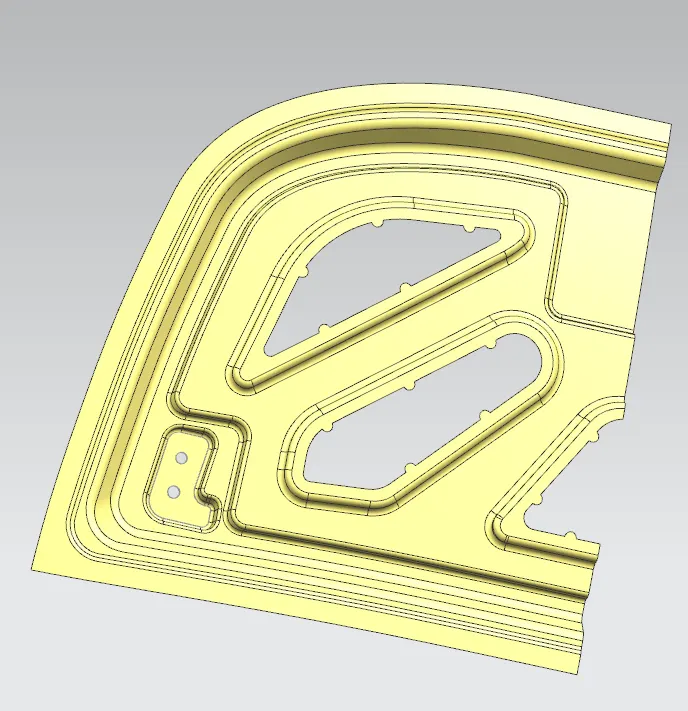
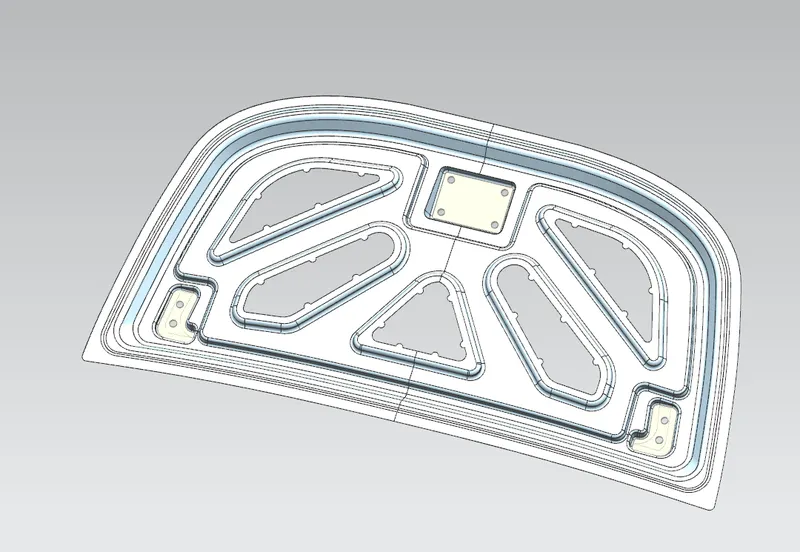
Image of Inner panel
Emboss- the main purpose of emboss is to provide strength to inner panel and to distribute the force produced during collision away from passenger into hinges.
EMBOSS FOR HANGES ASSEMBLY
HINGES ASSEMBLY
- Hinge assembly is used to open and close our hood.
- One side of hing assembly is mounted to inner panel of wood were as other side is mounted on the engine compartment.
- With the help of hinge axis we will place our Stricker.
- So we will make hinges emboss at first.
- After making emboss for hinge assembly we will mirror our inner panel.
- Now using assembly constrain, we have assembly with inner panel.
Creation of Latch tragedy and emboss for Stricker
Striker
Purpose of striker is to lock the hood to engine compartment. It is located at the inner panel of food and the position of the striker is decided by latches trajectory method.
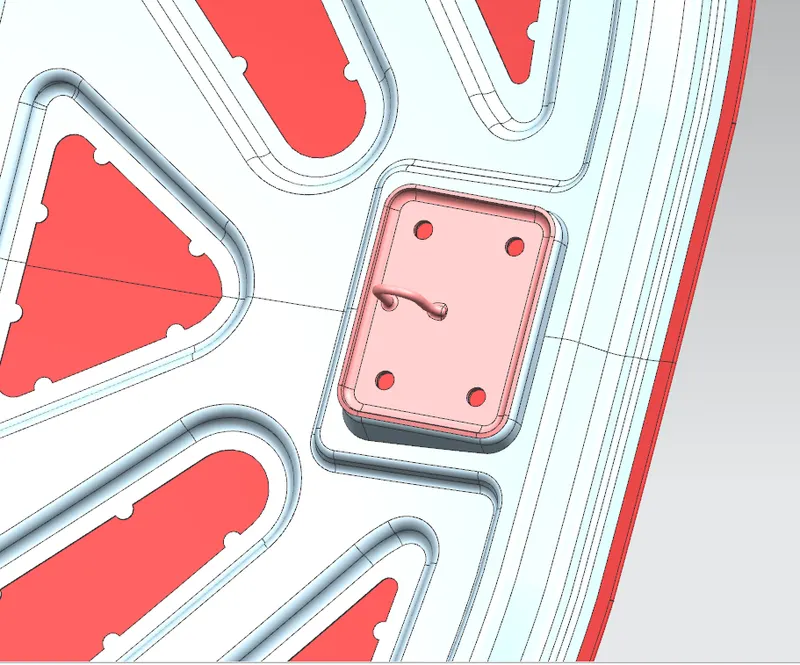
LATCH TRAGEDY - It is used to position the striker on hood.
- First we will make line on both on the Hinges assembly.
- Now we will make up point at the centre of this line.
- Now we have made a a circle on YZ plane
- We have drawn online which is horizontal and another line which is at certain angle.
- Now from second line we have drawn at tangent as soon in the blow image
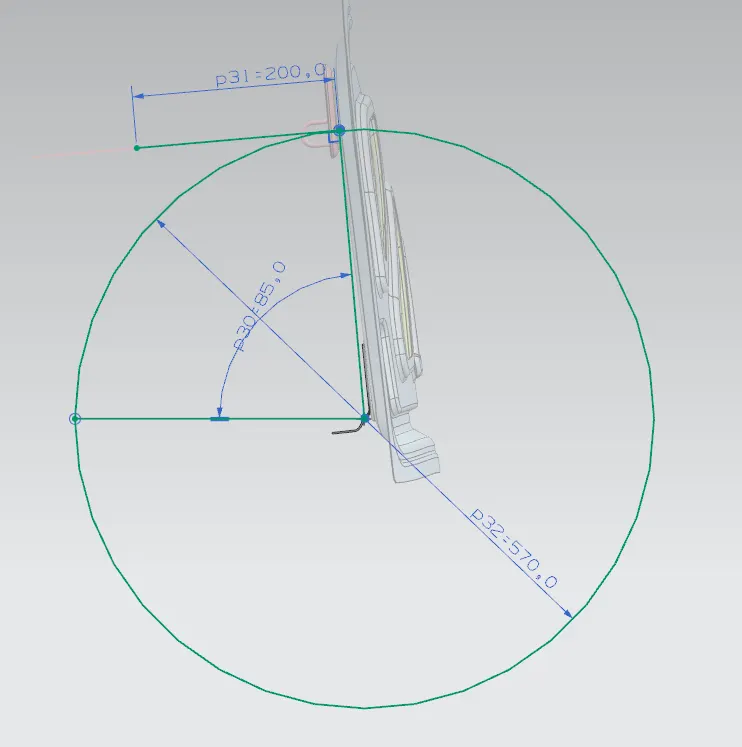
- Now we have drawn at tangent line on striker as soon in below image.
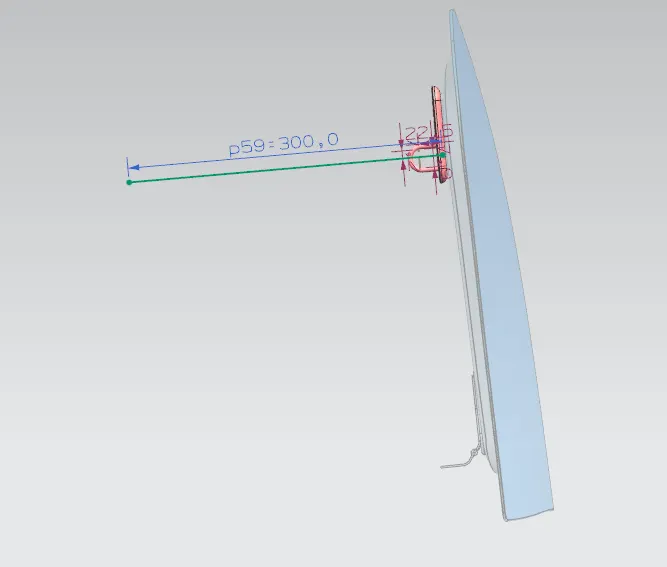
- Now we will use assembly constrain and use touch constrain.
- Now we can make emboss for our striker by extracting the face of it and using law extension command.
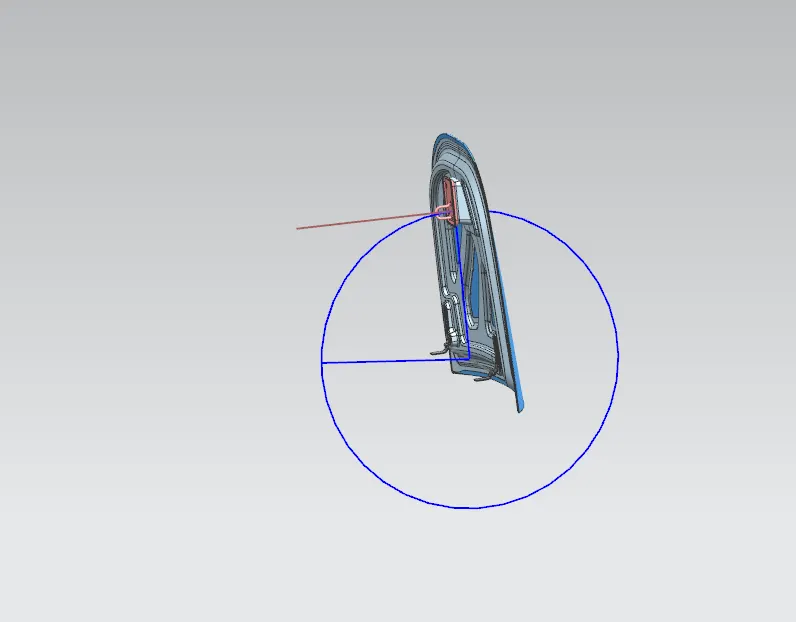
- Now we will offset the corner curve to mm inside and split the inner panel and provide it thickness of 0.75 mm.
Design of Hood Outer Panel
Outer hood
- The Outer good panel function as a metal cover for our food.
- Since it is visible to passenger, it provide aesthetic look to vehicle.
- Since we have received class a surface as our outer panel
- We cannot change the class a surface so we will work only on hemming and providing thinkness.
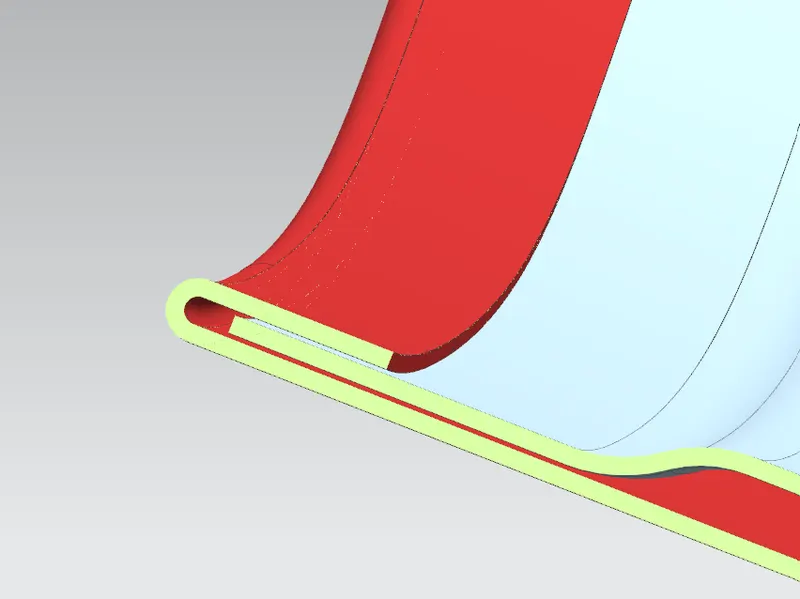
Hemming -
In hemming operation the edges of the parts are created round or folded so we connect another part together or to improve the appearance
Can be folded (close hemming)or it can folded over other part (open hemming).
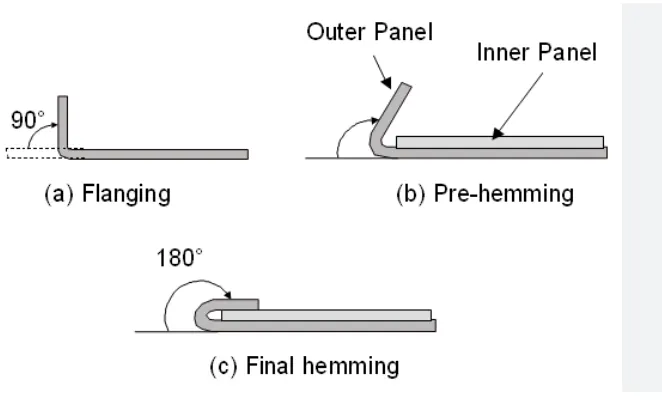
There are various types of hemming operations:
- Conventional die hemming
- Roll hemming
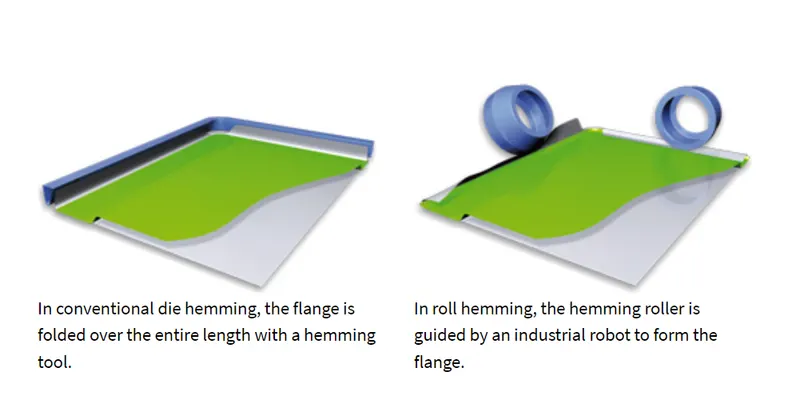
- In this with the help of master section we have created our Hemming in outer panel.
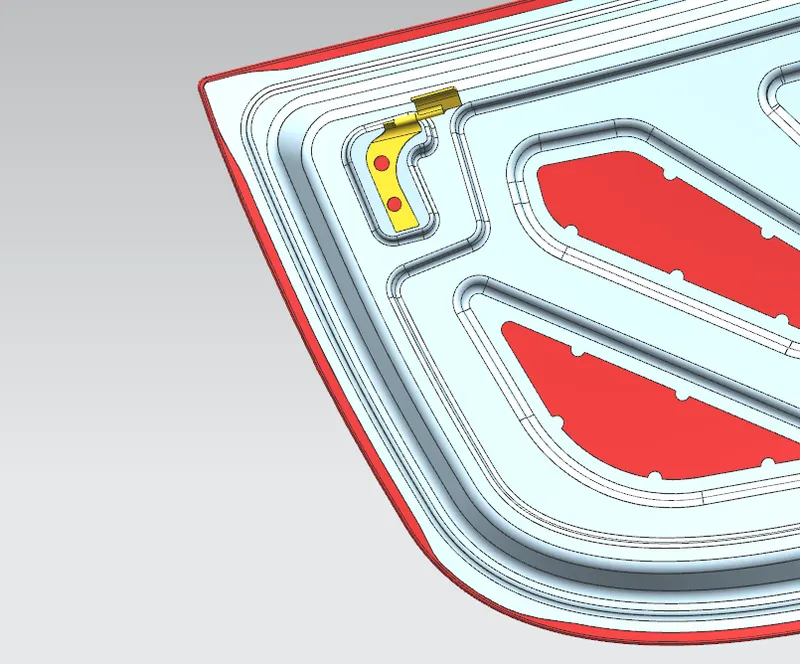
Corner Relief - This is provided in the corner because to avoid overlapping of sheet metal.
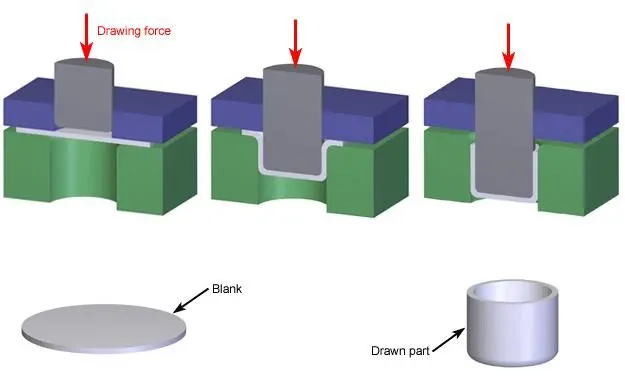
Deep Drawing
- This is a forming operation which used to produce a cup or a shell shapes in a sheet metal.
- So in this sheet is placed over a die and the sheet is pressed into die using a punch action.
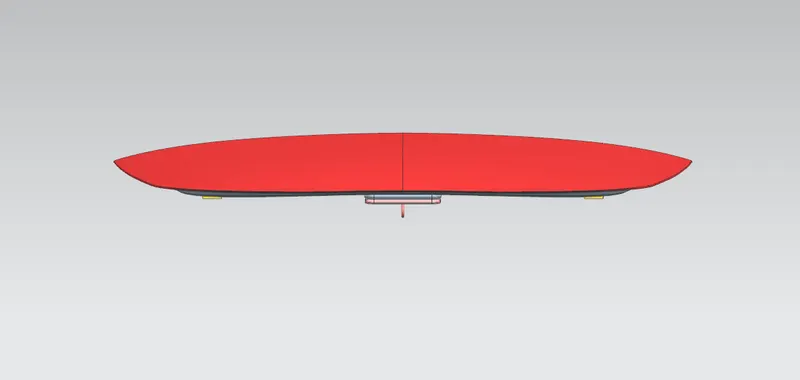
VIEWS