Hood design-Week 2
Desing and assembly of Hood using NX CAD
Hood:
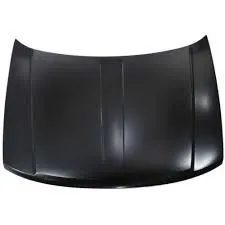
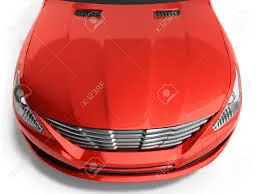
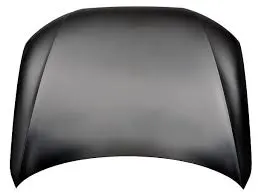
The hood is also known as a bonet of the car. The main porpuse of the hood is to cover the engine, to style or give looks to the front of the car and to dissipatate the force during a head on colission. The hood is made up of two pannels the Outer Pannel and the Inner Pannel. Both outer and the inner pannel are 0.75 mm in thickness. The hinge and the Latch are also mounted on the hood. Re-enforcements are provided at the latch and the hinge mounting, as that area becomes weak after making holes for the components. The re-enforcements are 1.5 mm in thickness.
Latch:
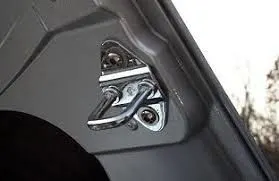
The latch, also known as a striker is a locking mechanism for closing the hood. The placement and the trajectory of this striker is determined by the circle drawn with pivotal axis of the hinge as its center. This is called 'latch trajectory'.
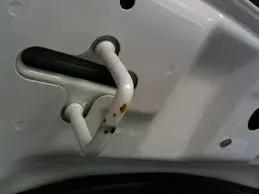
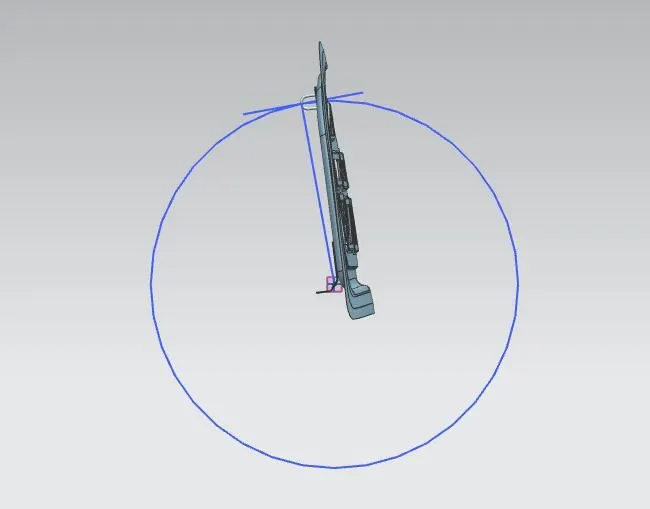
Latch Trajectory:
The latch trajectory is the path which the striker will follow when the hood is open/closed while pivoting on the hinge axis. The latch trajectory is taken as a circle with the hinge axis as the center of the circle. The striker is placed 90 degree such that it is tangent to the circle.
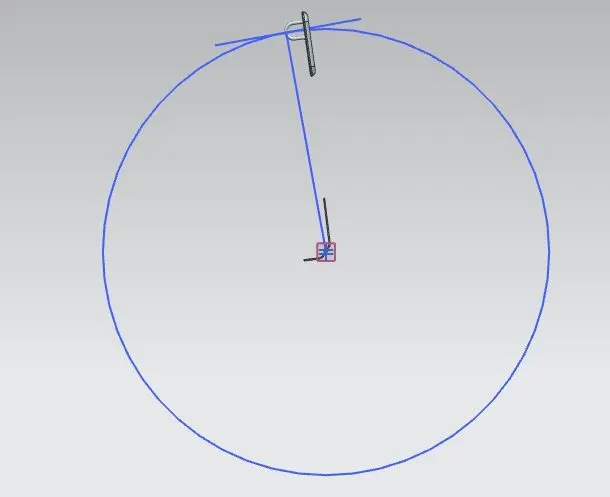
Hinge:
The hinge is used to pivot the hood on an axis to open/close the hood. The hinge is mounted on the hood and then attached to the engine bay. The hinge axis is used to determine the trajectory of the striker.
Hood stay:
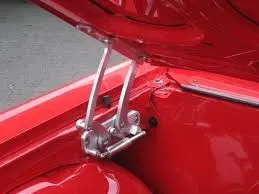
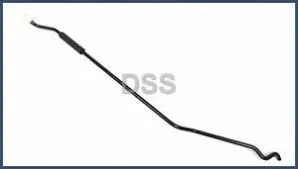
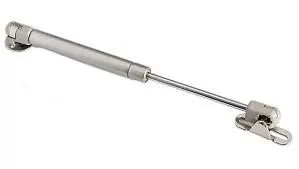
After opening the hood, the part which is used for holding the hood in it's place is known as hood stay. It can be a stick or a gas stay.
The stick is either mounted in the hood or in the engine bay. The shape of the stick depends on the space available.
The gas stay is used in expensive cars or cars which have a heavy hood.
Outer Pannel:
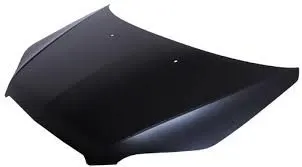
The outer pannel is the pannel we see most of the time. Its purpose is to style or to give looks to the car. This pannel is 0.75 mm in thickness.
Inner Pannel:
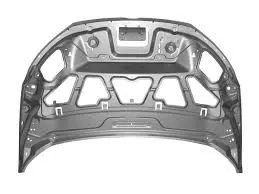
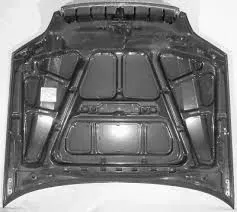
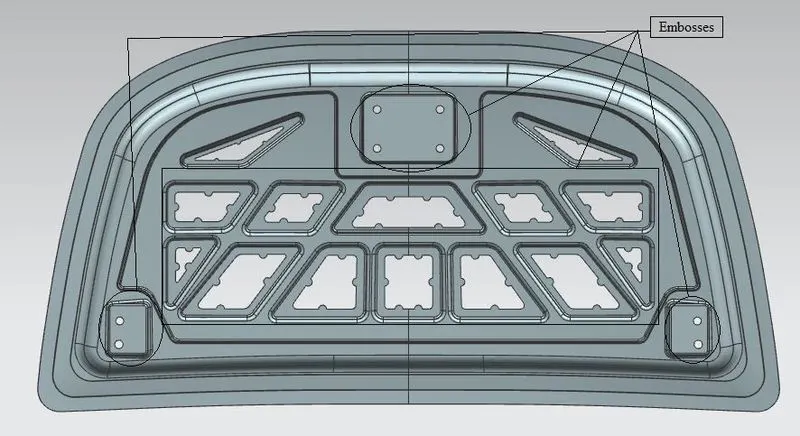
The inner pannel is a reenforcement pannel. The purpose of this pannel is to make the outer pannel strong. This pannel is also responsible for dissipatating or minimizing the force during a head on collision. The pannel is designed with V or Y shaped embosses to divert the force side ways so as to reduce the force acting on the cabin. This pannel is 0.75 mm in thickness.
Re-enforcement:
The re-enforcement are given at latch and hinge mounting. After drilling the holes the area of the mounting becomes weak, in order to strengthen the area plates of 1.5 mm thickness is applied in the area.
Emboss:
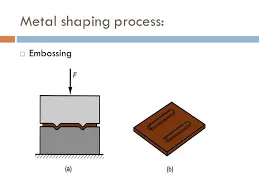
An emboss is a metal forming process in which a high pressure is applied on a die to make a imprint on the working surface. The imprint can be raised or sunken. In this process it is assumed that the metal thickness remains the same while embossing.
Mastic Data:
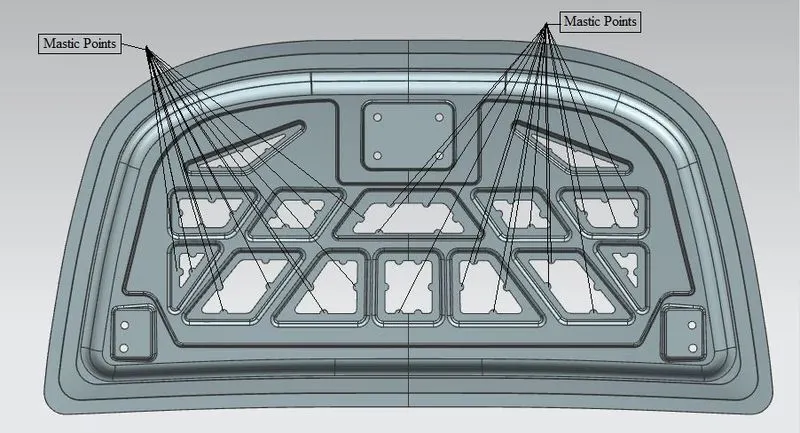
A mastic sealent is used between the outer and the inner pannel of the bond the two pannels. The mastic also provides the strength for the hood outer pannel. This can be a glue or a rubber which is placed in between the inner and the outer panel at points known as 'mastic points'.
Deep Drawing:
Deep drawing is a manufacturing process in which a sheetmetal is applied with a force by a metal die to form a desired shape. If the depth of the drawn part is more than the diameter of the metal flange the process is called 'deep drawing'. In the Automobile industry the deep drawing is done using rigid tools like punch, die and binders.
The deep drawing process is divided in three types:
- Deep drawing with tools
- Deep drawing with Activity mean
- Deep drawing with Energy mean
In auto industry, the binder closes the sheetmetal and the punch is applied in the die, this process is done slowly to prevent the formation of the wrinkles.
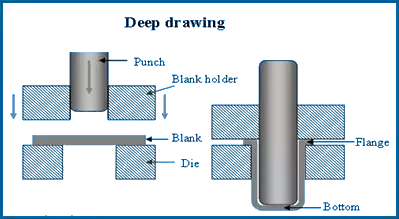
Hemming Process:
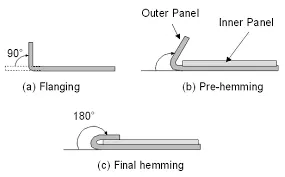
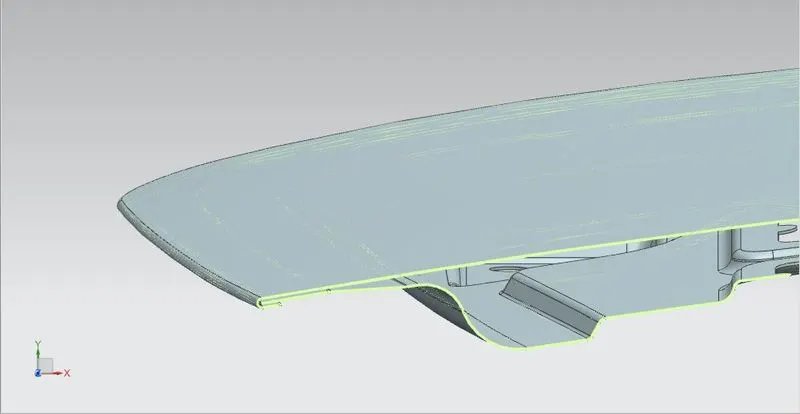
The hemming process is a metal forming process in which a sheetmetal is folded, or folded over another sheetmetal. This give the two metals parts a tight fit. This is used in automobile industry to create doors, hood, trunk, etc. The outer and the inner panels are fitted together using this process.
There are Conventional hemming and Roller Hemming. The roller hemming is used for hemming the hood outer panel. The conventional hemming is used for mass prodution.
conventional hemming:
Roller hemming:
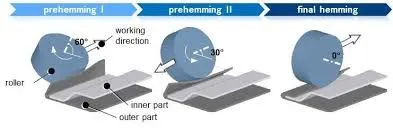
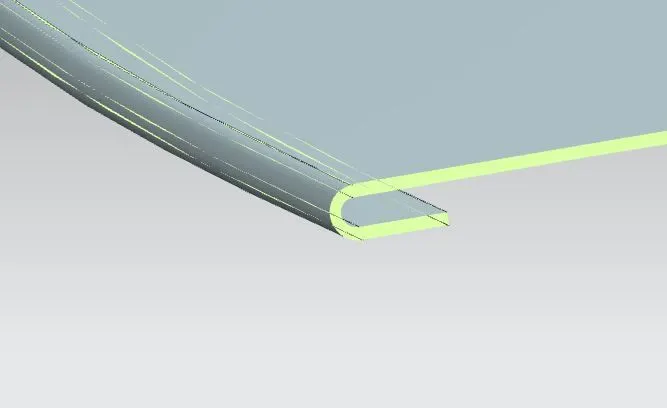
- Joining inner and outer panel using hemm.
Hood opening angle:
The angle at which the hood opens is hood opening angle. This angle varies depending on the region you live. This depends on the average height of a person in that perticular region.
Design of the Hood:
Master sketch provided:
Parameters for Hood design:
- Outer Panel Thickness = 0.75mm
- Inner Panel Thickness = 0.75mm
- Reinforcement Thickness = 1.5mm
Before assebly:
- Open the given body in an assembly folder (This folder is used to save all the parts)--> create a new part through assembly in the same folder for the inner pannel--> Extract the body and copy it to the inner pannel part navigator.
Commands used:
- Sketch: to make a drawing on the datum plane
- Datum: to make a reference plane using original plane.
- offset curve in face: to make curves from the edges of the face.
- Projected curve: to project a sketch on the face of the workpiece.
- Emboss: To create rise or a dent in the workpiece.
- Wave geometry linker: to copy curve/face of one part to the another part.
- Mirror assembly: to copy/mirror an assembly
- mirror: to mirror the workpiece on an axis or a plane.
- create new: to make a new part in the assembly
- add: to add an existing part to the assembly
- Extract body: to extract a copy of an already existing workpart.
- Trim sheet: This command is used for removing unwanted material from the workpart
- curve on surface: this command is used to create composite curves on a surface.
- offset surface: this command is used to offset an already existing surface.
Design of the Inner Pannel:
- Using the above extracted body offset the surface according to the master data provided
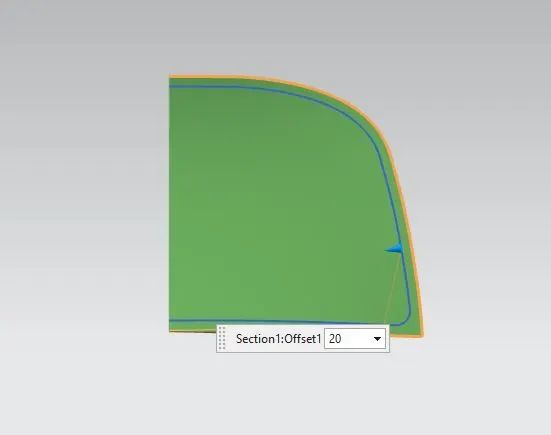
- Offset the body using offset surface command to 2mm--> Use offset curve in face command to make a curve 20 mm inside--> Use trim sheet to remove the inner surface of the sheet
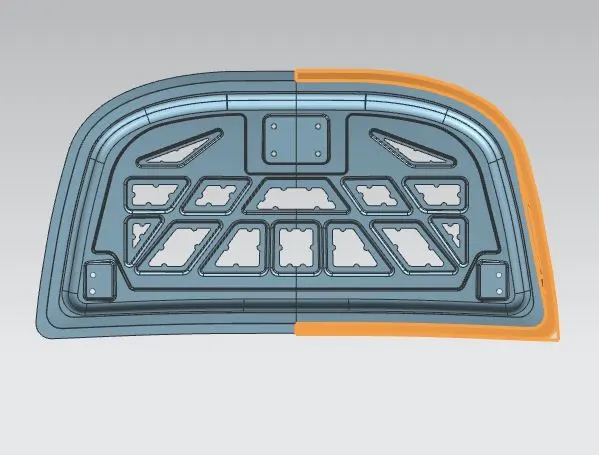
- Offest the body again using offset surface command to 4 mm
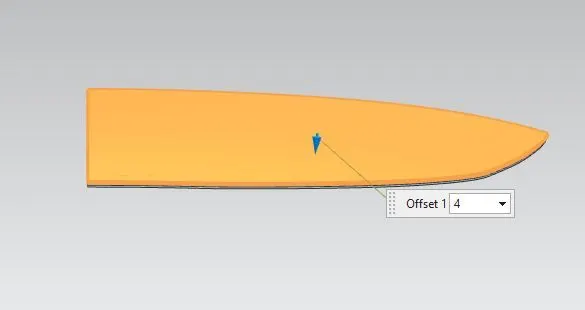
- Use Curve in face command to make a curve 20 mm
- Use trim command and trim the outer edges
- Use through curve command to join the two surfaces
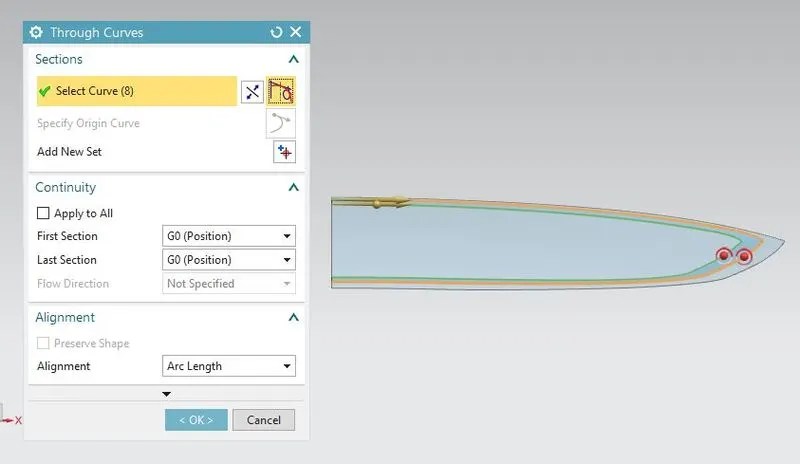
- Offset the body again to 25mm depth--> Use offset curve in face to make curve on the surface.
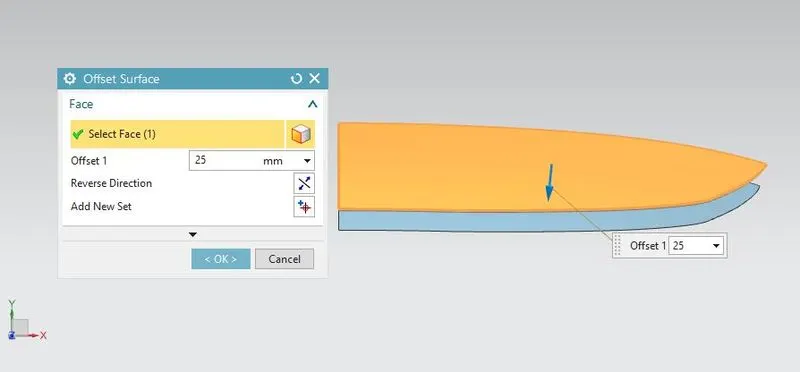
- Use trim sheet and remove the outer edges
- Use Law Extension command to join the pannel
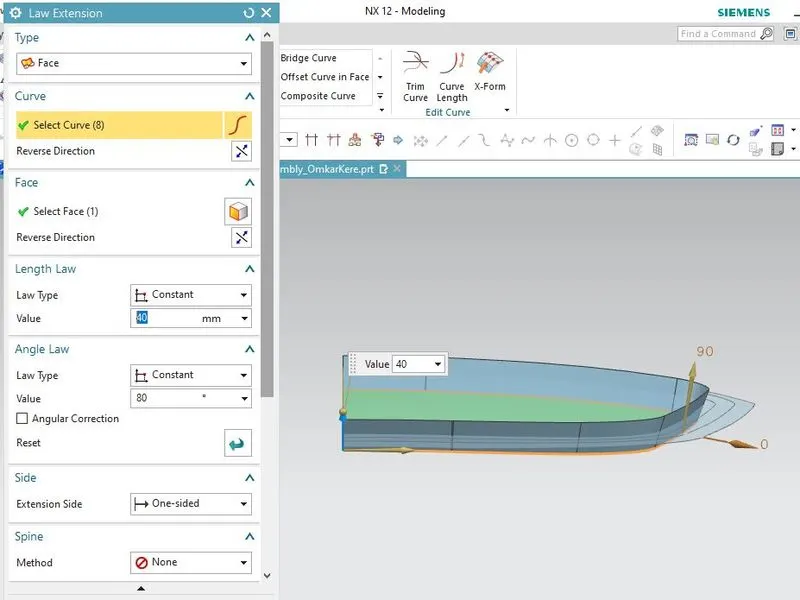
- Use trim and extend to join the faces
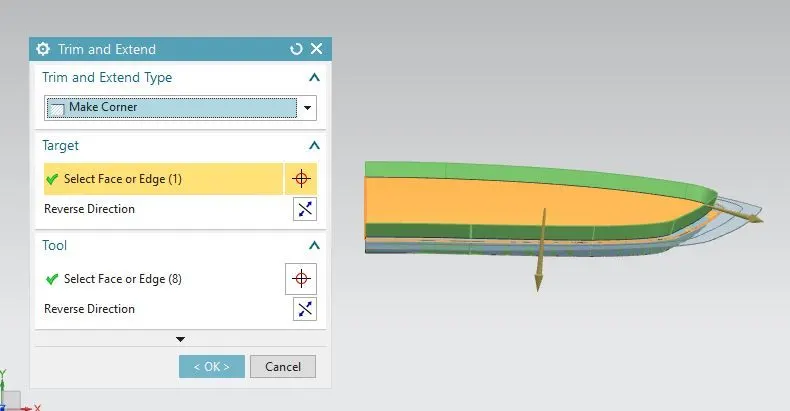
- Use face blend to smoothen the joints of the two faces with blend radius 6 mm
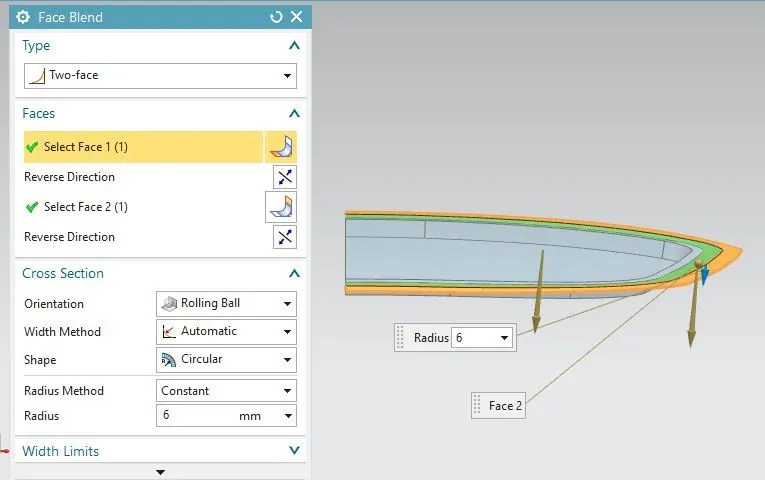
- Repeat with all the other faces
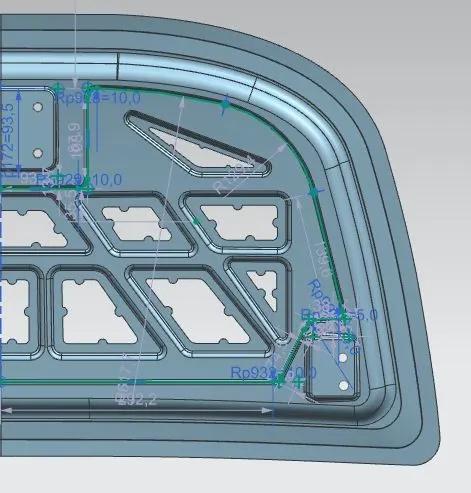
- Make a sketch to make an emboss
- Make the sketch on a plane and then use project curve command to project the sketch on the surface of the inner pannel.
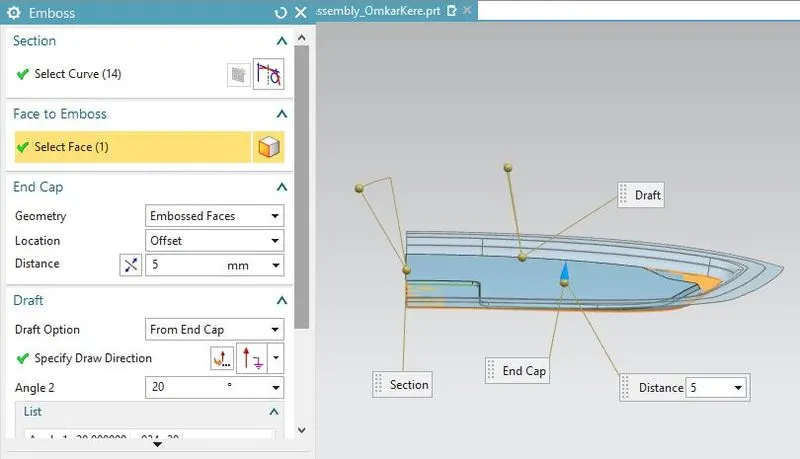
- Use emboss command to emboss the sketch to 5 mm and a draft angle of 20 mm
- Use edge blend command to give curve to the edges of the emboss
- Make a sketch to make embosses this should be in V or Y direction in order to dissipatate the force
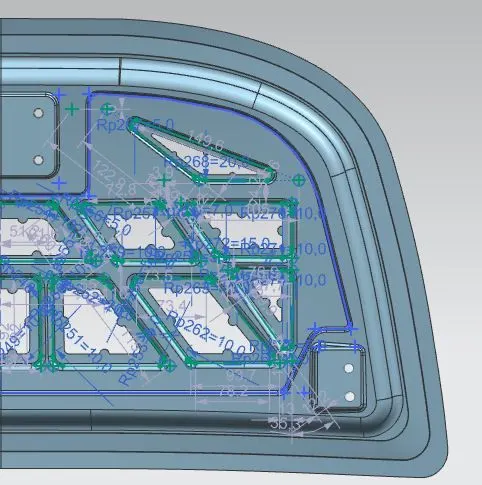
- Use emboss command to make embosses as above to 5 mm
- Use edge blend to curve the edges of all the embosses
- Make sketches on the plane and use projected curve to project the curve on the surface of the face
- Use emboss to make make an emboss
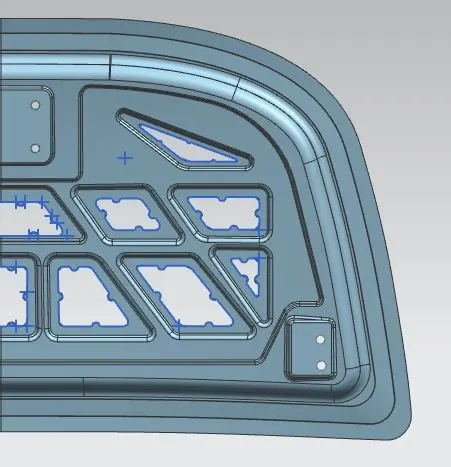
- Use trim sheet command to cut the holes in the embosses as shown above. Make mastic points as shown above.
Making hinge mounting:
- Make a datum plane--> used move object command to move the plane and make it approximatily parallel to the hood inner pannel.
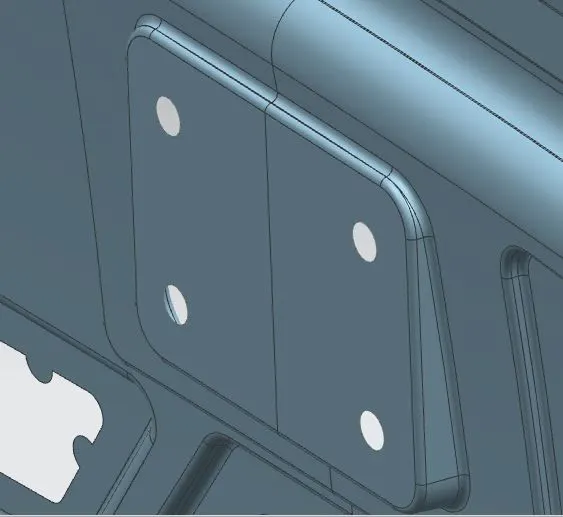
- Make a sketch on the plane to mount the hinge and use emboss command to make the emboss
- Use edge blend to make the edge curved
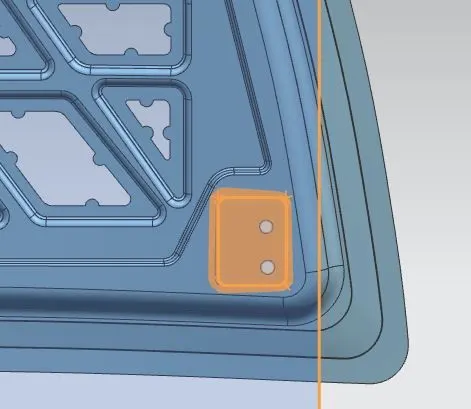
- Use mirror command to mirror the pannel
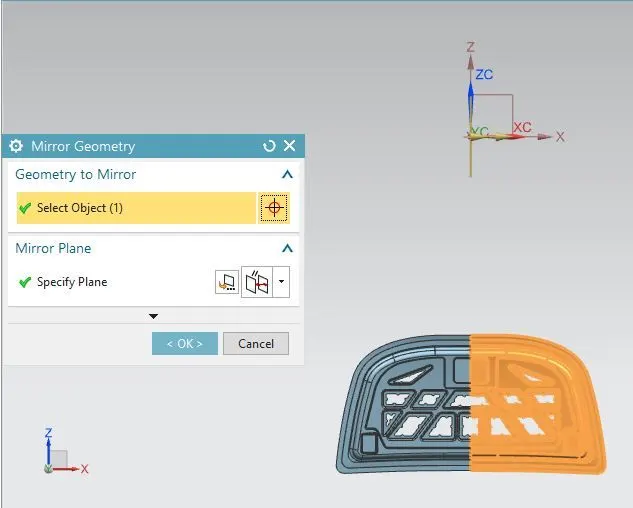
- Use sew command to make the two halve as one
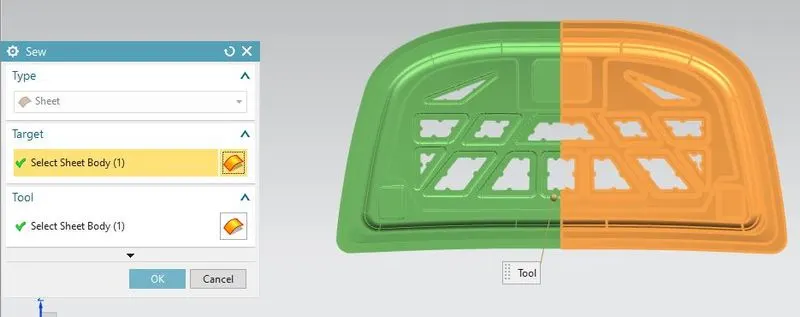
Making mountinf for the strike/latch:
- Activae the assembly folder and use point command to mark the point on the center of the both the hinges--> make a 3D line--> make plane perpendicular to the line in the center--> Draw a circle upto the latch ---> bring the latch close to the hood--> palce the latch 90 degree to the circle path
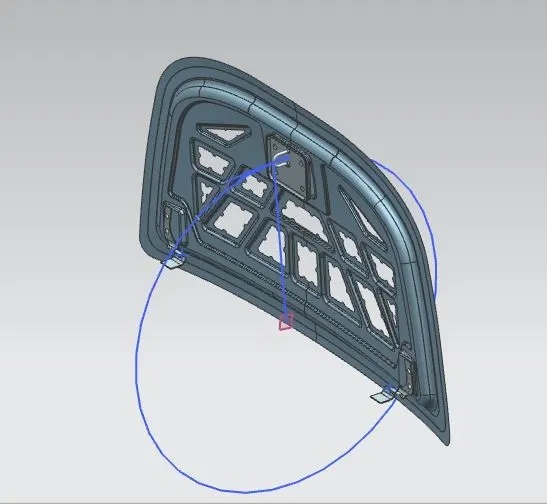
- After placing the striker use wave geometry linker to copy the face of the striker on to the inner pannel--> Use the emboss function to make the emboss and use edge blend to curve the edges
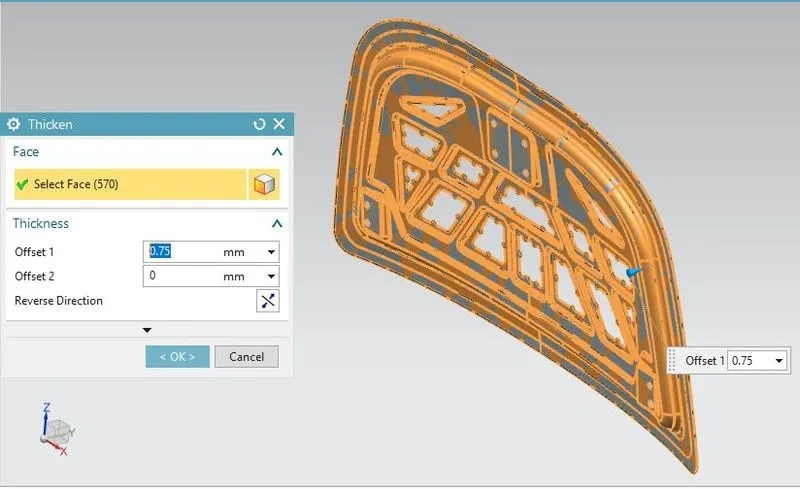
- Use thicken command to thicken the inner pannel to 0.75 mm (Thickenn the pannel upwards)
Making Outer Pannel of the hood:
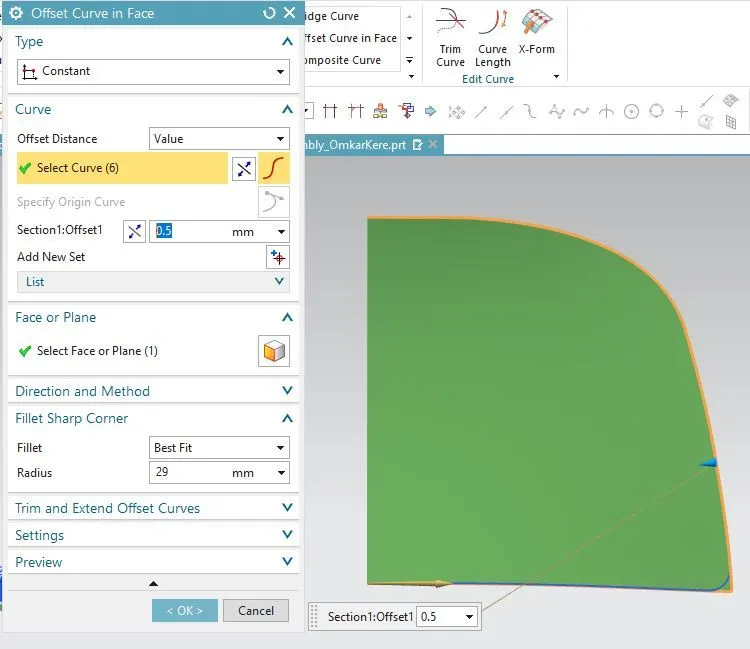
Create a new part through the asembly and add it to the same folder as the inner pannel--> Offset the outer edges of the body to 0.5 mm and sharp corner radius 29mm
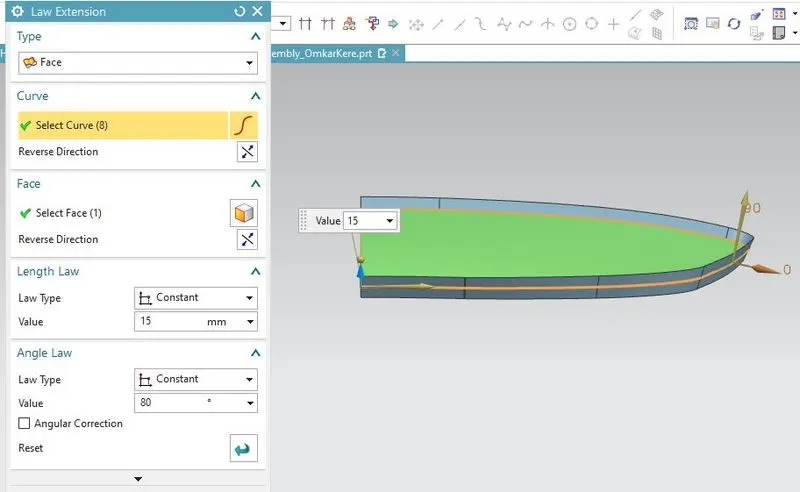
- Use law extension to extend the curve made before
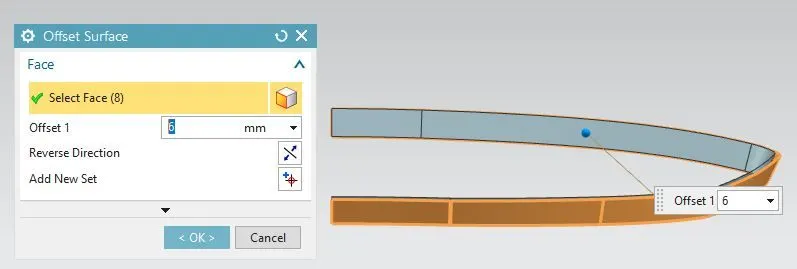
- Use off set surface to offset the above surface to 6mm
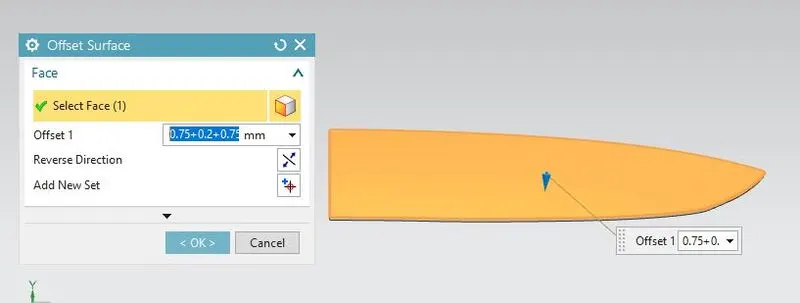
- Offset the main body to 3.15 mm
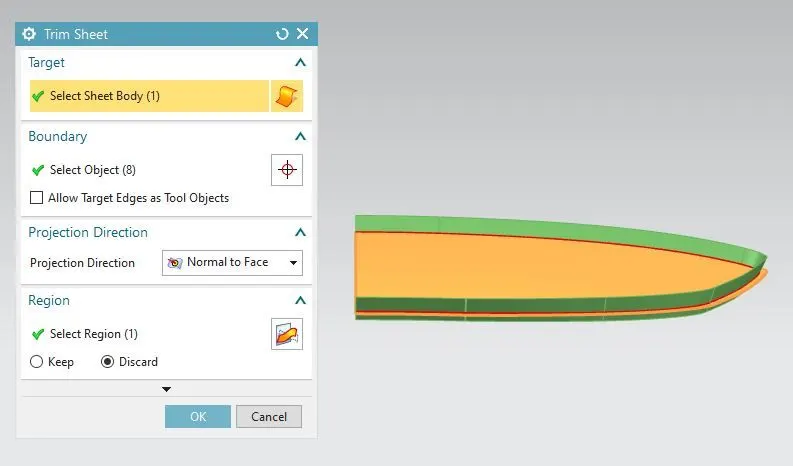
- Use trim sheet to cut the body using the above created surface
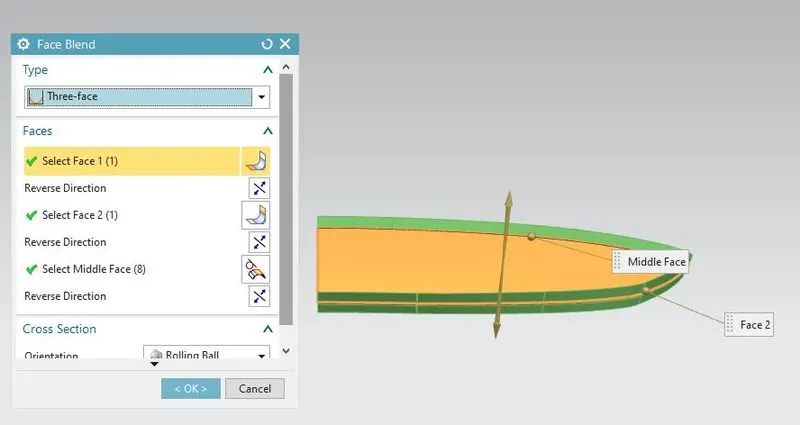
- Use face blend to make the hemm--> Use type: Three face--> Select the top and the bottom face as face 1 and 2 and the above offest surface as middle face
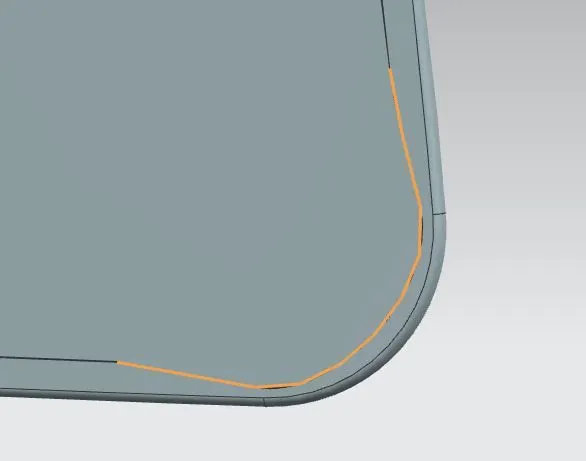
- Use composite curve on face to make the curve for the rear relief for the hemming
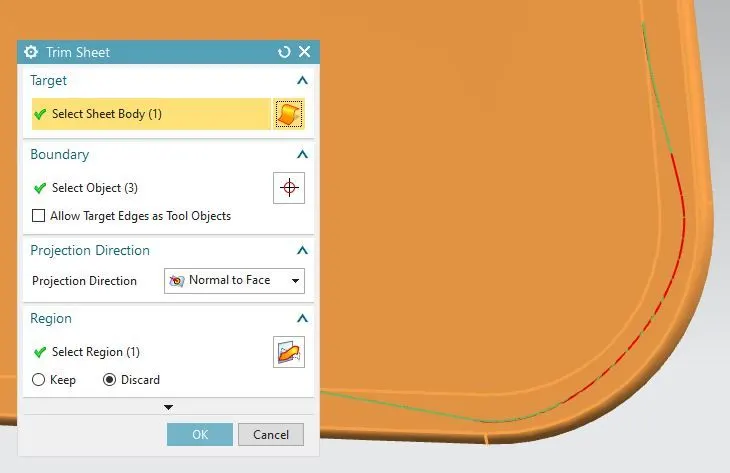
- Use trim sheet command to cut the sheet
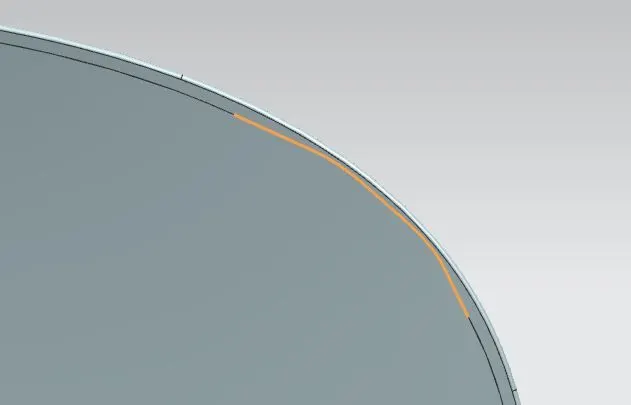
- Do the same for the front relife
- Mirror and sew to finish the outer pannel and use thicken command to thicken the pannel by 0.75 mm
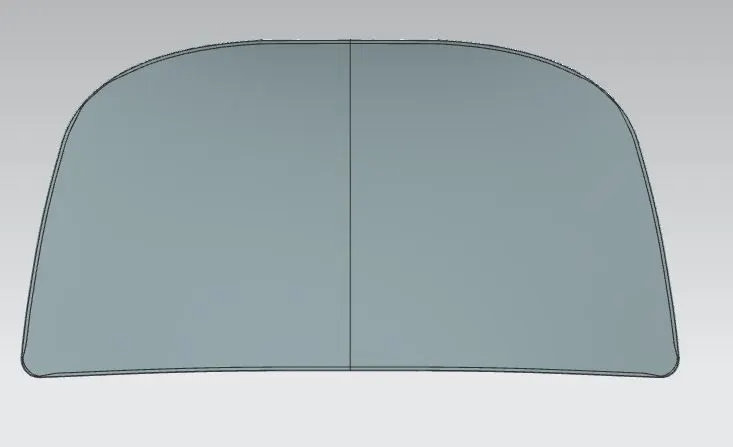
- Using wave geometry linker make the re-enforcements for the striker and the hinges as seperate parts
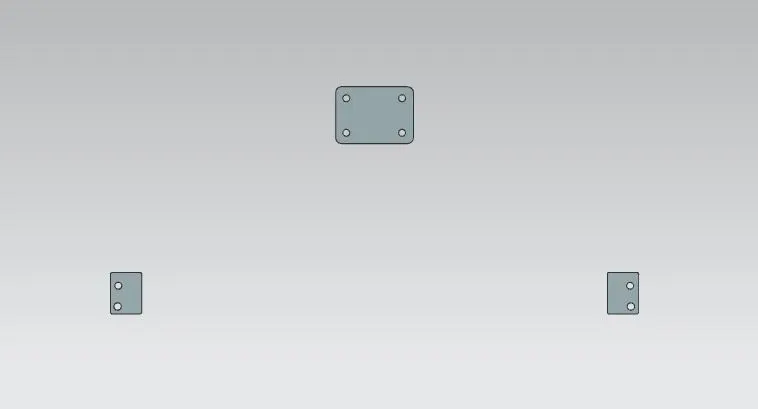
- Use wave geometry linker to make the holes for the stiker and the hinge
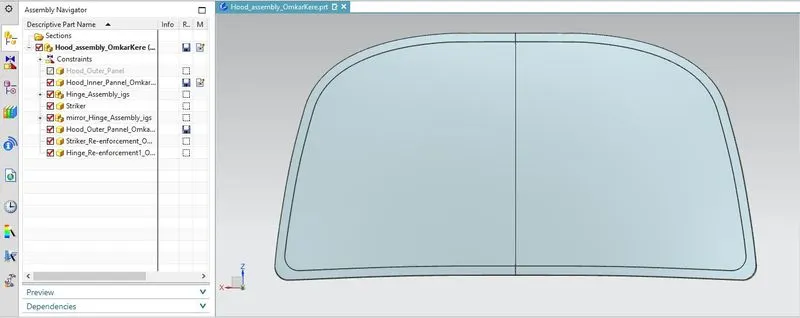
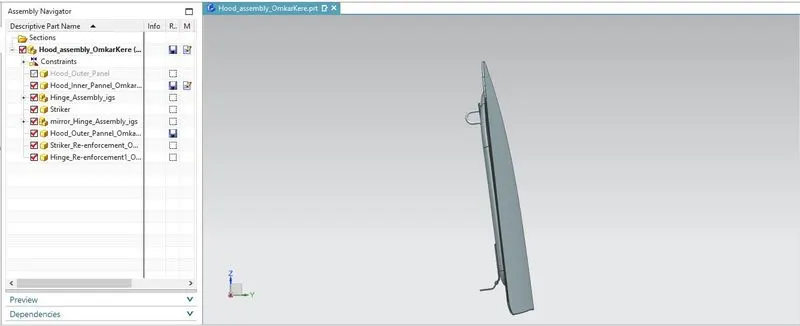
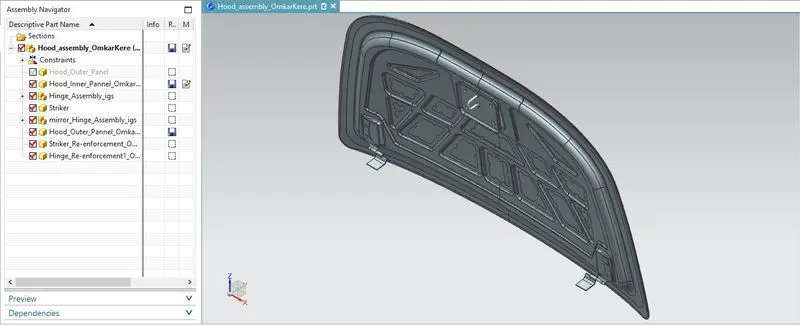
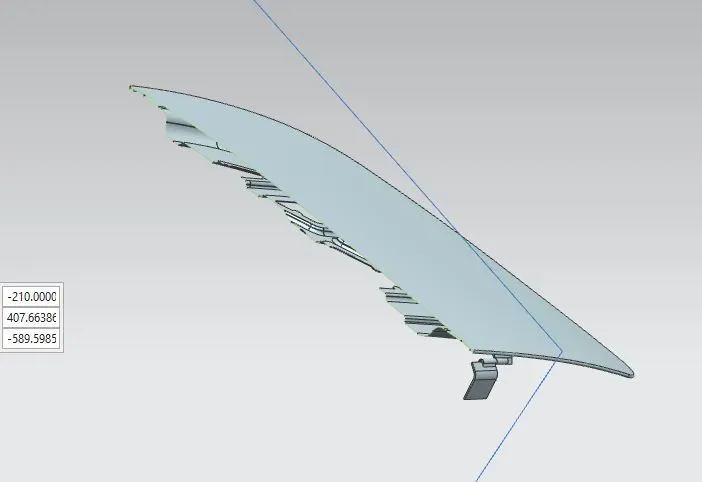
Images of the assembled hood:
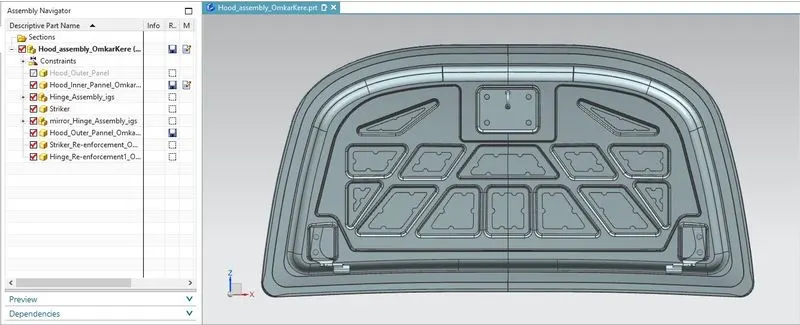
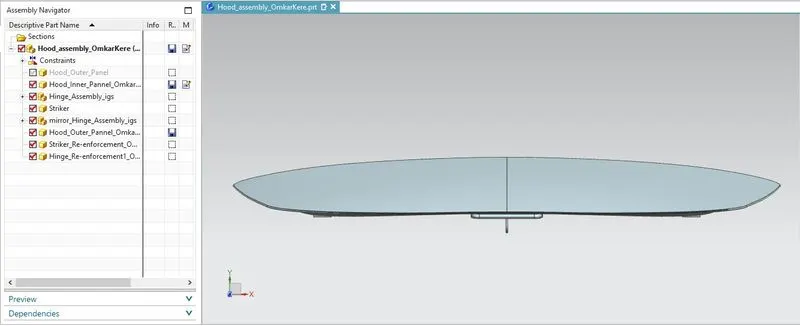
Conclusion:
- The hood was designed using the given master sketch and all the other paramater using NX CAD. Both the outre and inner panel were designed. All re-enforcemets for the striker and the Hinge were created. The final hood was assembled in the assembly.