Fender Design Challenge
DESIGN OF CAR FRONT FENDER USING NX-CAD
Objective: The aim of this project is to complete the design of an automotive front fender by adding mounting brackets to the fender.
1.0 Introduction
Fender :
A fender is a body part of a vehicle designed to provide an aesthetic appearance and also to shield regions of the vehicle from damage and protect pedestrians from debris thrown out by the travelling vehicle. The front fender on an automobile, also called the front quarter-panel, is a fender in the front of the vehicle bridging the bumper, engine compartment/drip area, engine cowl, A-pillar, front door frame, sill, and wheel well. The front fender must help secure the bumper, the wheel baffle and splash guard to protect the engine compartment from gravel, sand, mud and other debris thrown off by the rotating front wheel, and prevent debris from injuring pedestrians.

Fig. 1 Fender
Types of Fender:
Automobile front fenders generally fall into one of two types:
1) Full bumper type
2) Half bumper type
1) Full bumper type:
In a full bumper type, the front fender extends all the way to the bumper. No longer common, these designs have the disadvantage in that they typically lead to greater material wastage as a proportion of the sheet metal used to form the panel. They also don’t allow for cheaper and lighter plastic material to be used to form the bumper panel.
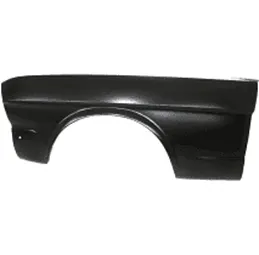
Fig 2 – Full Bumper Type Front fender, 1965 Ford Mustang.
Half bumper type:
The half bumper fender divides the area previously covered by the full bumper fender into two regions: the fender region and the bumper region. The fender region thus covers a smaller surface area than in the full-bumper type. The remaining bumper panel region can be made of cheaper and lighter plastic material, leading to production economies. Also, because the sheet metal in the half bumper covers a smaller area, two fender panels can be formed from one sheet metal blank, thus economizing on materials wastage.
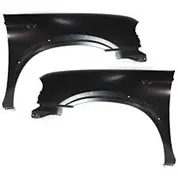
Fig 3 - Half bumper type
Materials used for the fender:
Fenders are typically made from 0.75mm steel sheet metal. Other materials can also be used, such as aluminum, carbon-fiber reinforced plastic, fiberglass, and other materials. The main tradeoffs are in weight, strength, and cost.
2.0 Design Considerations for fender
Fender design should take into account safety standards, especially for the wheel arch, styling, and aesthetics. In terms of aesthetics, and important design objective is to obstruct views of unsightly areas such as the engine compartment. This can be achieved by angling flanges across the line of vision to conceal the engine compartment from the viewer.
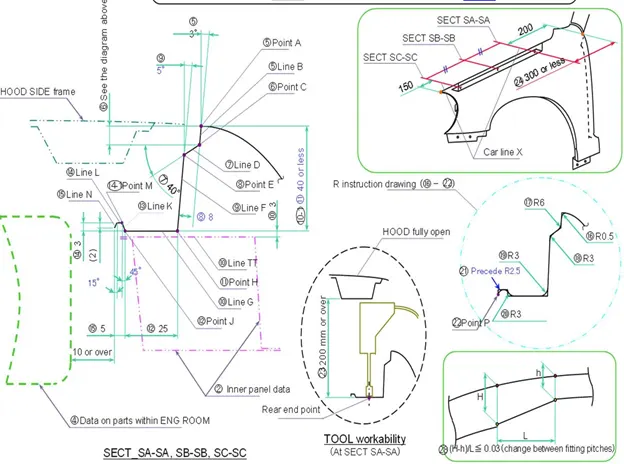
Fig 4 Fender Master section
2.1 Types of mountings provided on Fender:
A front fender typically features five types of mountings to affix the fender on the vehicle frame and also attach to the fender the wheel baffle and splash guard, and the bumper panel. Additionally, these mountings serve to optimize NVH, or noise, vibration and hardness.
1) Drip area mounting
2) Bumper mounting
3) Sill mounting
4) A-pillar mounting
5) Splash & Baffle mounting
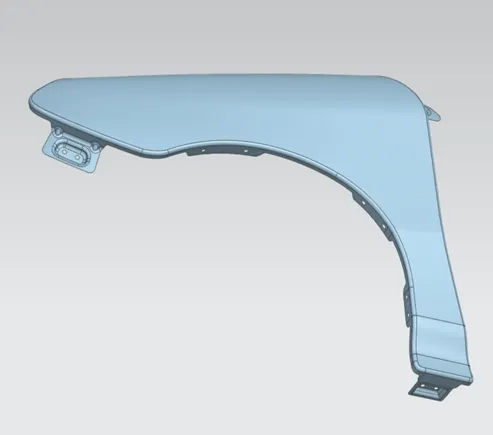
Fig 5 Fender Mountings
1) Drip area mounting:
This is the most important fender mounting, as it provides the stability for the fender, prevents dripping into the engine compartment, and obstructs unsightly views into the engine compartment. The drip area must allow between 150-250mm for cowl mounting & wiper motor mounting and 150mm for the headlamps mounting. To avoid springback in the manufacturing process, the maximum depth of the drip area should not exceed 40mm. All mounting holes must have at least 5mm clearance for proper mounting of fasteners.
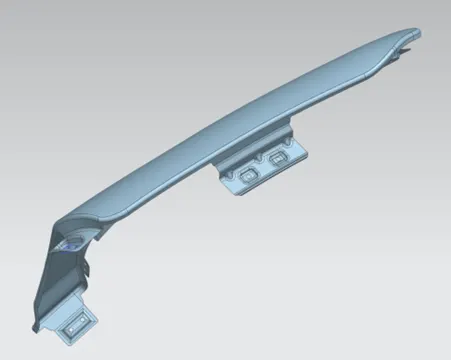
Fig 6 – Drip Area Mounting
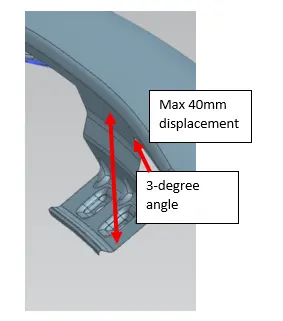
Fig 7 Drip Area Mounting Key Design Considerations
2) Bumper mounting:
The bumper mounting joins the front fender to the bumper panel. It should allow 150mm clearance for the headlight mounting.
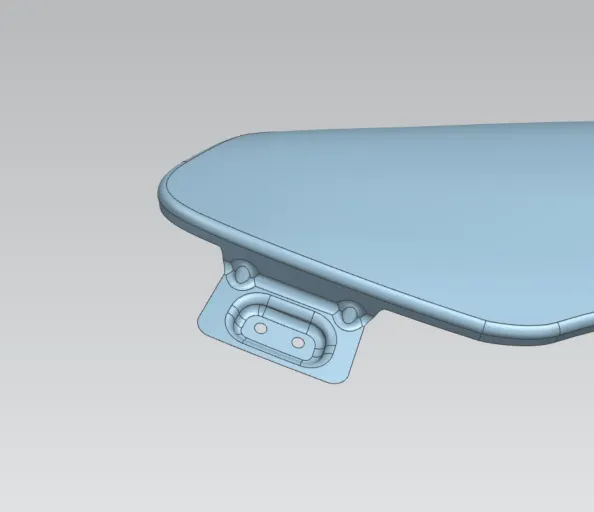
Fig 8 - Bumper mounting
3) Sill mounting:
The sill mounting is situated at the lower end of the fender. It joins the bottom of the fender with the frame of the car near the rocker panel. By securing the fender, it adds structural integrity needed for safety concerns, and helps reduce NVH.
Fig 9 - Sill Mounting
4) A-Pillar mounting:
The A-Pillar mounting joins the front fender to the A-Pillar, the vertically-angled pillar that supports the roof at the front side of the vehicle. The fender mounts with the A-Pillars to enhance the structural integrity of the vehicle in case of crash impact, and to reduce NVH.
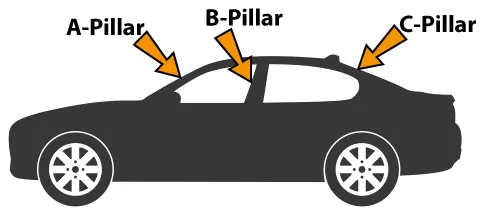
Fig 10a - Pillars
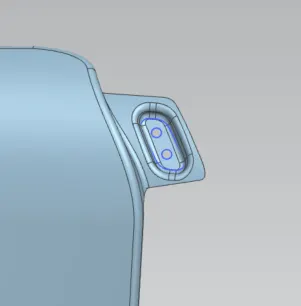
Fig 10b - A-Pillar Mounting
5) Splash & Baffle Mounting:
The Splash and Baffle Mountings are provided along the wheel well of the fender. These are used to attach the Splash Guard and Baffle, which in turn protect the engine compartment on interior of the vehicle from debris kicked up by the rotating motion of the front tire. The Splash Guard and Baffles are typically made of light weight plastic and are mounted to the fender.
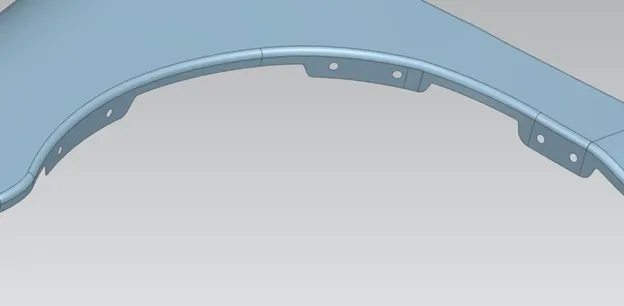
Fig. 11 - Splash & Baffle Mountings
6.2 Images of Front Fender
Front view
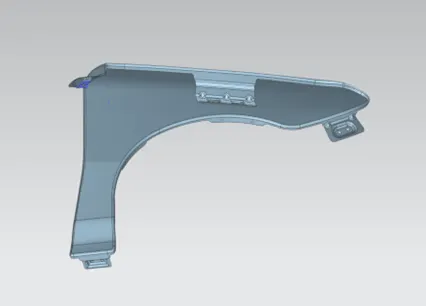
Fig 12 – Front View
Top View
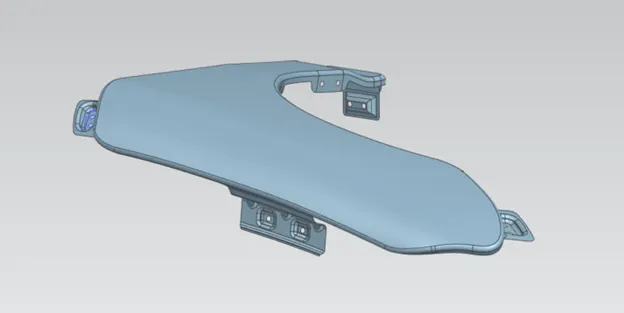
Fig 13 – Top View
Side View
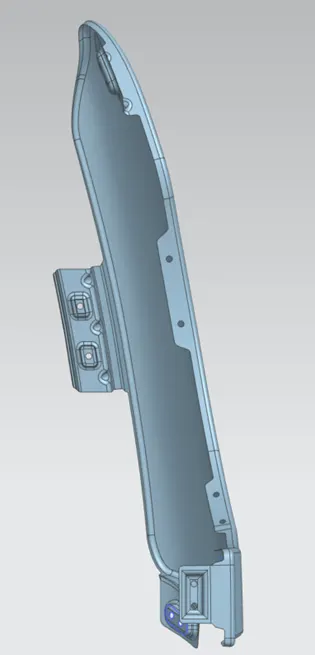
Fig 14 – Side View
Isometric view
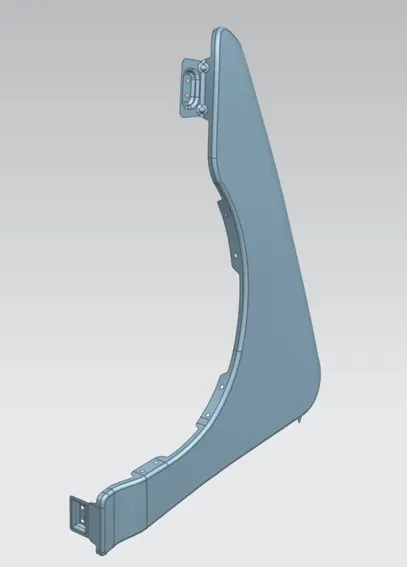
Fig 15 – Isometric View
Conclusion: We successfully completed our Front Fender by adding mountings in accordance with the master section of the fender.