Fender Design Challenge
- What is Fender?
It is the automobile part framing a wheel well. Its major purpose is to prevent sand, mud, rocks, liquids, and other road spray from being thrown into pedestrians or other vehicles by the rotating tire.
The fender’s wheel arch needs to be large enough to allow the full range of tire motion on the suspension without touching the interior of the wheel well.
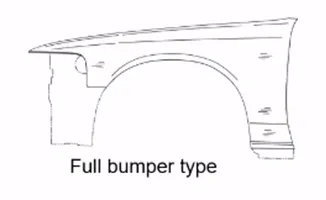
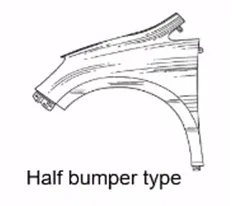
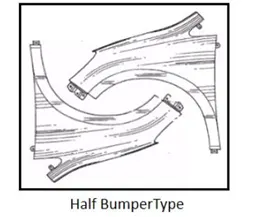
There are two types of fenders. One is full bumper type, and the other is half bumper type. The half bumper type is commonly used nowadays because it can reduce the material uses during manufacturing process by minimizing the scrap. It also allows to make bumper with more plastic materials and less steel, which leads to weight reduction of the vehicle.
- Fender Design
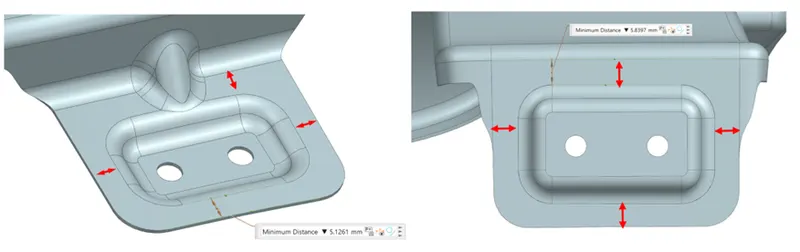
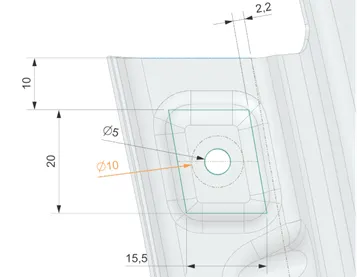
This design follows the given fender’s skin data and a provided mater section for the drip area. The thickness of fender is 0.75 mm, and all sharp corners are removed with fillets (>= 3.75 mm) for the safety. Plus, every mounting emboss is 5 – 10 mm away from edges to prevent fails while deep drawing process.
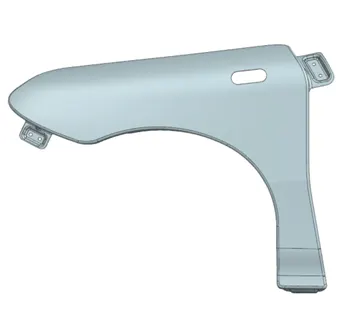
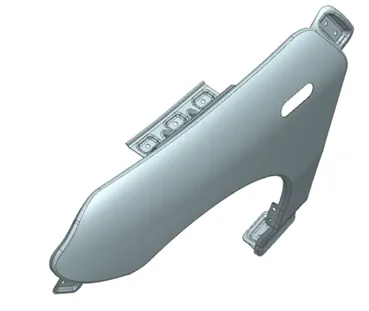
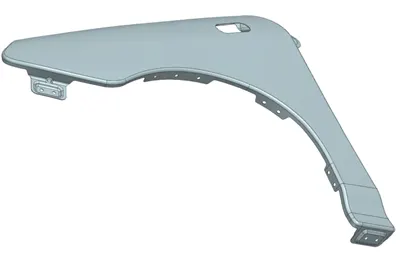
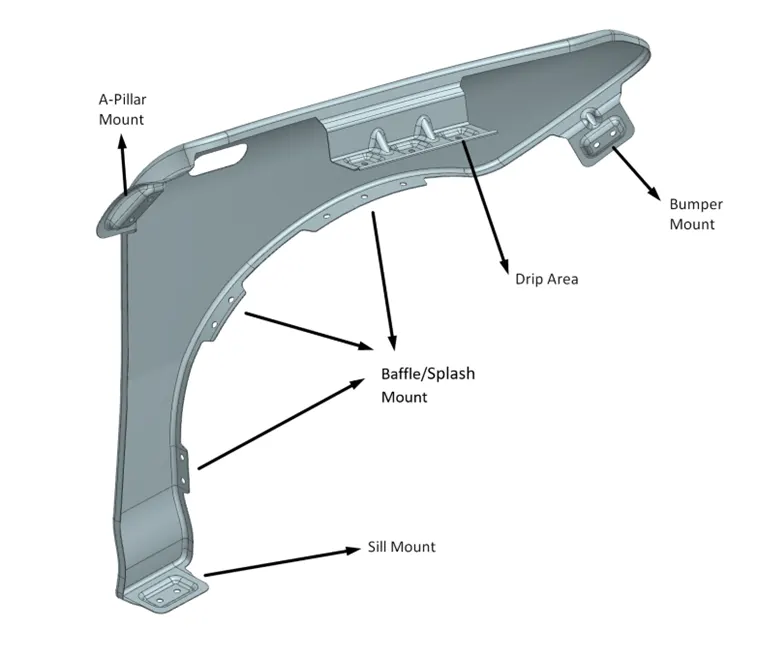
To assemble the fender to other parts of the vehicle, several mounts are added. As you can see from the below image, there are drip Area, A-pillar mount, sill mount, bumper mount, and baffle/splash mount.
- Drip Area & Master Section’s Design Consideration
- Its role is mounting the fender to the engine compartment of the car.
- It is 300 mm or less apart from the A-pillar mount starting position to give enough space for cowl top mounting (windshield wipers and plastic parts).
- For the head light mounting, it needs at least 150 mm distance from the front.
- The depth of drip area is kept as 40 mm to avoid the spring back effect, occurring when it exceeds 60 mm depth.
- Equal or more than 10 mm gap is required from the engine room.
- For the deep drawing manufacturing process, more than 3° is opened for each step.
- It should be unable to see engine compartments and mounting bolts from the outside when it is all assembled.
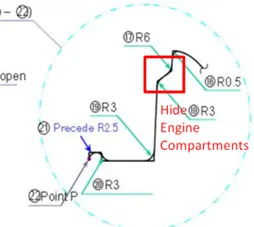
- L-shaped brackets will be added to join the engine compartments and fender’s drip area. Its height will be same as drip area’s one (40 mm).
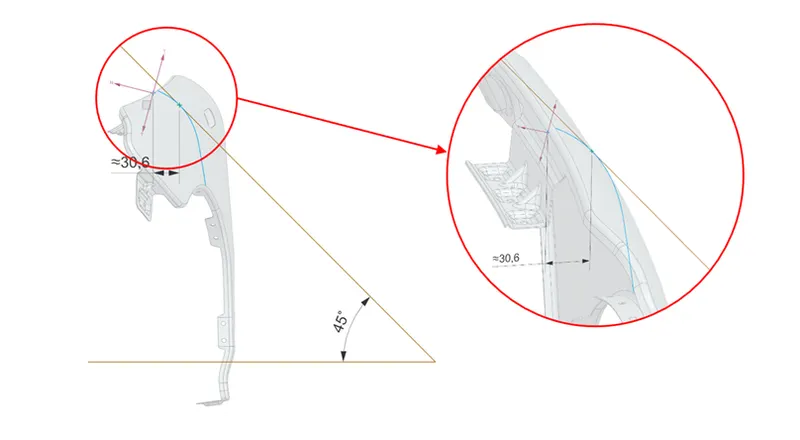
- For the pedestrian safety, the side reference line is considered. The distance from the drip area start position to the point where the SRL meets the fender’s outer surface should be less than 47.5 mm.
2. A-Pillar Mount
- It mounts the fender to the A-Pillar, which is located on either side of vehicle’s windshield while supporting the roof.
3. Sill Mount
- This connects the fend to the sill, the part running between the wheel arches beneath the doors.
4. Bumper Mount
- The bumper is connected to chassis by mounted on the fender.
5. Baffle/Splash Mount
- Baffle can be attached to fender to improve the NVH (Noise, Vibration, Heat) performance.
- Splash (Fender flare) can be installed to protect the fender from debris or road spray.
Every emboss for mounts has 15° draft angle for deep drawing process. For the firm assembly, bolting holes position on the flat surface having enough space more than 10 mm diameter circle.
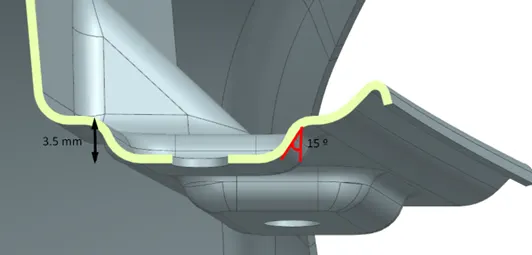
Ribs are applied to drip area and bumper mount to get better structrual strength (stiffness).
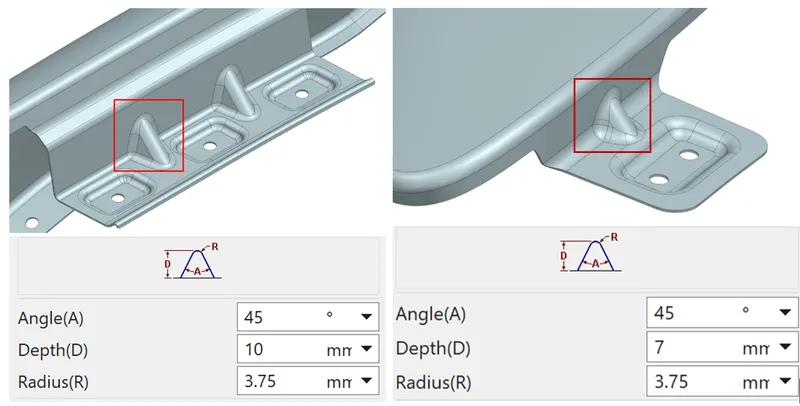
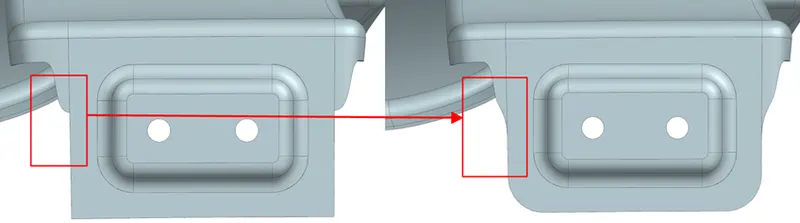
For uncontinuous edges, it is changed to smooth line with an relief for manufacturing process. It also prevent unnecessary stress concentrations.