Fender Design Challenge
Fender design
Fender: A fender is automobile sheet-metal part which is placed above the wheel region. The fenders include front and rear fender, it might also include indicators also.
Purpose of fender:
To prevent it from mud , stones or any other obstacles from being thrown into air cause of rotating tire.
Functions of fender:
- The fender should be unbending to the point of remaining in putting consistently because of weighty vibration.
- It ought to forestall any contact of the soil and stones with the principle part of the vehicle in particular motor.
- The fender ought to likewise safeguard the travellers inside the vehicle during a side effect impact, mishap and ought to just insignificantly harm any common. The fender configuration ought to be in a such a way that the effect made during crash ought to be completely consumed by the actual fender.
- It is responsible for the reduction of vibration and noise transferred to the passenger from the road, hence these should also be checked.
Types of Fender
- Full body fender
This type is very costlier and complex process . It covers more area than the half body fender. the use of material in this is more so it creates more scrap.
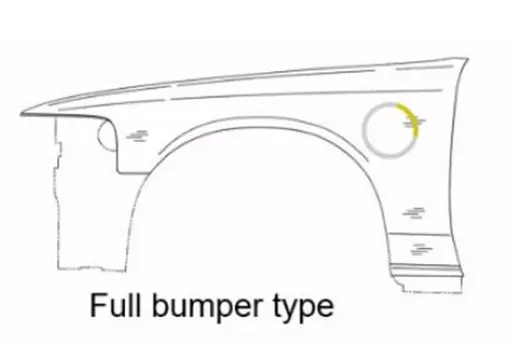
- Half body Fender
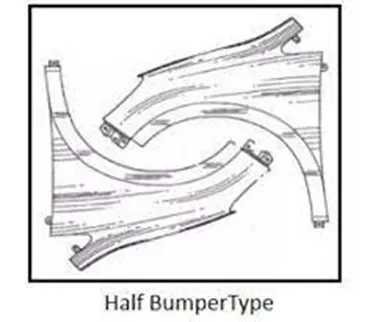
Presently we are using this half body type cause its possibility to reduce scrap. The usage of material is less. it reduces the weight of steel material used and also there will be a wide area.
There are 5 important mounting regions of a fender:
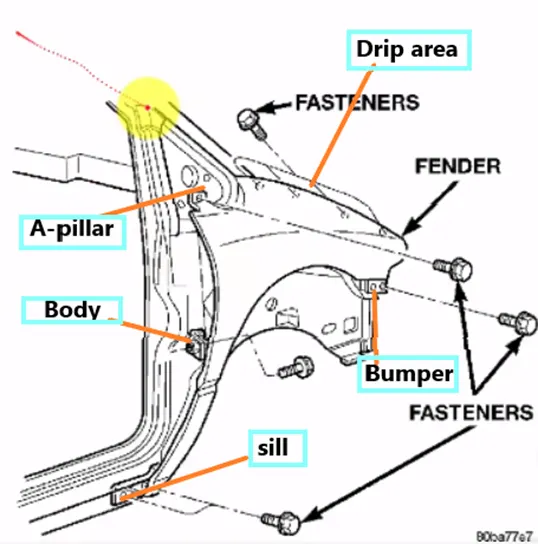
- A Body
The car body is the main structure of the vehicle. It forms the skeleton of the car. All the aesthetic parts of the car is fastened to the body.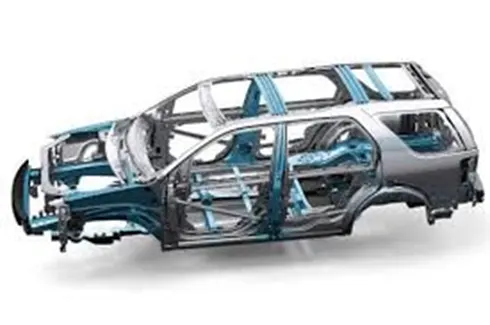
2.A pillar
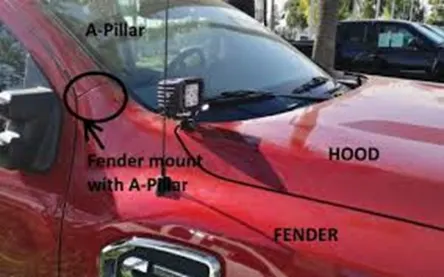
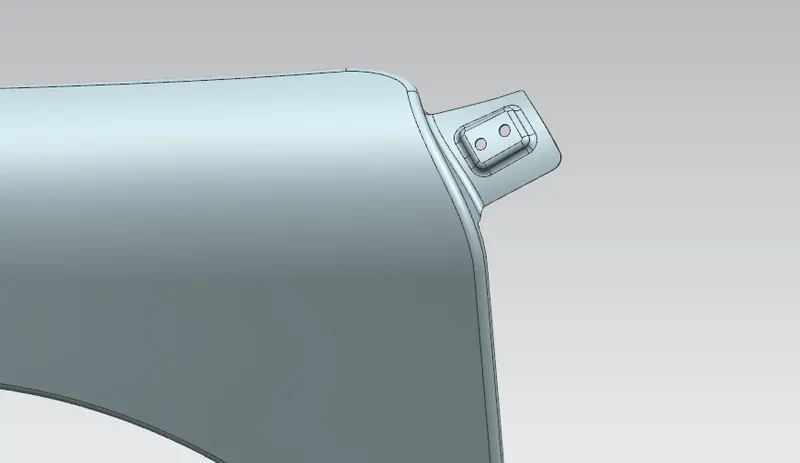
The A-pillar is the structural pillar that combines the body to roof. It is where the front glass is fixed. Front fender are fastened to the A-pillar to form a robust structure.
3.Sill
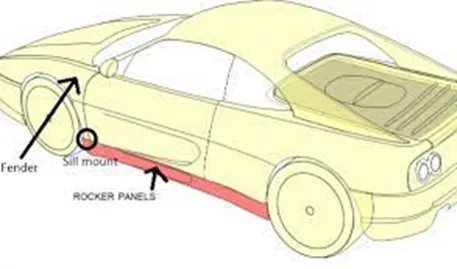
- Sill is the panel below the bottom of the door supporting the floor and may be used to combine the floor and the body.
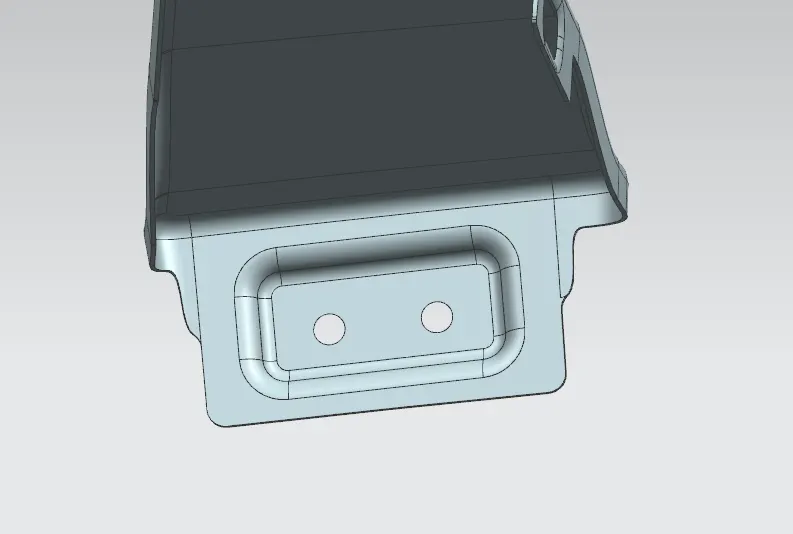
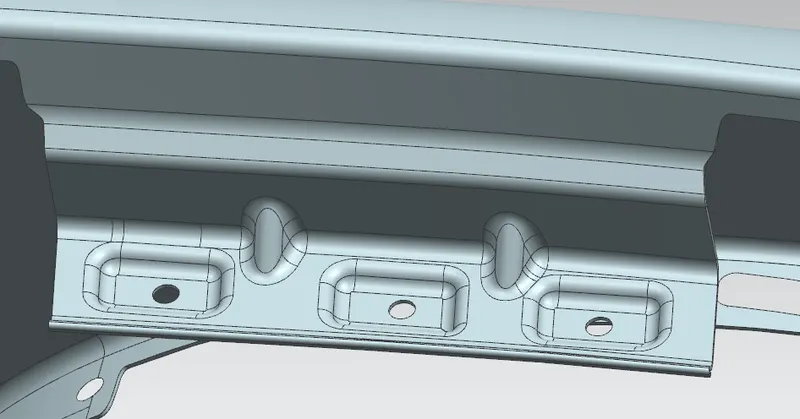
- The bottom part of the fender is attached to the sill body for reinforcement of the fender panel.
- It is designed with holes and emboss.
- The sill is the bottom region of the car body where the front fender and rear fender is attached.
4. Drip area
- It is the area through which fender is attached to engine housing through fasteners.
- There should be some consideration followed to design the drip area of fender.
- From back side of front fender, there will be 200mm clearance for cowl (wiper motor) mounting area.
- From front side of front fender there will be 150mm clearance for headlight.
- From the given below data the drip area is designed.
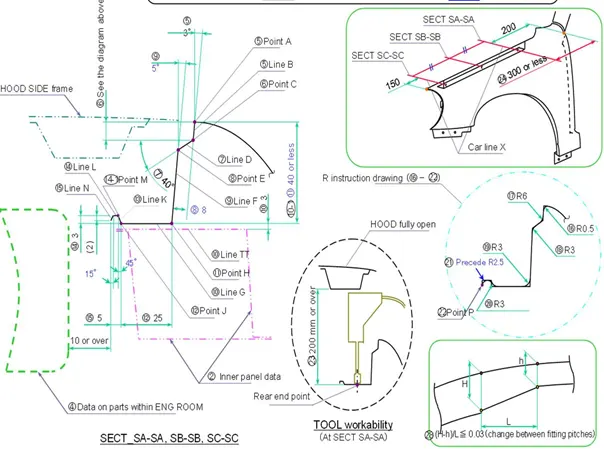
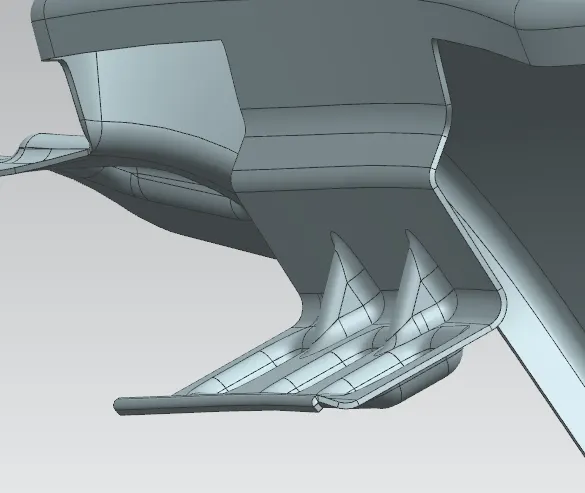
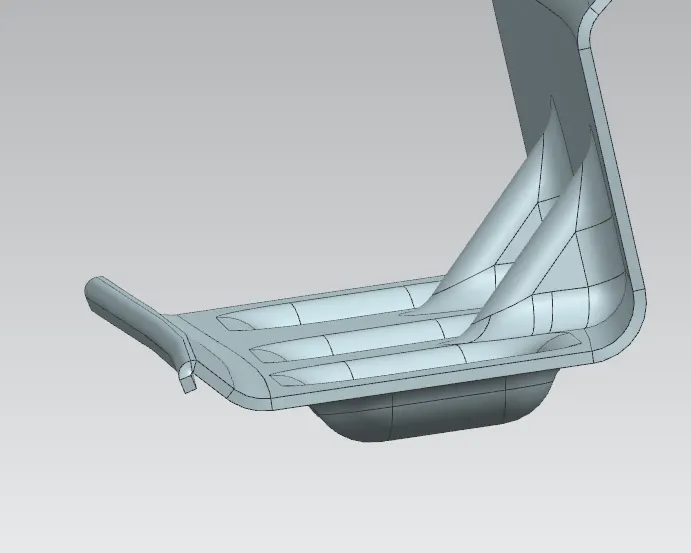
- The dart is provided to drip area to prevent from bending and to provide stiffness and strength to the part. It helps fender not to vibrate which increases NVH .
- Embossing are provided on the mount to strengthen during fastening.
5.Bumper mounting
It is used to fix the plastic bumper to the fender with the help of fasteners. 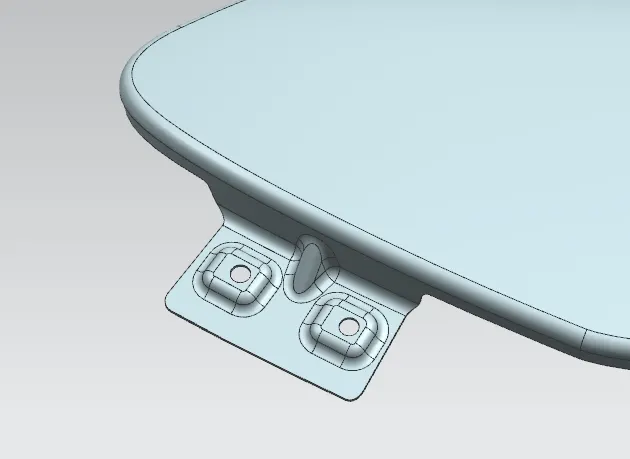
Baffle mounting/ Splash cover mounting
- This is provided to place the plastic baffle at the edge of fender. It is provided with holes.
- this plastic is used to provide dust and stones entering in the body part of the car.

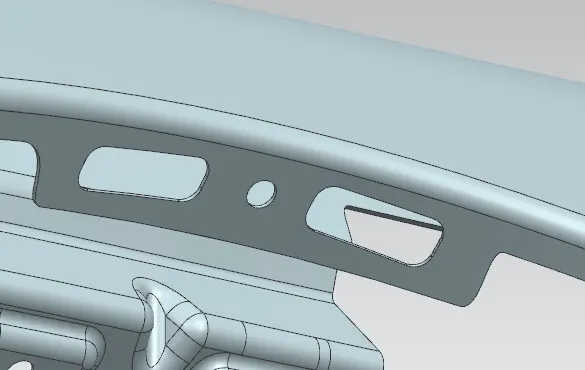
- After all this mounting the thickness is provided of 0.75mm.
- In this design there should be any sharp corners since it will loose its stress concentration
Manufacturing of fender
It is made up of
Depending on the make of the car, fenders may be made from fiberglass, steel, or other materials. Many of these materials are designed to crumple in a crash, distributing the impact across the frame of the car to make the crash more survivable for the occupants of the vehicle.
The manufacturing process includes the following steps
1. Unfolding and shearing are carried out on a plate, wherein a proper cold roll specification is selected at first, a cold roll is unfolded, and then the unfolded cold roll is sheared to an iron plate of the corresponding size according to production material specifications;
2. Oil pressing and punching are carried out, wherein the iron plate is extended at first, then side shearing and punching are conducted on the iron plate, folding and shaping are carried out on the iron plate, and finally reshaping is carried out on the iron plate;
3. Small first parts of the fender are machined, wherein first of all, the iron plate is punched to a needed outer contour blank, then the iron plate completing the outer contour blank is further shaped, and the iron plate is punched at last;
4. Installation and welding of a metal plate are conducted. The manufacturing process for the car fender is simple and high in production efficiency
Different views of fender
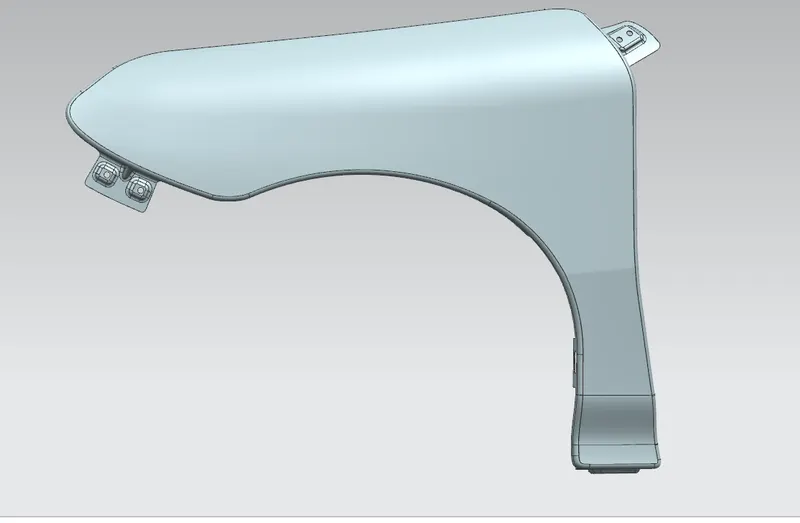
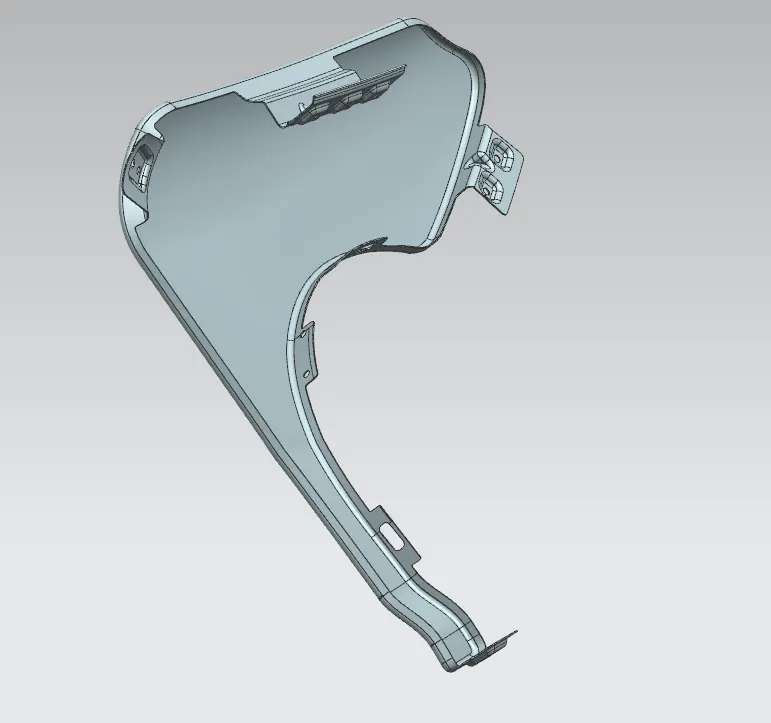
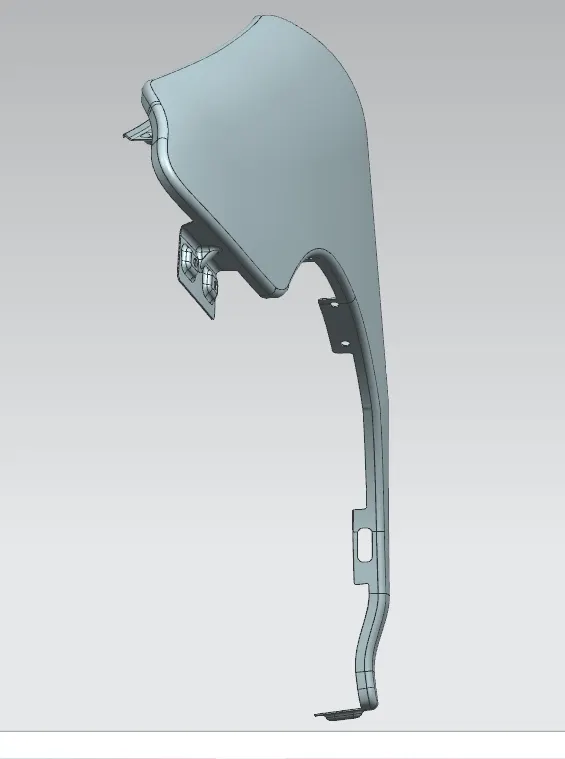
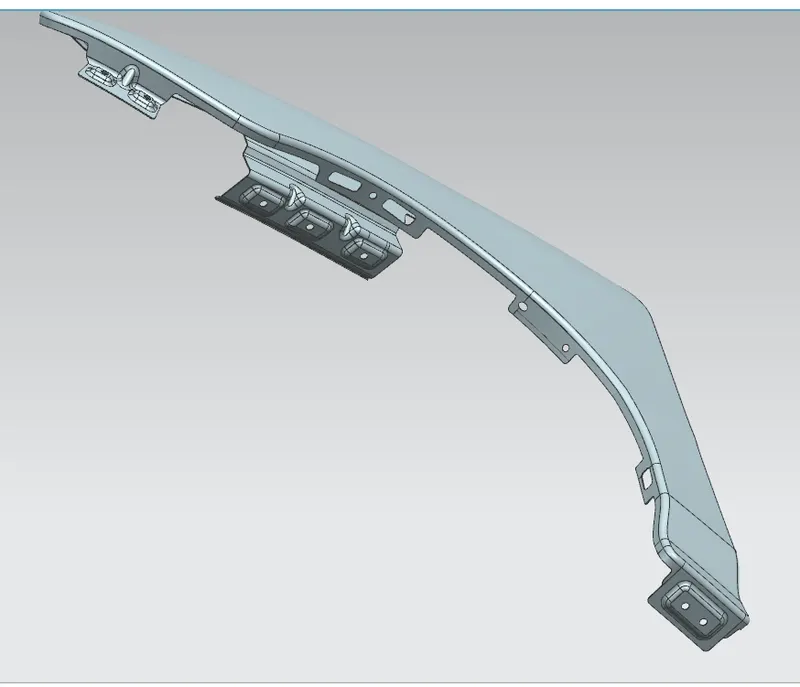
Conclusion:
Fender designed using NX CAD looking at the required data provided.