Fender Design Challenge
To design a front fender from the given skin data and the master section provided with a Drip Mounting, A-Pillar Mounting, Sill Mounting, Bumper Mounting and Baffle Mounting
Introduction to a Fender
The fender is an important component on the exterior of the car as it houses the wheel arch which in turn houses the vehicles wheels. The wheel should ideally sit inside the boundaries of the fender to avoid the it from spraying abrasive particles into the air which could potentially cause damage, in the form of chipping to the exterior components of the vehicle or these same particles could be flung onto pedestrians, which again is dangerous.
The fender's openings for the wheel wells tend to be much larger than the diameter of the tire, because they do not move with the tire suspension and consequently must be large enough to allow the full range of tire motion on the suspension without touching the interior of the wheel well.
Types of Fenders:
- Full Bumper Type
- Half Bumper Type
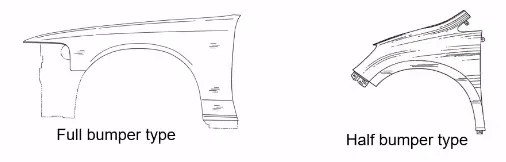
The type of fenders used in today’s market is the Half Bumper Type fender as it has various advantages over the Full Bumper type fender. For one, the blanks used to create the full bumper type fenders have a lot of space that is wasted but in the case of a half bumper type, by slightly increasing the blank size 2 fenders can be produced at the same time. This is in turn reduces the material usage and is very important when it comes to Scrap Management.
The other advantage a half bumper type is that it allows for more usage of plastic on the bumper, which means that less metal can be used and more plastic instead and this leads to overall decrease in the weight of the vehicle which is a key aspect all manufacturers are looking to decrease wherever possible on the vehicle.
Fender Regulations:
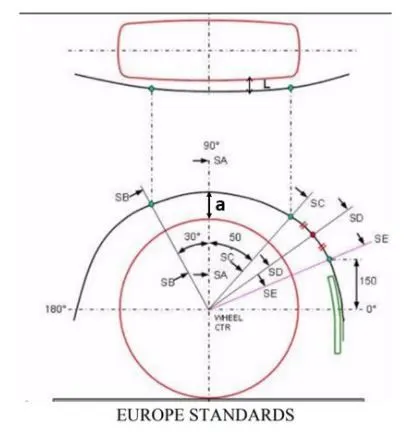
Considering the factor of pedestrian safety, there are certain regulations set by the different automotive bodies around the world when it comes to this safety factor. Although all of them state that the tire & wheel should sit inside the boundaries of the fender, there are slight variations on the distance the tires must be offset from the fender boundary depending on the different automotive governing bodies based on the road conditions of that specific region.
Design Methodology
Master Section:
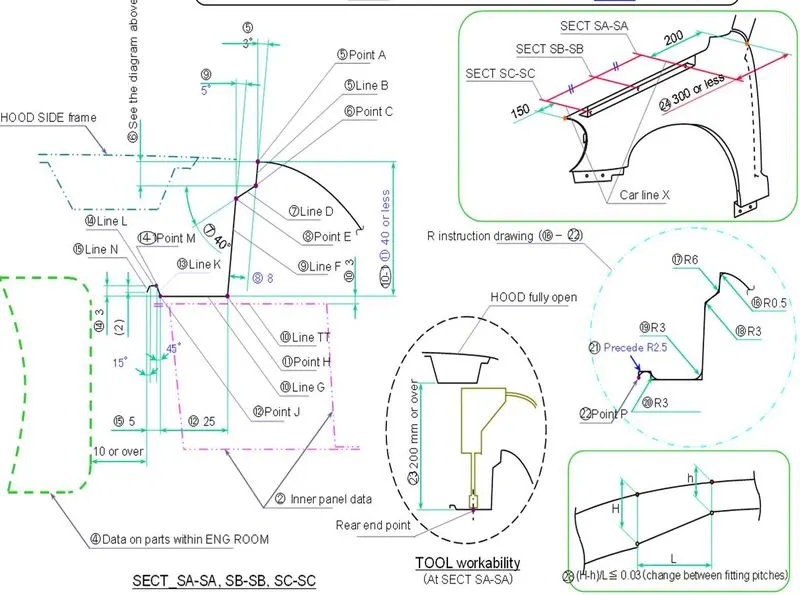
The image below shows the master section that was provided and taking into consideration this master section and its dimensions, the following fender design was maintained.
Fender Mounting Design
The overall thickness taken for the design of the Fender = 0.75 mm
Drip Area Mounting:
- The drip area mounting is the most important mounting in this challenge and was the dimensioning of it was very carefully considered as this is the area that is mounted inside the engine bay and hence has more design constraints than the other mounting regions.
- The master section shows that the drip area mounting must have 150 mm from the headlight mounting position as this would leave enough of a gap for the headlight to be mounted safely.
- The next requirement for this is that, from the other end of the drip area mount to the cowl top shouldn’t be more than 300 mm. The distance can be any number less than 300 mm. This is to ensure that the drip area is large enough.
Bumper Mounting:
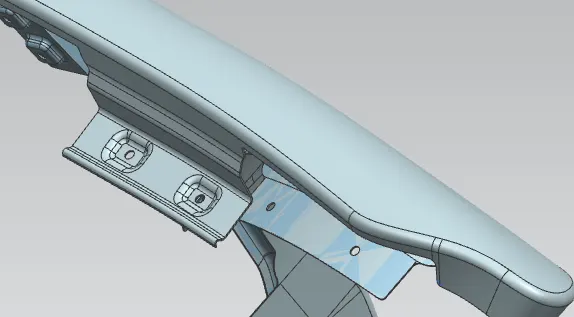
The Bumper mount sits in the front most portion of the fender, as the bumper comes in front of the fender and it will be easier to mount if the mounting points are right at the front. Regular fasteners are used to hold the bumper in place with the fender.
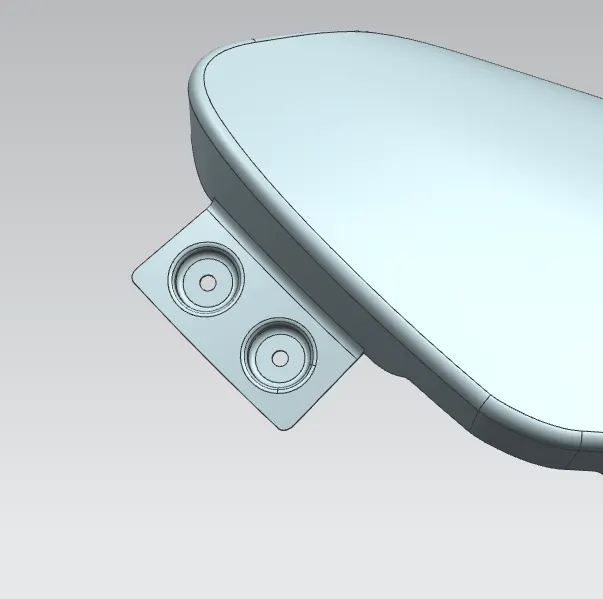
Baffle Mounting:
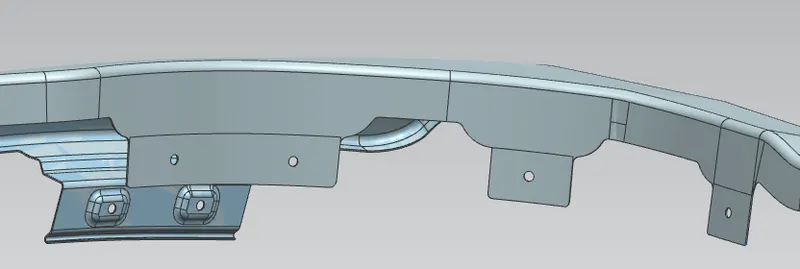
The Baffle mounting or the otherwise known as the splash mounting, is the in the wheel well which houses the wheel arch. This is the component in the fender that actually protects the engine bay from chipping from the particles that are thrown in the air by the rotation of the tyres. The baffle is usually a lightweight plastic piece and hence doesn’t require much strength to hold it, which is why no embosses were provided for further strengthening. There are 3 mounts given along the wheel arch. The 3 baffle mounts can be seen in the image below.
Sill Mounting:
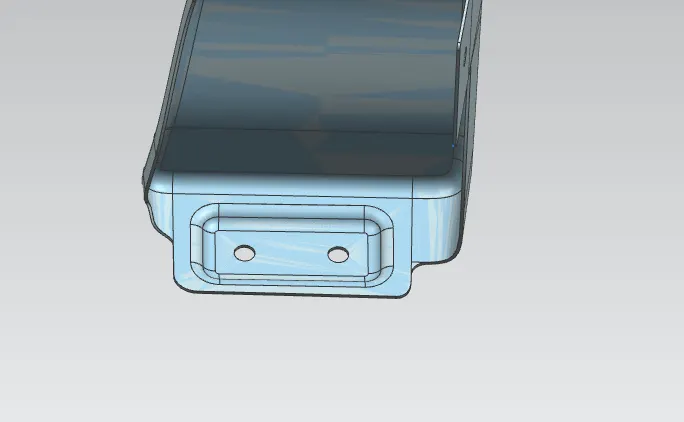
The sill mount or also known as the floor mount, is the bottom most region of the fender that mates with a portion of the floor of the vehicle. This is the only mounting provided in this region and hence it is strengthened with embosses so that it can be bolted down firmly in place.
A-Pillar Mounting:
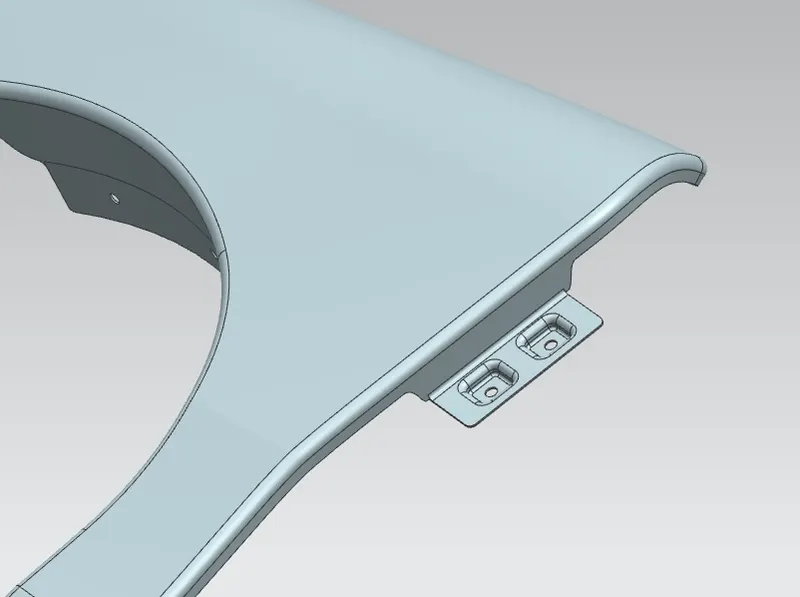
The A-Pillar mounting, as the name suggest is the area where the fender is mounted onto the A-Pillar of the vehicle. There is no exact area for this mounting as the pillar runs through the vertical side of the fender. This mounting has also been provided with embosses for the strengthening them as it is the only mounting point in this part of the fender. In my design, I have taken the mount to be a little lower than what they are traditionally like as I personally felt designing these mounts in this position is much easier, when it comes to both the design and manufacturing aspects.
Various Views of the Fender Design:
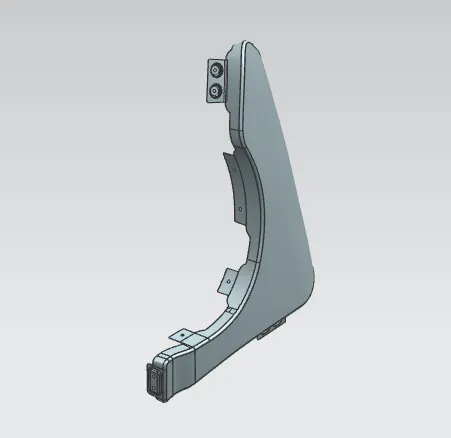
View 1
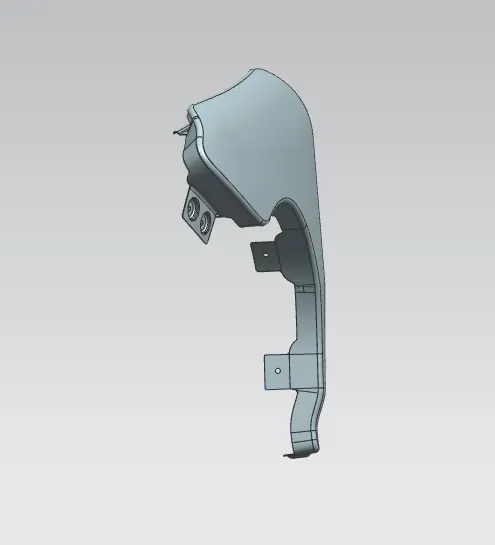
View 2
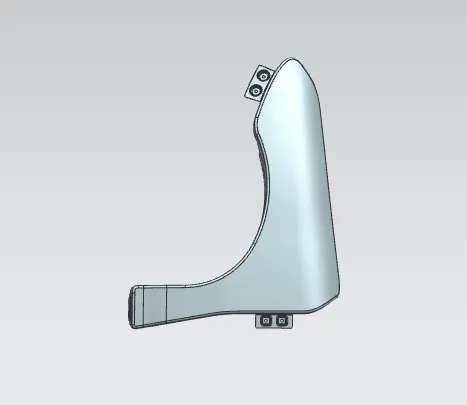
View 3
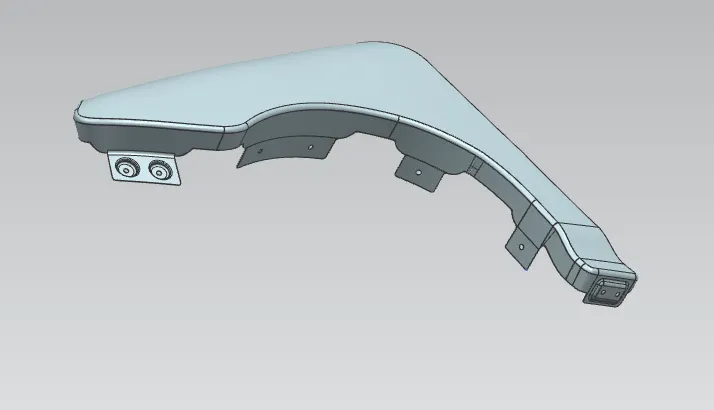
View 4