Fender Design Challenge
OBJECTIVE: To prepare the fender design with drip area, Sill mount, Bumper Mount and A-Pillar mount using NX CAD.
Follow the given Master section to create the Drip Area
Prepare roper report with all the relevant images included for the mounting points created.
INTRODUCTION:
FENDER - Fender is the american english term for the part of an automobile body that frames a wheel well (the fender underside). Its primary purpose is to prevent sand, mud, rocks, liquids, and other road spray from being thrown into the air by the rotating tire. Fenders are typically rigid and can be damaged by contact with the road surface.
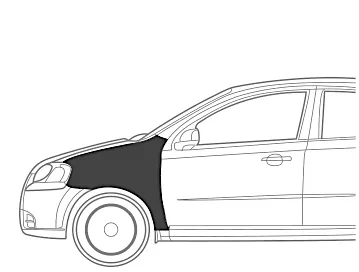
FIG. FRONT FENDER
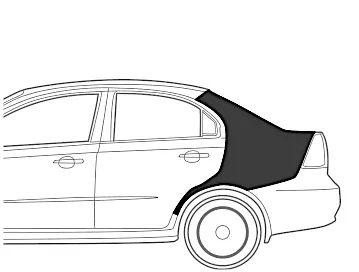
FIG. REAR FENDER
Basically fenders are of two types:
- full bumper type
- half bumper type
FIG. FULL BUMPER TYPE
FIG. HALF BUMPER TYPE
In fender, there are generally 5 mounting areas, these are as follows:
- Drip mount area
- Sill mount area
- Bumper mount area
- A-Pillar mount area
- Baffle mount area
DRIP MOUNT AREA: Drip mount area is a mounting area of car fender, which is mounted with car engine compartment. It is placed at a distance of 200 mm from cowl or A-pillar top and its length is upto the distance of 150mm from bumper mount area.
FIG. DRIP MOUNT AREA
Sill Mount Area: Sill mount area is mounted at the base of door opening which is called rocker panels or sills.
FIG.- SILL MOUNT AREA
Bumper Mount Area: In this mounting area, one side corner of bumper is mounted with the help of bolt or fastners.
FIG. - BUMPER MOUNT AREA
A-Pillar Mount Area: This mounting area is located near the cowl top of the car, where it is fastened with the cowl.
FIG. A-PILLAR MOUNT AREA
Baffle Mount Area: In this mounting area, baffles are mounted using fastners,whisch is used to seal the opening between wheel & engine campartment. So that, engine compartment can't be harmed by any kind of debris or mud splashes over it, through the rotating wheel.
FIG. BAFFLE MOUNT AREA
- Here is the google drive link for the NX Part file of the fender :
https://drive.google.com/file/d/1ahOrgJtmHOOk268ol_LKQeeZ_ieqMfTb/view?usp=sharing
- Here is the google drive link for the igs file of the fender :
https://drive.google.com/file/d/1_h_G_izw3ogIIXhoJKg5fJTBt8sZOMi9/view?usp=sharing
Here is a image of final model of car fender that I have prepared.
FIG. FENDER DESIGN THAT I HAVE PREPARED
CONCLUSION: So, in this project I have learnt the basic surface modelling commands of NX cad & prepare a part & igs model of car fender using the given data provided in the question.