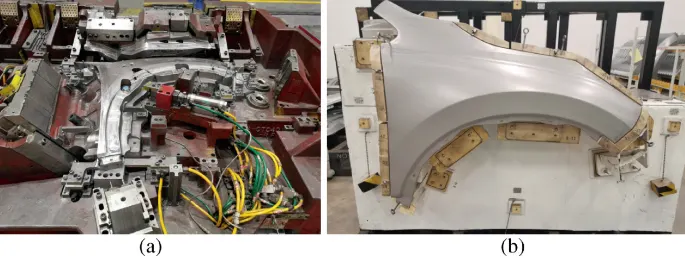
Fender Design
Fender Design
1.0 Introduction
A fender is the part of the vehicle's body that covers the wheel wells and extends along the side of the vehicle, typically from the front to the rear bumper. Fenders serve several important purposes in terms of both functionality and aesthetics.
A fender is a body panel that surrounds the wheel well of a vehicle and extends over the wheels. Fenders can be found on both the front and rear of the vehicle.
Fenders are located on either side of the vehicle and can be considered part of the exterior body. The front fenders cover the front wheels, while the rear fenders cover the rear wheels.
1.1 Need and Importance:
- Protection from Road Debris: Fenders help protect the vehicle's body and other road users from debris (e.g., rocks, mud, and water) thrown up by the rotating tires.
- Aerodynamics: Properly designed fenders can contribute to the aerodynamic efficiency of the vehicle, reducing drag and improving fuel economy.
- Aesthetic Appeal: Fenders play a significant role in the overall design and visual appeal of the vehicle. They help create a cohesive look and contribute to the vehicle's identity.
- Safety: Fenders help shield pedestrians from contact with the wheels in the event of an accident, contributing to pedestrian safety.
- Structural Support: Fenders can provide structural support to the vehicle's body, helping to maintain the integrity of the frame and other components.
- Compliance with Regulations: Most jurisdictions have regulations requiring vehicles to have fenders to contain road spray and debris, which helps improve safety on the road.
- Mounting Points for Accessories: Fenders can serve as mounting points for accessories such as side markers, reflectors, or fender flares.
1.2 Design Consideration:
- Material: Fenders can be made from various materials, including steel, aluminum, or composite plastics. The choice of material affects the weight, durability, and corrosion resistance of the fender.
- Shape and Contour: Fenders are designed to match the contour of the wheel and the vehicle's body for a seamless and attractive appearance.
- Compatibility with Wheels and Tires: Fenders must be designed to accommodate different wheel and tire sizes while still providing adequate coverage.
1.3 Types of Fenders:
The two main types of fenders are full bumper type and half bumper type
A) Full Bumper Type:
- The fender is designed to fully integrate with the bumper, creating a seamless look between the fender and the bumper.
- The full bumper type typically extends from the side of the vehicle to the front or rear bumper, enclosing the wheel wells completely. This design can provide a more cohesive appearance and improve aerodynamics.
- Full Bumper-type fenders are not used nowadays because they require a large size of blank to produce the part and they occupy more space.
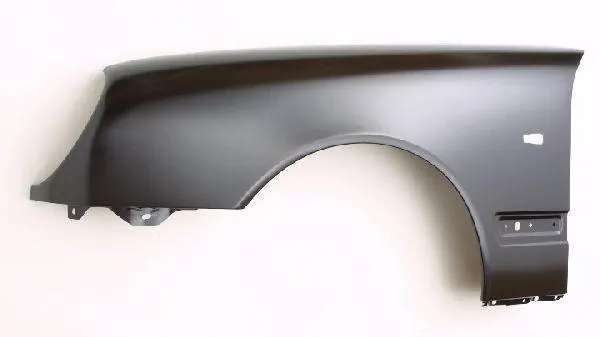
B) Half Bumper Type:
- The fender does not fully integrate with the bumper. Instead, there is a distinct separation between the fender and the bumper, with the fender covering only a portion of the wheel well.
- The half bumper type typically features a clear division between the fender and the bumper, with each component having its separate structure and style.
- Half-bumper type fender is used because the waste of material is less & can produce two fenders at a time by slightly increasing the blank size and to reduce the weight & cost mostly bumper fenders are been produced.
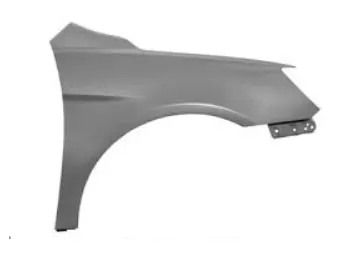
1.4 Design Parameters:
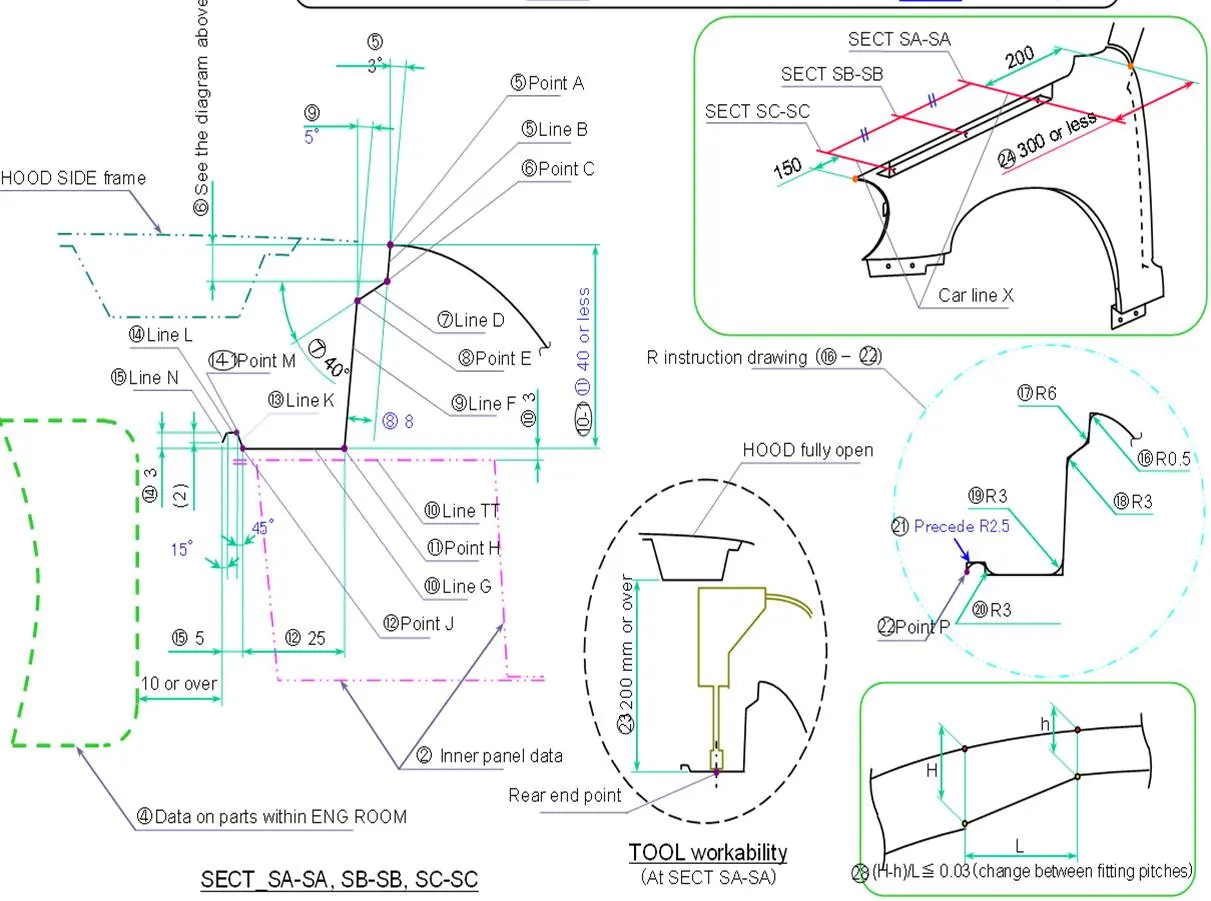
- To create the drip area, leave a 150mm space from the front for headlight mounting, then move 200mm from the cowl area and leave a 10mm distance from the Engine room.
- The angle from the top of the flange should be 40 degrees, and it should be 8mm long to block the view of the Engine Compartment.
- given master sections are attached below.
1.5 Mountings w.r.t. different positions:
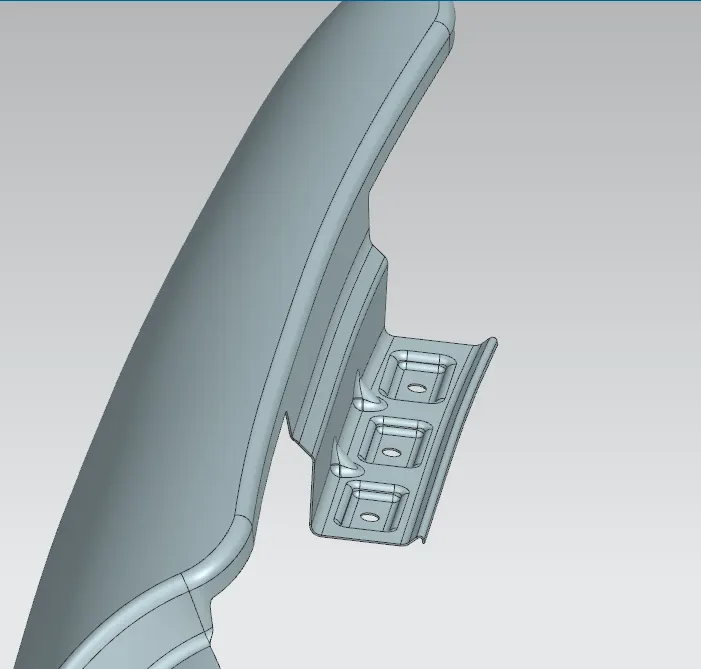
1. Drip Mounting Area:
- The drip mounting area in an automobile is a design feature that is located along the roof edges, typically at the sides of the vehicle where the roof meets the doors or windows.
- This area is engineered to manage water drainage and direct rainwater away from the interior of the vehicle. It plays a critical role in preventing water from seeping into the vehicle, which can cause damage to the interior and other components.
- The area where liquid drips would be visible is identifiable by the space between the Hood and Fender.
- This section is connected to the car's engine compartment. It is essential to maintain a minimum distance of 150mm from the front side and keep a distance of 300mm or less on the rear side to prevent spring back during manufacturing.
- The mounting's edge should be at least 10mm away from any nearby component in the engine.
- The drip area should be less than 40mm, and the emboss created on the drip mounting should be flat with respect to the curvature.
- To increase stiffness, a dart is added at the edge of the drip mounting.
2. Sill Mounting Area:
- The sill mounting area in an automobile is the part of the vehicle's body structure located along the bottom edge of the doors, commonly referred to as the "sill" or "rocker panel."
- This area plays a crucial role in the structural integrity of the vehicle, as well as in providing a mounting point for various components.
- The sill mounting area contributes significantly to the vehicle's overall structural rigidity. It helps maintain the vehicle's shape and provides a solid foundation for the body, which is essential for handling and safety.
3. A-Pillar Mounting Area:
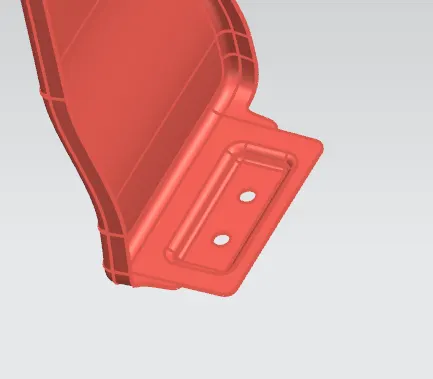
- The A-pillar mounting area is a crucial component of an automobile's structure.
- The A-pillars are the vertical supports on either side of the windshield, connecting the roof to the body of the vehicle.
- The mounting area for the A-pillars plays a vital role in maintaining the structural integrity, safety, and functionality of the vehicle.
- In the event of a frontal or rollover collision, the A-pillars help absorb and distribute the impact forces, protecting the occupants of the vehicle.
4. Bumper Mounting Area:
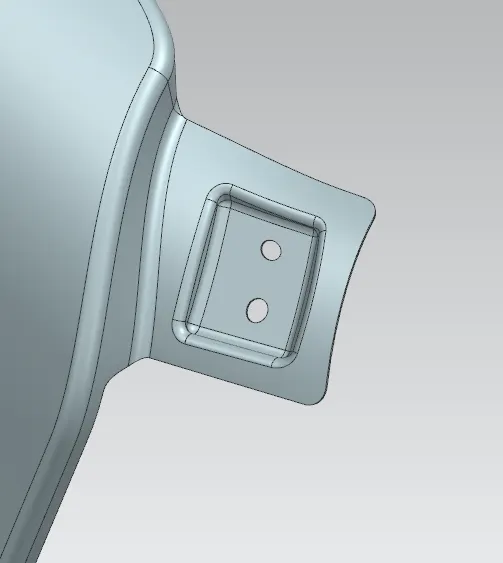
- The bumper mounting area in an automobile is a critical part of the vehicle's structure where the bumper is attached to the frame or body of the car.
- This area is designed to ensure that the bumper is securely mounted and capable of absorbing and distributing impact forces during collisions.
- The primary function of the bumper mounting area is to facilitate the attachment of the bumper, which absorbs and dissipates impact forces during low-speed collisions, protecting the vehicle’s occupants and minimizing damage to other components.
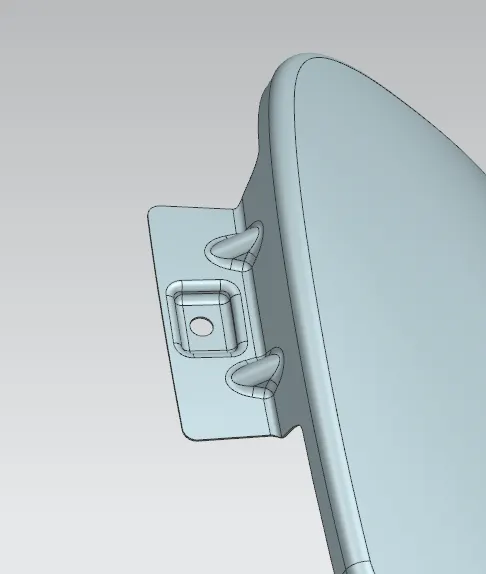
5. Baffle or Linear Mounting Area:
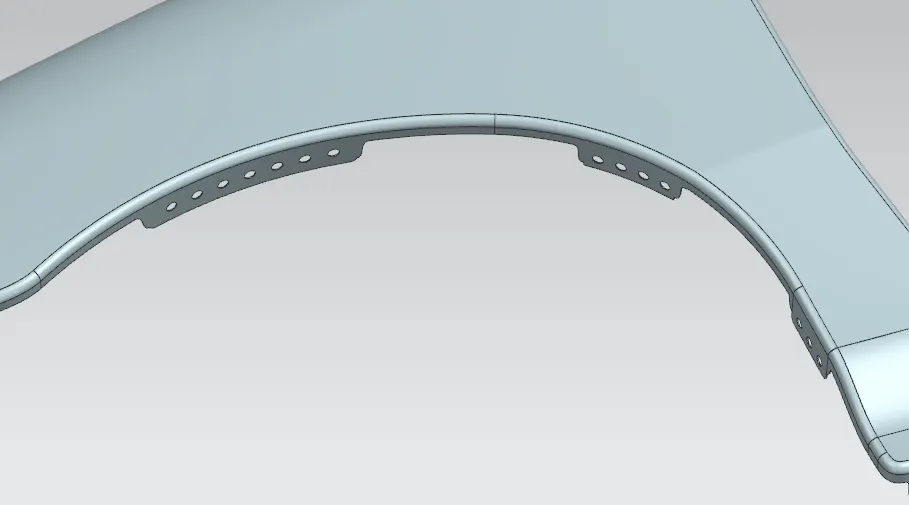
- A baffle mounting area is a designated location within a vehicle where baffles, which are barriers or partitions, are mounted.
- Baffles are used to control airflow, reduce noise, and improve the efficiency of various systems within the vehicle.
- Baffles serve several functions, including directing air for cooling purposes, reducing noise and vibrations, and preventing contaminants from entering certain areas.
- They can be found in the engine compartment, HVAC systems, and other areas where airflow management is critical.
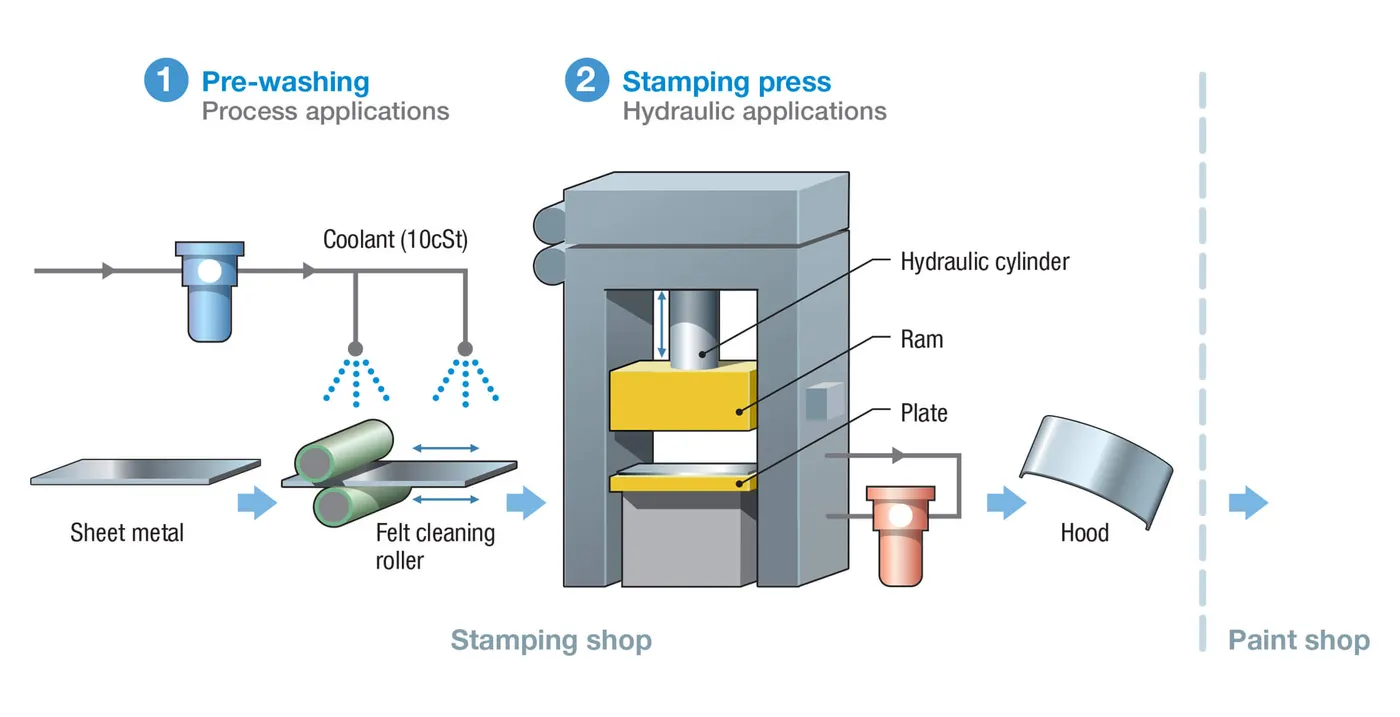
2.0 Manufacturing Process:
- Stamping:
Stamping is a high-speed, cost-effective method for producing large quantities of parts with precise shapes and dimensions. It includes several sub-processes such as blanking, drawing, bending, and flanging. Each sub-process serves a specific purpose in achieving the final shape of the part.
- Blanking
- Purpose: To cut a flat piece of sheet metal (blank) from a larger sheet or coil.
- Process: A die with the desired shape cuts the blank from the sheet metal using a high-powered press. Blanking ensures that the starting material has the correct dimensions and shape for subsequent forming operations.
- Drawing
- Purpose: To transform the flat blank into a three-dimensional shape by stretching the metal.
- Process: The blank is placed over a die cavity, and a punch forces the metal into the cavity, creating a cup-like shape. Deep drawing involves multiple stages to gradually achieve the desired depth without causing defects.
- Bending
- Purpose: To form angles and curves in the metal part.
- Process: The metal is clamped between a punch and die, and the punch bends the metal to the desired angle. Bending is often used to create flanges and other features that require specific angles.
- Flanging
- Purpose: To form edges or flanges on the part for additional strength or for attachment purposes.
- Process: Similar to bending, but specifically focuses on creating flanges. This can involve bending the edges of the part upward or downward.
- Forming
- Purpose: To refine the shape of the part, adding complex curves and contours.
- Process: The part undergoes further shaping using specialized dies and punches to achieve the final contours and features required by the design.
- Piercing and Trimming
- Purpose: To create holes, slots, and cut-outs, and to trim excess material from the part.
- Process: Piercing involves using punches and dies to cut holes or shapes into the part. Trimming removes excess material from the edges, ensuring the part meets precise dimensional specifications.