Fender Design
PROJECT
FENDER DESIGN
AIM: To create a drip area from the given master section and also create sill, bumper, baffle (splash) and A pillar mounting by our own with design aspects.
FENDER DESIGN:
FENDER:
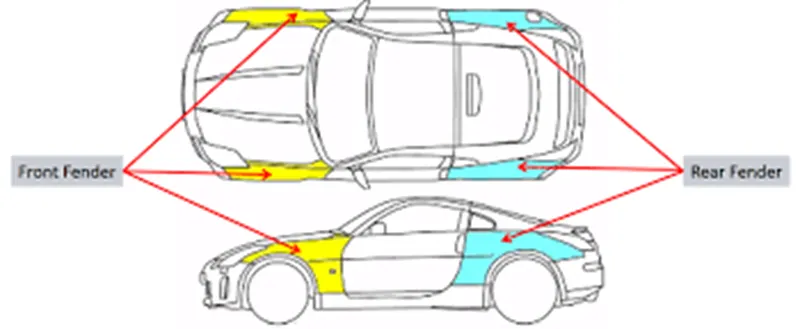
- Fender is the US English term for the part of an automobile (vehicle body) that frames a wheel well. Fender is a plastic, metal, or rubber curved panel over the wheels on the side of a car, extending from the front bumper of the car to the door.
- The main purpose of fenders is to keep dirt, mud, and other debris off of the tires and braking system, making them safer and more efficient. Fenders also help prevent mud, dirt, dust particles, and other liquids from getting thrown in the air while the tires rotate. Fenders are attached to the frame of the car, and they come in different styles and sizes.
- Rear fenders also called as quarter panels.
Types of fenders:
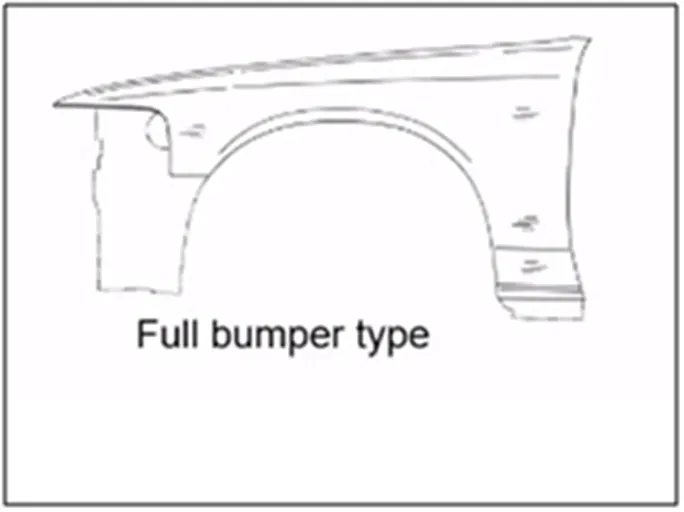
- Full bumper type
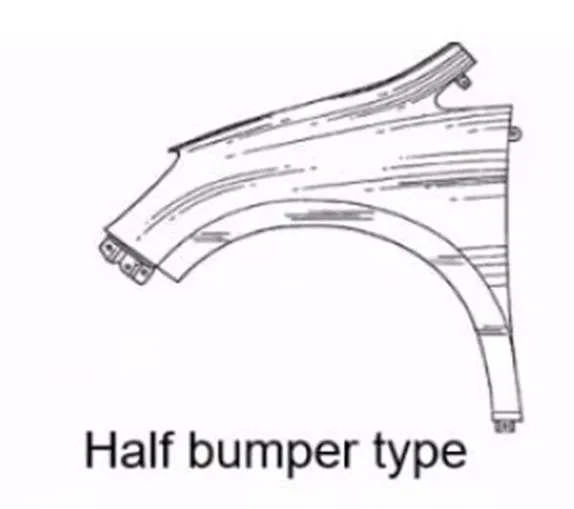
- Half bumper type
FULL BUMPER TYPE:
The full bumper type fender was used in old cars, it covers the full area until the front lighting. But it has a lot of sheet metal material which is unnecessary and increases the weight of the fender. These type fenders are no longer used in the automobiles. It is a high cost material.
HALF BUMPER TYPE:
- These fenders are mainly used for serving the purpose of cost-cutting and reducing enough proportions of the steel wait resulting in a reduction of the weight of the vehicle slightly. They can be economically manufactured, it means by slightly increasing the blank size, we can produce two fenders at a time.
- We are changed from full bumper type to half bumper type to reduce the scrap rate per blank. In the full bumper, we can only produce one Fender per blank.
FENDOR MOUNTING REGIONS:
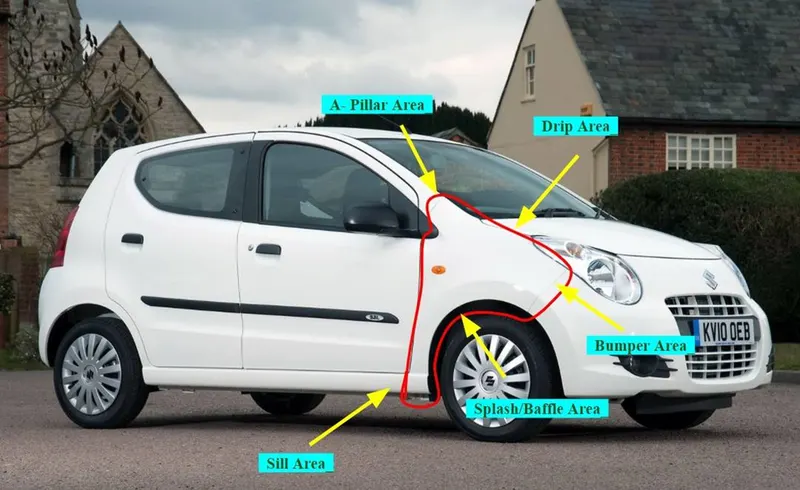
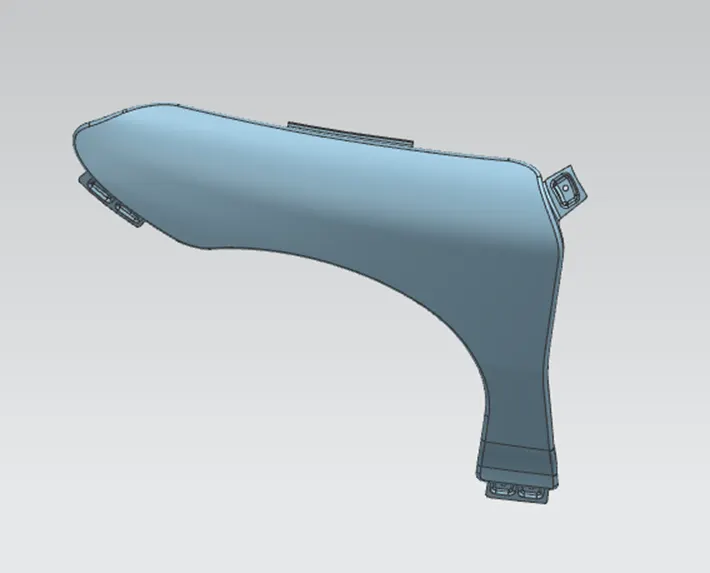
There are 5 mounting regions on fender. They are
- A Pillar mounting
- Body mounting
- Sill mounting
- Bumper mounting
- Drip mounting
Master section:
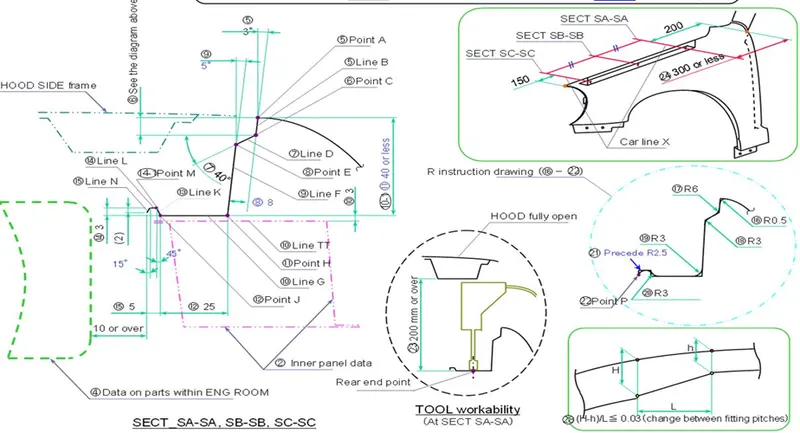
Creation of drip mounting:
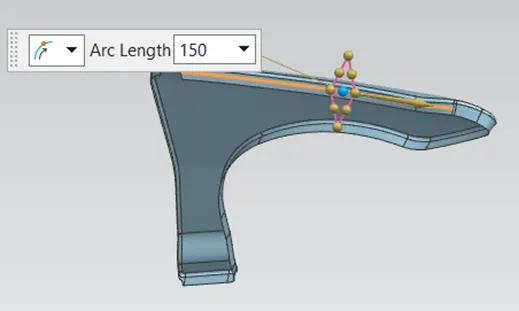
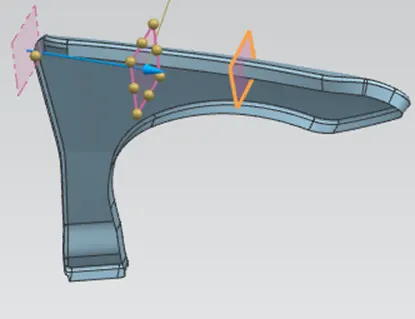
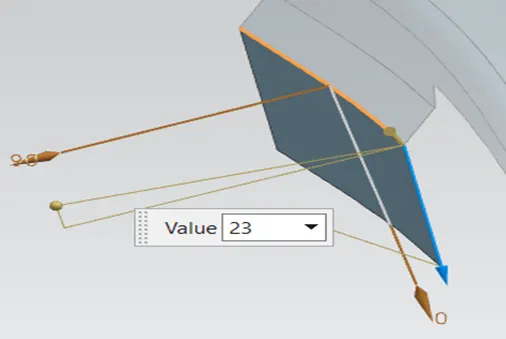
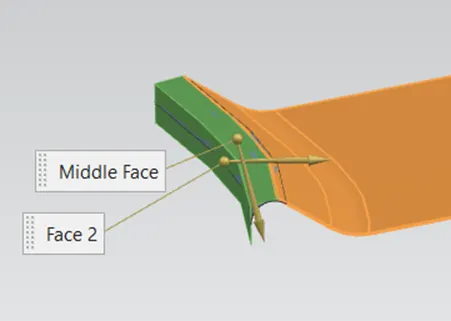
- This region is mounted below the hood inner panelwhich needs to be in flush when the hood is in closed condition and also there should be very less gaps. The drip area is either spot welded or in some cases bolted down via self-tapping screws.
- For the design of drip area should follow the distance at a cowl side is 300 or less and from the bumper side is 150 and it is the relief distance for the drip mounting.
- For this drip mounting we should follow the master section.
- Create a planes at the two sides using the relief distance and offset the flange curve at given distance. Trim this flange at a required.
- Extend the surface at an angle of 40 deg using law extension command at a horizontal.
- Create a vertical surface at angle of 5 deg
- Defects due to compression stamping such as camber etc., occur thus a touch difference is provided in flange depth when flange exceeds 800mm.
- Hood side drip depth must be 40mm or less as max productivity is achieved at the depth of 40mm. if depth exceeds 40mm rigidity bead is to be provided. Also, forming is not feasible if depth exceeds 60mm due to wrinking and spring back.
- To prevent fender fixation bolt to be seen from outside and improve appearance of porting gap between hood and front door.
- When the drip surface is stamped, 3 deg must be secured for spring back. Angle can be increased in order to make expected modification possible.
- Welding surface of drip area with bracket front fender should be flat with a clearance of 1 mm from bracket front fender upper surface.
- Create emboss at flat surface using by creating a datum plane and clearance for the fixing bolt is min 5mm gap.
A PILLAR MOUNTING:
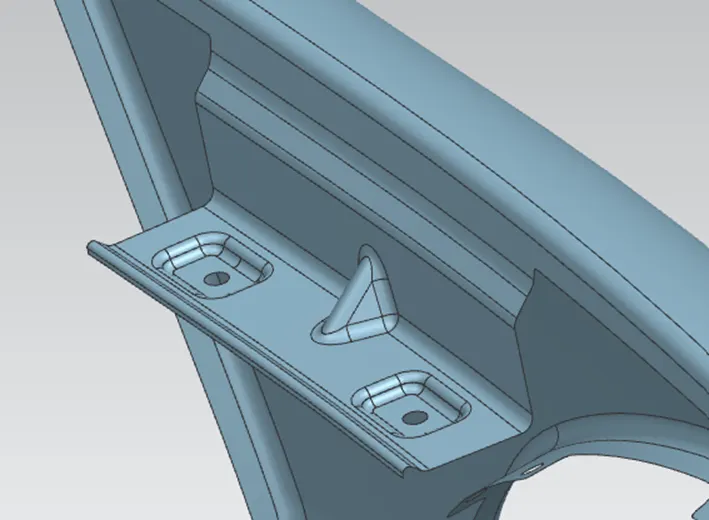
- The A -pillar is the structural pillar that combines the body to the roof. This make the sides of the windshield rest. Front fenders are fastened to the A -pillar to form a robust structure. For fixing the fender surface.
- For the creation of emboss as we know we may keep the clearance gap between the surfaces to the emboss.
BUMPER MOUNTING:
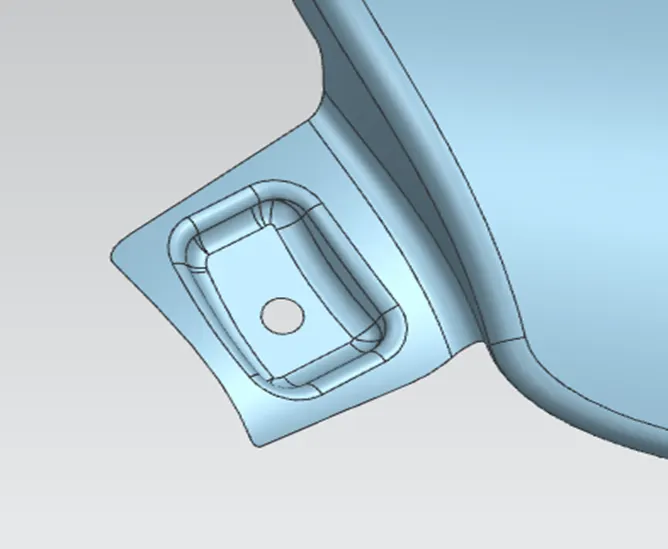
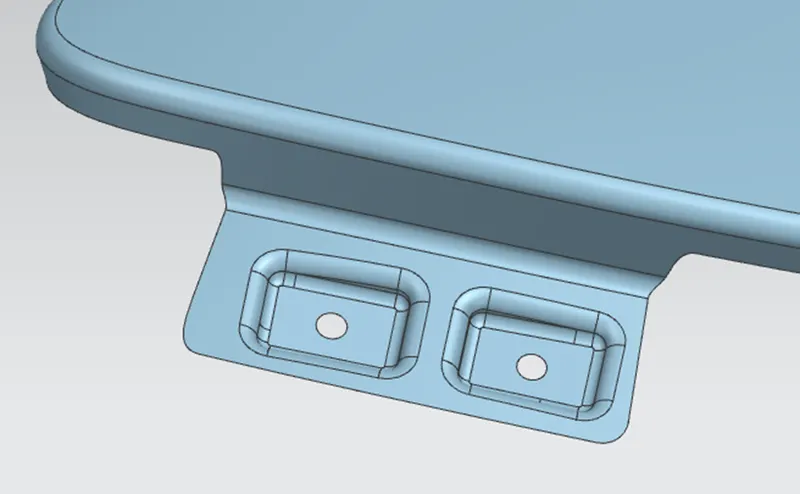
- Bumper mounting is created for the fixing the component to the bumper and it covers the entire.
- For the creation of emboss as we know we may keep the clearance gap between the surfaces to the emboss.
SILL MOUNTING:
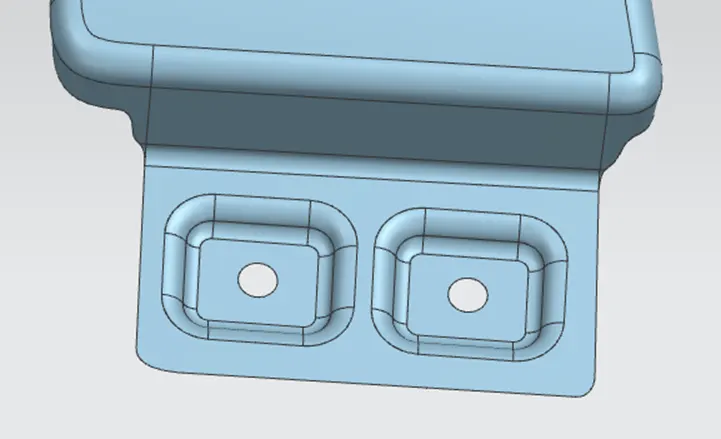
- Sill is the panel directly below the bottom of the door supporting the floor and may be used to combine the floor and the body.
- The bottom end of the fender is mounted on the sill body for reinforcement of the fender panel, thus the sill mounting position is designed with holes and emboss.
BAFFLE OR SPLASH MOUNTIG AREA:
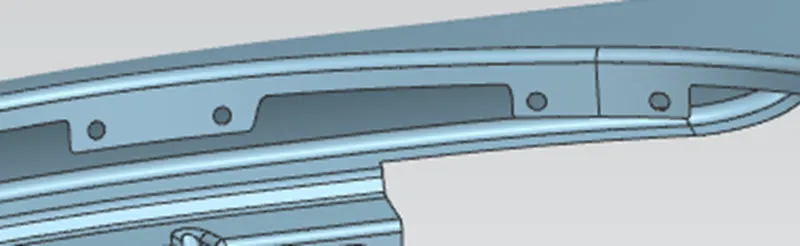
- Baffle mounting or mudguard are clip fit type of mounting on the inner side of the fender arch over the Tyre.
- It protects the car engine compartment and pedestrians from causing injuries from chip out debris on the road when the car is in motion. they are mounted on the fender using a special type of locking clips which are made up of plastics.
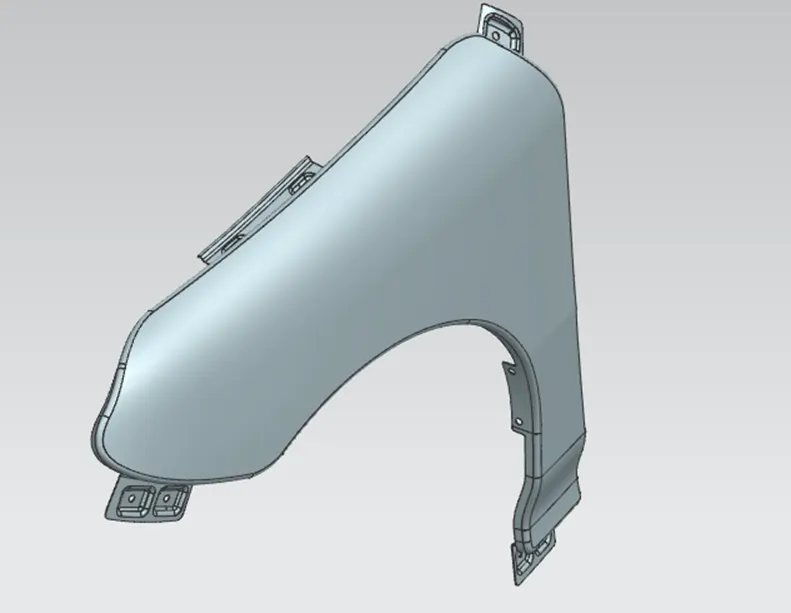
FINAL DESIGN:
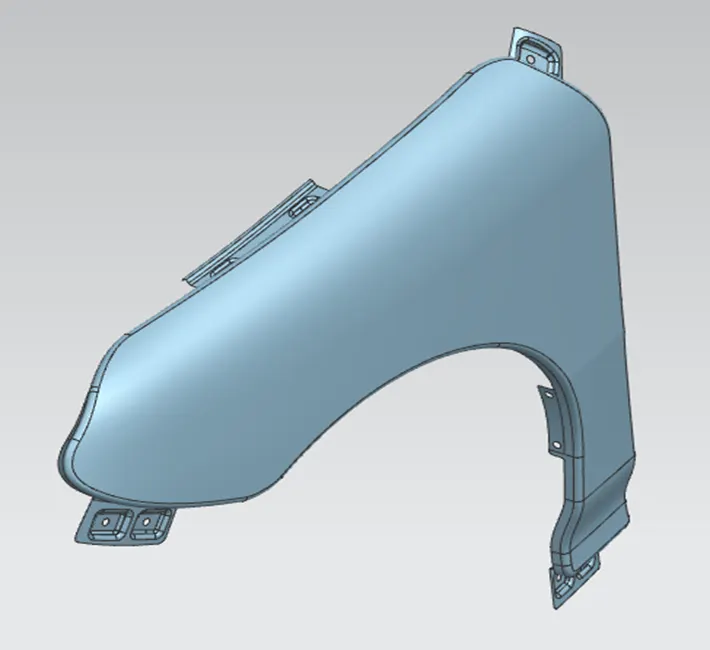
- The part is created with all mountings and design with a design considerations.
- Thicken the part at 0.75mm and the thicken direction is given proper.
CONCLUSION:
All the mounting areas is designed for the fender from the given skin data and master section, and it is designed by the all design rules.