Drafting of various geometries using Chamfer, Fillet tool in AutoCad
CHAMFER
Introduction:
AutoCAD is computer-aided 2d and 3d designing software which many designing professionals use. We have many different types of command in this software for making our work easy. The chamfer is one of the commands which make our work easy in Auto Cad software.
The chamfer is a command through which you can cut corners of two adjacent sides of any 2d shape at any distance or any particular angle by entering specific values. Here in this article, we will understand this command through an example and also have a look at the working technique of this command. So let us start our discussion.
AIM:
To draw the different various geometric drawing in the chamfer
PROCEDURE:
i.) At the top of the working screen, there is a ribbon which has many different types of tabs for making our work easy such as the Home tab, Insert tab, Annotation, and many others; below this, we have a working window in which we can see our current drawing, below this we have some navigation tool for handling our working in the window area.
ii.) Let us take a line command for our learning from the Draw menu of the Home tab and draw a line like this of 5, 5 unit dimensions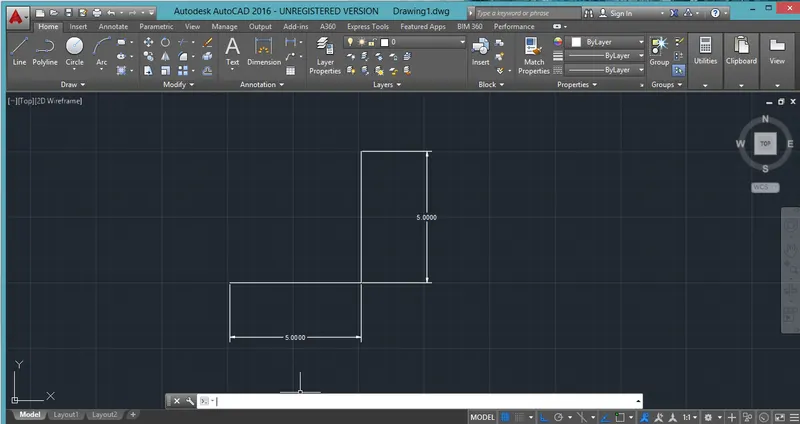
iii.) Now, take the Chamfer command from the Modify menu of the Home tab of this software by click on it
iv.) Once you take the Chamfer command, you will have some option of this command at the bottom of the working screen in the parameters box of the Chamfer command. We will discuss each of them one by one.
v.) We have two methods for making chamfer on this rectangle; one is Distance, and the second is an angle. We will first take the Distance method. For distance, type D from the keyboard in the parameter box of the chamfer command and press the Enter button of the keyboard.
vi.) We give the radiu repectively 1
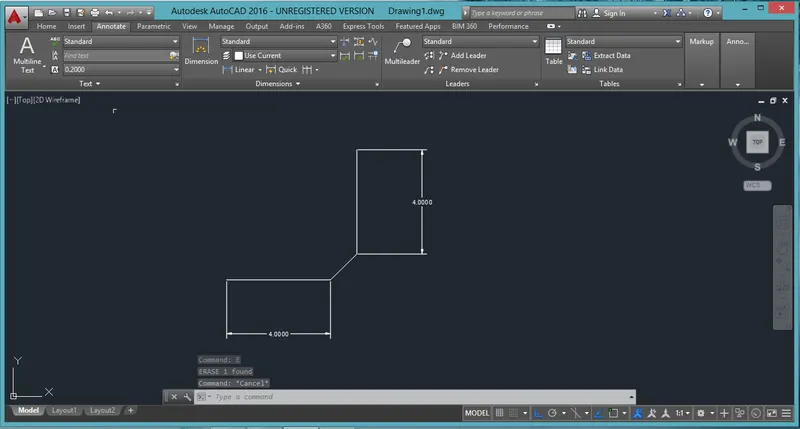
vii.) Then click on the second line between which you want to add chamfer, then press enter to apply the command.
viii.) Now, let us analyze other options of this command. Again take the chamfer command; for the chamfer command, you can type CHA from the keyboard and press enter button of the keyboard.
ix.) Draw the rectangle for an to the measurement like 4,5 unit
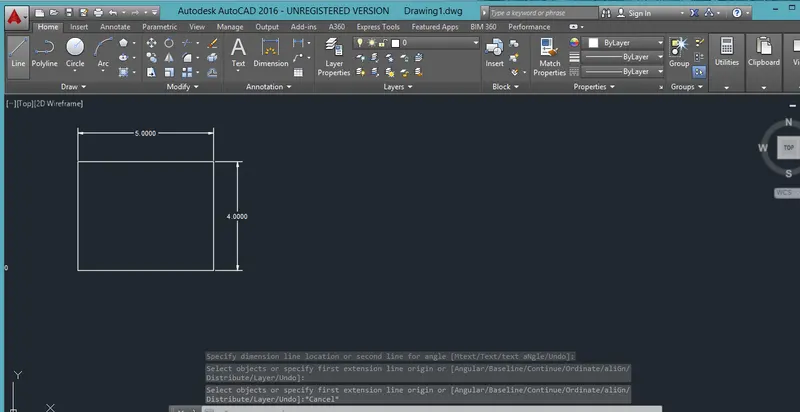
x.) Now, it will ask you to enter the value of chamfer distance at the first line of the chamfer. I will take it as 1 then press the enter button of the keyboard.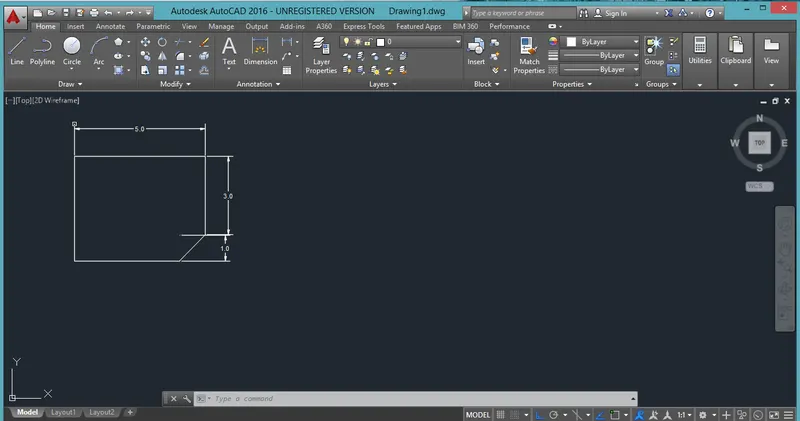
xi.) Next we try an angle to chamfer tool using the units of 5,5
xii.) Now, let us come to the Angle option of the Chamfer command. For angle, option take Chamfer command again by type CHA from keyboard then press enter button of the keyboard. Now press the A button on the keyboard, then press the enter button of the keyboard.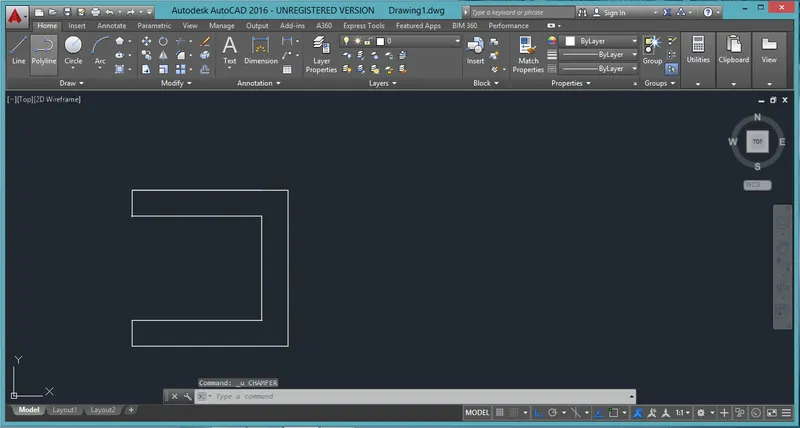
Xiii.) Now, it will ask you to specify the length of Chamfer. I will take it as 1 then press the enter button of the keyboard.
xiv.) Now, it will ask you the angle of chamfer from the first line. I will take 20 a
s the angle of my chamfer then press the enter button from the keyboard.
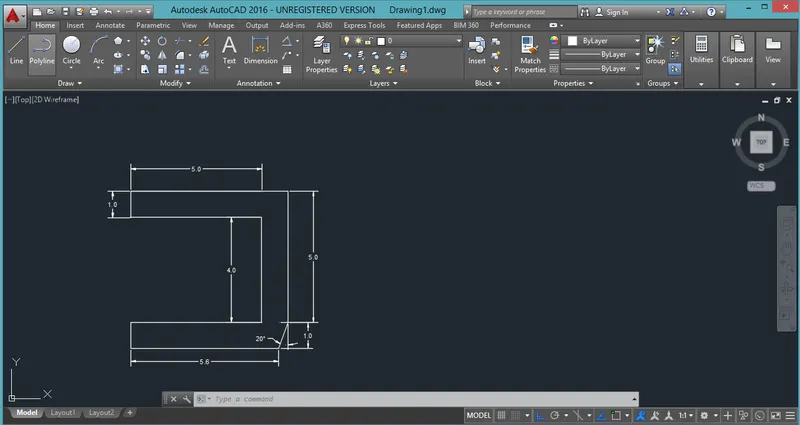
xv.) Now, let us see the ‘Multiple’ option of this command. Again make a rectangle and take the Chamfer command, then press D from the keyboard, then specify the distance of the chamfer for the first and second line as we did in the previous. Now press the M button from the keyboard, then press the enter button of the keyboard.
Xvi.) Now, you can make multiply chamfer by clicking one by one on the rectangle side without exiting this command at one time.
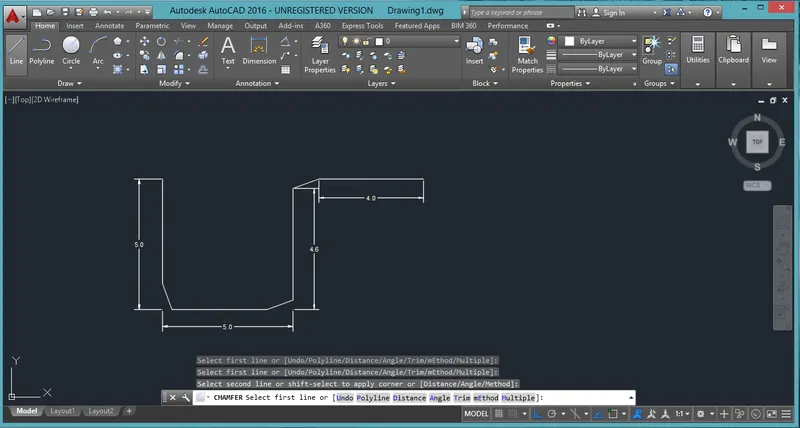
Xvii.) Now, let us see the Poly option of this command. Now again, make a rectangle and follow the steps of the chamfer command up to giving a distance of chamfer. Now press the P button from the keyboard, then press the enter button of the keyboard.
xviii.)To draw one line and another line not connected
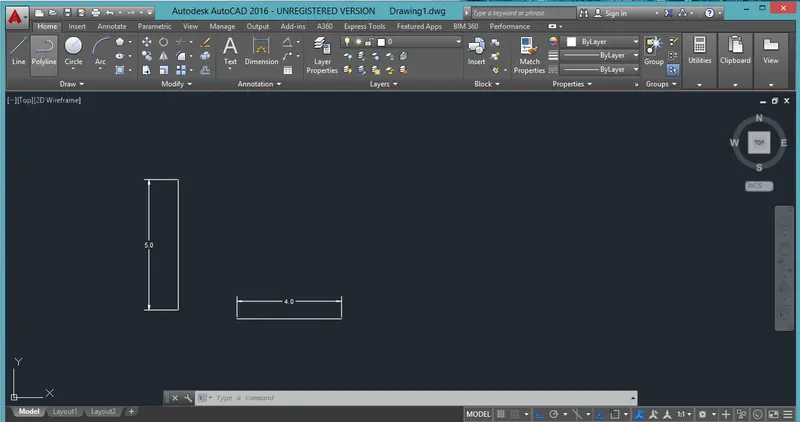
xix.) Type Chamfer to select poly line option to select the line and press enter
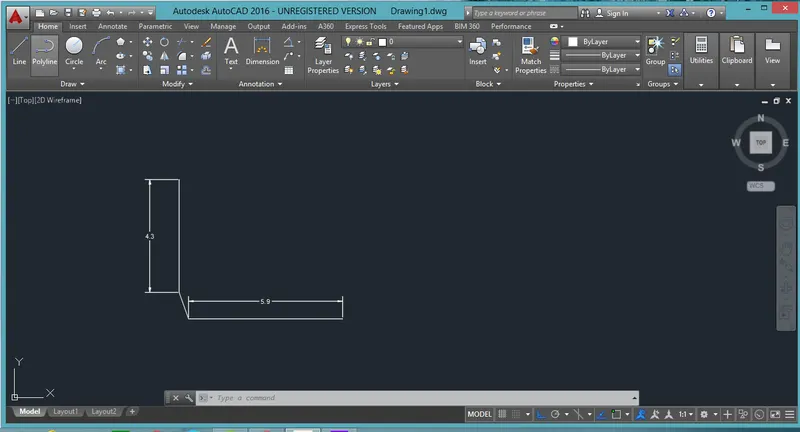
xx.) Next example draw an to the intersection at the unit of 6,6
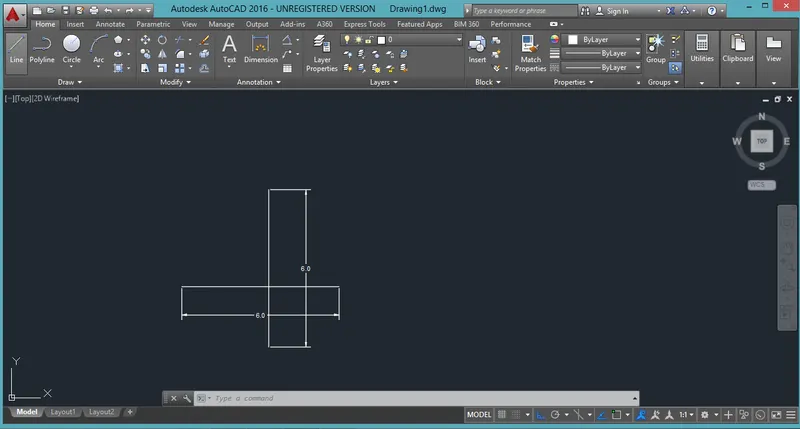
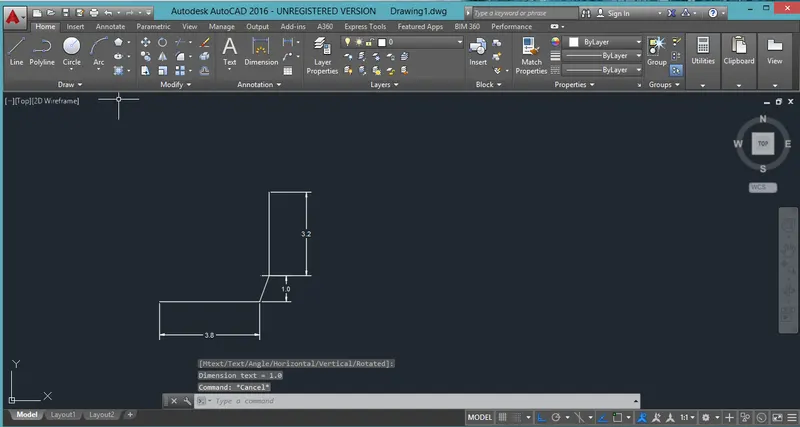
xxi.)To select the chamfer command in the trim at the distance of 1 unit
xxii.) Next example to draw an rectangle to take an offset 10, 10 unit as respectively
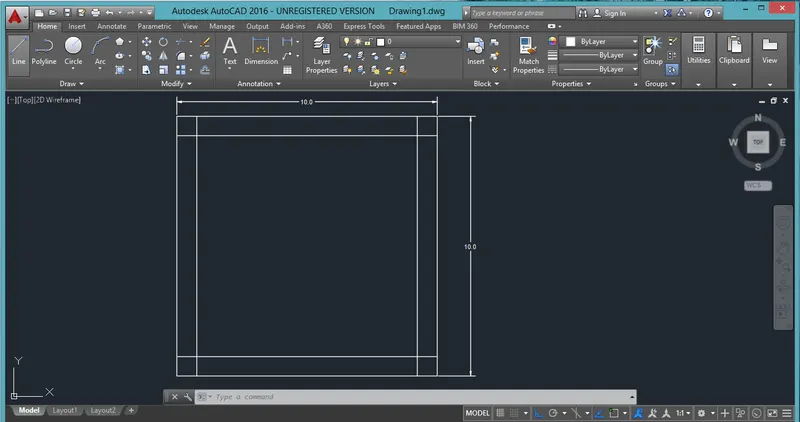
xxiii.) To take an chamfer multiple action we choose
xxiv.) Trim option at the edge of the rectangle
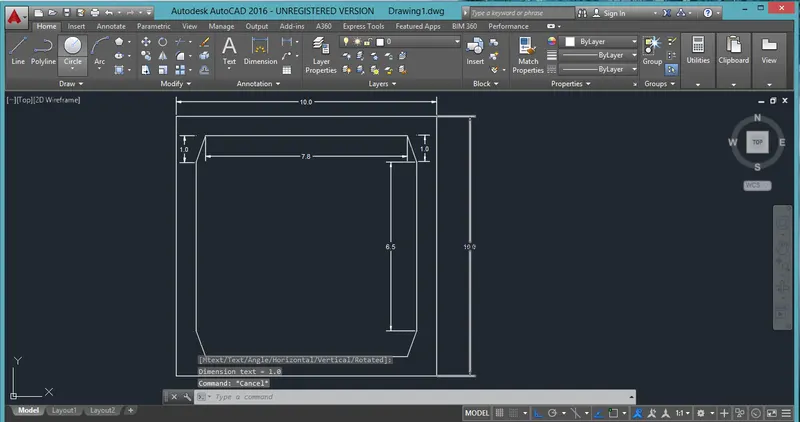
xxv.) In this way, you can use the Chamfer command in Auto Cad software and handle its parameters.
RESULT:
After this article, you can understand the Chamfer command in AutoCAD and how you can use it to make a good drawing of any particular part of engineering design. I can have a good command of this command after practicing on it.
FILLET
INTRODUCTION:
AutoCAD is a computer-aided 2d and 3d drawing software that is maintaining by Autodesk. We have many different types of command for making its work easy in this software. The fillet is one of the commands which make a drawing of any object easy in this software.
The fillet is that command through which you can add radius or arc at the adjustment side of any 2d shape in the drawing of any model. Here in this software, we will understand the Fillet command of Auto Cad software through an example of 2d shape and learn how to handle Fillet parameters during its use. So let us start our discussion.
AIM:
To draw an various of geometric in fillet tool using autocad
PROCEDURE:
i.) At the top of the working screen there are some tabs which have different types of command for making drawing and 3d model of that drawing, below this we have a working window in which we can see our drawn object, we have navigation cube in this area also which shows you different views of any drawing such as top view, front view and side view, at the bottom end of this software we have some navigation tool for handling the drawing in working window.
ii.) Let us first have a rectangle command for drawing a line shape in the working window. For the line command, go to the Draw menu of the Home tab and click on the line tool icon. Now draw a line of any shape like this, or you can give specific dimensions to this line according to you.
iii.) The units of 5,7
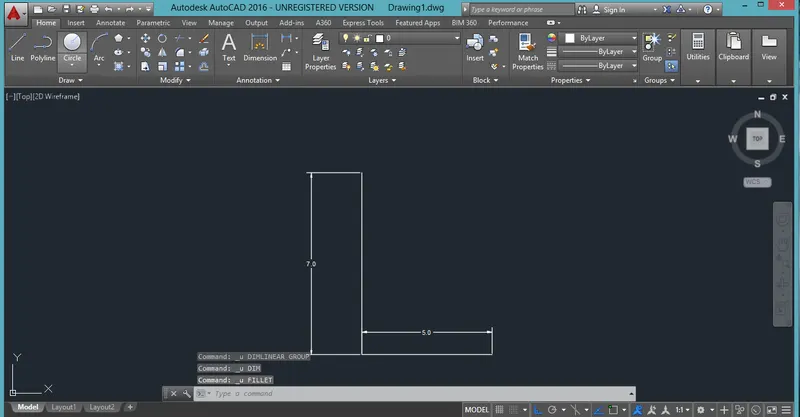
iv.) Now, let us have the Fillet command for drawing a fillet on this rectangle. For the Fillet command, go to Modify menu of the Home tab and click on the Fillet tool icon.
v.) can simply press the F button from the keyboard then press the ‘Enter’ button from the keyboard for the Fillet command.
vi.) Now, this command will ask you to select the object in which you want to use this command. Object means select one of the adjustment sides between which you want to add fillet.
vii.) But before selecting an object, go to the Parameter box of Fillet command, which is at the bottom end of the working window. There are three options through which you can apply fillet on any 2d shape that are Polyline, Trim and Multiple. We will have a look at each one by one. So first, press the R button from the keyboard in this box and press the Enter button from the keyboard.
viii.) Then enter the value of the radius of fillet, that means at which arc you want to add fillet on that shape. I will give 1 as the value of the radius.
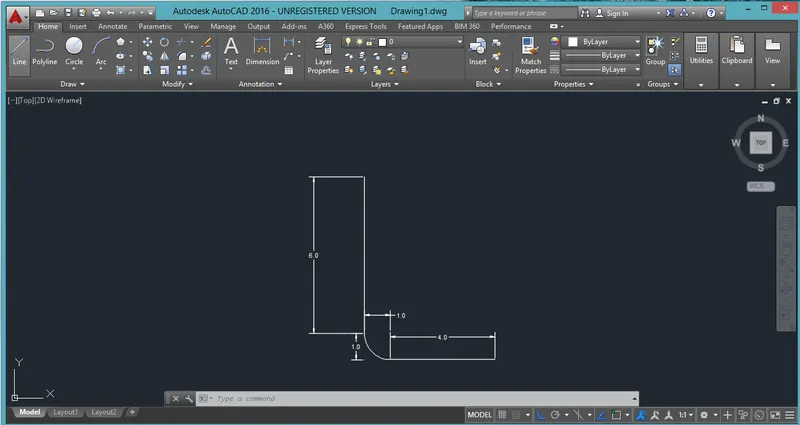
ix.) Now click on the other adjacent side, and once you click on the next adjacent side, it will apply a fillet of your chosen radius.
x.) Now we draw the circle at repectively radius of 2m and 1.8m
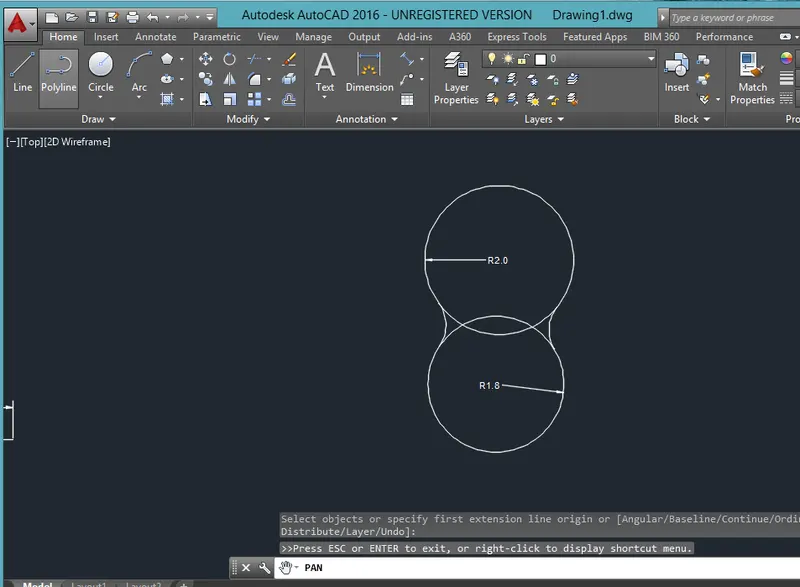
xi.) To select the radius method of 1 unit apply at the circle to joint the circle
xii.) Next example a rectangle respetively unit 5,4
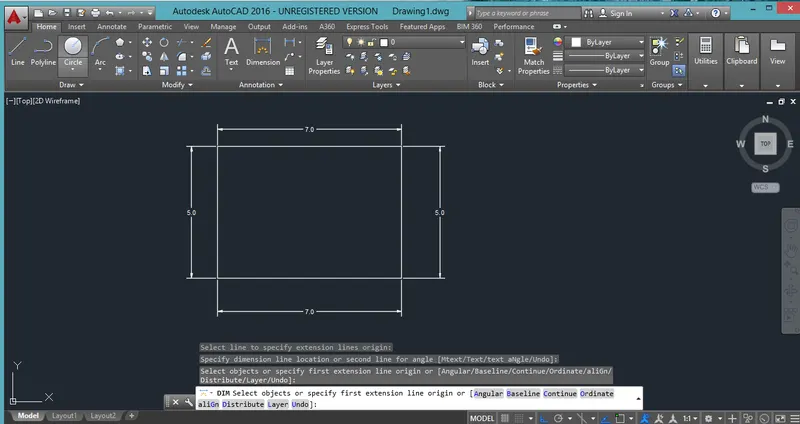
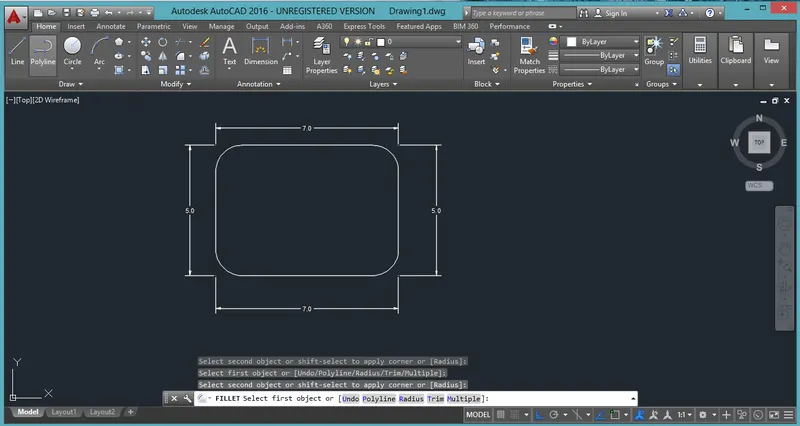
xiii.) In this rectangle we use an multiple option at the all edge
xiv.) At the radius of 1 unit for respectively at the all corners
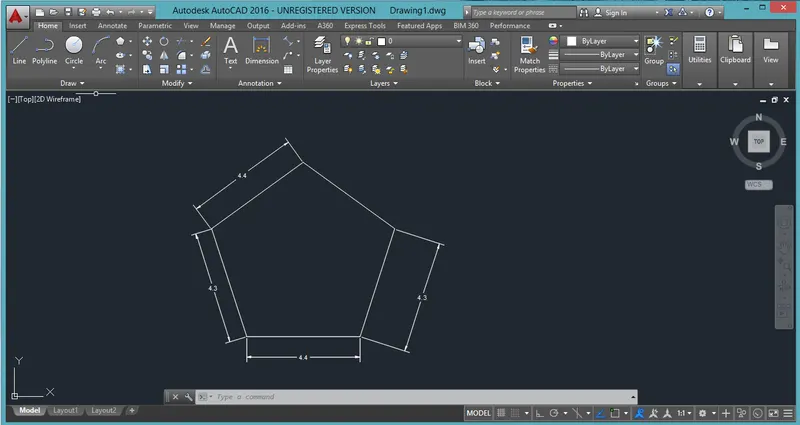
Xv.) Now we tried to the polygon at the multiple points at the unit of
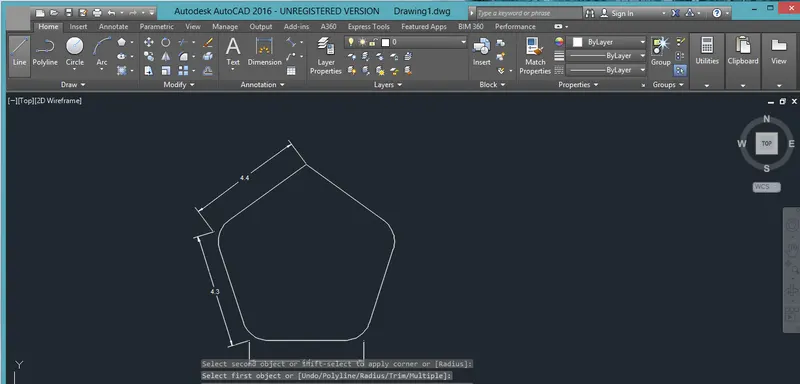
xvi.) At the polygon of the all the edge respective at the 1 unit of the apply on the fillet action
xvii.) Next we tried intersection line respective dimension 6,6
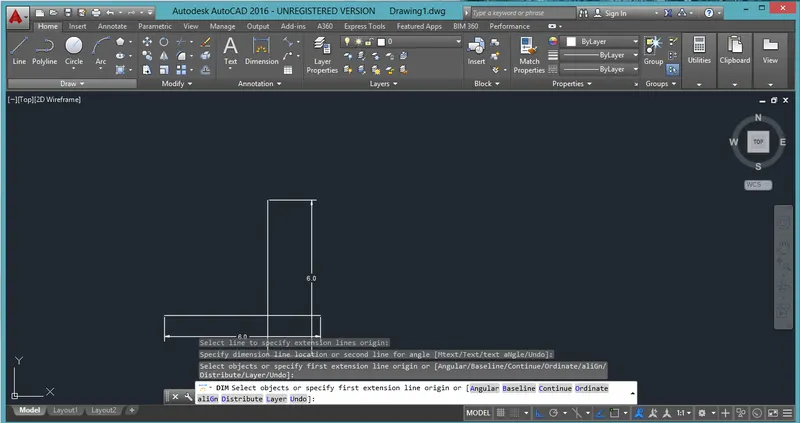
xviii.) Select the trim option at the two points at fillet unit as 1
xix.) To trim the polyline we get the fillet curve at the two point
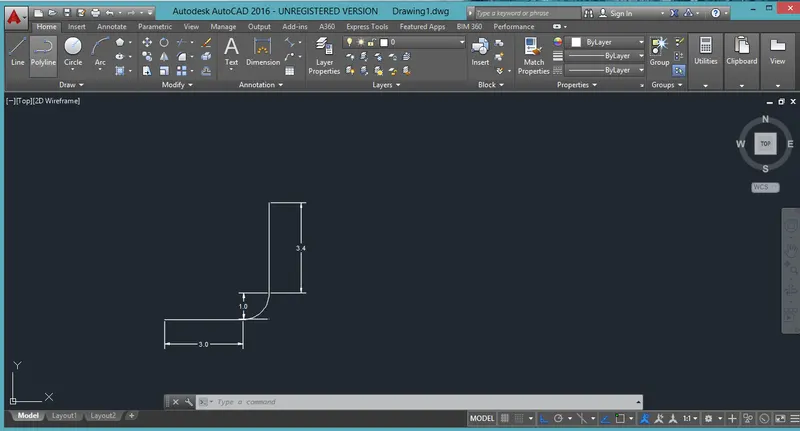
xx.) can use the Fillet command in Auto Cad software and use different options of this command for making the different types of Fillet in 2d shape of drawing in this software.
RESULT:
After going through this article, you can understand ‘what is Fillet command in Auto Cad software’ and ‘how you can use it to make shapes of drawing in Auto Cad software without any problem. You can have a good command of these software features after having to practice on this software.