Drafting of various geometries using Chamfer, Fillet tool in AutoCad
Project 3rd: Drafting of various geometries using Chamfer, Fillet tool in AutoCad
Aim: Drafting of various geometries using Chamfer, Fillet tool in AutoCad
Introduction: drafting a follow,ing tools by using following commands like, by using object snap, elliptical command, by using arcs commands, construction lines and ray tools, divide and measure tool, and by using modify commands like mirror, trim, extend, explode, lenghten, align, break and join command, and manage layers in auto cad 2019.
1) DECIMAL:
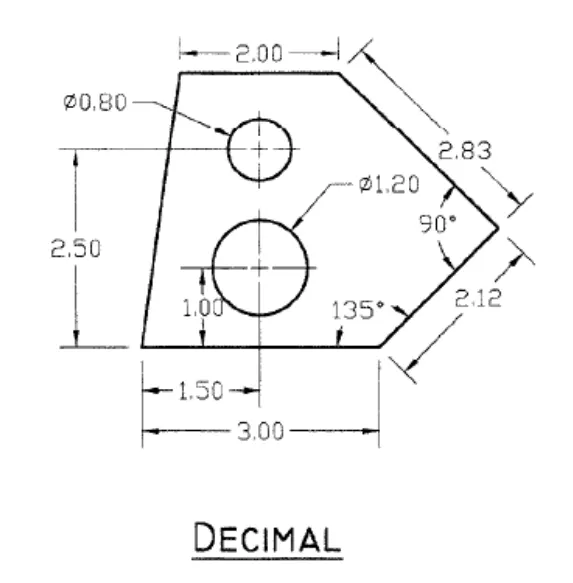
a) procedure:
- start the auto cad with imperical
- choose line command from tool bar ar any like dialog box, draw
- draw a horizontal line with 3 distance
- draw another line with 135 degree angle by chossing line command and @2.12<135
- then line with 90 degree angle with distance @2.83<90
- draw one horizontal left side line with 2 distance
- then closed to bottom line or first started point
- and give all dimensions
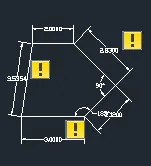
b) procedure
- draw a circle with 1.2 dia by using circle, diameter command
- with center point of @1.5,1
- then draw upper circle of 0.8 dia
- with 2.5 height and 1.5 on right sight meance @1.5,2.5
- and give diameter dimensions
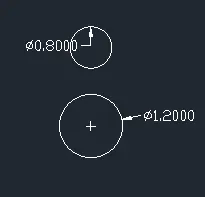
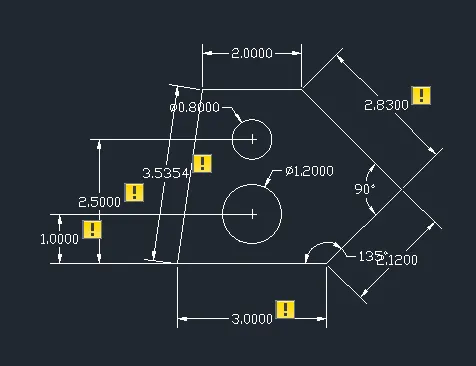
result: we draw decimal by using line command, circle command, by using relative coordinate system, and also use polar system for angles, we draft by using two sepreate part for clear understanding with procedure
2) Architectural
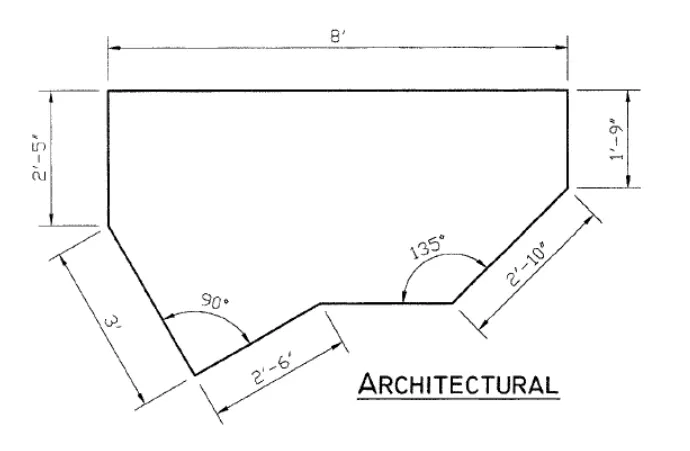
a) process
- choose line command
- draw a line at 135 degr. with distance 3'
- then provide 90 angle
- and draw line with 2'6" distance
- give all dimensions using dimensions command
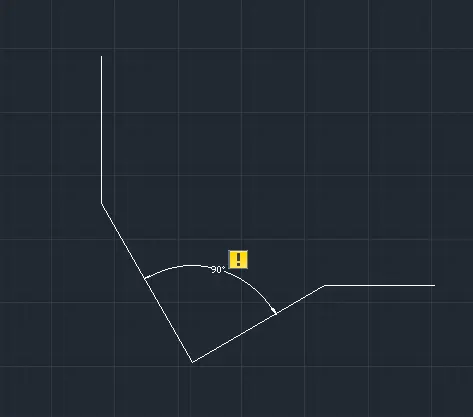
b) procedure
- choose line command draw a line horizontal right at a distance 8"
- then go below with 1'9"
- then at a angle 235 with distance 2'10"
- give all dimensions using dimensions command
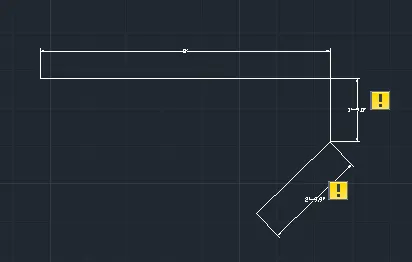
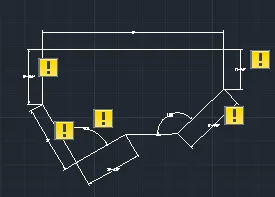
refrence: draw the digram from combination of above two(a,b), using relatived coordinate method and line command
3) Engineering
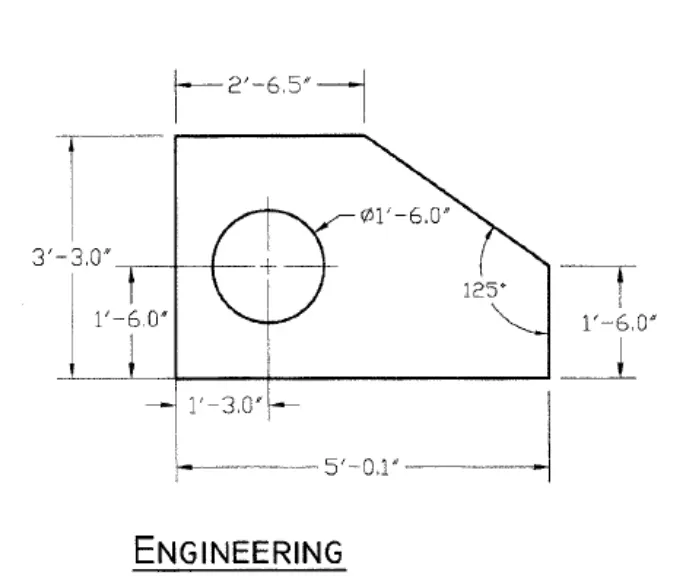
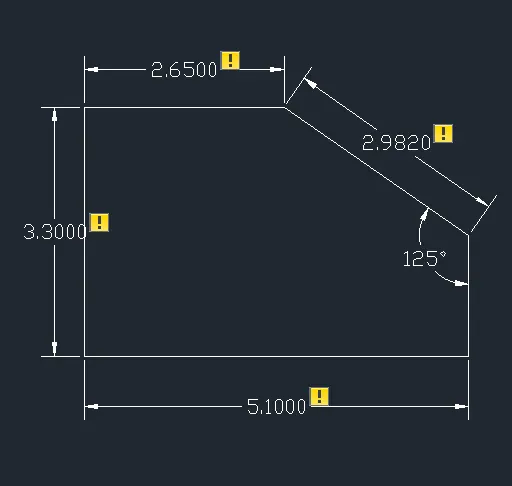
a) procedure
- choose a line command
- draw a line of 5.01 horizontal at right side by using cursor
- draw a line with top side at distance 1.6
- then draw line @2.982<125
- draw horizontal left 2.6.5
- then go bottom or closed with 3.3
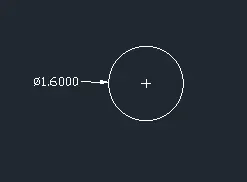
b) procedure
- take point at @1.3,1.6 from origine
- draw a circle using circle,diameter command
- with dia 1.6
- and give dimension
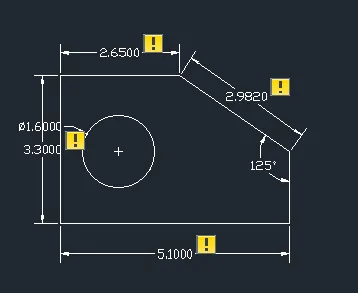
result: we draw the engineering diagram using angle, line, coordinate and give dimensions to all and draft in two parts for clear understanding
4) random
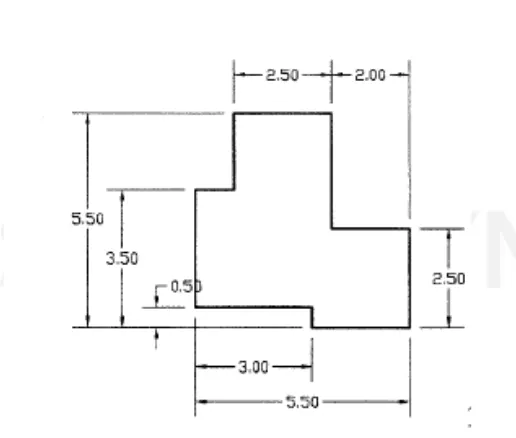
a) procedure
- choose a line command and draw horizontal line of 2.50
- the draw above with 2.50
- then draw left with 2 distance
- then up with 2 distance
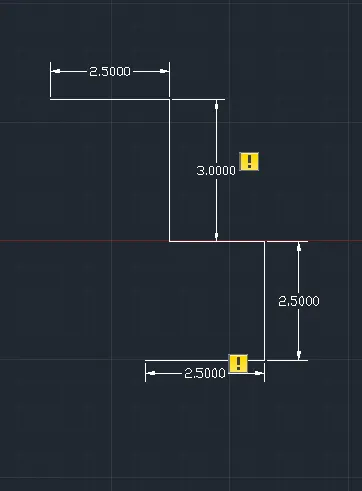
b) procedure
- go to first origine point of a part diagram
- choose line command
- go up with 0.5
- then go to left with cursor at a distance of 3
- then again up with distance of 3
- then right with a distance of 0.5
- then up with 2
- and comple the sketch and give dimensions
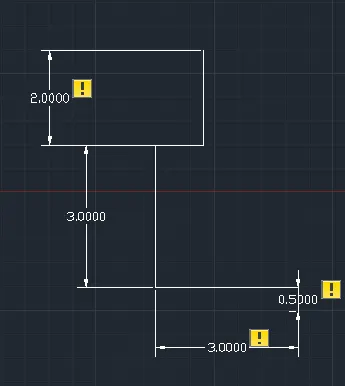
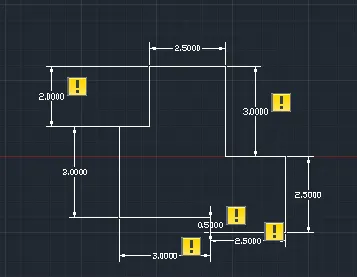
result: we draw the digram in two parts and complete, we use line command for that and give direction cursor
5)
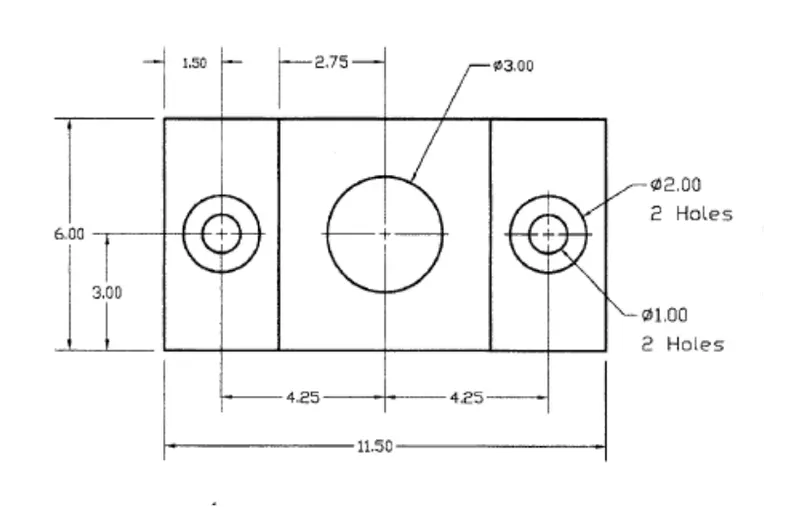
a) Procedure
- choose a line command from toolbar
- draw a horizontal line with on right side with 5.57 distance
- draw verticle up line from origine at a distance of 6
- draw a horizontal line with on right side with @5.57 distance
- draw left side with 4.25
- and down with 6 or closed
- then maeked center point at origine at distance of @1.5,3
- and draw 1st circle with dia 2
- and second or inner circle with dia 1
- then go to origine and draw center point @5.75,3 distance
- and draw cemi circle by using arc command with dia 3
- give all dimensions
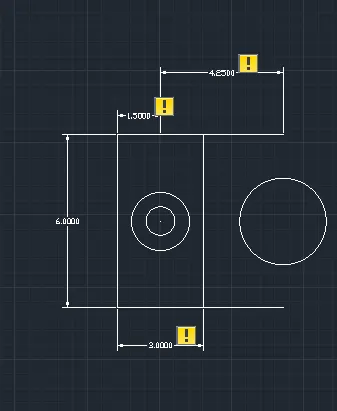
b) procedure
- choose mirror tool
- mirror the sketch
- by taking a horizontal last base point and mirror it at 90 degree
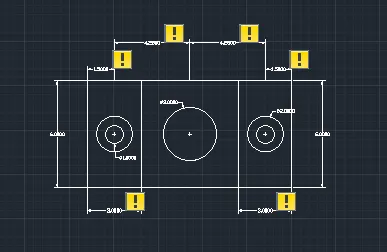
Result: we used the mirror command here due to symmetric object, so draw first part and mirror it at 90 degree for second part
6)
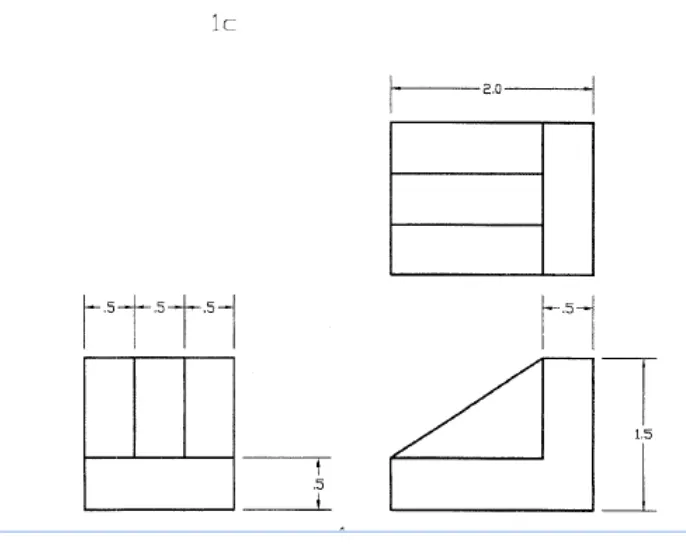
a) procedure
- choose rectangle command
- draw a 1.5,.5 rectangle
- above it draw a .5,1 dimensions 3 rectangle above 1.5 side of below rectangle
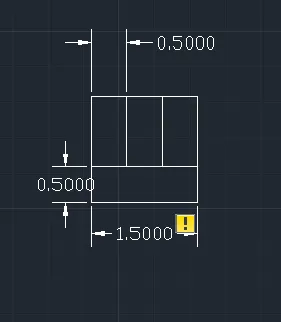
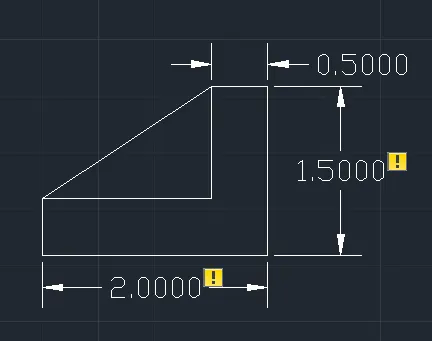
b)procedure
- choose line command
- draw horizontal line at right side with 2
- draw one vertical line with 1.5
- draw left side with 0.5
- draw bottom side with 1
- draw left side with 1
- and close it
- then draw up line with 0.5 and
- turn ortho off and joint line to top corner line
c) procedure of c part
- choose line command
- draw horizontal line with 2
- go up with 1.5
- then again left side with 2
- then go bottom with 0.5
- draw horizontal right line with 1
- and offset it two times at a distance of 0.5
- then mark vertical line at distance @1.5,0 from origine
- and give all dimensions
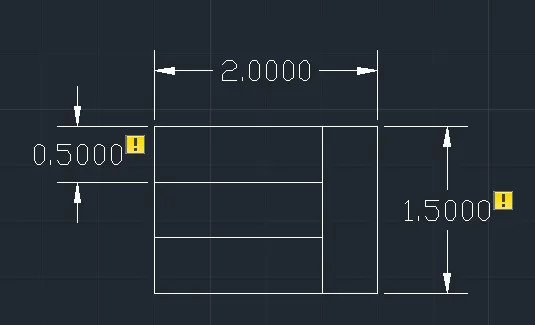
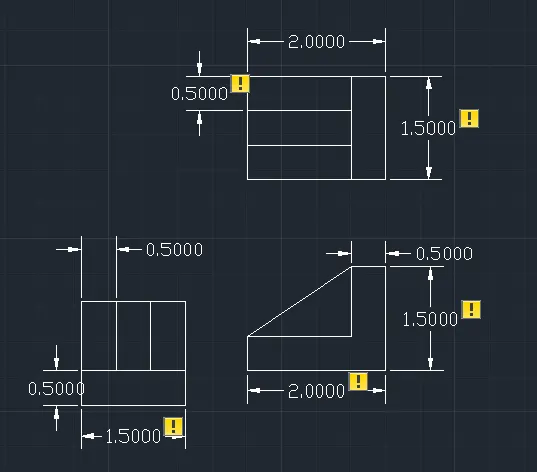
result: we draw plan and side view of staircase in 3 diffrent parts by using line command rectangle command and give all dimensions
7)
)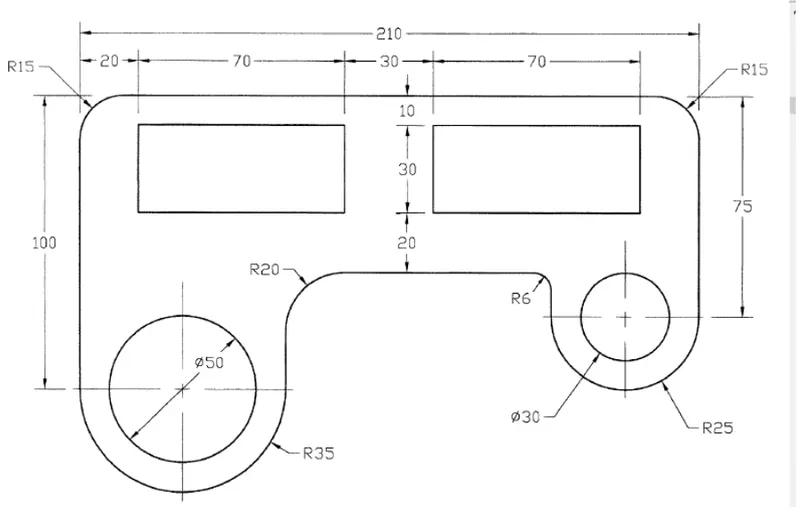
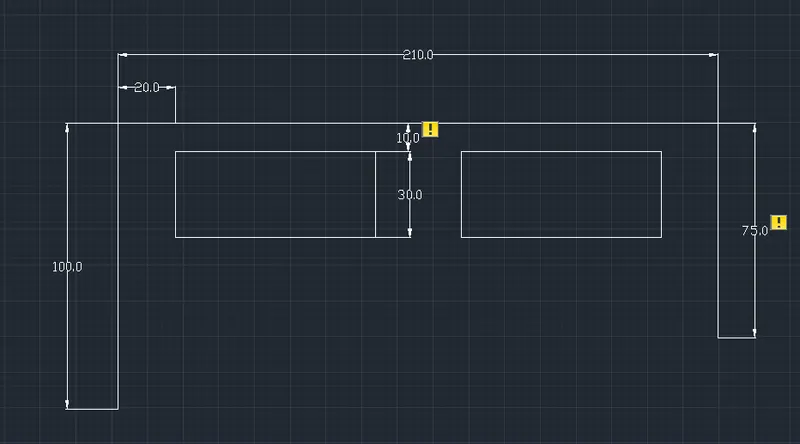
a) procedure
- choose line from toolbar
- draw vertical line of 100
- draw horizontal line of 210 with right side
- draw bottom side with 75
- go @0,75
- from that go @-20,-10
- from that point draw 70,30 rectangle
- copy the section at a displacement 100 to left horizintally with cursor
- give all dimensions
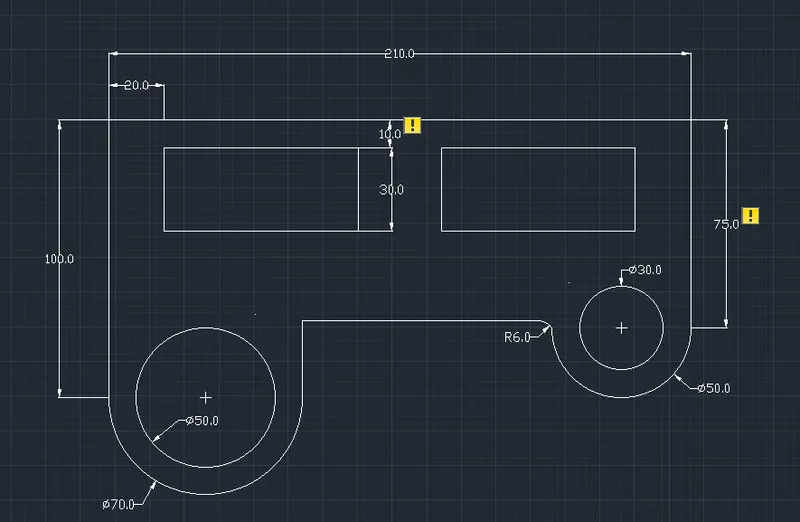
b) procedure
- draw a bottom circle
- by choosing circle command draw 50 dia outer circle by deciding the center point
- then from thats refrence we draw 30 di half circle
- then draw arc of radius 6 at corner
- and go to left side
- here at bottom pointed mid point then draw outer semi circle with 70 dia
- and from same refrence draw circle with dia 50
- and joint the bottom line to both circles
- and mension all dimesions
c) procedure
- by using fillet tool
- fillet all corners mensions in the digram
- and give dimesion from dimension radius
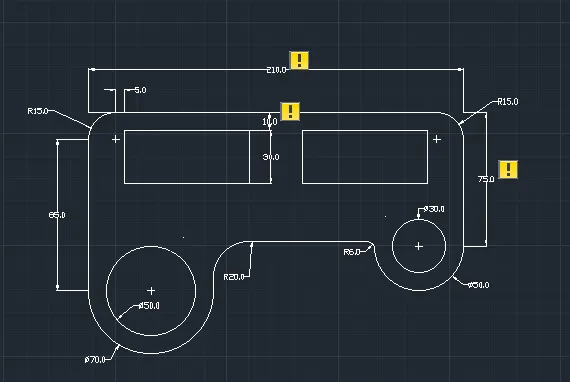
result: we draw a upper sketch by using, arc, circle, semi circle, lines and fillet command
8)
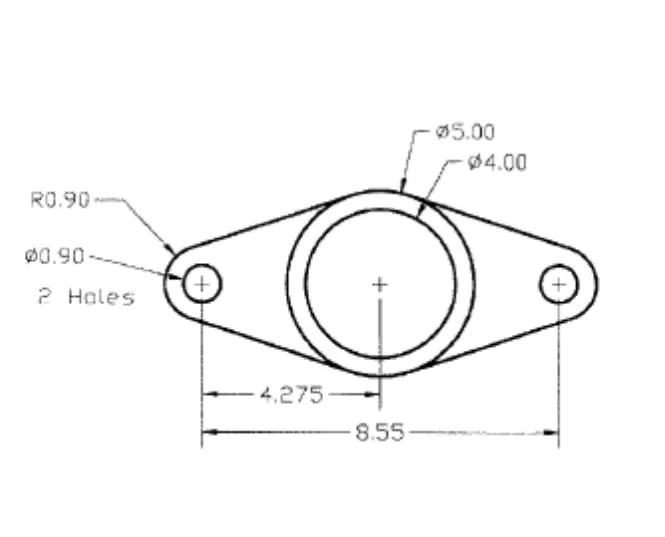
a) procedure
- choose circle
- draw circle with dia 5 and dia 4 with same point
- go left 4.275 from the circle
- and draw 0.9 dia circle from thats point
- then draw 1.8 dia circle from same point
- then draw tangent between middle big cicle to outer big circle
- and trim extra by using trim command
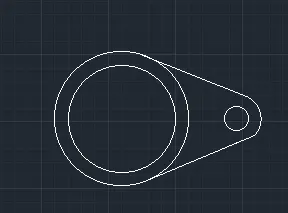
b) procedure
- take mirror tool
- mirror the whole image
- by taking middle center as refrence
- at a 90 degree and all dimensions
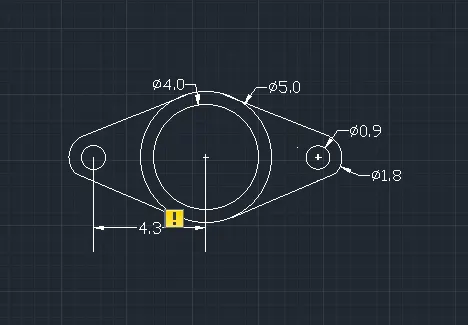
result: we draw a sketch using circles and give tangent line and all dimensions and we get final sketch
9)
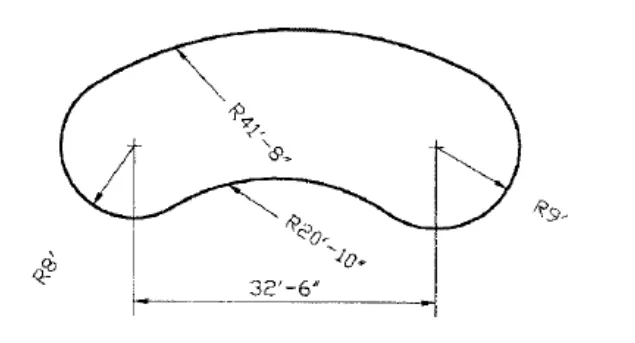
Procedure :
- locate a point at a distance 32'6"
- draw a first circle with radius 8'
- go to another point and draw circle of R9'
- then draw upper arc with R41'8"
- and draw bottom are with below circle point of R20'10"
- and trim extra points
- give all respective dimenssions
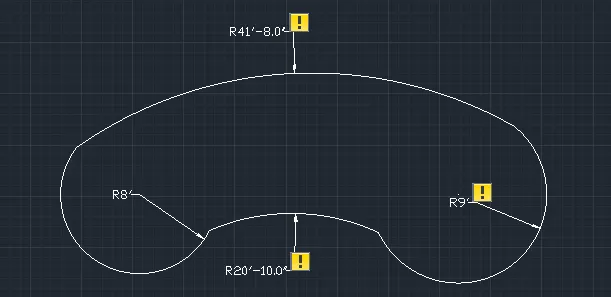
Resut: we draw the sketch by the help circles, points, and arc and finally using trim command for trimming extra points or lines, and give all resprctive dimensions
\
10)
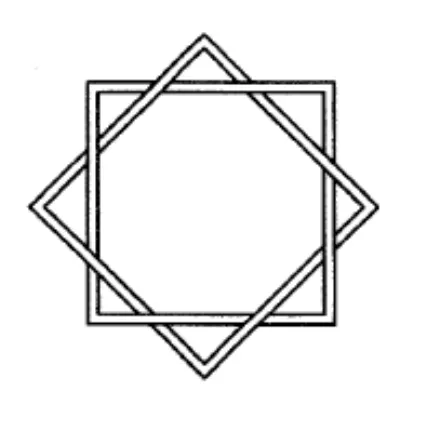
a) procedur
- choose squre and draw 100X100
- then draw inner sqaure
- with 90X 90 dim.
- then copy this sketch
- and move it on it
- to make overlap with 45 angle
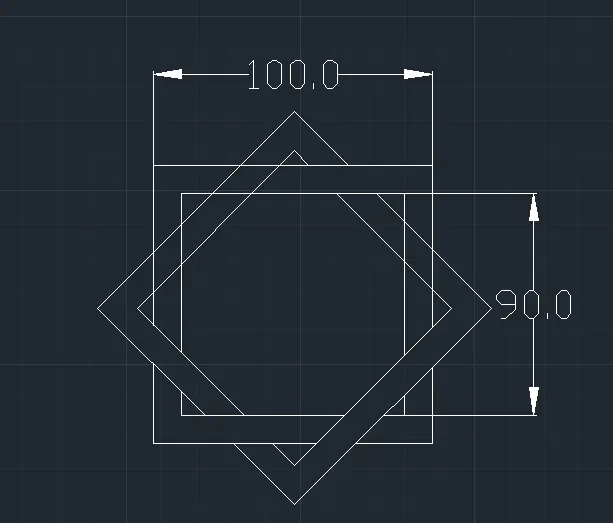
result:
we draw 100X 100 outer sqaure and inner square 90x90, and copy and move and put to make overlap with first, and give all dimensions by using dimensions command
11)
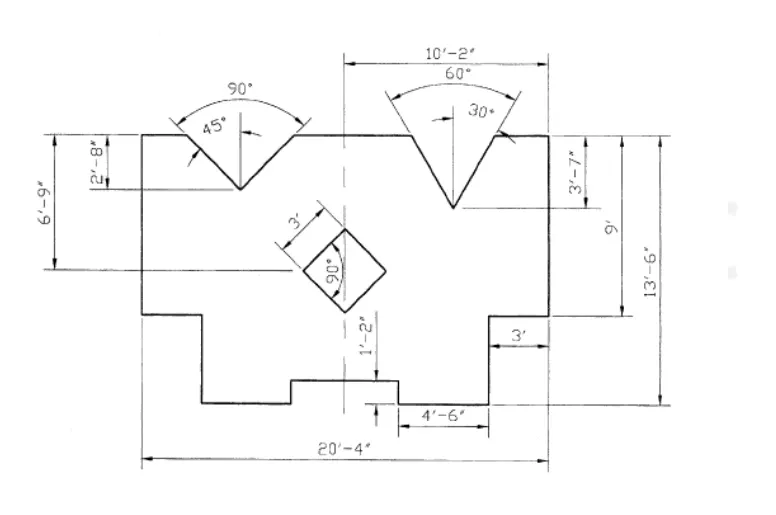
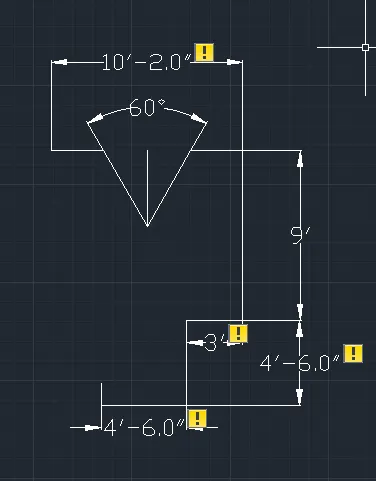
a) procedure:
- choose line from toolbar
- draw right side horizontal line of 4'6"
- then up with 4'6"
- right side using cursor 3'
- then up with 9'
- then left side with 10'2"
- then on mid point from polar
- and make 60 degree angle
- by using lines and angles
- and give dimensions
 \
\
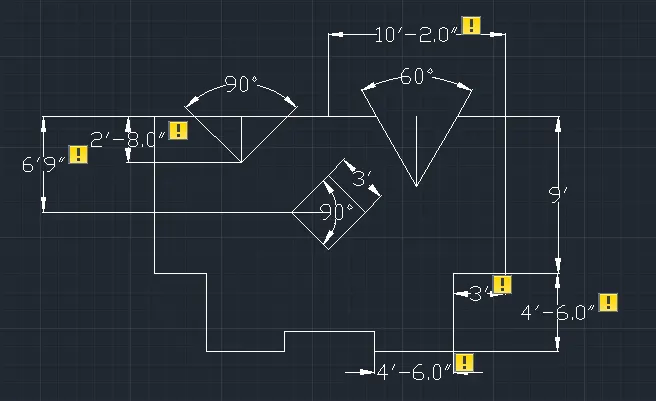
b) procedure
- go bottom last point of 1st part
- choose line
- and draw left side with 4'60"
- and top with 4'6"
- and left side again with 3'
- now go up with 9'
- go right with 10'2"
- at mid point of that line
- make angle 90 degree with helps 3 lines
- and from top left origine
- locate @ 10'2",6'9"
- then from that point
- on polar with 45,90,135
- and draw 3,3 dimension with square with 45,90,135 angle
- and give all dimensions
Result:
we draw the sketch by using trim, angle, polar command and also use line, dimensions and merged 1 st part and 2nd part