Creation of Multiple viewports, Scaling the drawing and setting in Template in AutoCad
Creating Multiple viewports, Scaling the drawing and setting in Template in AutoCad.
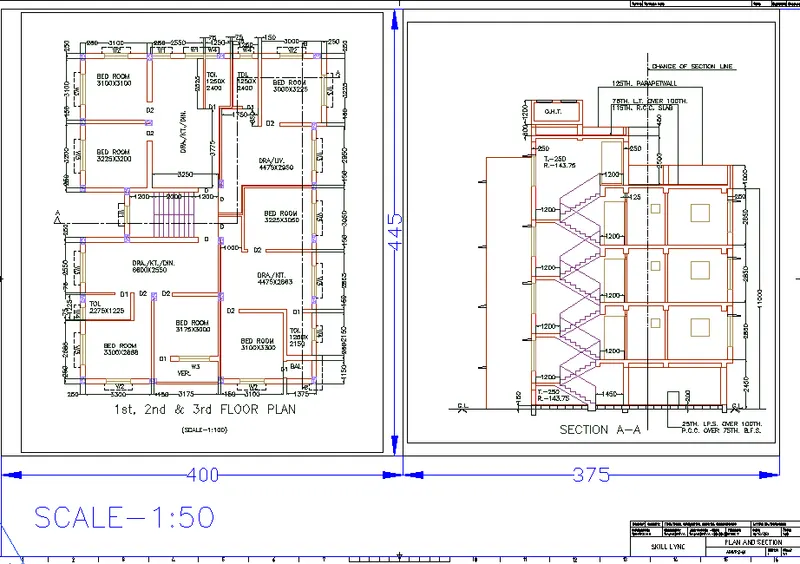
1.Creating layout of the Plan and Section A of the project in Challenges 7, using the template Tutorial-mArch.dwt in a scale as given in the Figure.
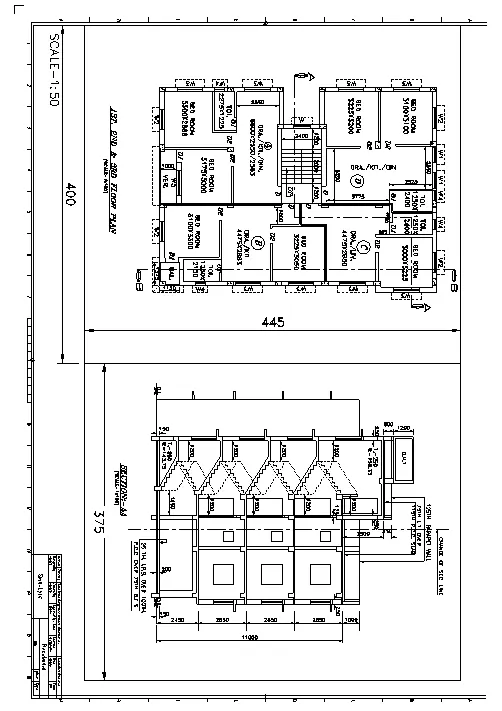
AIM: To Create a layout of the Plan and Section A of the project in Challenges 7, as shown in the figure above,in AutoCad.
INTRODUCTION: The layout is created in AutoCad using the template Tutorial-mArch.dwt in a scale as given in the Figure.The procedure is explained and the final result is given.
PROCEDURE:
- Open the drawing , Click on the layout tab right click and create a new layout.
- Rename the layout tab as plan and section.
- Delete the current viewport displayed in the layout.
- To create the template use Command LAYOUT Select template.dwt select m.Arch from the dialogue box and select ISO A1 layout.
- Type MS for the activation of model space.
- To create a viewport draw a rectangle of size 400x455 and 375x445 for creating the viewport.
- Use the command MV multiple view select object option and click on the rectangle , then the drawing will be displayed in the viewport.
- Similarly, do it for the Second rectangle.
- Command MS for the model space and click on the viewport we need to set the drawing.
- Click on the first viewport and zoom in on the drawing for the plan and give a scale of 1:50 and lock the view port so further zooming will not change the scale.
- Similarly do it in the second viewport in the section view and making a scale 1:50 and lock.
- Mark the dimension in paper space by the dimlin command.
- Go to attributes in template.
- Go to paper space and click on the template which is a block.
- Click on the attributes and edit attributes-double click the attribute text and the attribute dialogue box appears.
- Enter the text by multiline text in paper space with text height 20.
- Taking the plot using A1 Sheet.
- Use command PLOT the dialogue appears.
- Give name as DWG to PDF.
- Select the paper size as ISO A1(594x841mm).
- Select what to put as layout and give scale as 1:1with orientation as landscape.
- Select the pen as MONOCHROME So that the print will be in Black.
RESULT:
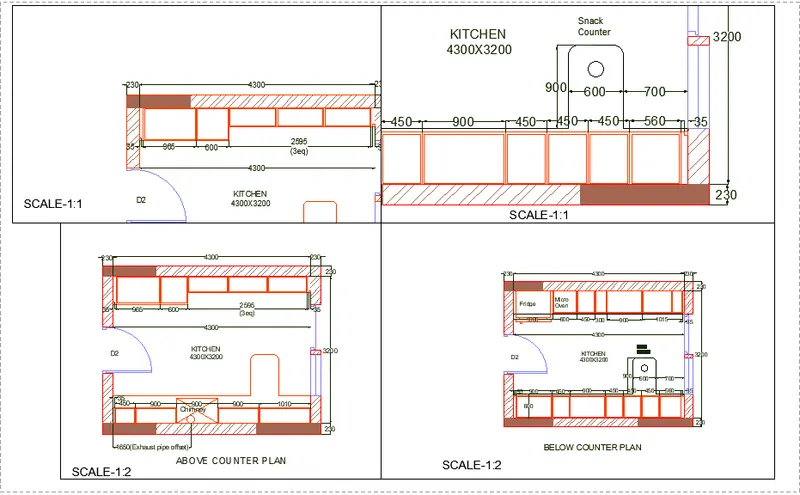
2. Creating a layout of the Kitchen drawn in Challenge 9 as shown in Figure.
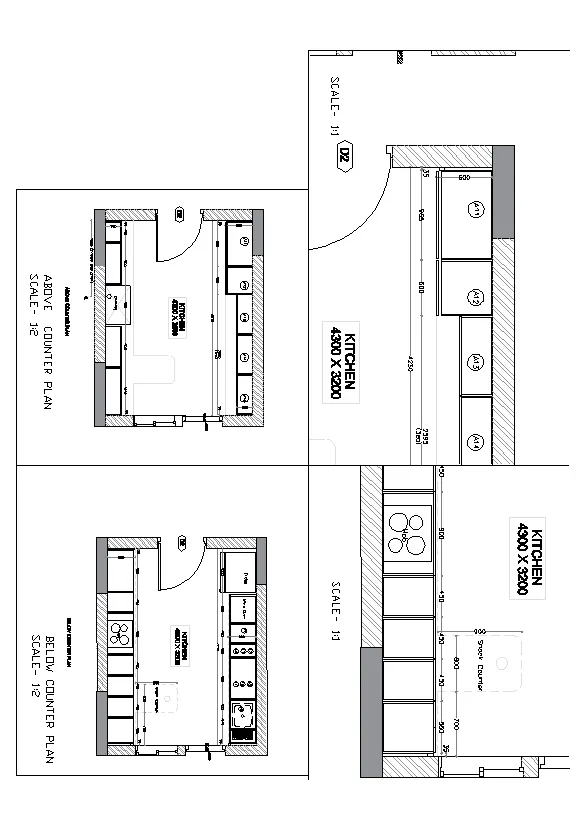
AIM: To Create a layout of the Kitchen in Challenges 9, as shown in the figure above,in AutoCad.
INTRODUCTION: The layout is created and plotted in AutoCad .The procedure is explained and the final result is given.
PROCEDURE:
- Take the different views for the layout in model space.
- Open the drawing , Use command view to create new view.
- The View manager dialouge box appears. Click on the model and click on new to create a new view.
- Another dialouge box of new appears, give the view name as above counter plan select the boundary as define window and select it using the window selection from the drawing.
- Click on ok and the view with the name above the counter plan and the selected drawing will be created.
- Similarly create views for the below counter plan, hob and 11 to A14 cabinates.
- Create the layout with 4 view ports with A4 Sheet.
- Rename the layout tab as kitchen layout.
- Delete the current viewport displayed in the layout.
- The MV Command creates 4 viewports by making the window.
- Type Command View in the layout tab, Select the required view and click on the viewport where it has to be displayed and lock each viewport.
- Select the A11 to A14 cabinate view in the first viewport,Zoom and pan to fit in the viewport.
- Go to paper Space , with text command type scale 1:1.
- Enter command MS click on the second viewport.
- Enter the command view and select the view name snack counter.
- Zoom and pan the viewport to make the view fit in the viewport.
- Lock the viewport.
- Go to paper space and with Command T enter the text scale 1:1.
- Similarly in model space click on the third viewport.
- Enter the view above counter plan.
- Zoom and pan the viewport, so that the drawing fits in it.
- Lock the view port.
- Go to paperspace and with command T enter the text as ABOVE COUNTER PLAN and scale 1:2 with text height 150.
- Similarly, do it for the below counter plan and scale 1:2 with text height 150.
- Now create the plot using the plot Command.
- Select the paper size as A$ and name are given as A4, printer name and print to pdf.
- Select what to plot as a layout and select pen assignment as monochrome.
- Select ok to convert to pdf.
RESULT:
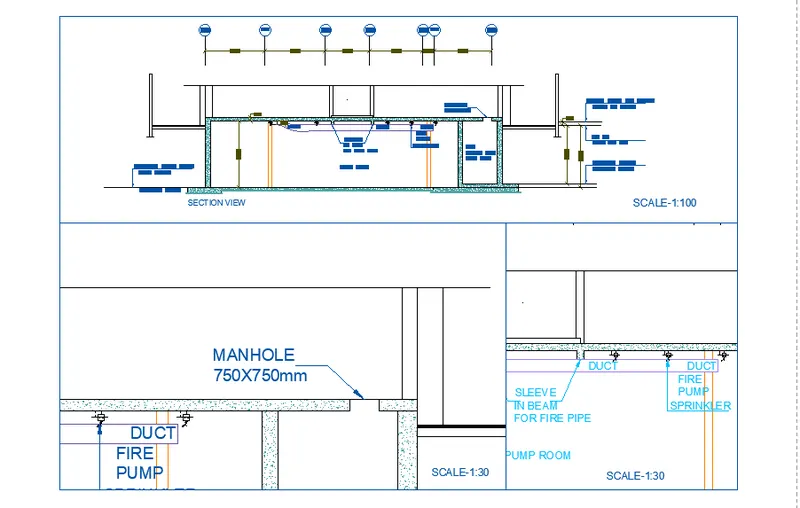
3. Creating layout of the section created in challange 9.
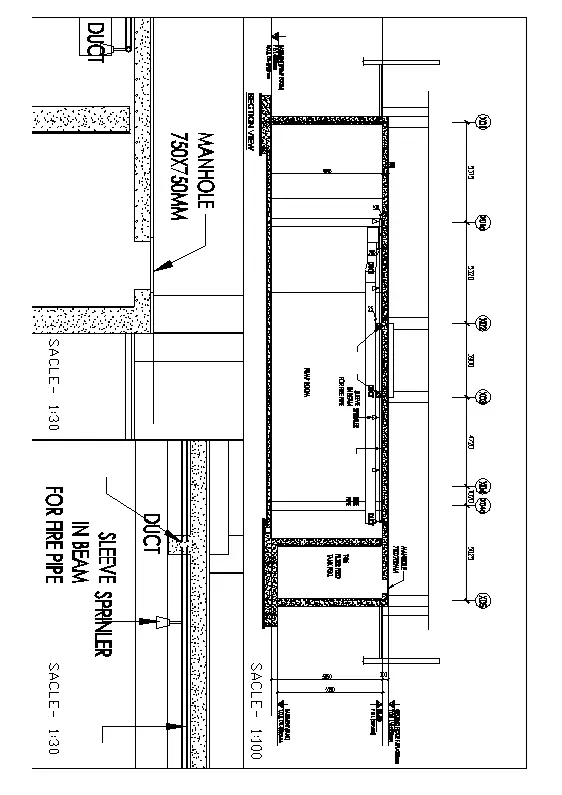
AIM: To create layout of the section created challange 9 as shown in the figure above, in AutoCAD.
INTRODUCTION: The layout is created and plotted in AutoCAD. The procedure is explained and the final result is given.
PROCEDURE:
- Open the week 10 Industrial section drawing.
- Go to ribbon>view>viewconfigaration.
- Select the three:above from the drop down list.
- In the windows select and zoom in on the views as shown in the given figure.
- click on the named option in the model viewports panel.
- click on new viewports.
- Enter the name as section layout 1, click ok.
- select the above counter plan viewport.
- To create views:ribbon>view>namedviews>newview.
- In the new view dialog box enter view name as section and click ok.
- Repeat the same process to create Manhole,sprinkler views.
- To create a new layout, enter layout in the command line.
- select the new option.
- enter new layout name as Section layout 1.
- press enter.
- Go to layout page and select the delete the default model view.
- Enter pagesetup in the command line.
- Select specific layout, and click on modify.
- Select the ISO A3 papersize.
- click ok.
- enter MV in the command line.
- Specify corners and viewports.
- Repeat MV Command twice more to create three viewports.
- Enter MS in the command line.
- Select the view ports and assign the specific views to the viewports.
- Open layer manager dialog box and change the viewport layer colors for both the viewports to darker shades.
- Select the views and scale them as required individually.
- Enter Pan in the command line to adjust the position of the drawing inside the viewport.
- Lockviews.
- Enter PS to go to paper Space.
- Enter Mtext command in the command line.
- Type the text to required locations.
- Save the drawing.
- Enter PLoT in the command line.
- Click OK, Save the PDF File.
RESULT: