Creation of Multiple viewports, Scaling the drawing and setting in Template in AutoCad
Week 10-Assignment 10-Module 2
Aim: To create a Multiple Viewports, Scaling the Drawing and setting in Template using the proper layout techniques and editing tools with the aid of AutoCAD.
Introduction: For these exercises, this is just a matter of applications of what have been covered from week 10 titled Design Center and Tool Palettes Concept, manipulation with the layout and printing settings in particular. Working with the model space and paper space as well as page set-up and handling of viewports are important to carry out the given challenges which uses the drawings from the previous challenges.
Procedure:
A. Setting the Drawing Parameters;
- No any special drawing set up done on these exercises since it uses what have been drawn from the previous exercises. It is more on opening the previous drawings or using the XREF command and bind to the new drawing.
B. Starting the exercise;
- Combination and manipulation of all the different coordinate entry methods, drawing and modifying tools learned from weeks 1 to 10 were being used here in the completion of all the exercises given and result as pasted below.
- I have attached some screenshots while working on the exercises to show the procedure on how it was done to come out with the requested plot layouts.
C. Challenge;
- In general, below commands/functions were being used while working on the exercises.
- Units
- LIMMAX
- DDIM
- LINE
- OFFSET
- MTEXT
- DIM
- XREF
- COPY
- SCALE
- ATTRIBUTES
- REC
- PAGE SET UP MANAGER
- VIEWPORTS
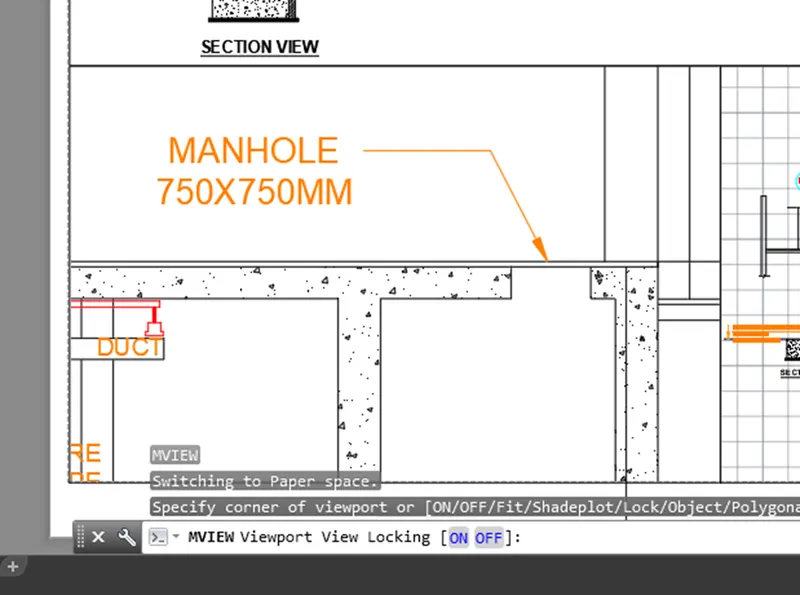
- MVIEW
- LAYOUT
Challenge 1: Below are the brief steps while working on the given exercises.
- Opening the previous drawings covered from challenge number 7 or open a new drawing then proceed with the XREF command calling out challenge number 7 drawing.
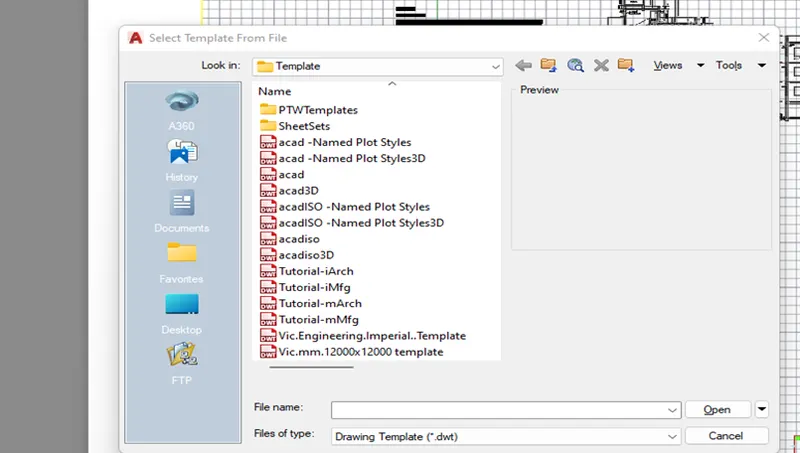
- Make a new layout by loading the Tutorial-mArch.dwt available in AutoCAD Template Folder considering the scale given.
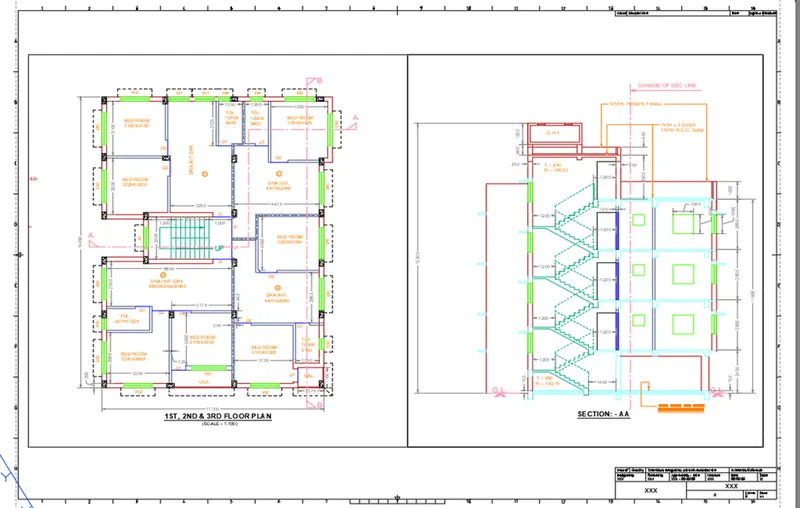
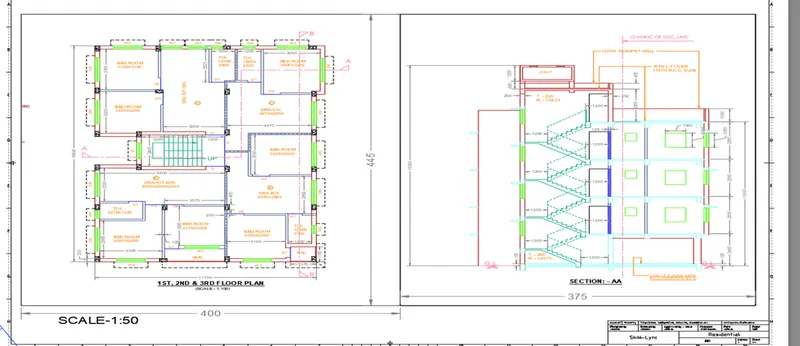
- Draw two rectangles on the paper space of the template layout. Use the dimensions given from the exercise such as 400x445 and 375x445 in mm.
- By enabling MV command select the Object option and click the first rectangle having a size of 400x445 as your first view.
- To go model space by typing MS on that 400x445 triangle. Zoom window for that 1st, 2nd & 3rd Floor Plan and set up the scale in Status Bar as 1:50. Pan the view properly then proceed locking it through the MV command.
- As for the next rectangle for Section AA, just follow above steps as done for the first view.
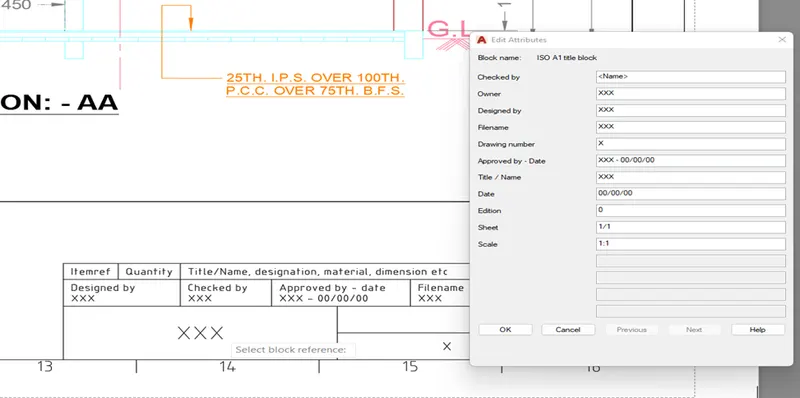
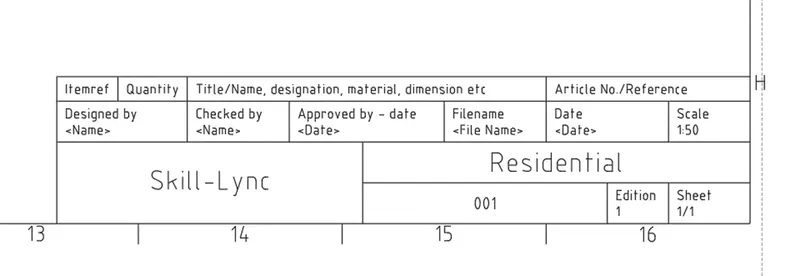
- Use ATTEDIT command to proceed providing inputs to the title block template as well as provide annotations as needed.
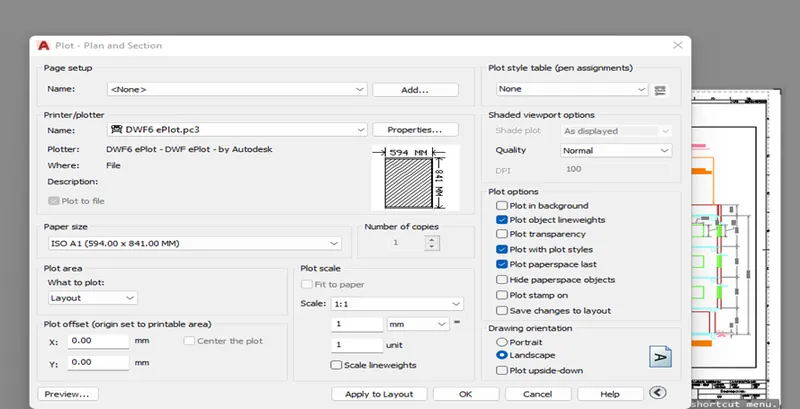
- Proceed with PLOT command while in paper space with 1:1 plot scale, layout plot area settings using the default paper intended for the Tutorial-mArch.dwt template.
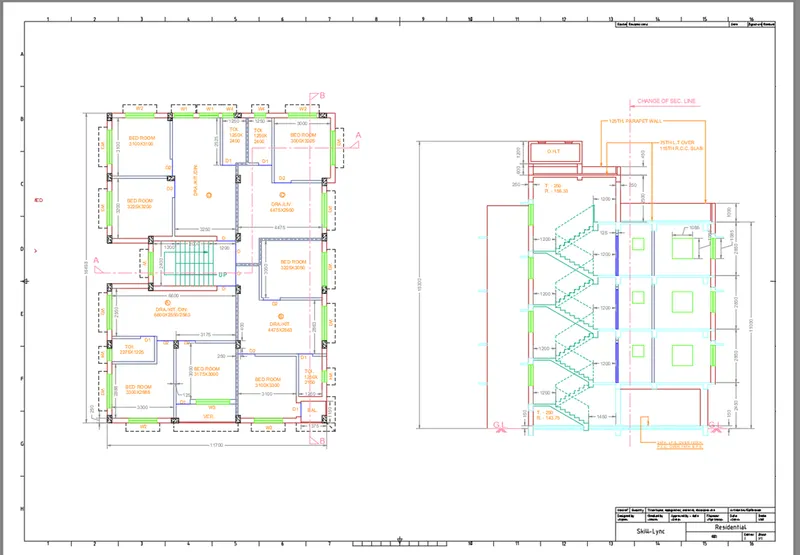
Challenge 2: Below are the brief steps while working on the given exercises.
- Opening the previous drawings covered from challenge number 9 or open a new drawing then proceed with the XREF command calling out challenge number 9 drawing.
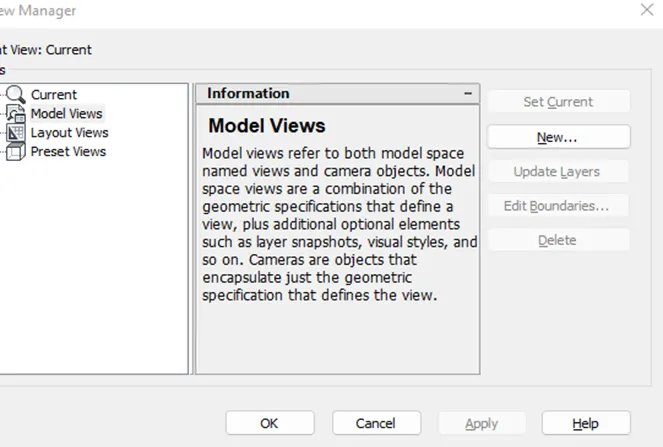
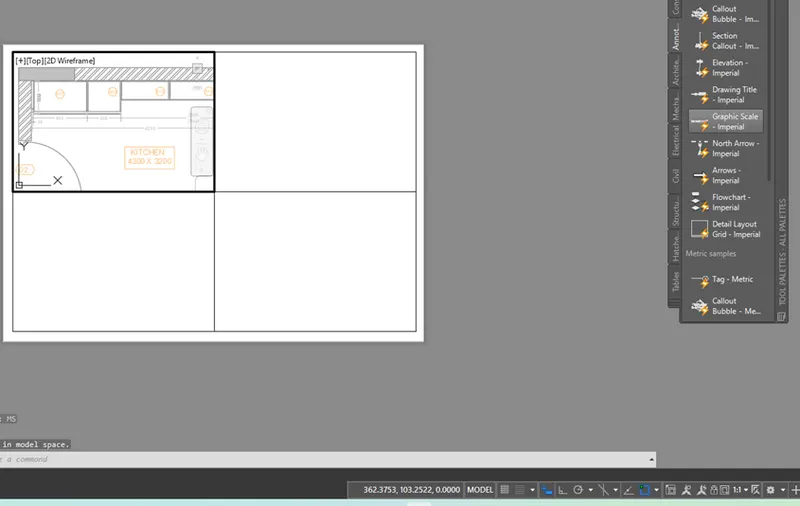
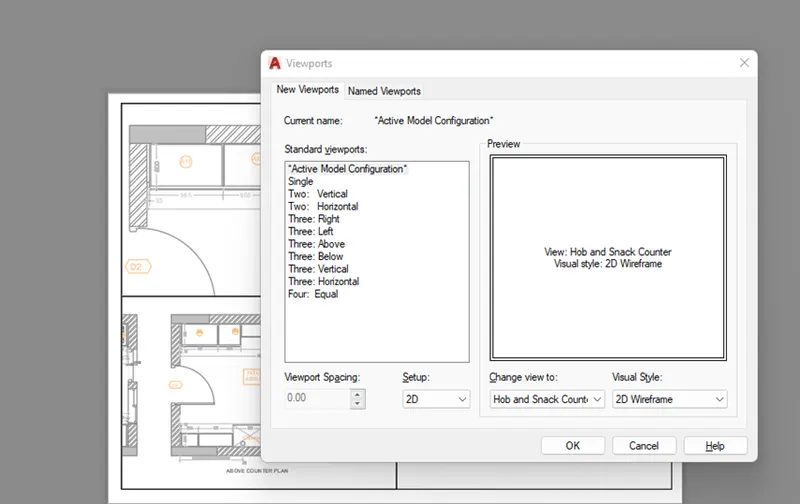
- Setting up views using the viewport command and saving it.
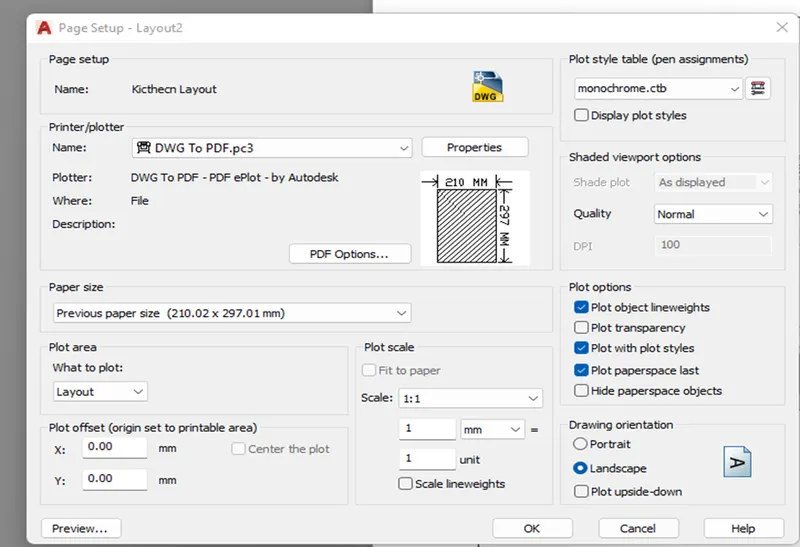
- Opening a new layout using the A4 size paper or 210x297mm size paper.
- In this exercise you can either use VPORTS or MV command but in Layout but we proceeded with VPORTS in our case.
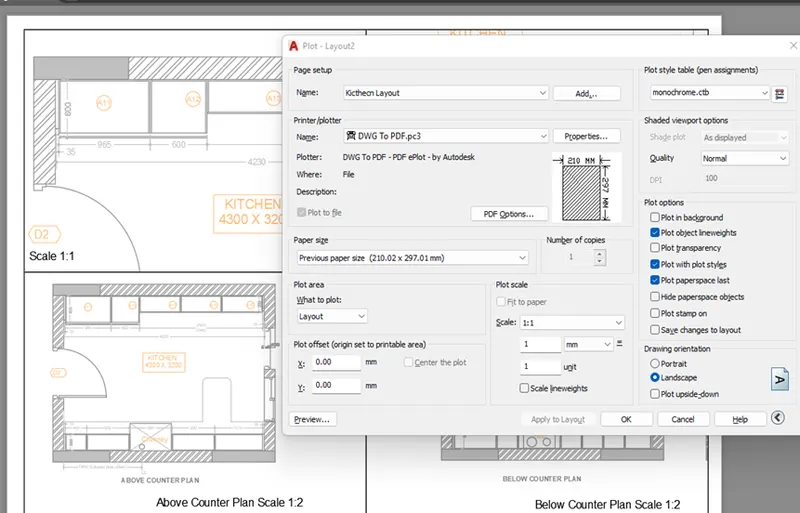
- .Plotting 4 views according to the given exercises in paper space under A4 size paper layout using the VPORTS and calling out previous saved views one by one considering the needed scale.
- Provide the needed text on paper space as needed,
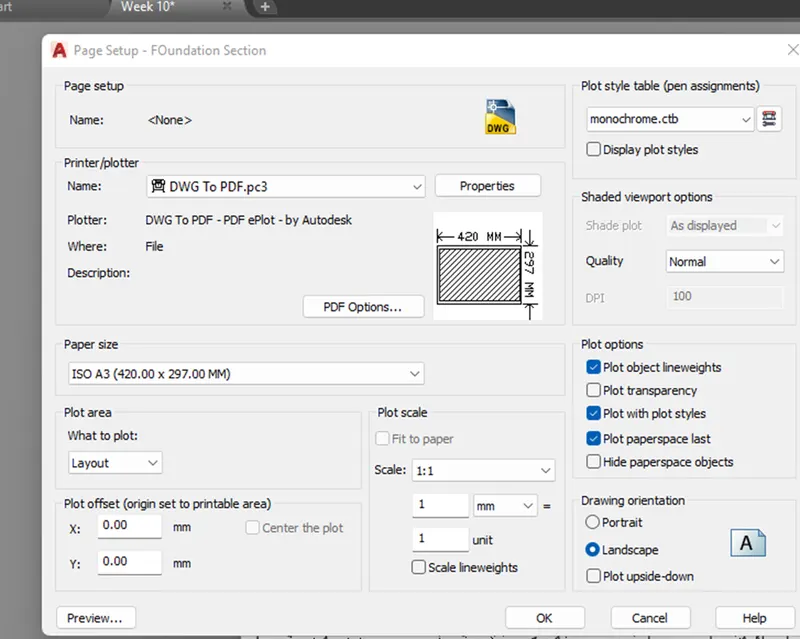
- Proceed using the PLOT command while in paper space with 1:1 plot scale, layout plot area settings with size paper and DWG to PDF printer and try monochrome.ctb plot style.
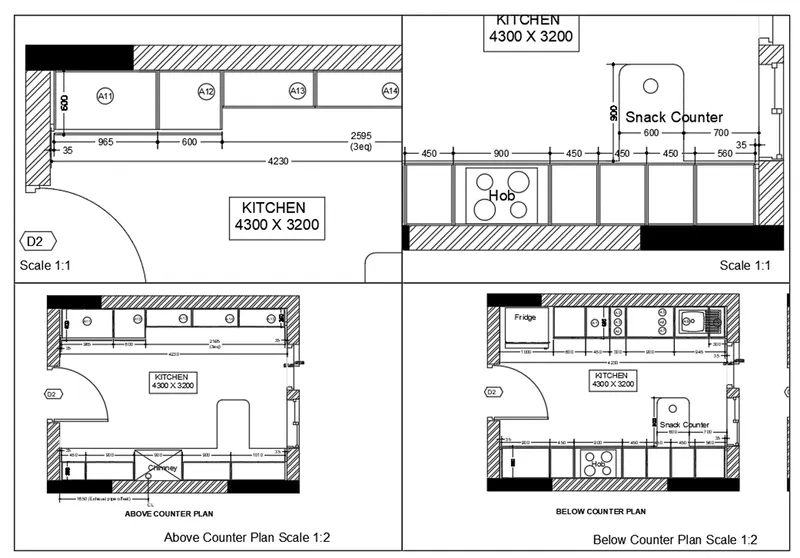
Challenge 3: Below are the brief steps while working on the given exercises.
- Opening the previous drawings covered from challenge number 9 or open a new drawing then proceed with the XREF command calling out challenge number 7 drawing.
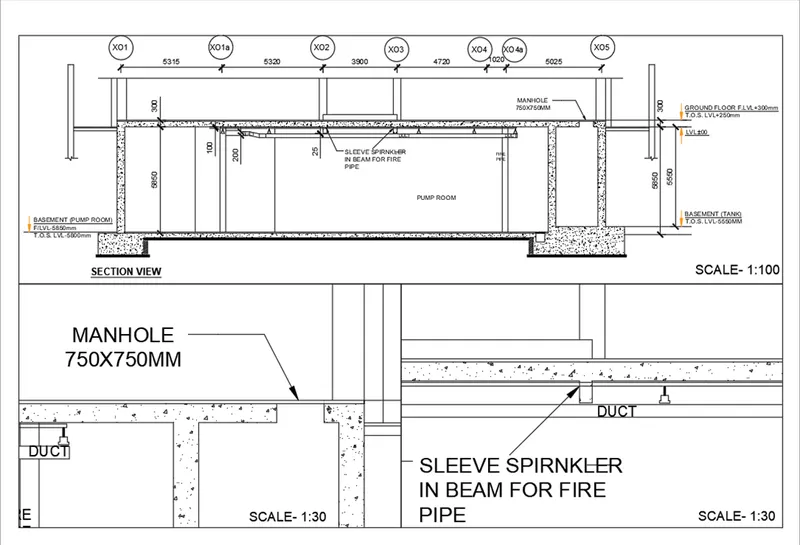
- Opening a new layout using the A3 size paper.
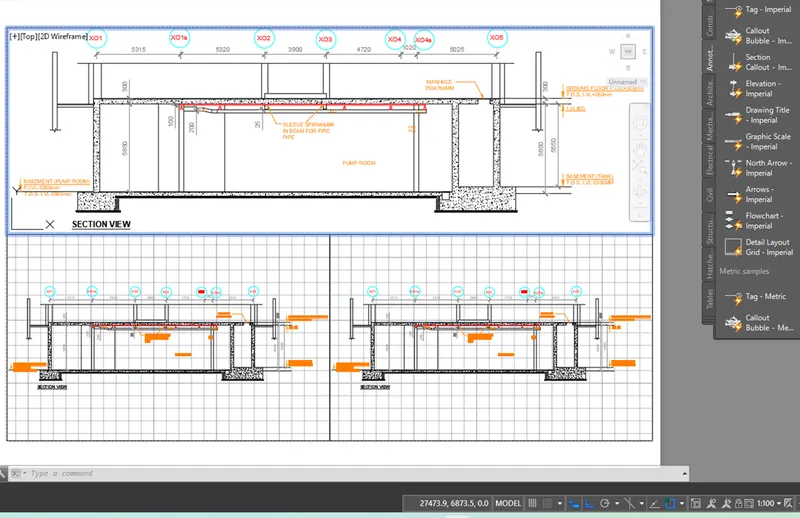
- By enabling MV command in the A3 Layout, create the 3 needed views considering the needed scale. Lock each one of them using the same command afterwards.
- Provide the needed text on paper space as needed,
- Proceed using the PLOT command while in paper space with 1:1 plot scale, layout plot area settings with size paper and DWG to PDF printer and try monochrome.ctb plot style.