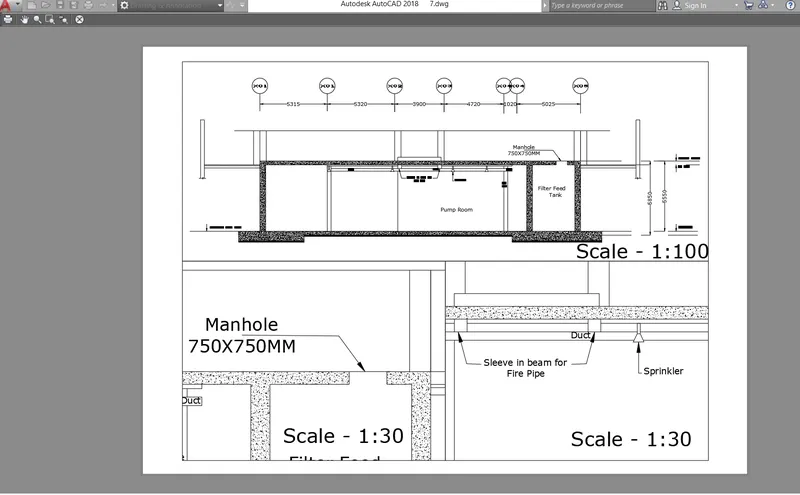
Creation of Multiple viewports, Scaling the drawing and setting in Template in AutoCad
AIM : - To Create a layout of the Plan and Section A of the project in Challenges 7 using AutoCAD.
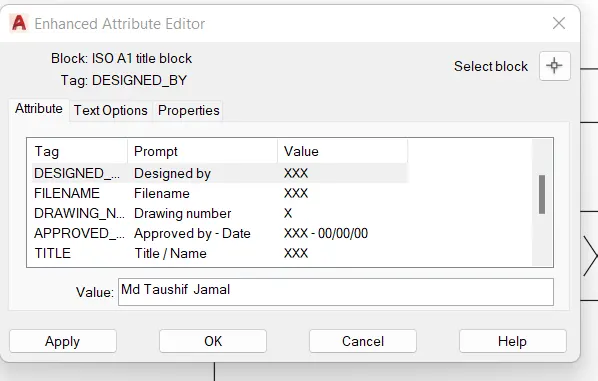
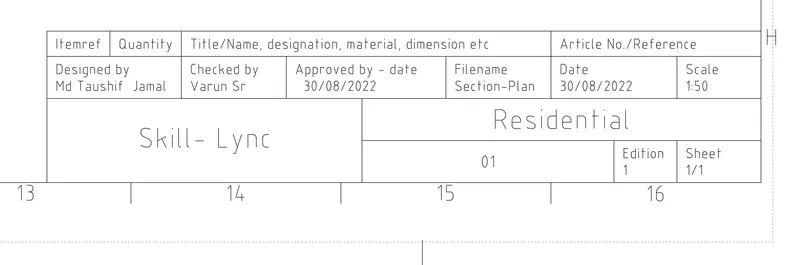
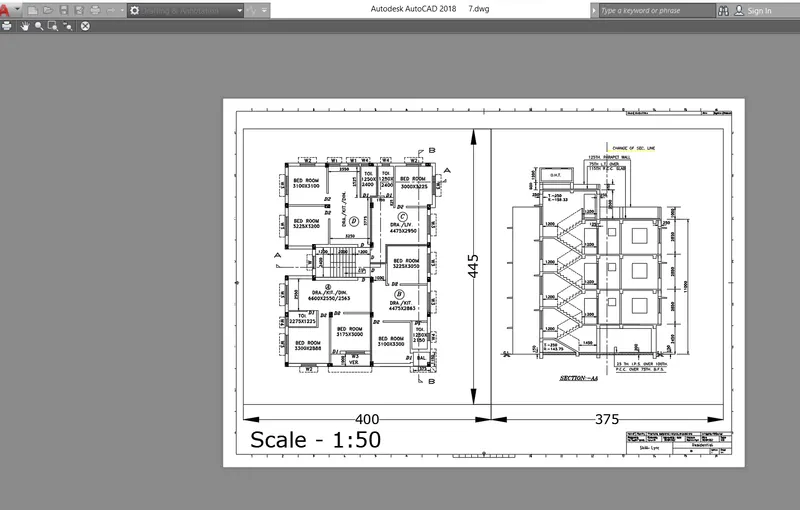
Introduction: - The layout is drawn using the template Tutorial-mArch.dwt in a scale of 1:50 as given in the Figure. MV command is used to create the viewport of the size 445 X 400mm & 445 X 375mm as shown in Figure. Also, ATTEDIT command is used to edit the information in the title block. PLot is also taken and the preview is shown.
A1 size is used for the layout.
PROCEDURE: -
Before we start the drawings we need to set up the drawing as Metric and the units into Decimal Units.
Following are the steps in order to set up the drawing as Imperial Template and the units into Engineering Units.
- Go to Application Menu or click CTRL + N (New)
- Click on New from the Application Menu
- A popup menu appears, click on the first tab known as Start from Scratch > Select Metric
- Now click on the third tab known as Use a Wizard > Go to Advance setup > A Dialog box appears > Select the unit of measurement as Decimal > Press Next > select Angle as Decimal Degrees > Press Next > Select Angle Measure > Press Next > Select Angle Direction > Press Next > Select Area > Click Finish
- Set the page limit by entering Limits in the command tab. The lower left corner is specified as 0,0 and the upper right corner is specified as 594, 841.
- In the Drawing Units dialog box, select 'Engineering' in Type; ' 0 ' in Precision; and 'Millimeter' in Insertion scale.
- Click OK
- Now we are all set to go.
Now,
- Import the drawing pdf which we are given to draw.
- Go to Ribbon Tab
- Click on Insert
- Then click on the PDF Import tool
- Import the required pdf.
Now,
- In order draw the drawing perfectly according to the size, we need to Scale it.
- So draw any dimension of the imported drawing like the size of the section wardrobe and draw it on the workspace by using line tool and direct distance method.
In order to Scale the Drawing,
- First select the entire imported drawing
- Select the base point
- Go to Reference option in the command box
- Select any dimension length of the imported drawing
- Then directing enter the scale length like 2550 or
- You can click on Points in the command box and select the two points of the line i.e., the first and the end point of the line which you have drawn.
- Now you are all set to go.
Now,
- Go to A Icon which is above the Home .
- Click on the A icon
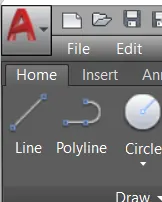
- Then click on Open Tab
- A pop up menu appears
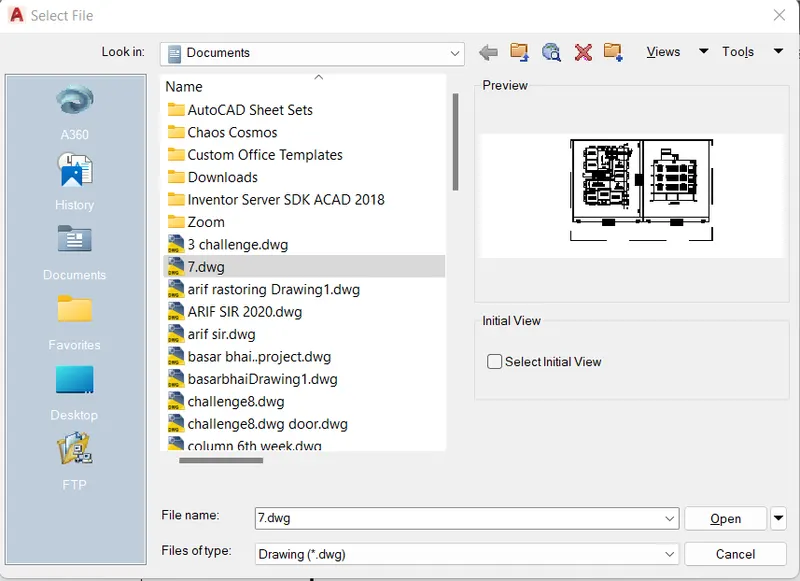
- Select the challenge 7 file
- And open it.
Now,
- Click on the Layout near the Model.
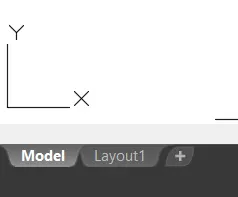
- A popup menu appears
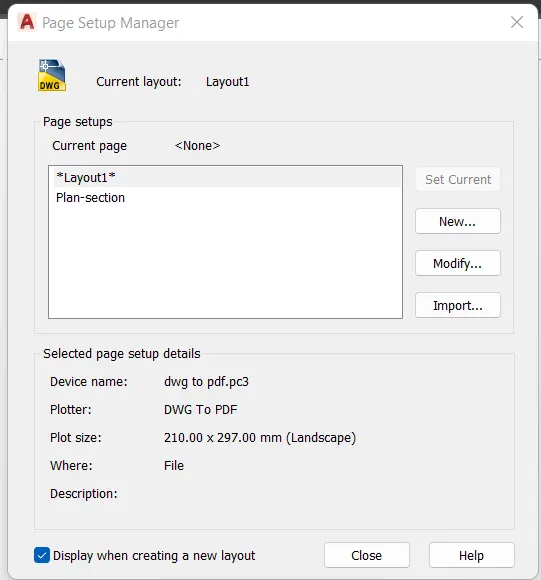
- Click on modfy to change the settings as per requirement.
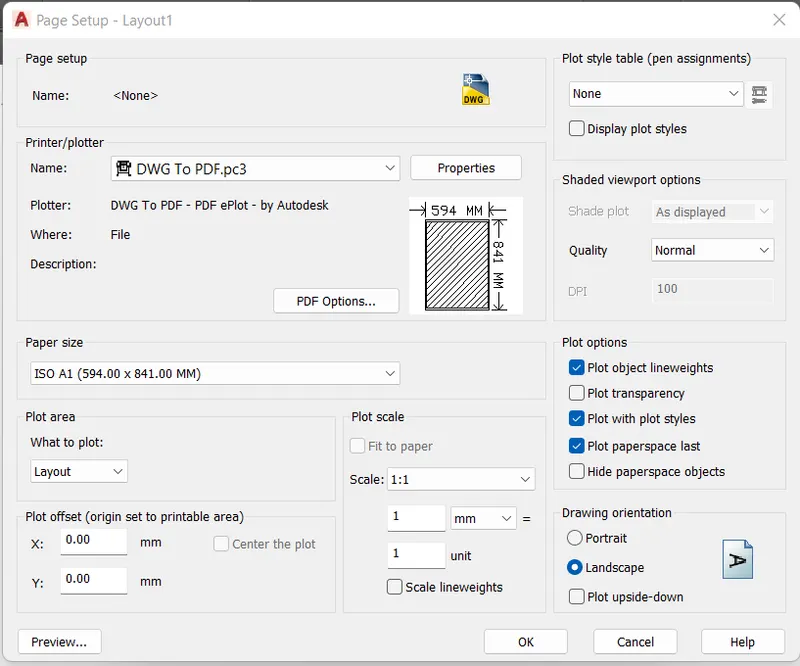
- Print as DWG to PDF.
- Take paper size as ISO A1 594 X 841mm as given.
- Scale is taken as 1:1
- Rest everything is aokay.
- Click on Okay.
Now,
- Right CLick on Layout tab.
- Go to From Template.
- Select the template as mArch.dwt.
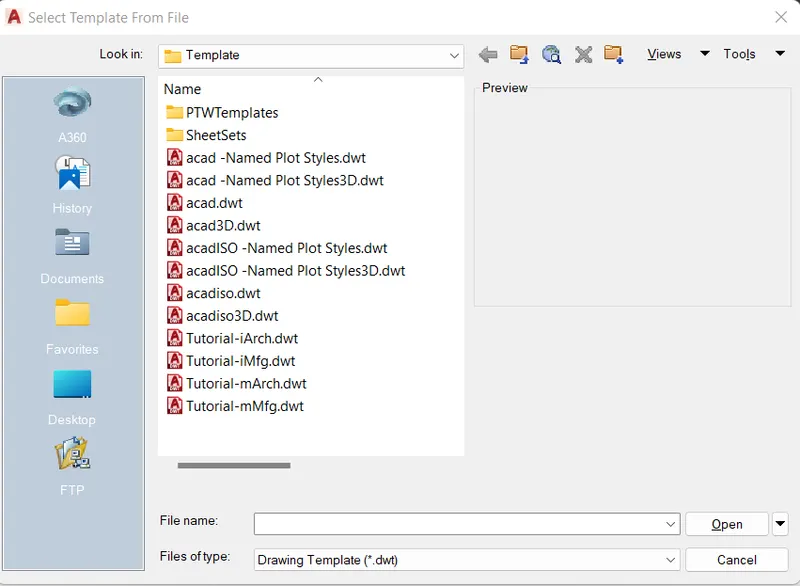
- Click on mArch.dwt.
- A popup menu appears
- Click on ISO Layout 1.
- Click OK
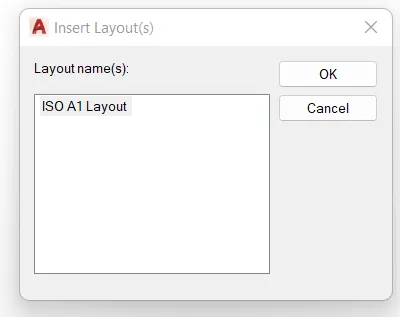
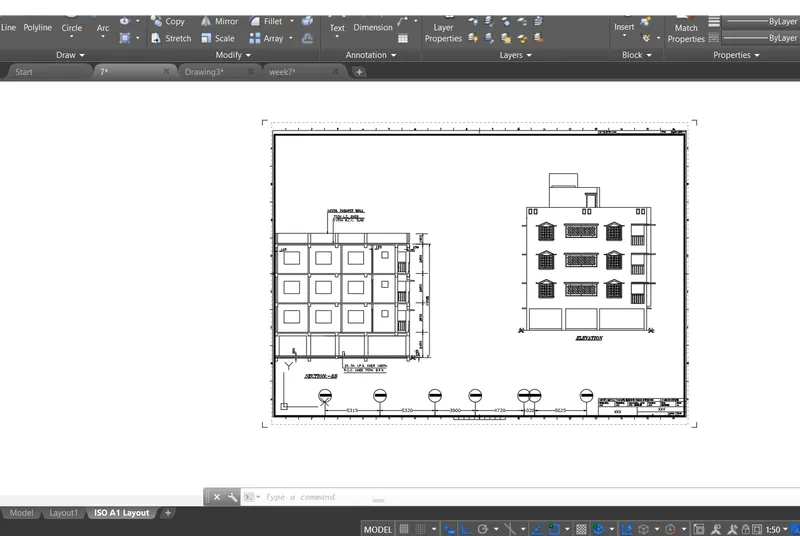
- A new layout named ISO Layout 1 opens.
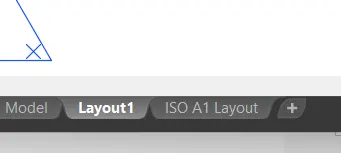
- Click on that.
- The following layout page appears
Now,
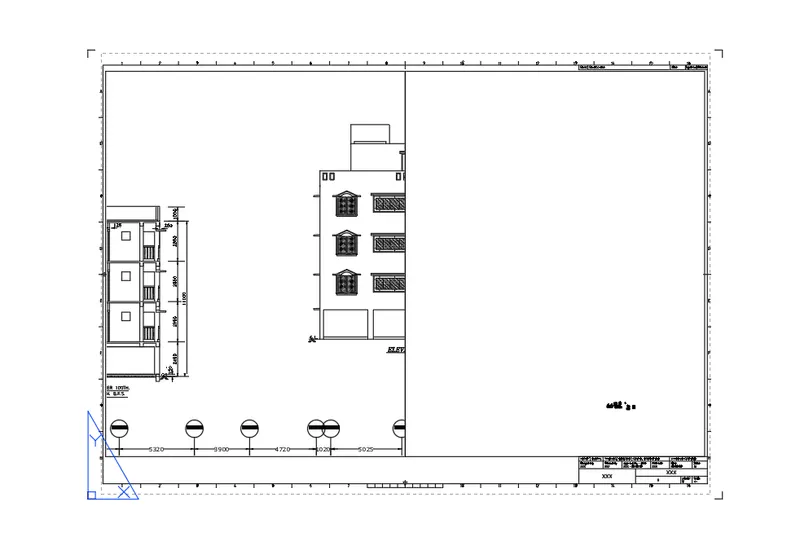
- Type MV or multiple view
- Then click on 2
- Then click Vertical
- The following image appears with the two viewports.
Now,
- Set the size of the viewport as per the given sizes 445 X 400 mm & 445 X 375 mm
- To do so.
- Select the View port.
- Right click on it.
- Go to properties.
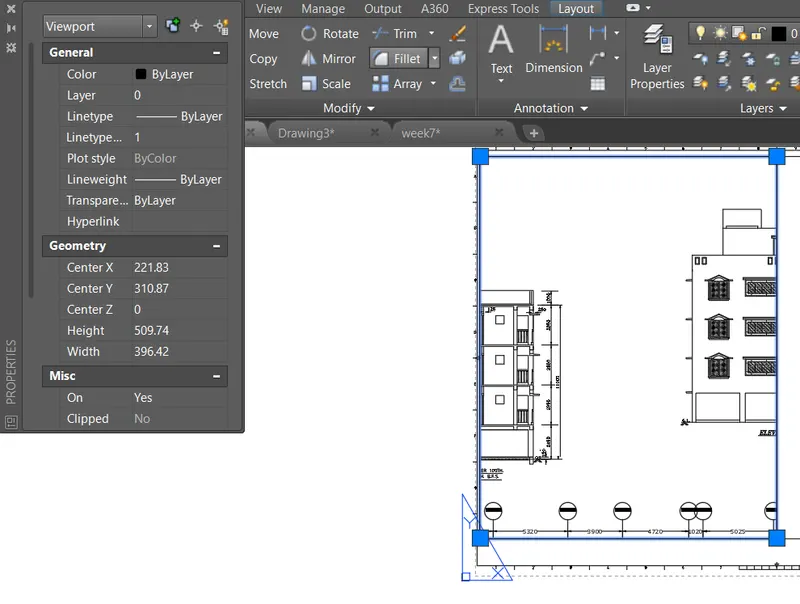
- From the properties dailogue box,
- Change the height to 445
- And width to 400.
- Similarly change the other viewport also.
Now,
- After setting it properly.
- Click on MS or model space
- Do the required settings in the model.
- Now click on the scale to scale it as 1:50.
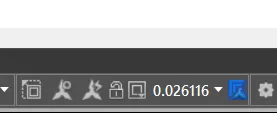
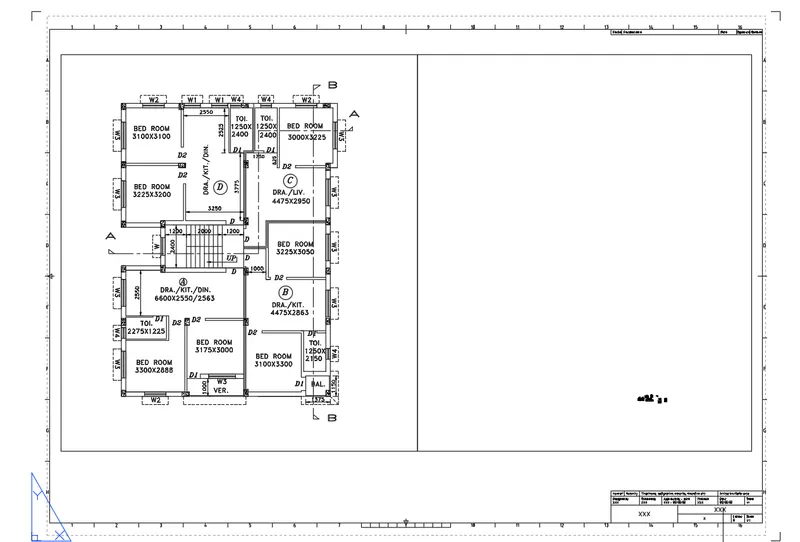
- Similarly set the other drawng too in the same scale as 1:50.
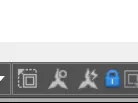
- Lock the viewports after setting the Scale.
- You can get this in properties or
- Go to Customization panel.
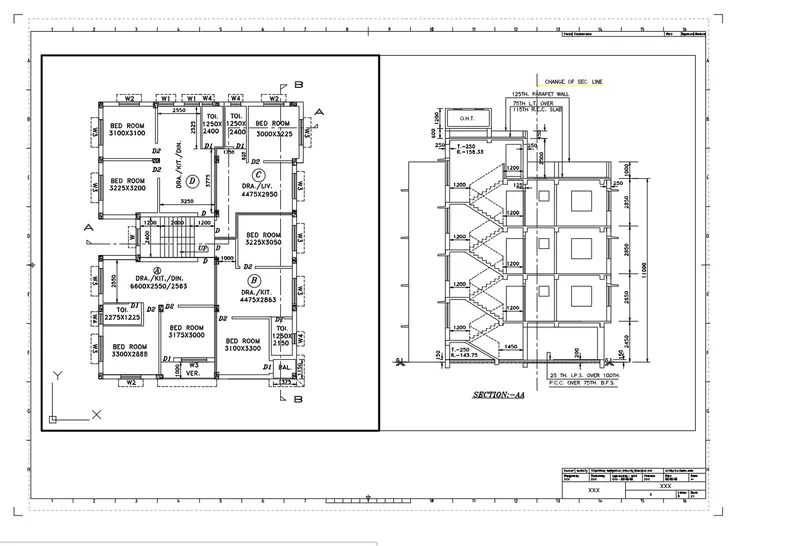
So we have the following layout
Now, its time for Dimension.
- Select the Layer pdf_text for the various dimension.
- Type 'D' or Dimension Style
- Select the size of the arrow as 20 and text height as 15.
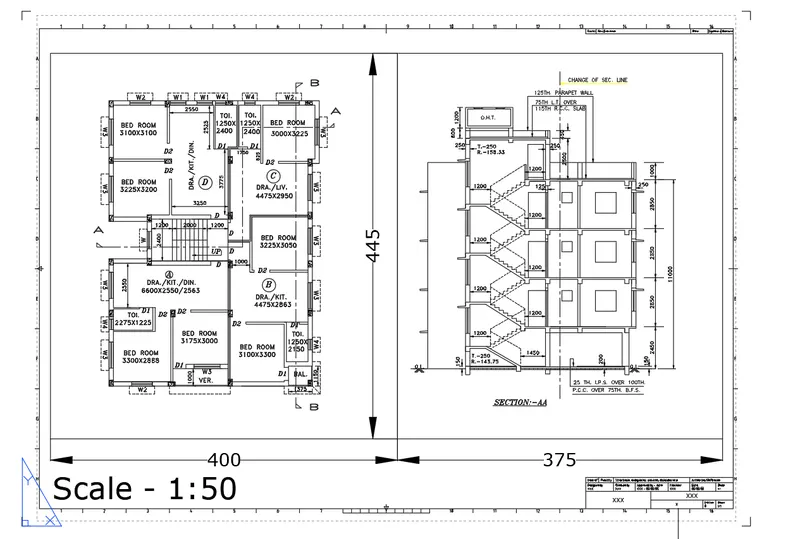
Now,
- Let us change the attributes as per given in the question.
- Double click the attributes
- The following dialogue box will appear.
- Change accordingly.
So we have the following attributes after editing.
Now,
- Type PLOT to plot the layout
- The following window appears.
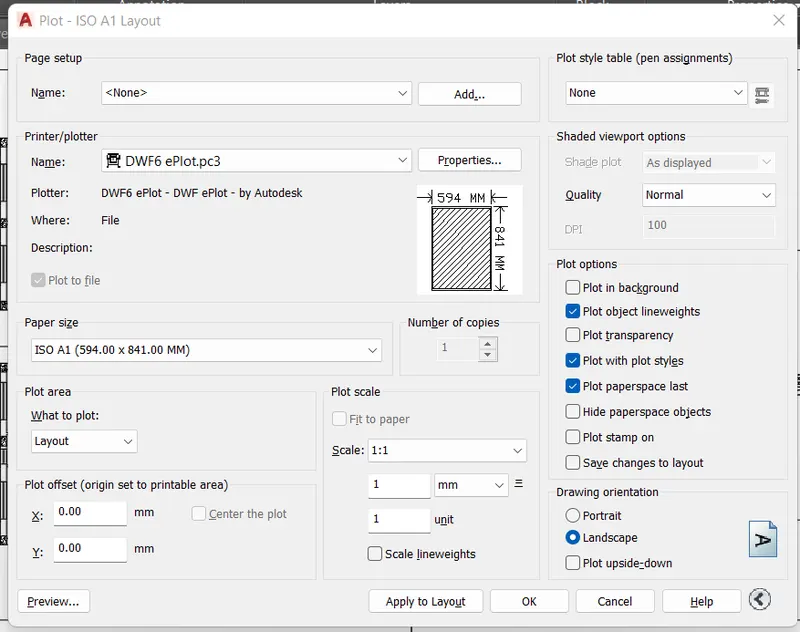
- Click on the preview, to see your layout.
- So we have the following Preview
------------------------------------------------------------------------------------------------------------------------------------------------------------
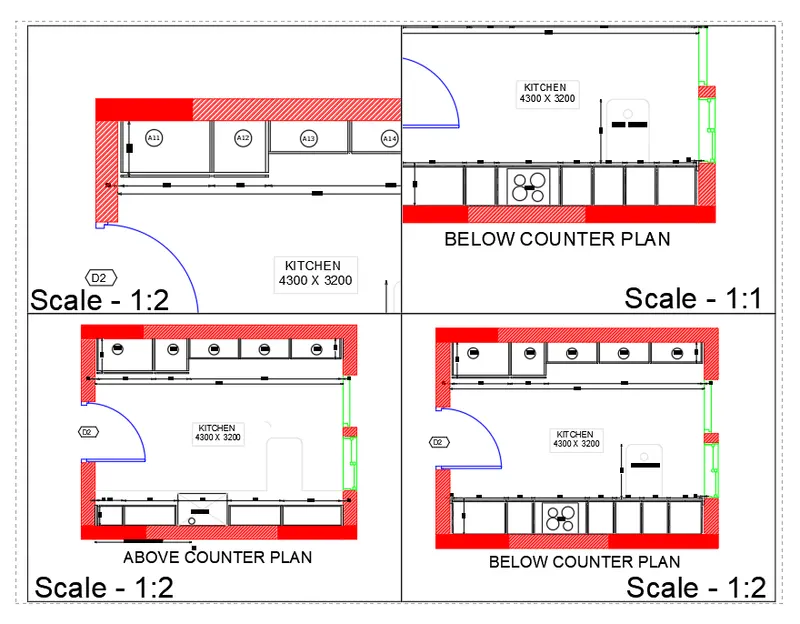
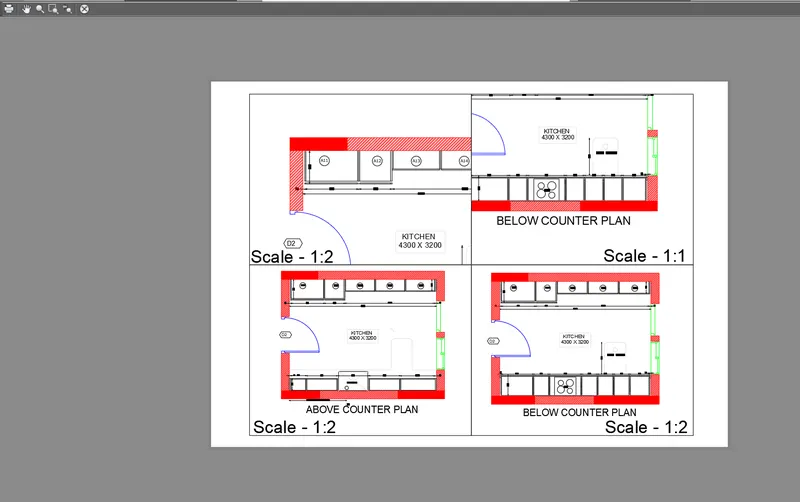
AIM : - To Create a layout of the Kitchen drawn in Challenge 9 as shown in Figure using AutoCAD.
Introduction: - The layout is drawn using the different scales as given in each of the Figure. MV command is used to create the viewport of the different sizes. PLot is also taken and the preview is shown.
A4 size is used for the layout.
PROCEDURE: -
Before we start the drawings we need to set up the drawing as Metric and the units into Decimal Units.
Following are the steps in order to set up the drawing as Imperial Template and the units into Engineering Units.
- Go to Application Menu or click CTRL + N (New)
- Click on New from the Application Menu
- A popup menu appears, click on the first tab known as Start from Scratch > Select Metric
- Now click on the third tab known as Use a Wizard > Go to Advance setup > A Dialog box appears > Select the unit of measurement as Decimal > Press Next > select Angle as Decimal Degrees > Press Next > Select Angle Measure > Press Next > Select Angle Direction > Press Next > Select Area > Click Finish
- Set the page limit by entering Limits in the command tab. The lower left corner is specified as 0,0 and the upper right corner is specified as 297 X 210.
- In the Drawing Units dialog box, select 'Engineering' in Type; ' 0 ' in Precision; and 'Millimeter' in Insertion scale.
- Click OK
- Now we are all set to go.
Now,
- Import the drawing pdf which we are given to draw.
- Go to Ribbon Tab
- Click on Insert
- Then click on the PDF Import tool
- Import the required pdf.
Now,
- In order draw the drawing perfectly according to the size, we need to Scale it.
- So draw any dimension of the imported drawing like the size of the section wardrobe and draw it on the workspace by using line tool and direct distance method.
In order to Scale the Drawing,
- First select the entire imported drawing
- Select the base point
- Go to Reference option in the command box
- Select any dimension length of the imported drawing
- Then directing enter the scale length like 2550 or
- You can click on Points in the command box and select the two points of the line i.e., the first and the end point of the line which you have drawn.
- Now you are all set to go.
Now,
- Go to A Icon which is above the Home .
- Click on the A icon
- Then click on Open Tab
- A pop up menu appears
- Select the challenge 7 file
- And open it.
Now,
- Click on the Layout near the Model.
- A popup menu appears
- Click on modfy to change the settings as per requirement.
- Print as DWG to PDF.
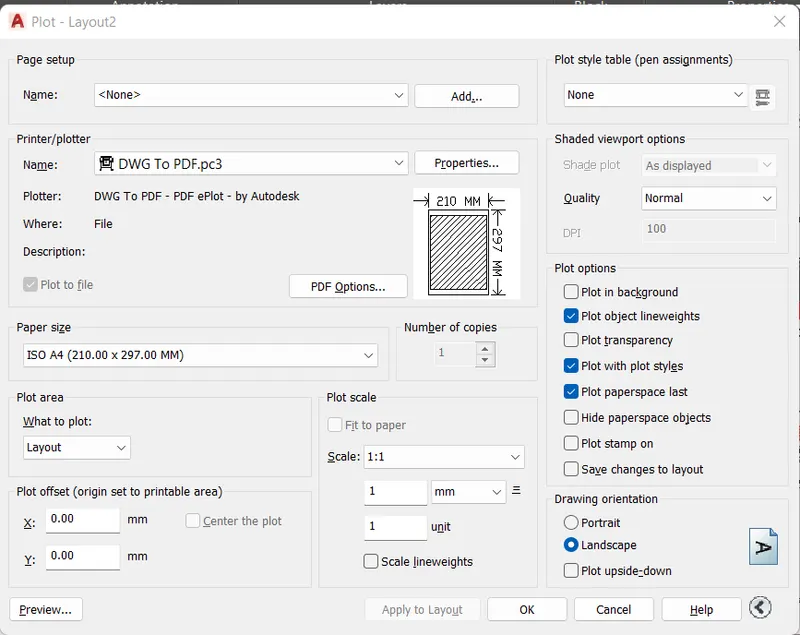
- Take paper size as ISO A4 210 X 297mm as given.
- Scale is taken as 1:1
- Rest everything is aokay.
- Click on Okay.
Now,
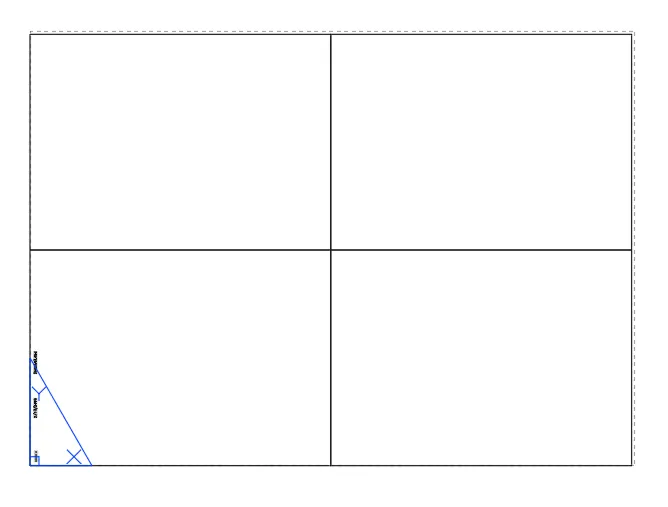
- Type MV or multiple view
- Then click on 4.
- The following image appears with the two viewports.
Now,
- Set the different sizes of the viewport as per the given drawings.
- To do so.
- Select the View port.
- Right click on it.
- Go to properties.
- From the properties dailogue box,
- Change the height to 445
- And width to 400.
- Similarly change the other viewport also.
Now,
- After setting it properly.
- Click on MS or model space
- Do the required settings in the model.
- Now click on the scale to scale it as 1:2.
- Similarly set the other drawng too in the same scale as 1:2.
- Lock the viewports after setting the Scale.
- You can get this in properties or
- Go to Customization panel.
So we have the following layout
Now,
- Type PLOT to plot the layout
- The following window appears.
- Click on the preview, to see your layout.
- So we have the following Preview
------------------------------------------------------------------------------------------------------------------------------------------------------------
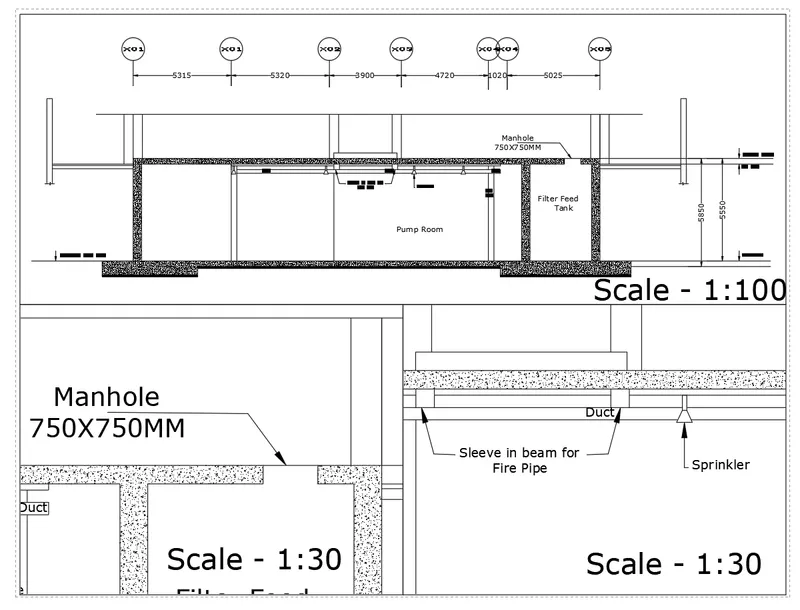
AIM : - To Create a layout of the section created in Challenges 9 as shown in Figure using AutoCAD.
Introduction: - The layout is drawn using the different scales as given in each of the Figure. MV command is used to create the viewport of the different sizes. PLot is also taken and the preview is shown.
A4 size is used for the layout.
PROCEDURE: -
Before we start the drawings we need to set up the drawing as Metric and the units into Decimal Units.
Following are the steps in order to set up the drawing as Imperial Template and the units into Engineering Units.
- Go to Application Menu or click CTRL + N (New)
- Click on New from the Application Menu
- A popup menu appears, click on the first tab known as Start from Scratch > Select Metric
- Now click on the third tab known as Use a Wizard > Go to Advance setup > A Dialog box appears > Select the unit of measurement as Decimal > Press Next > select Angle as Decimal Degrees > Press Next > Select Angle Measure > Press Next > Select Angle Direction > Press Next > Select Area > Click Finish
- Set the page limit by entering Limits in the command tab. The lower left corner is specified as 0,0 and the upper right corner is specified as 297 X 210.
- In the Drawing Units dialog box, select 'Engineering' in Type; ' 0 ' in Precision; and 'Millimeter' in Insertion scale.
- Click OK
- Now we are all set to go.
Now,
- Import the drawing pdf which we are given to draw.
- Go to Ribbon Tab
- Click on Insert
- Then click on the PDF Import tool
- Import the required pdf.
Now,
- In order draw the drawing perfectly according to the size, we need to Scale it.
- So draw any dimension of the imported drawing like the size of the section wardrobe and draw it on the workspace by using line tool and direct distance method.
In order to Scale the Drawing,
- First select the entire imported drawing
- Select the base point
- Go to Reference option in the command box
- Select any dimension length of the imported drawing
- Then directing enter the scale length like 2550 or
- You can click on Points in the command box and select the two points of the line i.e., the first and the end point of the line which you have drawn.
- Now you are all set to go.
Now,
- Go to A Icon which is above the Home .
- Click on the A icon
- Then click on Open Tab
- A pop up menu appears
- Select the challenge 7 file
- And open it.
Now,
- Click on the Layout near the Model.
- A popup menu appears
- Click on modfy to change the settings as per requirement.
- Print as DWG to PDF.
- Take paper size as ISO A4 210 X 297mm as given.
- Scale is taken as 1:1
- Rest everything is aokay.
- Click on Okay.
Now,
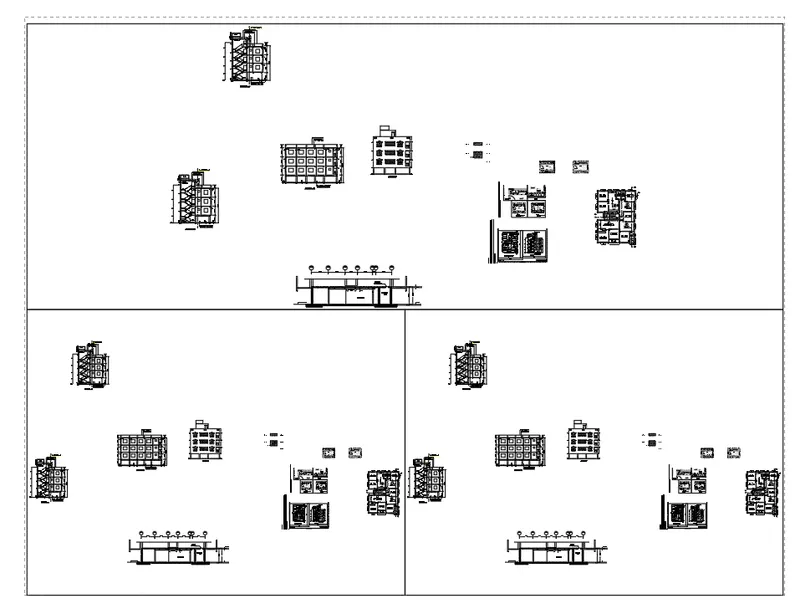
- Type MV or multiple view
- Then click on 4.
- The following image appears with the two viewports.
Now,
- Set the different sizes of the viewport as per the given drawings.
- To do so.
- Select the View port.
- Right click on it.
- Go to properties.
- From the properties dailogue box,
- Change the height to 445
- And width to 400.
- Similarly change the other viewport also.
Now,
- After setting it properly.
- Click on MS or model space
- Do the required settings in the model.
- Now click on the scale to scale it as 1:30.
- Similarly set the other drawng too in the same scale as 1:30.
- Lock the viewports after setting the Scale.
- You can get this in properties or
- Go to Customization panel.
So we have the following layout
Now,
- Type PLOT to plot the layout
- The following window appears.
- Click on the preview, to see your layout.
- So we have the following Preview