Creation of Multiple viewports, Scaling the drawing and setting in Template in AutoCad
- AIM:-
- To create the layout of plan and section, creating viewports, editing attributes and taking a plot.
- To create a kitchen layout in an A4 sheet and take a plot.
- To create multi-viewports for industrial section drawing, scaling it and taking a plot.
- Commands Used:
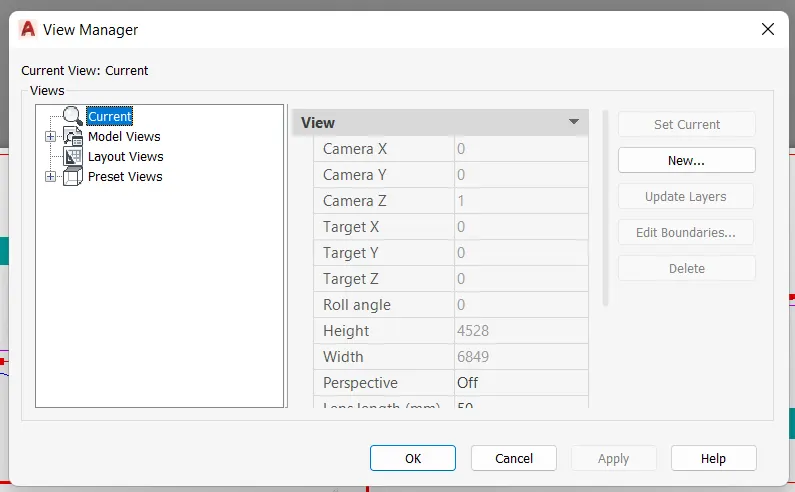
- VIEW- To create different views in model space so that it becomes easy to zoom that particular view. Command "VIEW" - click on model views - click on new from the dialogue box - click on define window - and select the particular part of the drawing - click on apply, then that view will be saved. We can take it from the view dialogue box itself under model views.
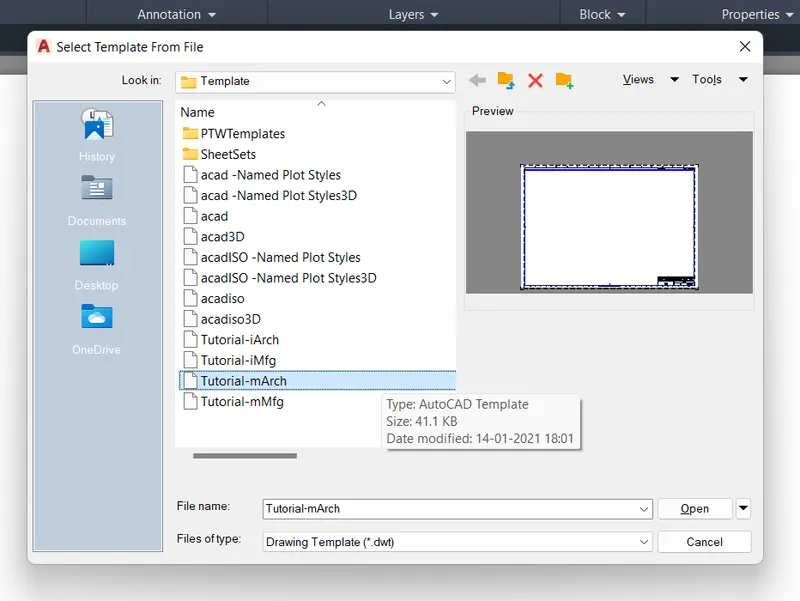
- LAYOUT- This command is used in Layout tab, to create a particular template. Command "LAYOUT" click on template (or right click on the layout tab) and we can select the required template from the dialogue box (m-Arch for metric architecture). We can rename, copy delete, create new from this command, all these options are also available when we right click the layout tab.
- MULTIPLE VIEW- Used to create multiple viewports. Command "MV" - specify corner of viewport and create a viewport. If we have already created a shape for the viewport - we can make it a viewport by clicking on object displayed when "MV" command is given and selecting that particular object.
- MODEL SPACE- Command "MS" - to activate the model space.
- PAPER SPACE- Command "PS" - to activate the paper space.
- SCALE- By activating the model space, we can give scale for the drawing in that model space by clicking on the scale menu on the bottom toolbar (we can also do it by right clicking - properties).
- LOCK- We can lock the viewport, so that further scaling is not done during zooming the viewport. Lock symbol is provided on the bottom toolbar (or right click - properties).
- PAGE SETUP MANAGER- By right clicking on the layout tab, we can find the option of page set up manager or command "PAGESETUP" - from that we can set of paper of the layout.
- PAN- Command "P" to pan the drawing.
- PLOT- Command "PLOT" - used to take print outs. Plot dialogue box appears.
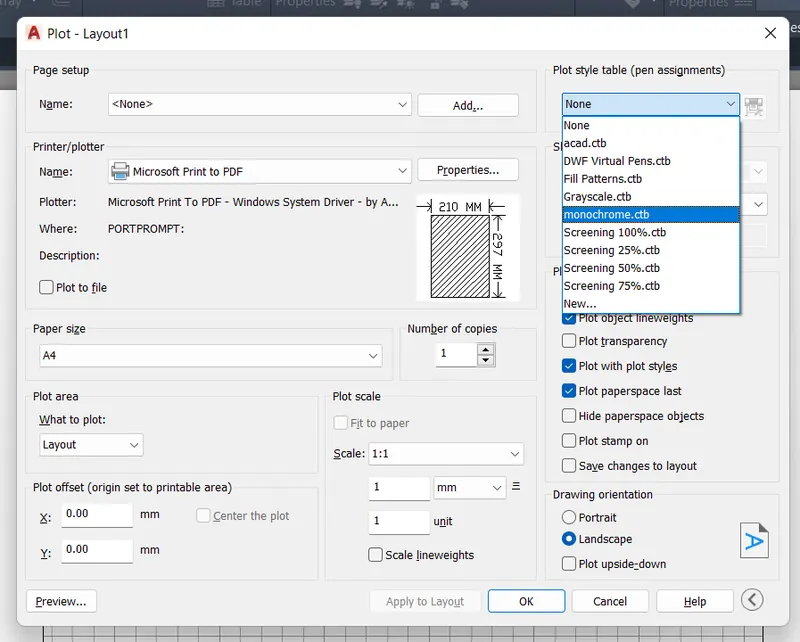
- Name of the plot is given.
- Name of the printer should be given, here dwg to pdf is given to convert it into pdf file.
- Paper size is given, we can select the paper size according to our need.
- What to plot: we have options of: (i) display - whatever in the screen will be plotted (ii) layout - the created layout will be plotted (iii) extends - the drawing inside the set limits will be plotted (iv) window - we have to select the part to be plotted by window selection.
- Scale can be given accordingly, if fit to paper is given, the drawing will be set such that it is inside the entire paper.
- Plot styletable (pen assignments) - how the color of line, transparency of line of the print is determined. (i) monochrome - all the lines will be in black color (ii) grey scale - some lines is in grey color. (iii) none - The same color as in drawing i.e., if layers are given as such is displayed (iv) Screening - it lightens the color of line.
- Drawing orientation - it can be given as portrait or landscape.
- Preview - to preview the drawing before printing.
- PROCEDURE:-
- Aim:
- To create layout of plan and section using Template mArch.dwt
- To create viewport using "MV" command os size 400x445 and 375x445 and setting the scale (1:50).
- Editing Attributes in the template.
- Take a plot using A1 size.
- Procedure:
1. Open the drawing, click on the layout tab right click it and create a new layout.
2. Rename the layout tab as plan and section
3. Delete the current viewport displayed in the layout.
a. To create the template:
4. Use command "LAYOUT" select template(.dwt) - select "mArch." from the dialogue box, seelct ISO A1 layout
5. Type"MS" for the activation of model space.
b. To create viewport:
6. Draw a rectangle of size 400x455 and 375x445 for creating the viewport.
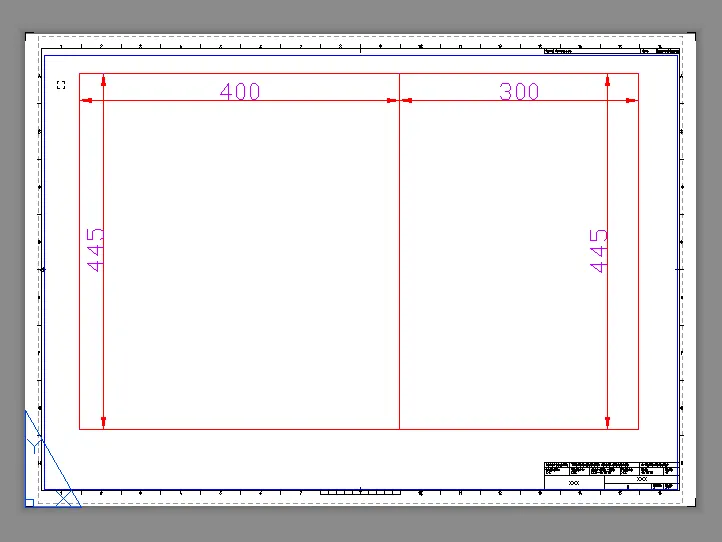
7. Use the command "MV" multiple view- select object option and click on the rectangle , then the drawing will be displayed in the viewport,
8. Similarly do it for the second rectangle.
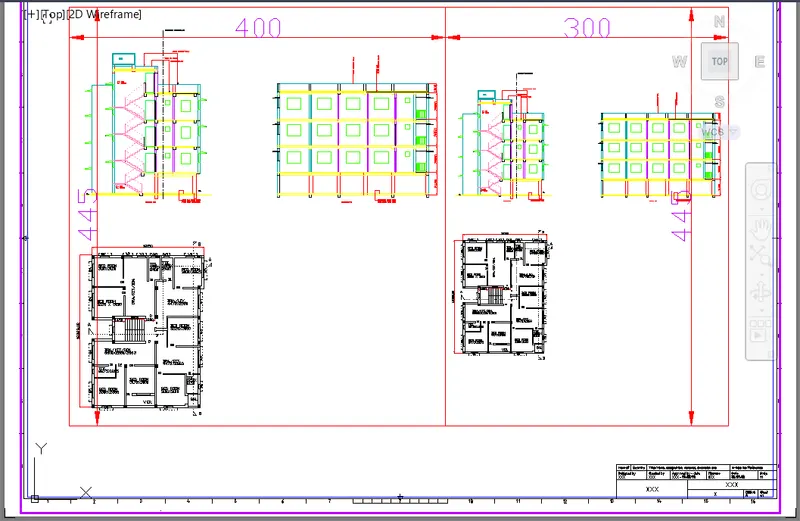
9. Command "MS" for model space and click on the viewport we need to set the drawing.
10. Click on the first viewport and zoom in the drawing fro the plan and give a scale of 1:50 and lock the viewport so that further zooming will not change the scale.
11. Similarly do it in second viewport zoom in the section view , making it a scale of1:50 and lock.
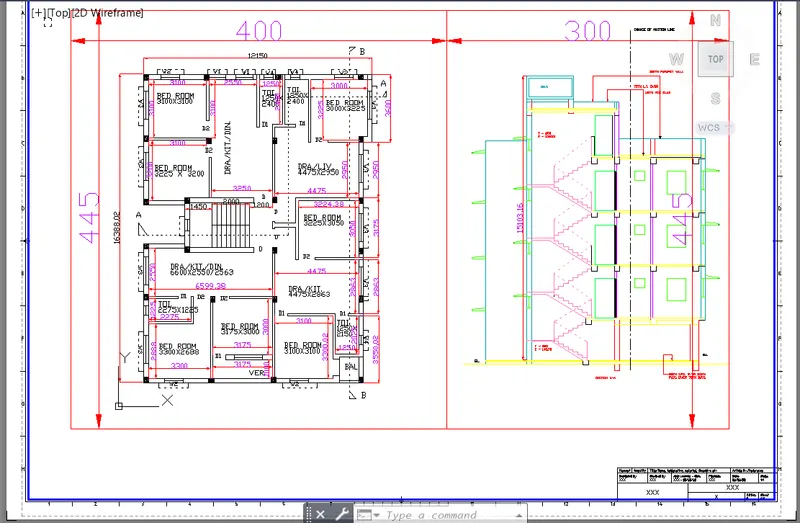
12. Mark the dimension in the paper space by "dimlinear" command.
c. Editing Attributes in the template.
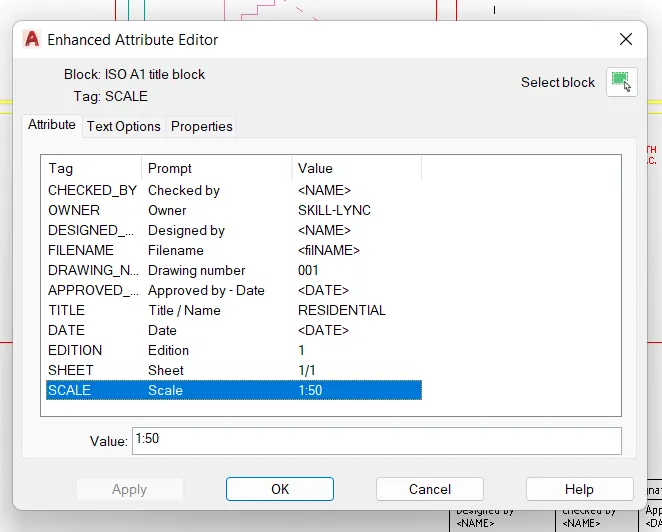
13. Go to paper space by command"PS" and click on the template which is a block.
14. Click on the attributes and edit the attributes- double click the attribute text or command "ATTEDIT" , the attribute dialogue box apperas
15. Give the value as NAME ,DATE ,scale etc.
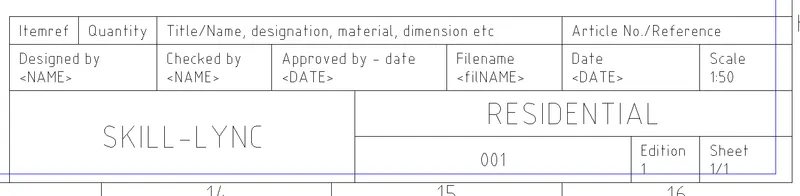
16. Enter the text by multiline text in paper space and with text height 20 .
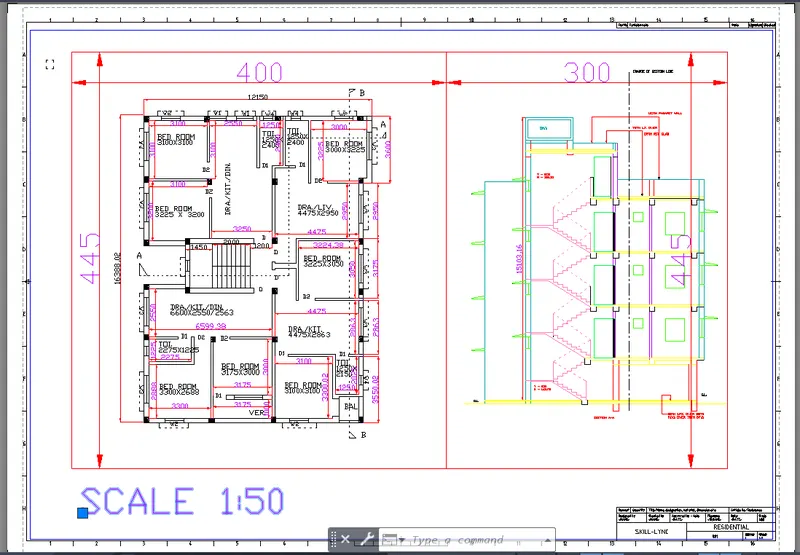
d. Taking plot using A1 sheet
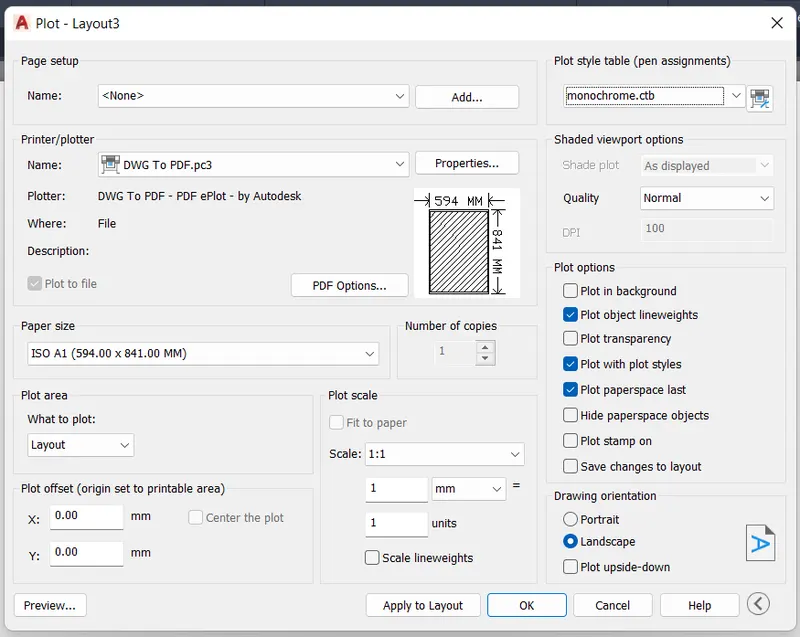
17. Use command "PLOT" , the dialogue box appears.
18. Give the name as "DWG to PDF".
19. Select the paper size as ISO A1 (594x841 mm).
20. Select what to plot as layout.
21.Scale is given as 1:1 ,oreintation is given as landscape.
21. Select the pen asignment as "Monochrome" so that the print will be in lack.
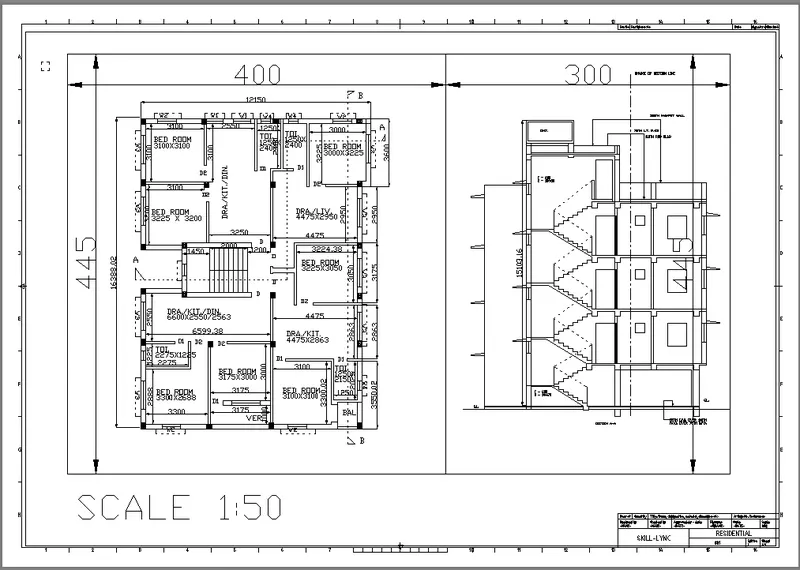
- Result:
a. Layout is created using template m.Arch.dwt
b. Viewport is created using MV command of size 400x445 and 375x445mm and the scale of viewport is set to 1:50.
c. Attributes in the template are edited
d. A plot is taken using A1 size.
2. Aim :
a. Take different view of kitchen for layout in model space
b. Create the layout with four viewports, with A4 sheet .
c. Create a plot.
- Procedure:
a. Take different views for the layout in model space
1. Open the drawing , use command "VIEW" to create new views.
2. The view manager dialogue box apperas .click on model , click on new to craete new view.
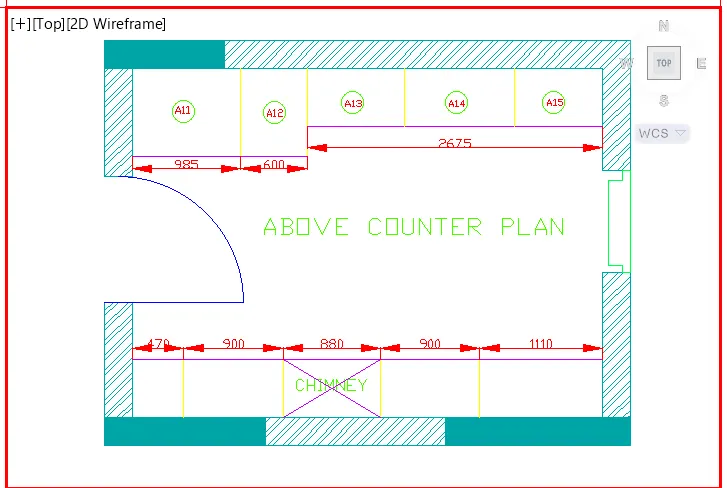
3. Another dilaogue box of new view appears , give the view name as "above counter plan" select the boundary as define window, and eelct it using the window selection from the drawing.
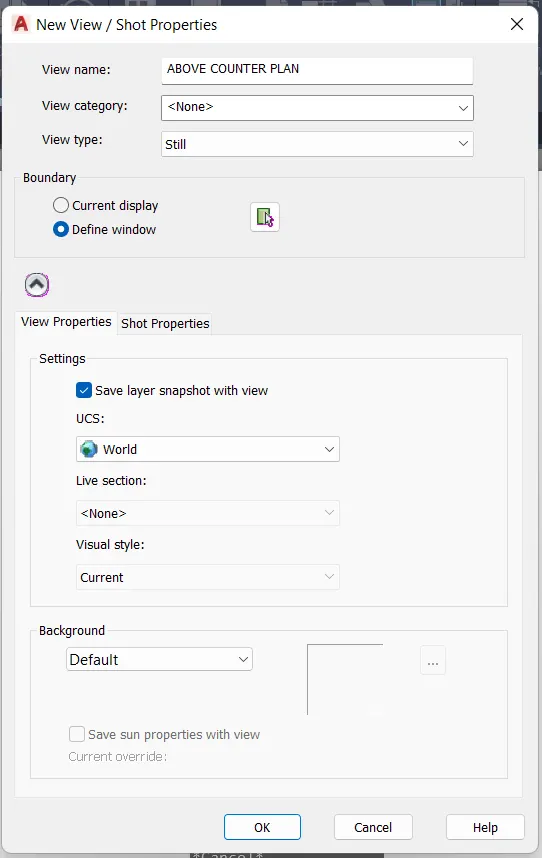
4. Click on OK and the view with name above counter plan and the selected drawing will be created.
5. Similary craete views for below counter plan, hob , and A11 to A14 cabinets.
b. Create the layout with four viewports, with A4 sheet.
6. Open the layout tab, rename the layout as kitchen layout.
7. Delete the exisiting viewport
8. Default is the A4 sheet.
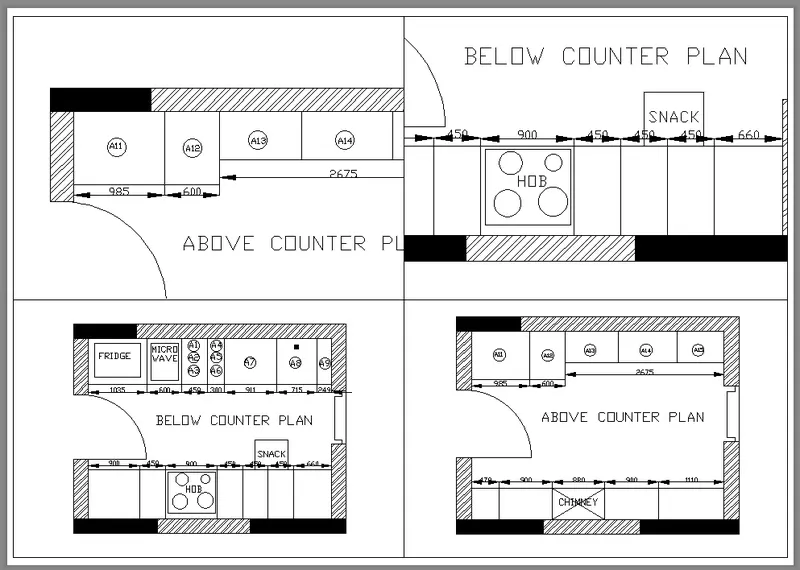
9. With "MV" command create 4 viewports by making the window .
10. Type command "VIEW" in the layout tab , select the required view and click on the viewport where it has to be displayed and lock each viewport.
11. Select the A11 to A14 cabinet view in the first viewport,zoom and pan to fit in the viewport
12. Go to paper space ,with Text command type SCALE 1:1
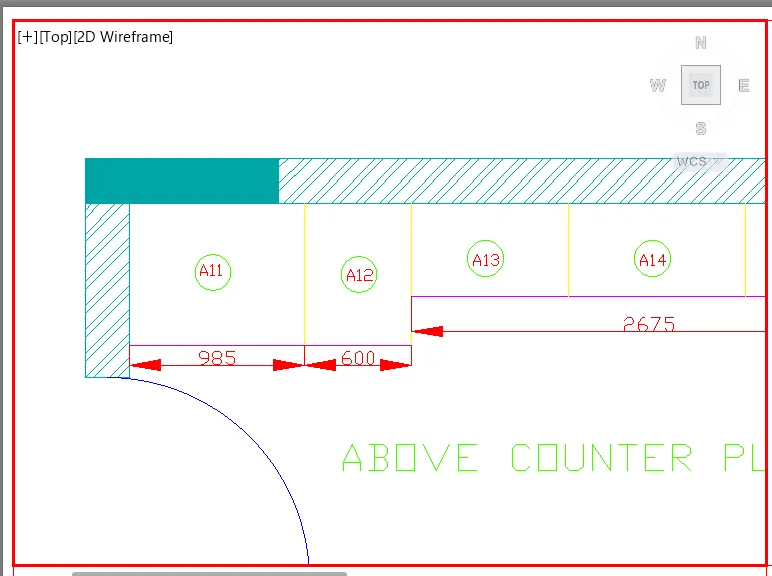
13. Enter command "MS" click on the second viewport .
14. Enter the command "VIEW" and select the view name snack counter
15. Zoom and pan the viewport to make the view fit in the viewport.
16. Lock the viewport
17. Go to paper space and with command "T" enter the text SCALE 1:1.
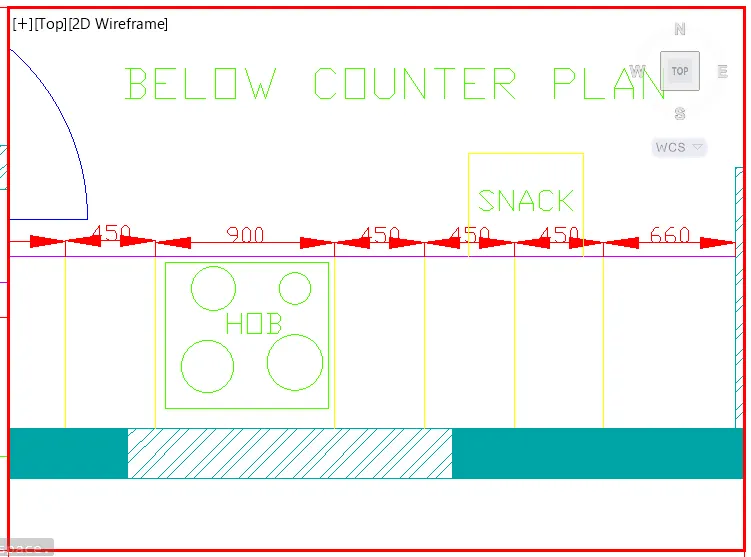
18. Similary in model space click on third viewport .
19. Enter the view above counter plan .
20. Zoom and pan the viewport , so that the drawing fit in it.
21. Lock the viewport.
22. Go to paper space and with command "T" enter the text as ABOVE COUNTER PLAN and SCALE 1:2 with text height 150.
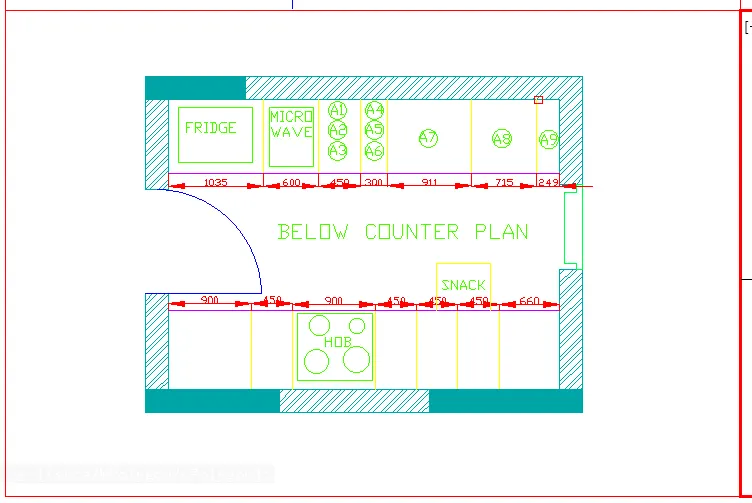
23.Similary in model space click on third viewport .
19. Enter the view below counter plan .
20. Zoom and pan the viewport , so that the drawing fit in it.
21. Lock the viewport.
22. Go to paper space and with command "T" enter the text as BELOW COUNTER PLAN and SCALE 1:2with text height 150.
c. Creating a plot
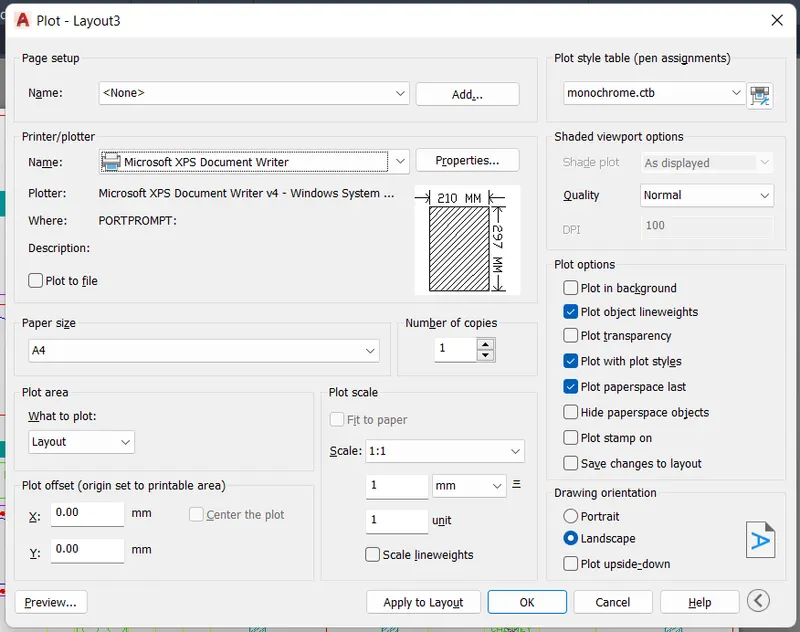
23. Use "PLOT" command , plot dialogue box appears.
24. Paper size is selected as A4 and name is given as A4, printer name ad print to pdf
25. Select what to plot as layout , and select pen assignment as monochrome.
26. Preview the print
27. Select ok to convert to pdf .
- Result:
a. Different view of kitchen for layout in model space is created.
b. The layout with four viewports, with A4 sheet is created.
c. A plot is created.
3. Aim :
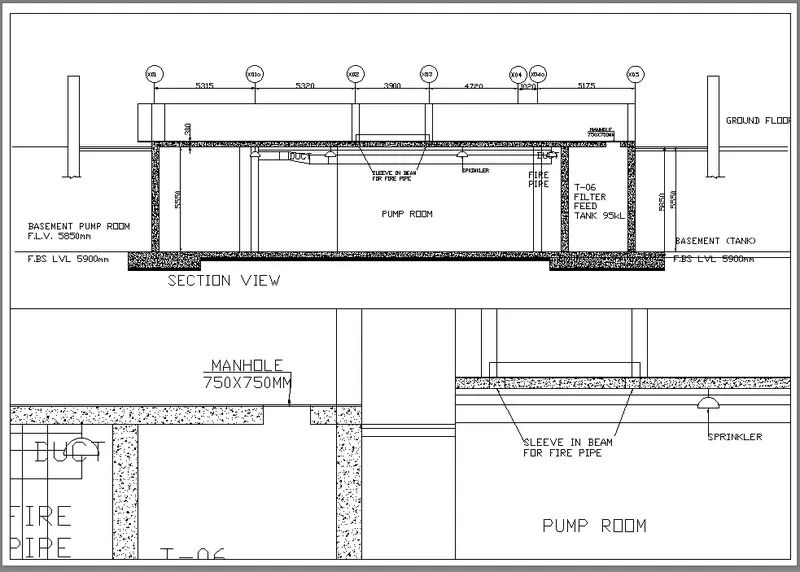
a. Create layout of the section of industrial building
b.Creating viewport by MV command(multiviewport) and scale 1:30 and 1:100 is given.
c. To take a plot of the layout.
- Procedure:
a. Creating layout of the section of industrial building
1. Open the drawing of section of industrial building.
2. Take the layout tab
3. Remane the tab as industrial section.
4. Right click on the tab and select pageset up manager option.
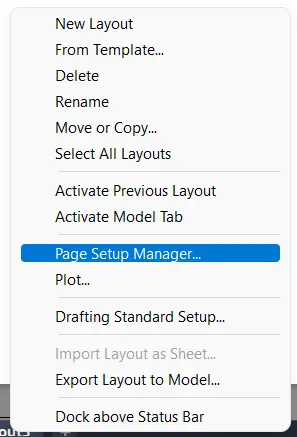
5. Click on new - give a name , page setup dialogue box appears.
6. Give the paper size as A3 in page setup dialogue box.
7. Make it current, the layout paper size chages to A3.
b. Creating viewport by MV command and giving a scale of 1:100 and 1:30
8. Use "MV" command and craete 3 viewports accordingly.
9. Use Command "MS" for the model space , click on the first viewport
10. Set the scale to 1:100 from the bottom toolbar or right click and properties ,from there also we can change the scale.
11. By pan command fit the drawing inside the viewport.
12. By text command write the text as SCALE1:100 with a text height of 50 and lock the viewport.
13. Go to model view , and create views for the next two viewports.
14. Command "VIEW" -view manager dialogue box appears -create new-give name as mahole view -select define window and select the view we need to create,press enter
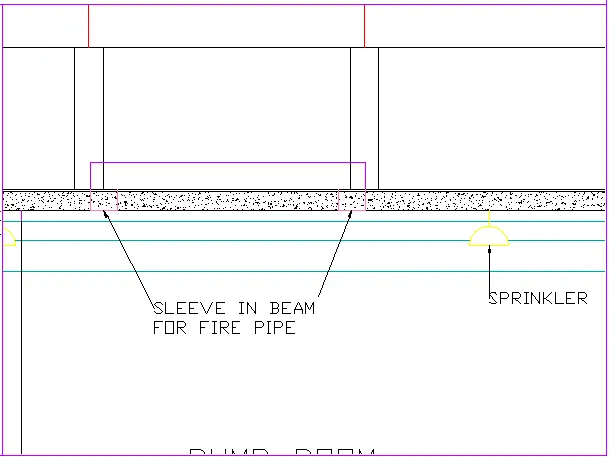
15. Similarly create view for sprinkelr named as sprinkler view .
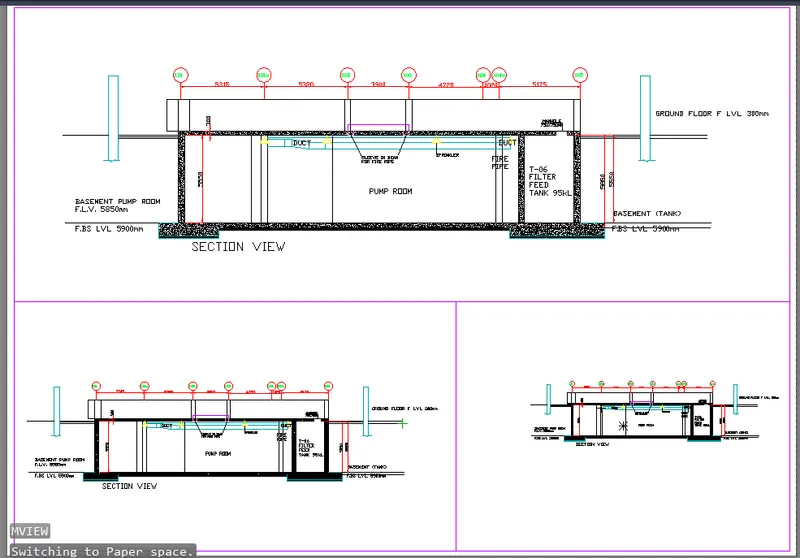
16. Now go to the layout industrial section and command "ms " and click on the left model space.
17. Now use command "view" -seelct the manhole view- and click on set current.
18. Then the view will be displayed on the model space
19. Select the scale to 1:30 from the bottom toolbar
20. By multiline text give the text as SCALE 1:30 with a text height of 150.
21. Lock the viewport from the bottom toolbar lock symbol.
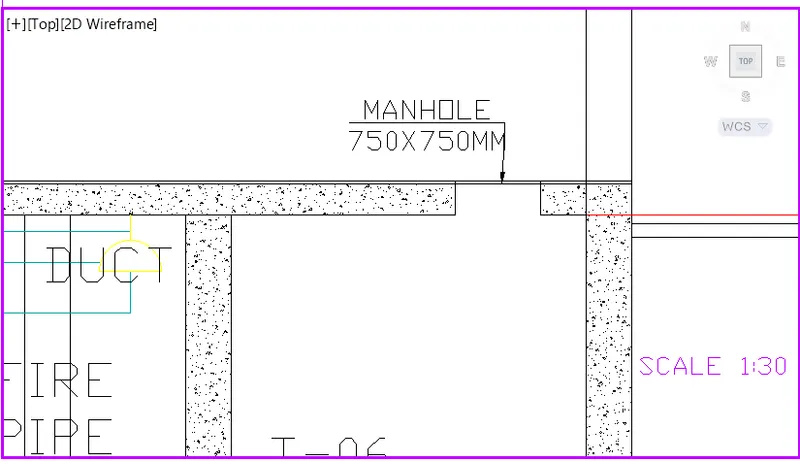
22. Type "MS" and click on the third viewport .
23. Use comand "VIEW" and select the sprinkler view and make it current.
24. Select the scale to 1:30 from the bottom toolbar
25. By multiline text insert the text as SCALE1: 30 with a text height of 150.
26.Lock the viewport .
c. Take a plot of the viewport
27. Enter the command "PLOT".
28. The dilaogue box appears, select paper size as A3, what to plot as layout
29. Give pen assignments as monochrome.
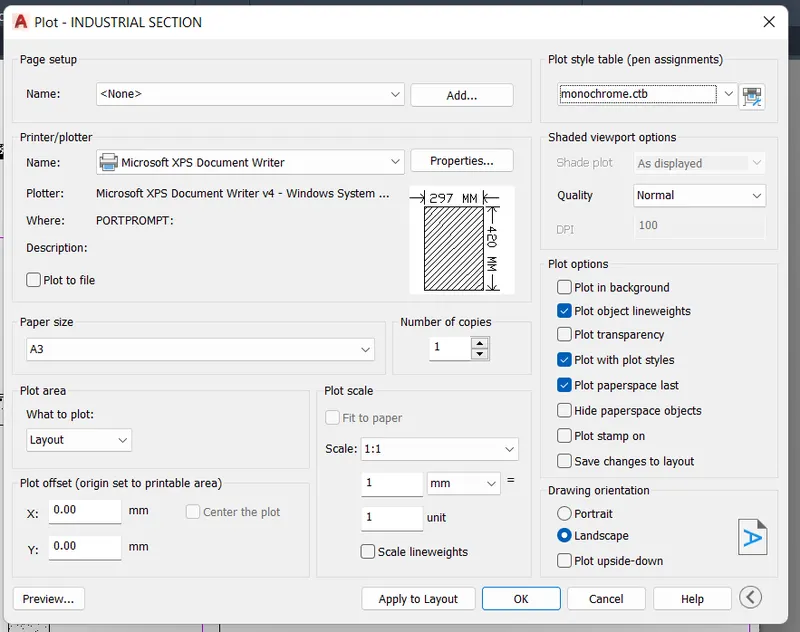
30. Click on preview option to see the preview and apply to layout.
31. Click ok to save as pdf.
- Result:
a. Layout of the section of industrial building is created
b.Viewport is created by MV command and scale 1:30 and 1:100 is given.
c. Plot of the layout is taken.