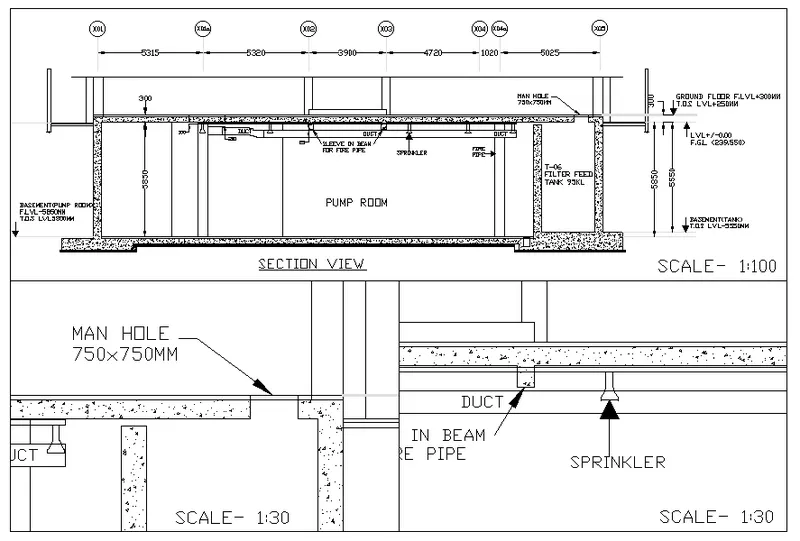
Creation of Multiple viewports, Scaling the drawing and setting in Template in AutoCad
1) AIM: To create a layout of the Plan and Section A of the project in Challenges 7, using the template Tutorial-mArch.dwt in a scale as given in the Figure.
PROCEDURE:
- Open cad application in the pc and set all the limits required.
- Set the units as required for drawing. Set units in decimal and scale in Millimeters.
- Now here no need of drawing the drawing again because the drawing has been previously drawn in other challenges.
- To bring that drawing back we have a command XREF so type that in the command box and a dialogue box will appear.
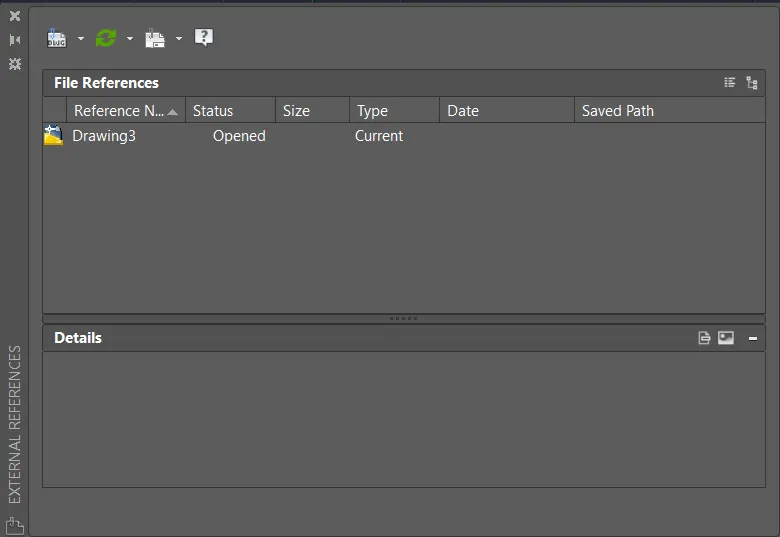
- Here in top left select the type of file. We can attach any type of file here.
- So we now need to attach the dwg file so select it.
- Again a dialogue box will appear where we have to browse the drawing file and select it.
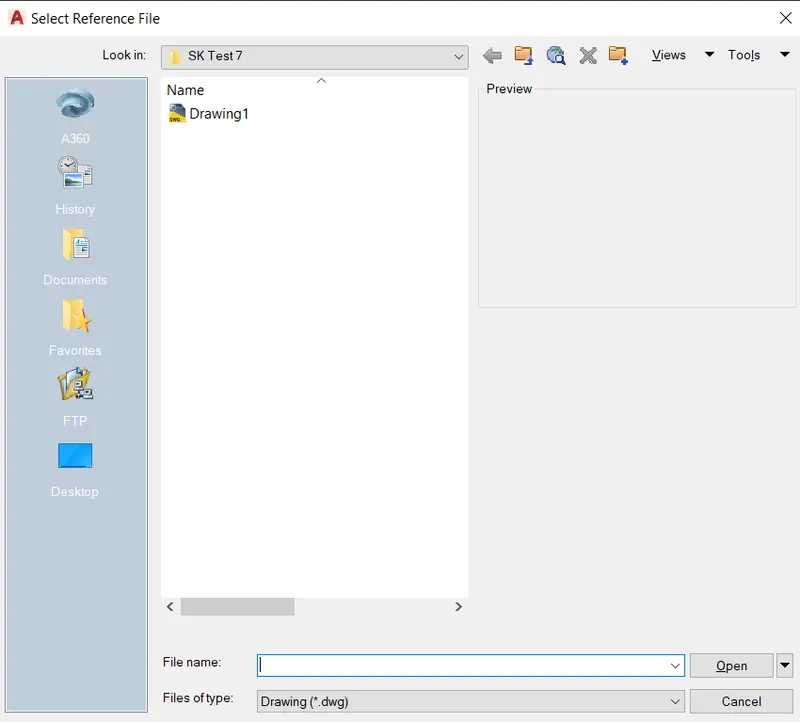
- After browsing select the file and click open.
- Now again another dialogue box will appear there we have several options to make it clearer and easier.
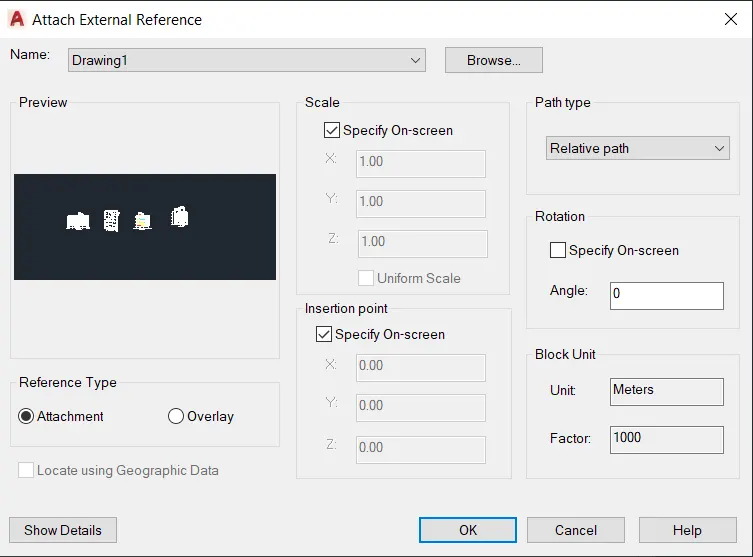
- Here we can change the scale of drawing.
- Change the angle of rotation, Insertion point and path type etc.
- Next something’s we cannot imagine simply so we can select the option Specify in screen.
- After all the settings and selections the drawing will appear in the cad screen.
- Once the drawing is in the screen now go to layout.
- In layout right click and select the layout template which is mentioned in the question part.
- Next comeback to model space and create the views which will make easier in layout.
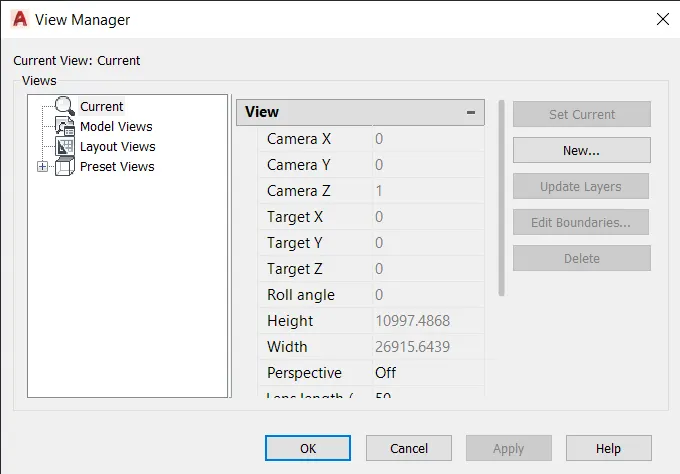
- Create as many as views required. Here we need only two so create two views.
- Go to layout draw a rectangle and go to model space.
- Again go to view dialogue box and select the saved views and set current it will appear.
- Here they have mentioned scale so lock the drawing and do the scaling.
- Here once we have to see the present scale and then set it.
- Next we have to mention the scale in the layout box so select Text command.
- Specify the height and type the name or scale.
- Once the naming part is finished now do the naming inside the template.
- The template texts are almost made of Attributes so that are very easy just answer all the questions and that are displayed in template.
- Next go to plot and there select the layout and plot it.
RESULT:
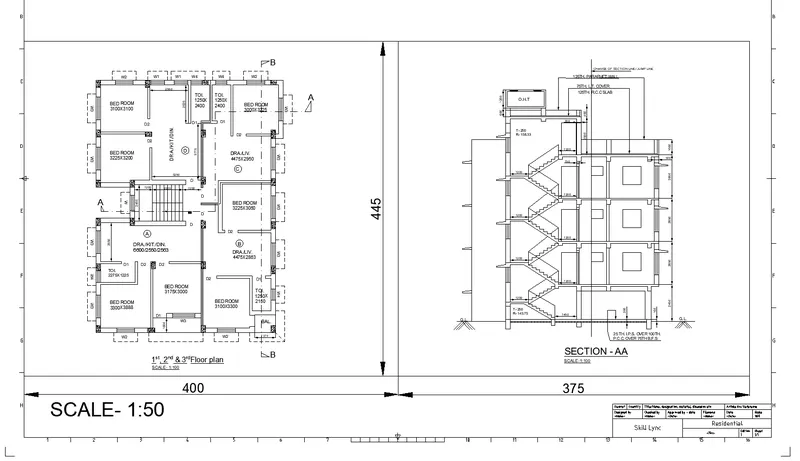
2) AIM: To create a layout of the Kitchen drawn in Challenge 9 and use the scale as mentioned. Use A4 Size page for the layout.
PROCEDURE:
- Open cad application in the pc and set all the limits required.
- Set the units as required for drawing. Set units in decimal and scale in Millimeters.
- Now here no need of drawing the drawing again because the drawing has been previously drawn in other challenges.
- To bring that drawing back we have a command XREF so type that in the command box and a dialogue box will appear.
- Here in top left select the type of file. We can attach any type of file here.
- So we now need to attach the dwg file so select it.
- Again a dialogue box will appear where we have to browse the drawing file and select it.
- After browsing select the file and click open.
- Now again another dialogue box will appear there we have several options to make it clearer and easier.
- Here we can change the scale of drawing.
- Change the angle of rotation, Insertion point and path type etc.
- Next something’s we cannot imagine simply so we can select the option Specify in screen.
- After all the settings and selections the drawing will appear in the cad screen.
- Once the drawing is in the screen now go to layout.
- In layout right click and select the layout template which is mentioned in the question part.
- Next comeback to model space and create the views which will make easier in layout.
- Create as many as views required. Here we need only two so create two views.
- Go to layout draw a rectangle and go to model space.
- Again go to view dialogue box and select the saved views and set current it will appear.
- Here they have mentioned scale so lock the drawing and do the scaling.
- Locking the drawing helps scaling it expands or contracts with the vp line.
- Here once we have to see the present scale and then set it.
- Next we have to mention the scale in the layout box so select Text command.
- Specify the height and type the name or scale.
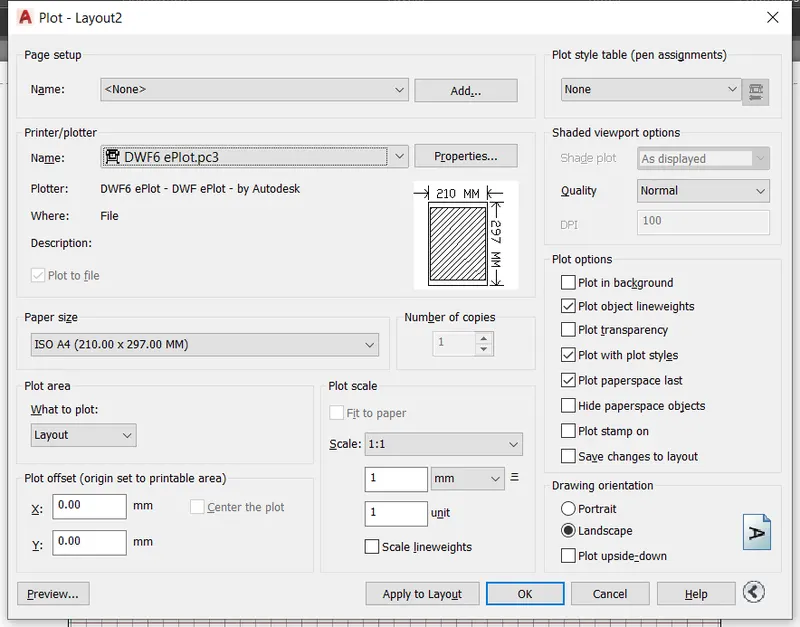
- Next go to plot and there select the layout and plot it.
- Here we have to select what we want to have like pdf or dwg or jpj etc.
- Select the paper size as mentioned in the question. In what to plot section we have several options.
- Like windows and layout or extends etc.
- In plot style table we can have different type of drawing printout.
- After all the selections we have preview option where we can see our drawing with respect to the selections just before plotting or saving in required formate.
RESULT:
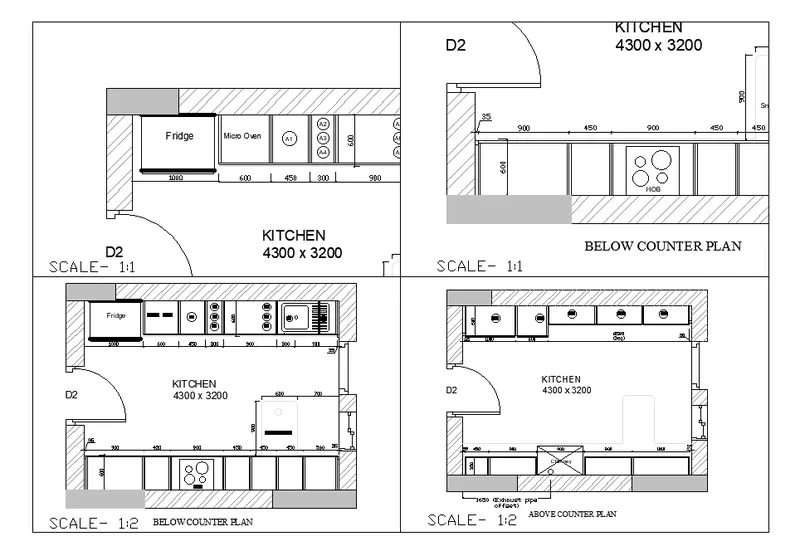
3) AIM: To create a layout of the section created in Challenges 9. Use scale as mentioned in the Figure. Cretae using myultiple views in MV command
PROCEDURE:
- Open cad application in the pc and set all the limits required.
- Set the units as required for drawing. Set units in decimal and scale in Millimeters.
- Now here no need of drawing the drawing again because the drawing has been previously drawn in other challenges.
- To bring that drawing back we have a command XREF so type that in the command box and a dialogue box will appear.
- Here in top left select the type of file. We can attach any type of file here.
- So we now need to attach the dwg file so select it.
- Again a dialogue box will appear where we have to browse the drawing file and select it.
- After browsing select the file and click open.
- Now again another dialogue box will appear there we have several options to make it clearer and easier.
- Here we can change the scale of drawing.
- Change the angle of rotation, Insertion point and path type etc.
- Next something’s we cannot imagine simply so we can select the option Specify in screen.
- After all the settings and selections the drawing will appear in the cad screen.
- Once the drawing is in the screen now go to layout.
- Next comeback to model space and create the views which will make easier in layout.
- Create as many as views required. Here we need only two so create two views.
- Go to layout draw a rectangle and go to model space.
- While drawing a rectangle before that we have a option so that all the four boxes made at a time together.
- In this we have to make less effort and times is also saved.
- We can use that method for both horizontal or vertical once.
- Again go to view dialogue box and select the saved views and set current it will appear.
- Here they have mentioned scale so lock the drawing and do the scaling.
- Locking the drawing helps scaling it expands or contracts with the vp line.
- Here once we have to see the present scale and then set it.
- Next we have to mention the scale in the layout box so select Text command.
- Specify the height and type the name or scale.
- Next go to plot and there select the layout and plot it.
- Here we have to select what we want to have like pdf or dwg or jpj etc.
- Select the paper size as mentioned in the question. In what to plot section we have several options.
- Like windows and layout or extends etc.
- In plot style table we can have different type of drawing printout.
- After all the selections we have preview option where we can see our drawing with respect to the selections just before plotting or saving in required formate.
RESULT: