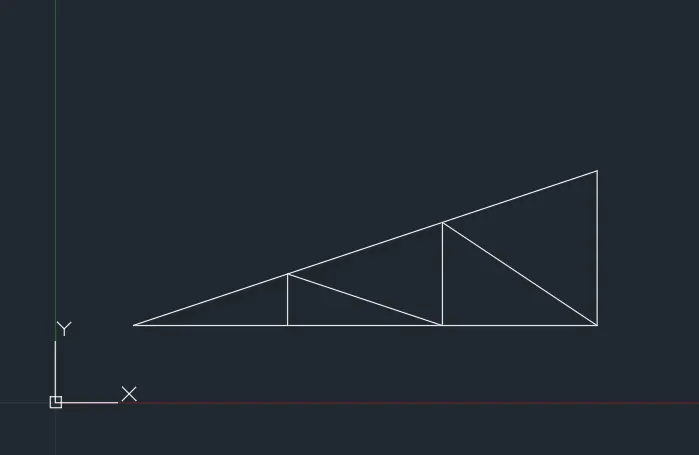
Creation of geometries by Coordinate system methods using AutoCad
AIM: Create a geometeries from P1 to P2 Using all coordinates system methods and we need to use line tool to create the coordinates and circle tool at some locations
Introduction :
All the drawings we are going to do in Coordinate system
In autocad there are 3 types of cordinates system
They are
- Absoulte coordibate system
- Relative coordinate system (Relative rectangular and Relative polar coordinate system)
- Direct distance entry
So the coordinate system is where the numbers are used at a sinle point and geometric points
1. Absoulte coordinate system: In this system all the coordinate are starting from the orgin (0,0) at some diatance can taken as ( x,y)
2. Relative coordinate system: The location of the relative coordinate system is difined from the distance from a refernce point when using this coordinate the first point if always from the origin (0,0)
a) Relative rectangular coordinate system: it is a coodinarte system that specifies each point of the numerical coordinates as long x and y directions in this system the first point always start while using @ like (@x, y)
b) Relative polar coordiate system : In this coordinate system the point is taken from the direction of angle like (1< angle)
3. Direct distance entry: In this system the the point starts from origin and the direction taken from the mouse with a specified value entred.
Coomands used
Line Command (L Enter)
Circle Command (C Enter)
Procedure:
Using Absolute coordinate system
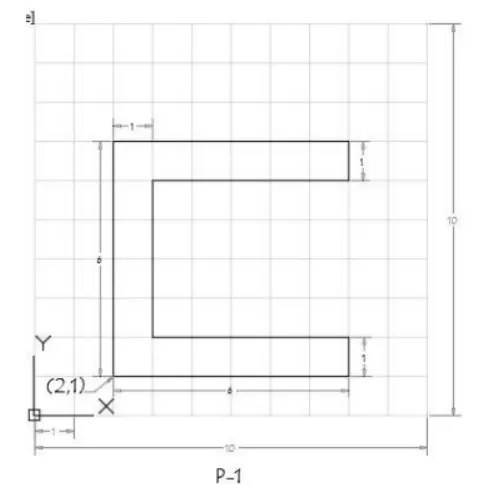
- Open the Autocad
- Click on new
- Enter the Line command (L enter) or use Line in Ribbon or use in line in draw tools
- Enter the first point (2,1)
- Next the coomand ask the another point
- Specify the next point (8,1)
- Specify the next point (8,2)
- Specify the next point (3,2)
- Specify the next point (3,6)
- Specify the next point (8,6)
- Specify the next point (8,7)
- Specify the next point (2,7)
- Specify the next point (2,1)
- And use close (C Enter)
Result
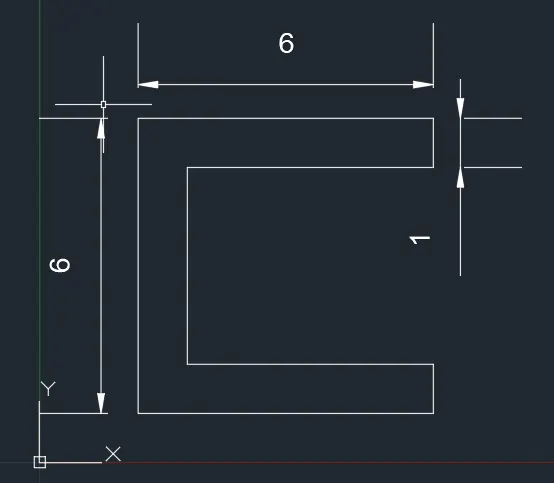
Usind Relative rectangular Coordinate system
- Open new drawing
- Enter the line command (L Enter)
- Enter the starting point (2,1)
- Next command ask the next point
- Specify the next point (@6,0)
- Specify the next point (@0,1)
- Specify the next point (@-5,0)
- Specify the next point (@0,4)
- Specify the next point (@5,0)
- Specify the next point (@0,1)
- Specify the next point (@-6,0)
- Click on close (C Enter)
Result
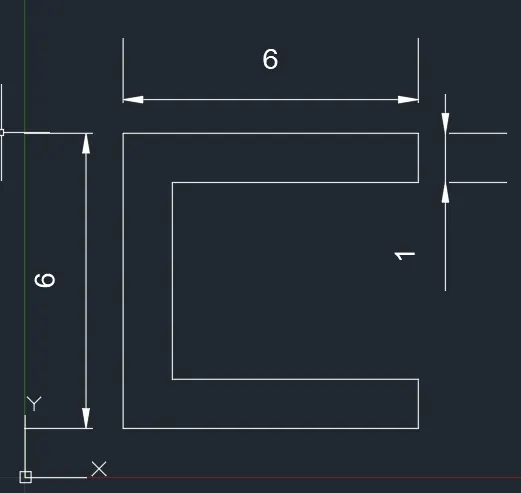
Using relative polar coordinate
- open new drawing
- Enter line command (L Enter)
- Specify the starting point (2,1)
- Specify the next point (6<0)
- Specify the next point (1<90)
- Specify the next point (5<180)
- Specify the next point (4<90)
- Specify the next point (5<0)
- Specify the next point (1<90)
- Specify the next point (6<180)
- So close (C Enter)
Result
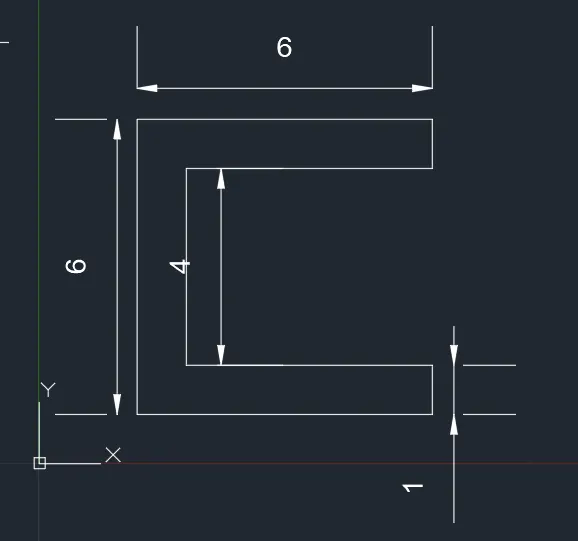
So finally the direct distance entry method
- Open new drawing
- Enter the line command (L Enter)
- Specify the first point (2,1)
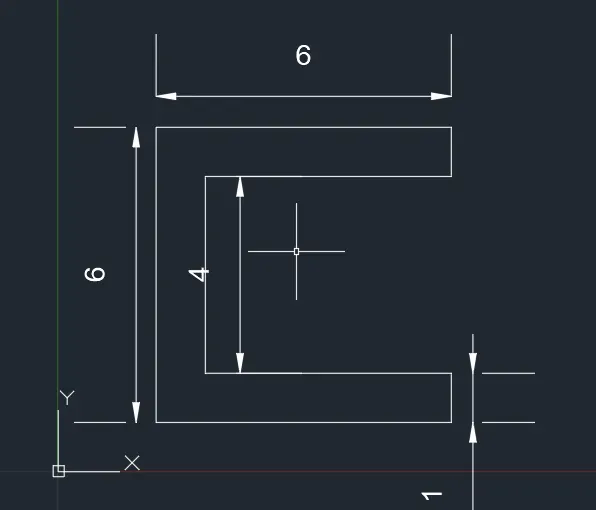
- Specify the next point 6 towards the +ve x-axis
- Specify the next point 1 towards the +ve y-axis
- Specify the next point 5 towards the -ve x-axis
- Specify the next point 4 towards the +ve y-axis
- Specify the next point 5 towards the +ve x-axis
- Specify the next point 1 towards the +ve y-axis
- Specify the next point 6 towards the -ve x-axis
- And Close (C Enter)
Result
P-2
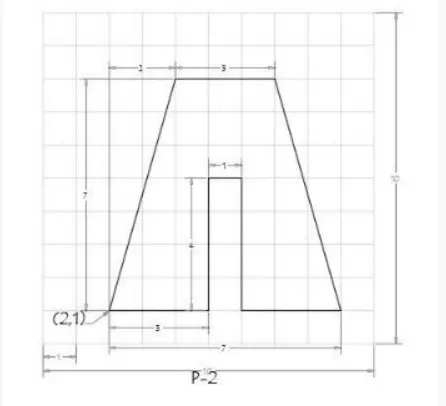
A) Using Absolute coordinate system
- Open the new drawing
- Enter Line command by using (L Enter)
- Specify the first point (2,1)
- Specify the next point (5,1)
- Specify the next point (5,5)
- Specify the next point (6,5)
- Specify the next point (6,1)
- Specify the next point (9,1)
- Specify the next point (7,8)
- Specify the next point (4,8)
- Close the command by using (C Enter)
Result
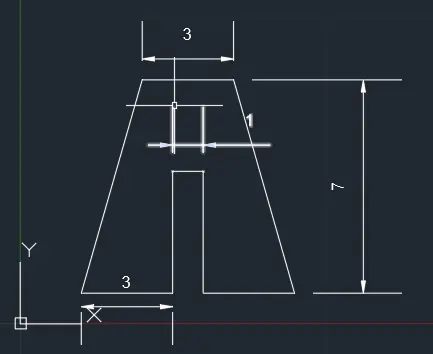
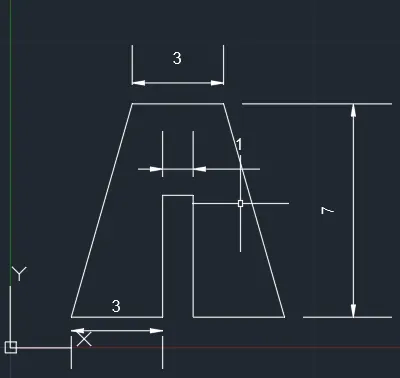
B) By using Rectangular coordinate system
- Open the new drawing
- Enter the line command by using (L Enter)
- Specify the first point (2,1)
- Specify the secong point (@3,0)
- Specify the secong point (@0,4)
- Specify the secong point (@1,0)
- Specify the secong point (@0,-4)
- Specify the secong point (@3,0)
- Specify the secong point (-2,7)
- Specify the secong point (-3,0)
- Close the command by using (C Enter)
Result
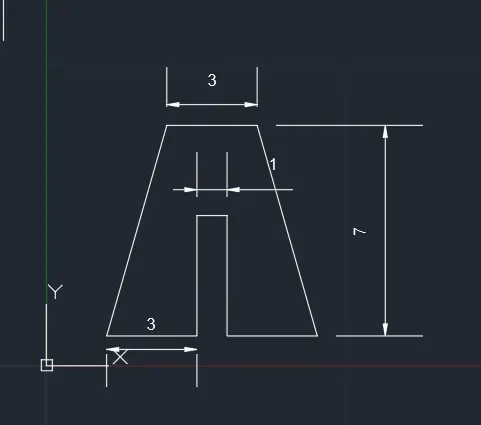
C) Relative polar coordinate system
- Open the new drawing
- Enter the line command by using (L Enter)
- Specify the first point (2,1)
- Specify the next point (3<0)
- Specify the next point (4<90)
- Specify the next point (1<0)
- Specify the next point (4<270)
- Specify the next point (3<0)
- Specify the next point (7<106)
- Specify the next point(3<180)
- Close the command by using (C Enter)
Result
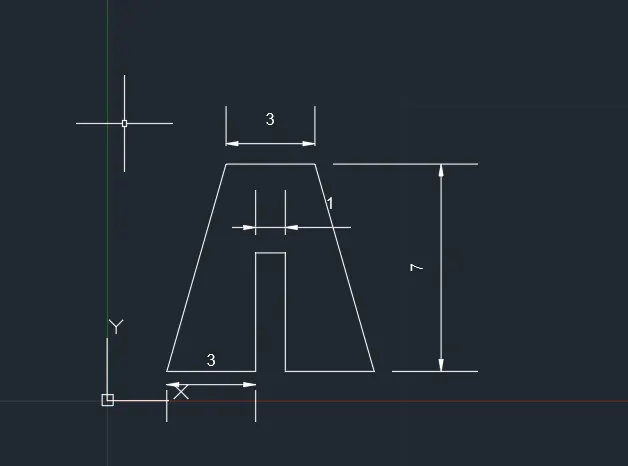
D) Direct distance entry method
- Open the new drawing
- Enter the line command by using (L Enter)
- Specify the first point (2,1)
- Specify the next point 3 towards the +ve x-axis
- Specify the next point 4 towards the +ve y-axis
- Specify the next point 1 towards the +ve x-axis
- Specify the next point 4 towards the -ve y-axis
- Specify the next point 3 towards the +ve x-axis
- Specify the next point 7 at an angle of 106 towards the -ve x-axis with +ve y-axis
- Specify the next point 3 towards the -ve x-axis
- Close the command by using (C Enter)
Result
Create the geometries for P-4 o P-10 by using any type of coordinate system
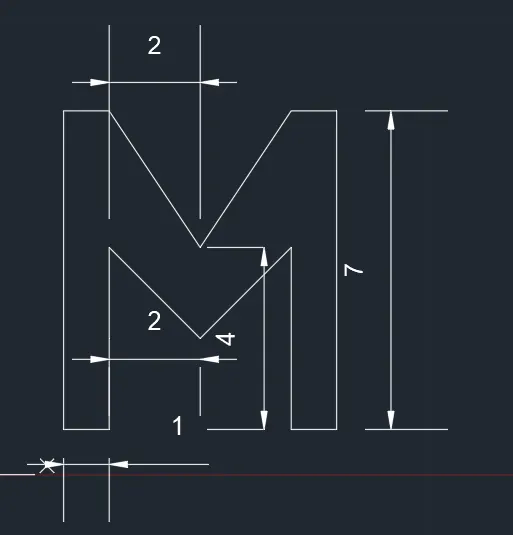
P-4
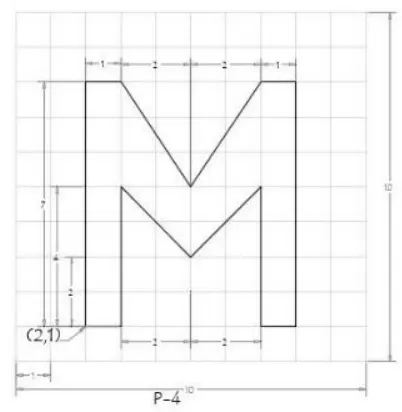
By using Absolute coordinate system
- Open the new drawing
- Use the line command by using (L Enter)
- Specify the first point (2,1)
- Specify the next point (3,1)
- Specify the next point (3,5)
- Specify the next point (5,3)
- Specify the next point (7,5)
- Specify the next point (7,1)
- Specify the next point (3,1)
- Specify the next point (8,8)
- Specify the next point (7,8)
- Specify the next point (5,5)
- Specify the next point (3,8)
- Specify the next point (2,8)
- Close the command by using (C Enter)
Result
P-5
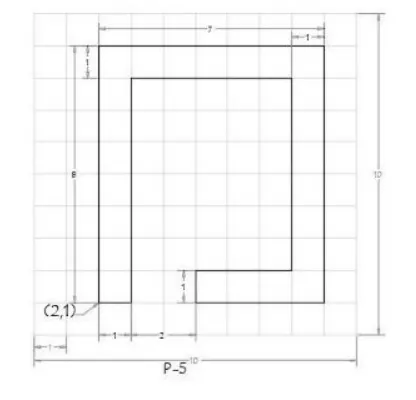
By using Rectangular polar coordinate system
- Open the new drawing
- Use the line command by using (L enter)
- Specify the first point (2,1)
- Specify the next point (@1,0)
- Specify the next point (@0,7)
- Specify the next point (@5,0)
- Specify the next point (@0,-6)
- Specify the next point (@-3,0)
- Specify the next point (@0,-1)
- Specify the next point (@4,0)
- Specify the next point (@0,8)
- Specify the next point (@-7,0)
- Close the command by using (C Enter)
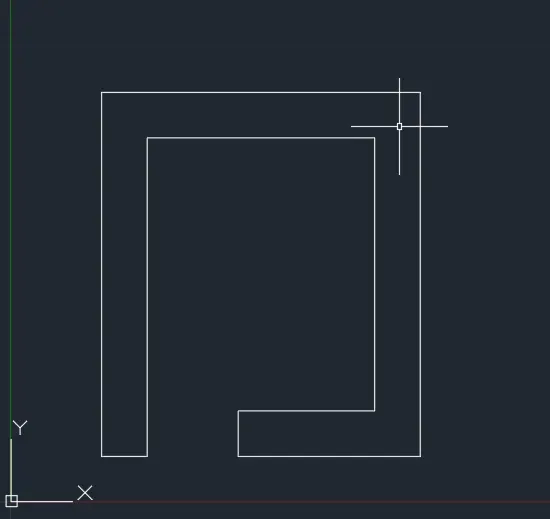
Result
P-7
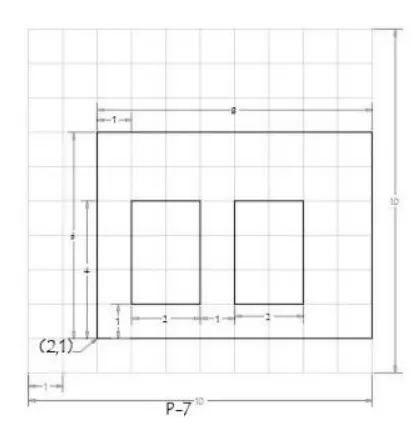
By using Absolute coordinate system
- Open the new drawing
- Use the line command by using (L enter)
- Specify the first point (2,1)
- Specify the next point (10,1)
- Specify the next point (10,7)
- Specify the next point (2,7)
- Close the command by using (C Enter)
- Again use the line command by using (L enter)
- Specify the first point (3,2)
- Specify the next point (5,2)
- Specify the next point (5,5)
- Specify the next point (3,5)
- Close the command by using (C Enter)
- Again use the line command by using (L enter)
- Specify the first point (9,2)
- Specify the next point (8,2)
- Specify the next point (8,5)
- Specify the next point (6,5)
- Close the command by using (C Enter)
Result
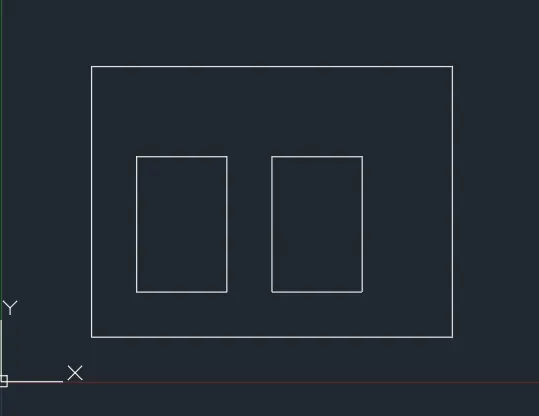
P-8
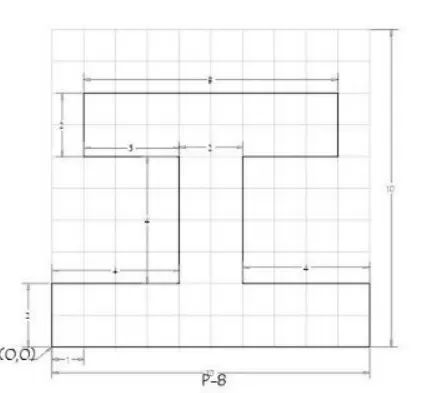
By using Relative Rectangular coordinate system
- Open the new drawing
- Use the line command by using (L enter)
- Specify the first point origin (0,0)
- Specify the next point (@10,0)
- Specify the next point (@0,2)
- Specify the next point (@-4,0)
- Specify the next point (@0,4)
- Specify the next point (@3,0)
- Specify the next point (@0,2)
- Specify the next point (@-8,0)
- Specify the next point (@0,-2)
- Specify the next point (@3,0)
- Specify the next point (@0,-4)
- Specify the next point (@-4,0)
- Close the command by using (C Enter)
Result
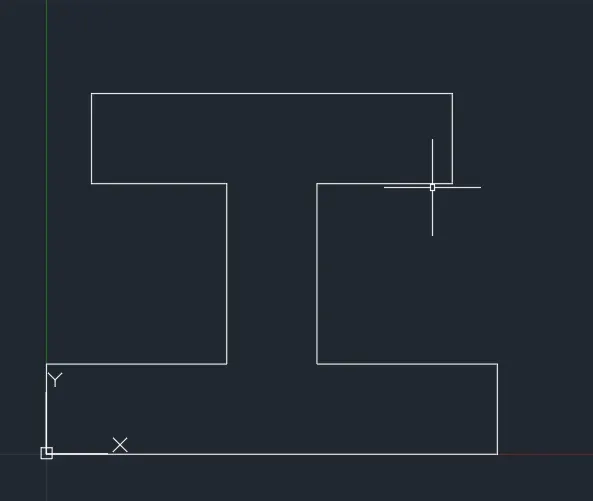
P-9
By using Absolute coordinate system
- Open the new drawing
- Use the line command by using (L enter)
- Specify the first point (1,1)
- Specify the next point (6,1)
- Specify the next point (6,3)
- Specify the next point (3,3)
- Specify the next point (3,2)
- Specify the next point (2,2)
- Specify the next point (2,4)
- Specify the next point (3,4)
- Specify the next point (5,6)
- Specify the next point (1,8)
- Close the command by using (C Enter)
Result
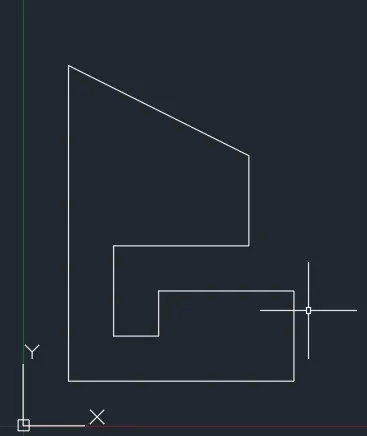
P-10
By using Relative polar coordinate system
- Open the new drawing
- Use the line command by using (L enter)
- Specify the first point (1,1)
- Specify the next point (@<0)
- Specify the next point (@3<90)
- Specify the next point (@3<0)
- Specify the next point (@4<90)
- Specify the next point (@5<180)
- Close the command by using (C Enter)
- Specify the first point (2,5)
- Specify the next point (@3<0)
- Specify the next point (@2<90)
- Specify the next point (@3<180)
- Close the command by using (C Enter)
Result
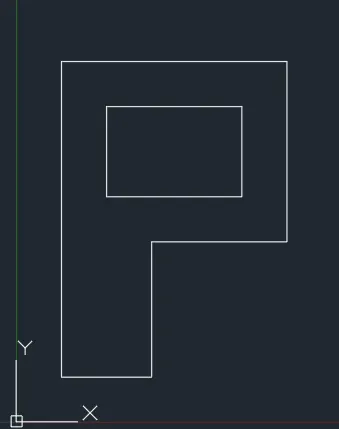
Profie wood
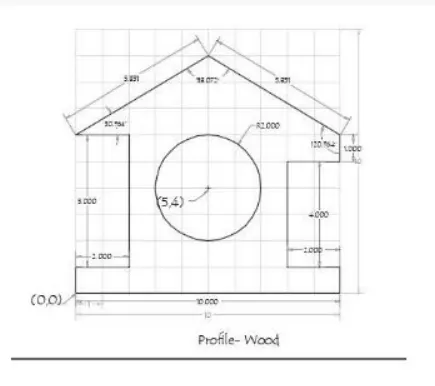
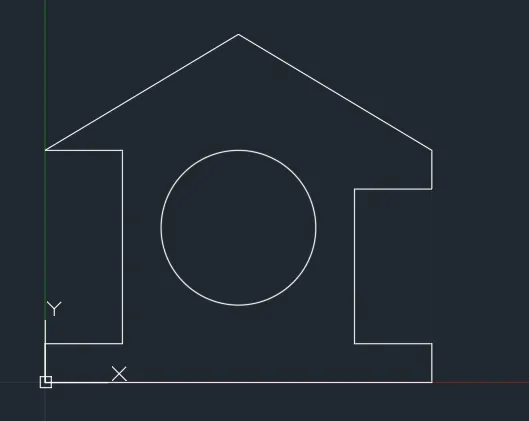
By using Relative rectangular coordinate system
- Open the new drawing
- Use line by using line command (L Enter)
- Specify the first point (0,0) is origin
- Specify the next point (@10,0)
- Specify the next point (@0,1)
- Specify the next point (@-2,0)
- Specify the next point (@0,4)
- Specify the next point (@2,0)
- Specify the next point (@0,1)
- Specify the next point (@-5,3)
- Specify the next point (@-5,-3)
- Specify the next point (@2,0)
- Specify the next point (@0,-5)
- Specify the next point (@-2,0)
- Close the command by using (C enter)
- Use the Circle command (C Enter) or in ribbon or in draw tools
- Specify the first point (5,4) and enter 2 for diameter
- Close the command
Result
Queen post truss
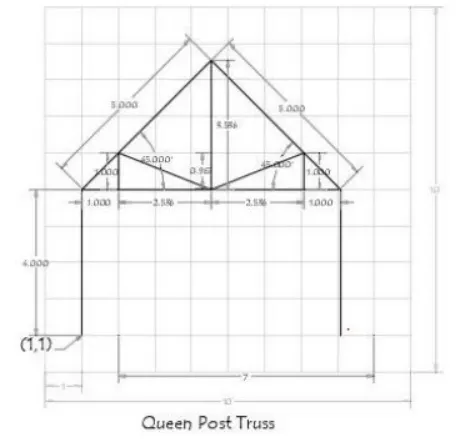
By using Relative recatngualar polar system
- Open new drawing
- Use the line command by using L Enter
- Specify the first point (1,1)
- Specify the next point (@0,4)
- Specify the next point (@3.536,3.536)
- Specify the next point (@3.536,-3.536)
- Specify the next point (@0,-4)
- Stop that command by using escape
- Use the line command by using L Enter
- Specify the first point (1,5)
- Specify the next point (@7.072,0)
- Stop that command by using escape
- Specify the first point (2,5)
- Specify the next point (@0,1)
- Specify the next point (@2.536,-1)
- Specify the next point (@2.536,1)
- Specify the next point (@0,-1)
- Stop that command by using escape
- Use the line command by using L Enter
- Specify the first point (4.536,5)
- Specify the next point (@0,3.536)
- Stop that command by using escape
Result
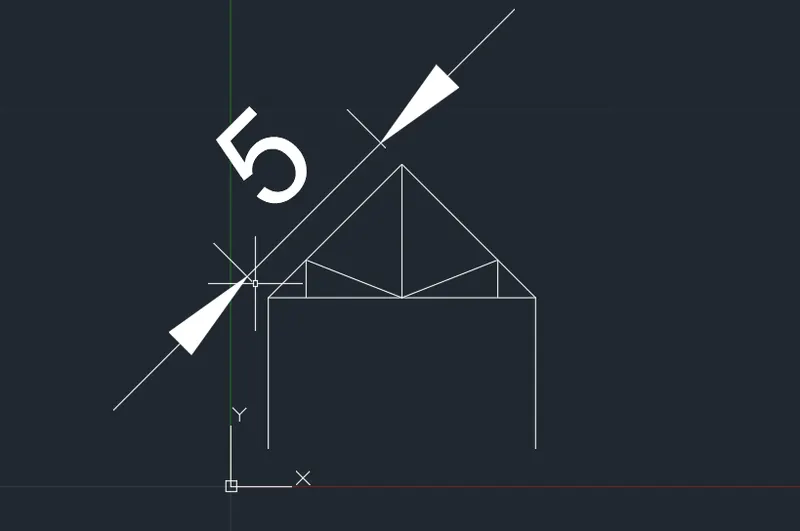
Mono pitch
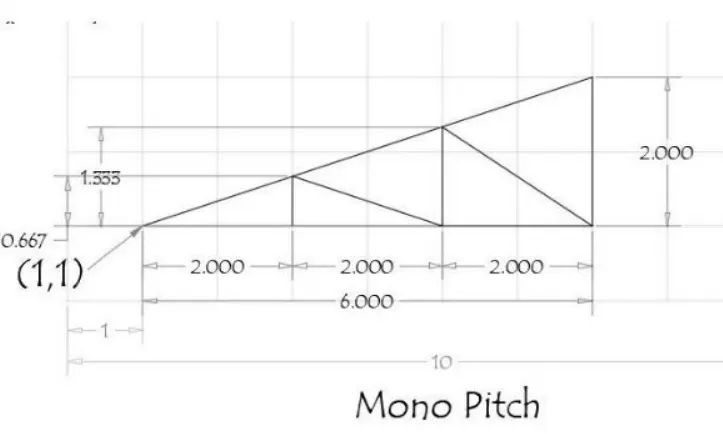
By using relative rectangular coordinate system
- Open the new drawing
- Use the line command by using (L enter)
- Specify the first point (1,1)
- Specify the next point (@6,0)
- Specify the next point (@0,2)
- Specify the next point (@-6,-2)
- Stop the command by using Escape
- Specify the First point (3,1)
- Specify the next point (@0,0.667)
- Specify the next point (@2,-0.667)
- Specify the next point (@0,1.333)
- Specify the next point (@2,-1.333)
- Stop the command by using Escape
Result