Creation of Column Schedule and Drawing Template using AutoCad
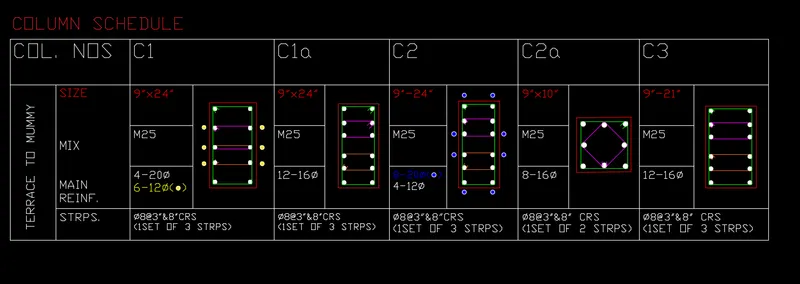
1. Create a column schedule as shown in the figure.
Note: Create a column schedule with the help of lines. Also, insert text with the help of Dtext command or Single Line text.
Hint: Use font name: romans.shx; Height: 8”, Justify: Left
AIM:
To create a column schedule as shown in the figure.
TOOLS USED:
TABLE
TEXT
RECTANGLE
OFFSET
CIRCLE
LINE
PROCEDURE:
Creating the Tabular column
Invoking the tool:
COMMAND: Tab/Table
MENUBAR: Annotate > Table
RIBBON: Annotation > Table
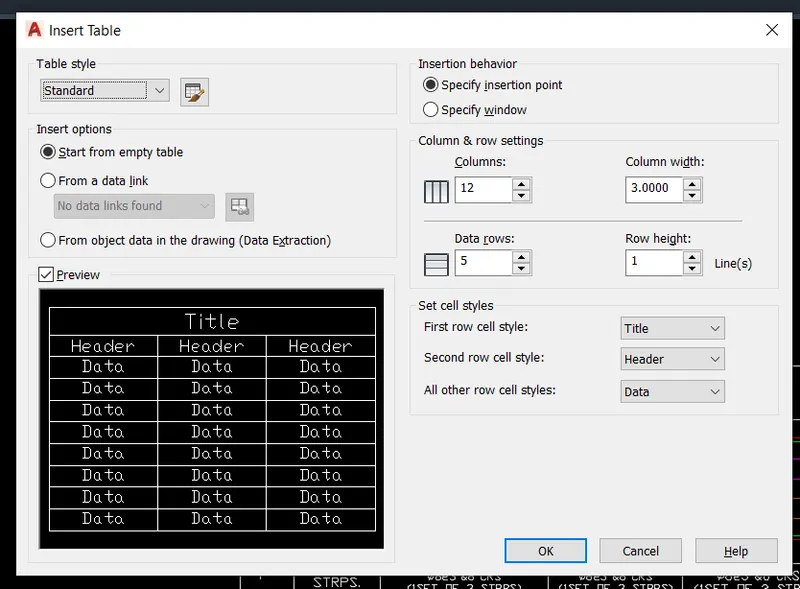
Created the table as per the required column and rows
EDITING TABLE:
Edit the Table as given the model like Merging the Rows & Columns.
TEXT IN TABLE:
Written the specification has given the Table
TEXT: Selected the romans text type
Text Height: 8"
JUSTIFICATION: TOP LEFT
Text color: Selected different colors for different texts
TEXT:
Single-Line Text:
Invoking the Text tool:
COMMAND: DT>
RIBBON: Annotation > Text > Single-Line
Specify start point of text or [Justify/Style]:
Specify height <8">
Specify rotation angle of text <90>
Write the Text Has we required ( TERRACE TO MUMMY )> ESCAPE
RECTANGLE:
Create the Columns & Stirrups by using the rectangular command
Invoking the tool
COMMAND: REC>
RIBBON: HOME>DRAW>RECTANGLE
Create a rectangle to fit the respected column type by assuming the dimensions
OFFSET:
Offset the created rectangle
Invoking the tool
COMMAND: OFF>
Specify offset distance< 0.2>
Select object to offset: Select the created rectangle
Specify point on side to offset: Inside
CIRCLE:
Create the Rebers by using the Circular command
Invoking the tool
COMMAND: C>
RIBBON: HOME>DRAW>CIRCLE>Tan Tan Radius
Select the Tangent Option in Object Snap mode for creating the Circle
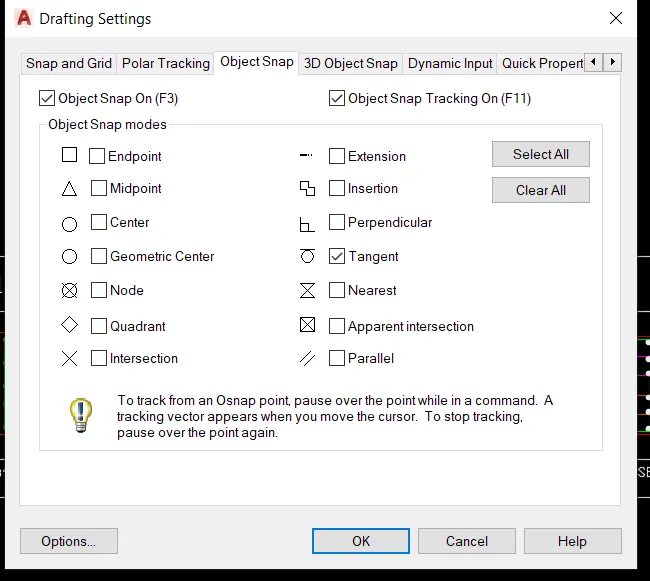
Specify point on object for first tangent of circle: select the horizontal line
Specify point on object for second tangent of circle: select the verticle line
Specify radius of circle: <0.05>
Created all the circles by using the same method
LINE:
Create a Hoock of the stirrups at Rebars by using the line tool
Invoking the tool
COMMAND: L>
RIBBON: HOME>DRAW>LINE
Created line by manually
RESULT:
Created Column Schedule by Using different tools and sketch the colors for better understanding
2. Create a window schedule as shown in the figures:
AIM:
To create a window schedule as shown in the figures:
TOOLS USED:
TABLE
TEXT
PROCEDURE:
TABLE:
Invoking the tool:
COMMAND: Tab/Table
MENUBAR: Annotate > Table
RIBBON: Annotation > Table
Created the table as per the required column and rows: 5 No. of Column and 6 no. of Rows
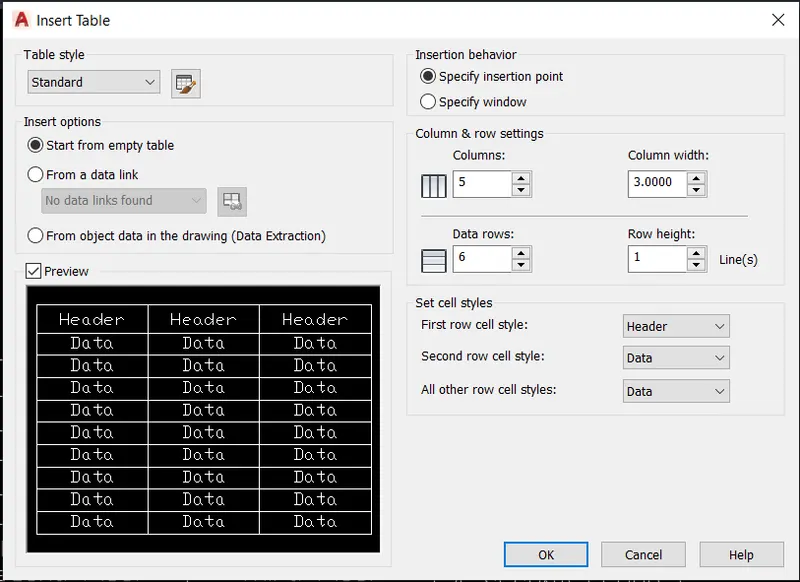
EDITING TABLE:
Edit the Table as given the model
TEXT IN TABLE:
Written the specification has given the Table
TEXT: Selected the txt text type
Text Height: 8"
JUSTIFICATION: Middle Center MC
Text color: Selected different colors for different texts
Fro Writing the Fractional numbers in the text: Write the fractional numbers and select the fractional number and In Formatting, tab select the b/a (Fractional option) it will be converted as a fraction
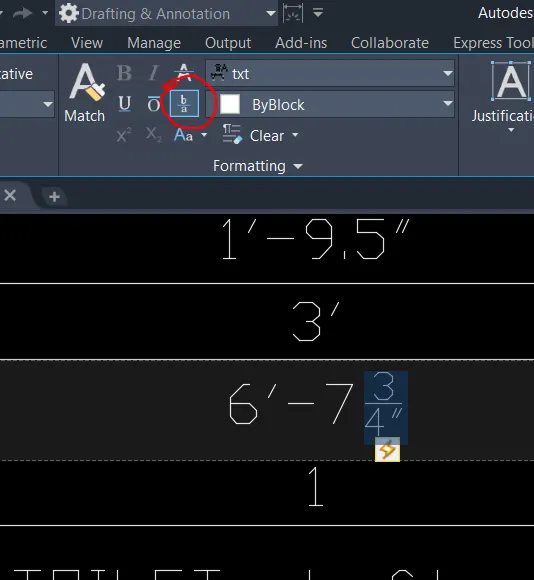
RESULT:
Created a Window Schedule as per the given model by using the tabular cool and text tools.
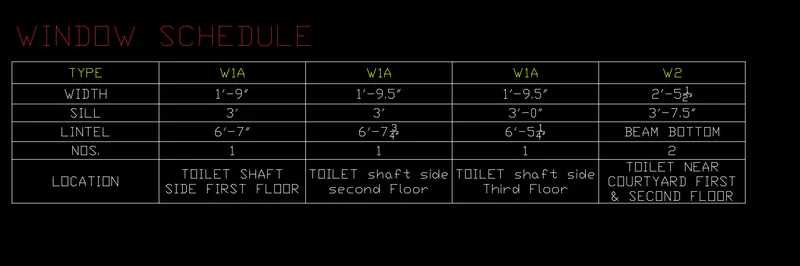
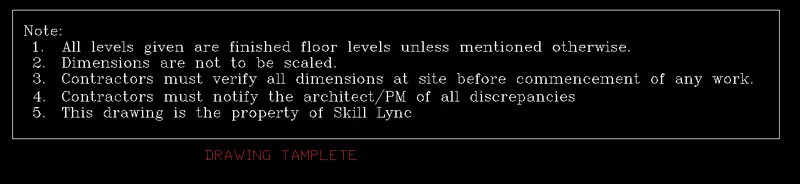
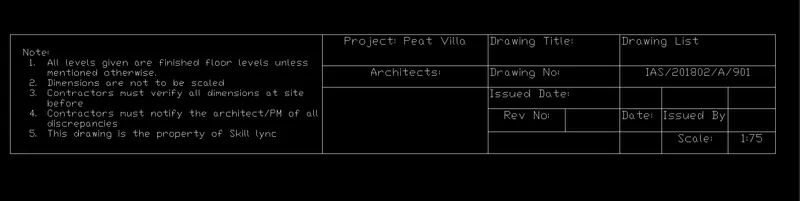
3. Create the drawing template as shown in the figure:< Use the Notes as in the figure:
AIM:
To create the drawing template as shown in the figure
TOOLS USED:
RECTANGLE
MTEXT
TABLE
PROCEDURE:
Creating the Drawing Templet Note:
RECTANGLE:
Create the One box for Note
Invoking the tool
COMMAND: REC>
RIBBON: HOME>DRAW>RECTANGLE
Create a rectangle to fit the Note into that
TEXT:
Invoking the tool:
Multiline Text:
Invoking the Text tool:
COMMAND: MT/MTEXT>
RIBBON: Annotation > Text > Multiline
Specify first corner: Select the top left corner of the rectangle
Specify opposite corner: Select the bottom right corner of the rectangle
Text Type: romanc
Text Height: 8"
Written the text as given in the figure.
Creating the Drawing Templet:
TABLE:
Invoking the tool:
COMMAND: Tab/Table
MENUBAR: Annotate > Table
RIBBON: Annotation > Table
Insert a Table for creating Drawing Template: It consists of 7 no. of Column & 5 no. of Rows
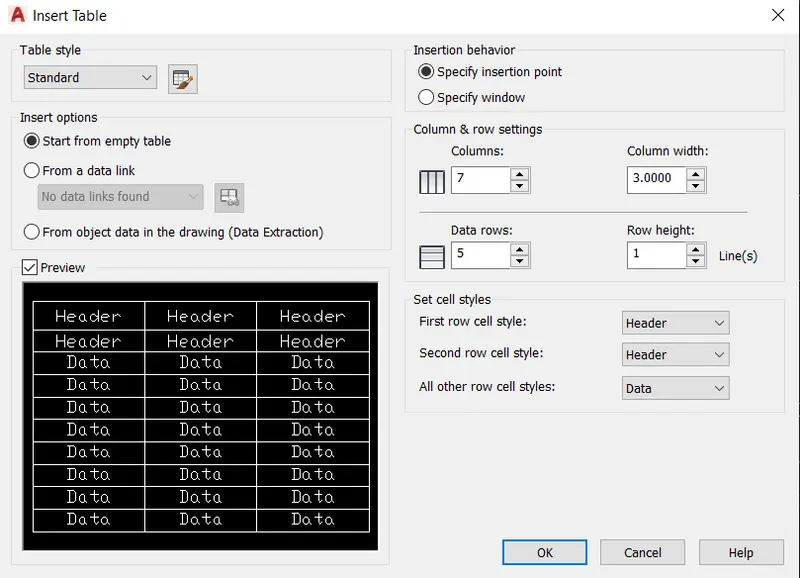
EDITING TABLE:
Edit the Table as given the model like Merging the Rows & Columns.
TEXT IN TABLE:
Written the Note and text has given in the Table
TEXT: Selected the txt text type
Text Height: 8"
JUSTIFICATION: As per the given figure.
RESULT:
Created Drawing Template as per given data:
4. Create the list of drawing schedules as shown in the figure:
AIM:
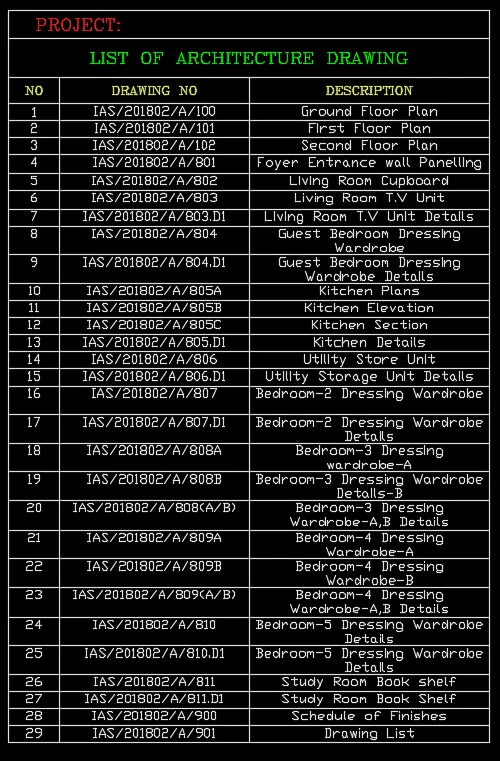
To create the list of drawing schedules as shown in the figure:
TOOLS USED:
TABLE
TEXT
PROCEDURE:
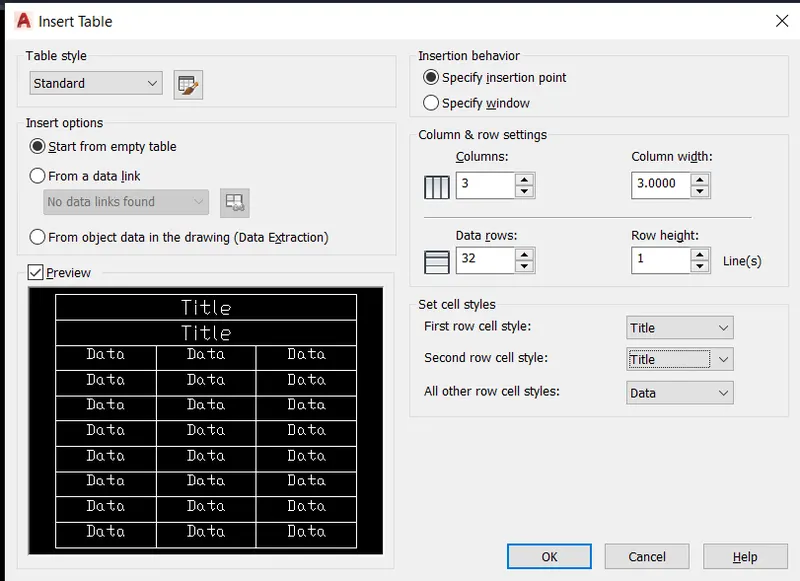
Insert the table for creating a Drawing Schedule:
TABLE:
Invoking the tool:
COMMAND: Tab/Table
MENUBAR: Annotate > Table
RIBBON: Annotation > Table
It consists of 3 no. of Column & 32 no. of Rows
TEXT IN TABLE:
Written the Note and text has given in the Table
TEXT: Selected the txt text type
Text Height: 8"
JUSTIFICATION: Title: Middle Left
Heading and Data: Middle Center.
RESULT:
Created the Drawing Schedule by using Table tool and text tool.
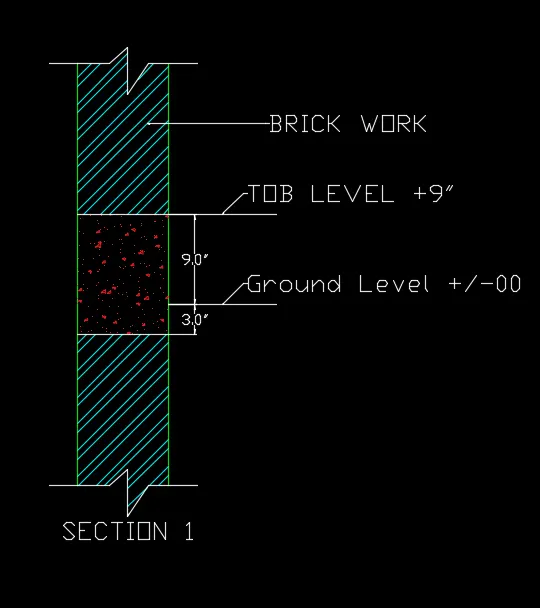
5. Create the Beam detail as shown in the figure and provide text wherever given.
AIM:
To create the Beam detail as shown in the figure.
TOOLS USED:
LINE
OFFSET
HATCH
DIMENSION
MULTI LEADER
PROCEDURE:
LINE
Invoking the tool:
COMMAND: L>
Specify first point: Click on the window
Specify next point: 2' Vertical
Escape
COMMAND: L>
Specify first point: Center of the line
Specify next point: 9" Horizontal
OFFSET:
Invoking the tool
COMMAND: OFF>
Specify offset distance< 9">
Select object to offset: Select the Verticle line
Specify point on side to offset: Right side
COMMAND: OFF>
Specify offset distance< 9">
Select object to offset: Select the Horizontal line
Specify point on side to offset: upside
COMMAND: OFF>
Specify offset distance< 3">
Select object to offset: Select the Horizontal line
Specify point on side to offset: Downside
TRIM: Trim the extra line
DIMENSION:
COMMAND: DIMLIN>
MULTILEADER:
COMMAND: MLD/MLEADER>
RESULT:
Created Beam details as per the given figure: