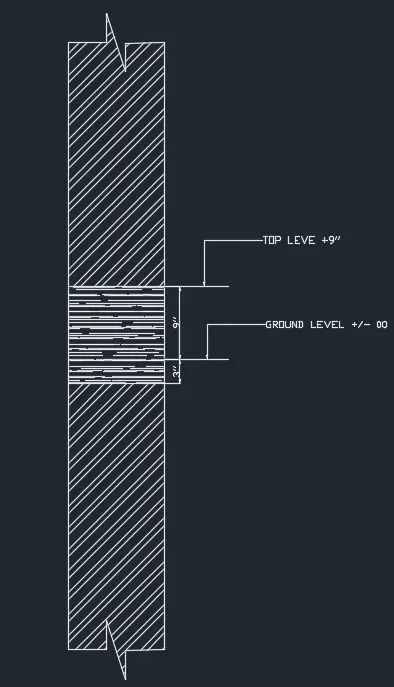
Creation of Column Schedule and Drawing Template using AutoCad
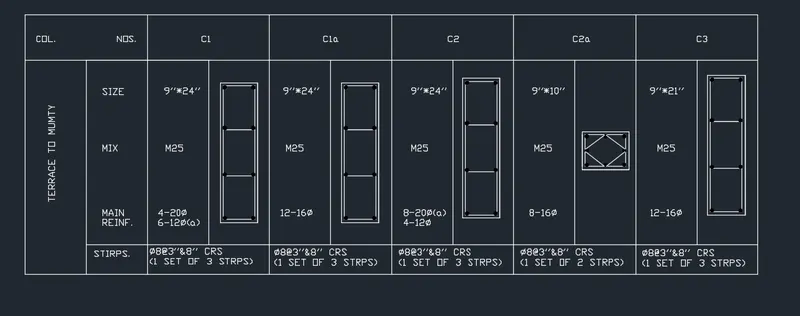
1.Column schedule:-
Aim:-
Create a column schedule using AutoCAD.
Step by step procedure:-
- Draw the table using Xline command.
- Trim and erase extra lines using Trim and erase command.
- Using Mtext command provide the text.
- Set the text size to 20.
- Give rotation angle of text where it is required.
Result:-
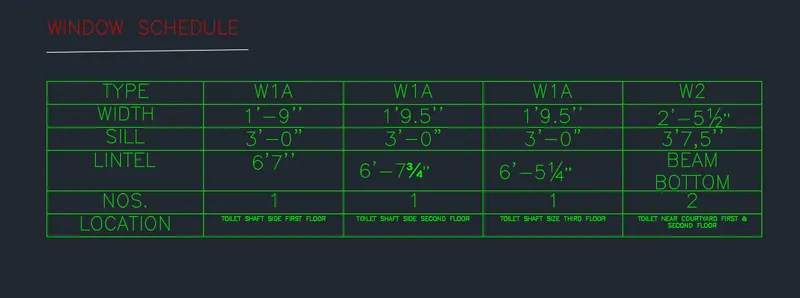
2.Window schedule:-
Aim:-
Create a window schedule using AutoCAD.
Step by step procedure:-
- Draw the table using Xline command.
- Trim and erase extra lines using Trim and erase command.
- Using Mtext command provide the text.
- Set the text size to 15.
- Set different layers.
- Layer 1 assign to heading with red colour.
- Layer 2 assign to table and text with green colour.
Result:-
3.Drawing template:-
Aim:-
Create the drawing template using AutoCAD.
Step by step procedure:-
- Draw the table using Xline command.
- Trim and erase extra lines using Trim and erase command.
- Using Mtext command provide the text.
- Set the text size to 5.
- Using Save as command provide File of type as AutoCAD Drawing template(*.dwt)
- Give file name and save.
Result:-

4.Drawing schedule:-
Aim:-
Create the list of drawing schedule using AutoCAD.
Step by step procedure:-
- Draw the table using Xline command.
- Trim and erase extra lines using Trim and erase command.
- Using Mtext command provide the text.
- Set the text size to 15.
- Set different layers.
- Layer 1 assign to table with red colour.
- Layer 2 assign to text with green colour.
Result:-

2.Beam detail:-
Aim:-
Create the Beam detail and provide text wherever given using AutoCAD.
Step by step procedure:-
- Draw the beam and wall portion using line command.
- Using dimensions provide dimensions and text where it is given.
- Using Leader provide leader amd specify starting point and text.
- Using hatch command hatch the wall and beam portion.
Result:-