Creation of Column Schedule and Drawing Template using AutoCad
1)
AIM:
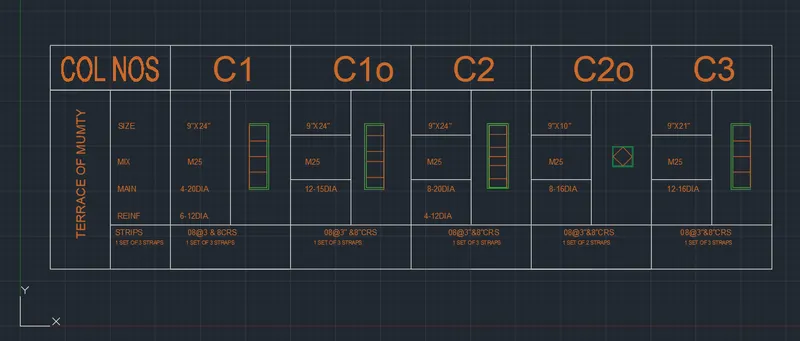
to Create a column schedule
Procedure
Enter UN in command box and select type as engineering and precision as 0'-0.000"
Select line command and draw a line of 84' and a line of 21' in in X and Y direction respectfully
Then select the offset command and enter offset for X and Y directon
Select multiline text and enter the content
Drawing the columns :
Draw a rectangular box and divide it to 4 parts according to the length
Draw offset accordingly to the the length to the sides
Change the colours of line
Draw the columns C1a, C2, C2a, C3 similarly
2)
AIM :
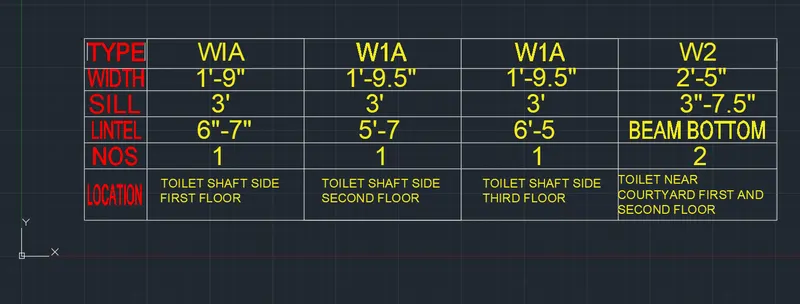
To create a Window schedule.
Procedure:
Enter UN in command box and select type as engineering and precision as 0'-0.000"
Select line command and draw a line in X and Y-direction
Then select the offset command and enter offset in X and Y direction.
Now select Multiline text and drag it in each of the row and column and enter the text.
Fill the entire table by using Multiline text option.
3)
AIM :
To create a line template.
Procedure:
Enter UN in command box and select type as engineering and precision as 0'-0.000"
Select line command and draw a line of in X and Y direction
Then select the offset command and enter give offsets accordingly.
Then enter an offset of 12-6". Give such 3 offsets in the right side
Now select the Multiline text command and drag it in each of the row and column and enter the text.
Fill the contents
4)
AIM :
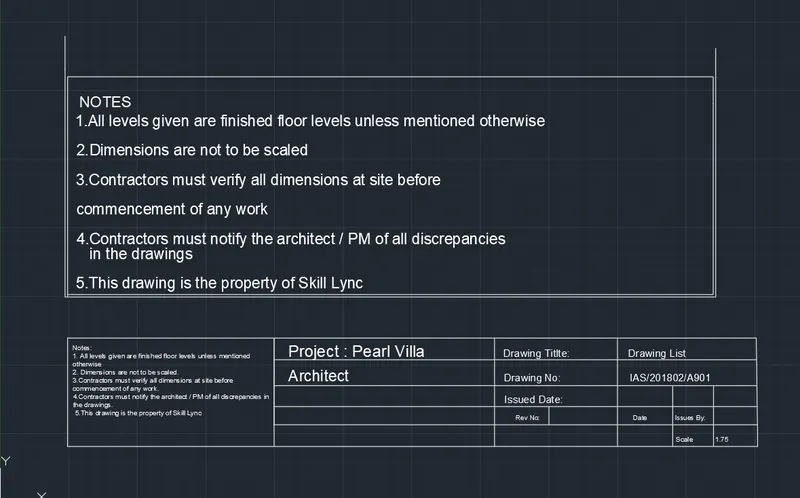
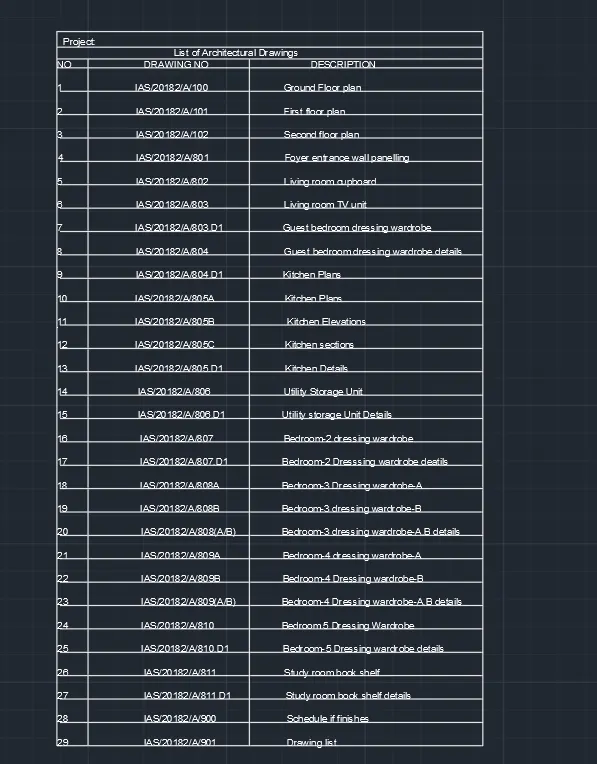
To create the list of drawing schedule table.
Procedure:
Enter UN in command box and select type as engineering and precision as 0'-0.000"
Select Rectang command and draw a rectangle with necessary dimensions
Then select the offset command and enter offset as 10", then select "multiple" option and make 29 rows.
Join the ends and finsih the column
Trim the unwanted lines and draw the table as required.
Now select the Multiline text and drag it in each of the row and column and enter the text.
Fill the contents
5)
AIM :
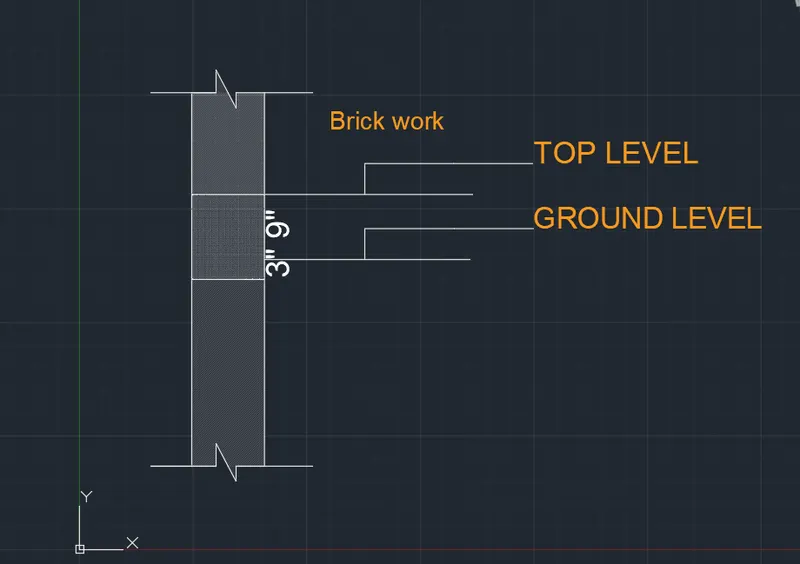
To create a Beam detail.
Procedure:
Enter UN in command box and select type as engineering and precision as 0'-0.000"
Select the rectang Command and draw a rectangle
Divide the rectangle into 3 parts , the centre being the smallest
Select Hatch command and fill the centre with "gravel" and the rest with other pattern.
Select Single text option and mark the parts.
Select Single text option and type " 3" 9" " and make the rotation as 90 degree.