Creation of Column Schedule and Drawing Template using AutoCad
Creation of Column Schedule and Drawing Template using AutoCad
1)
AIM:
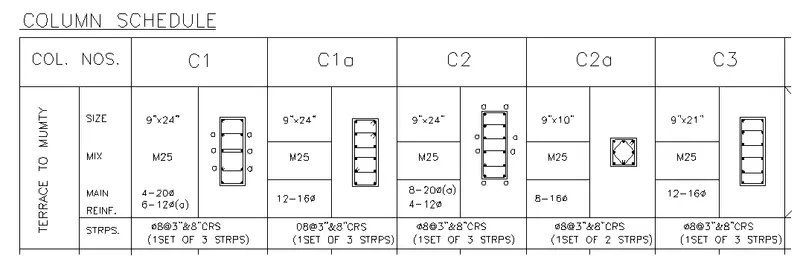
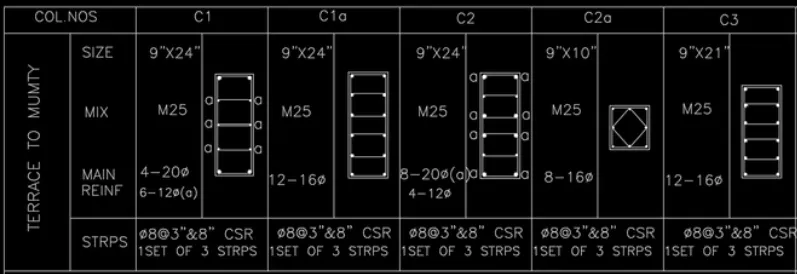
To create a column schedule as shown in the figure using AutoCad.
Note: Create a column schedule with the help of lines. Also, insert text with the help of Dtext command or Single Line text.
Hint: Use font name: romans.shx; Height: 8”, Justify: Left
PROCEDURE:
- Open AutoCad software and start a new drawing
- Using RECTANGLE command and LINE command draw the tables as shown in the figure
- For text use MTEXT command and define the closed space where the text is needed
- As mentioned above change the font to romans.shx of height 8".
- We can get the diameter symbol by typing %%c or through symbols in the ribbon bar of MTEXT
- Also draw the diagrams of C1,C1a,C2,C2a and C3 as shown using RECTANGLE, LINE and CIRCLE commands
- The required diagram is plotted, using AutoCad.
RESULT:
2)
AIM:
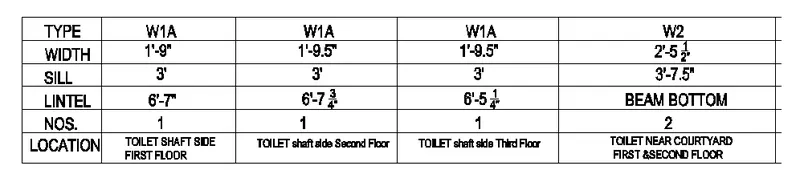
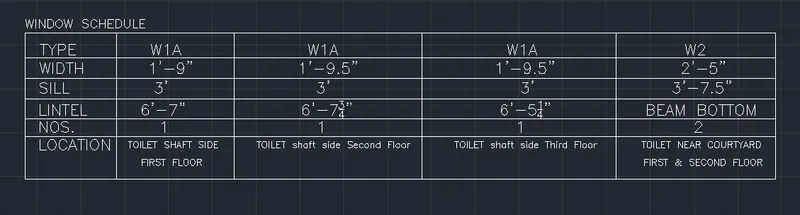
To create a window schedule as shown in the figures using AutoCad
Window Schedule:
PROCEDURE:
- Open AutoCad software and start a new drawing
- Using RECTANGLE and LINE commands plot the table as shown
- Then using MTEXT command type the text where it is needed
- Font to be used is romans.shx of height 8"
- The required diagram is plotted, using AutoCad.
RESULT:
3)
AIM:
To create the drawing template as shown in the figure:< Use the Notes as in the figure>
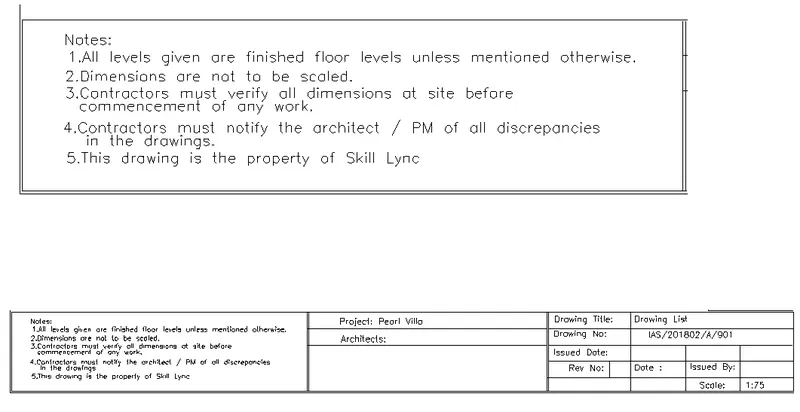
PROCEDURE:
- Open AutoCad software and start a new drawing
- Using RECTANGLE and LINE commands plot the table as shown
- Then using MTEXT command type the text where it is needed
- Font to be used is romans.shx of height 8"
- The required diagram is plotted, using AutoCad.
RESULT:

4)
AIM:
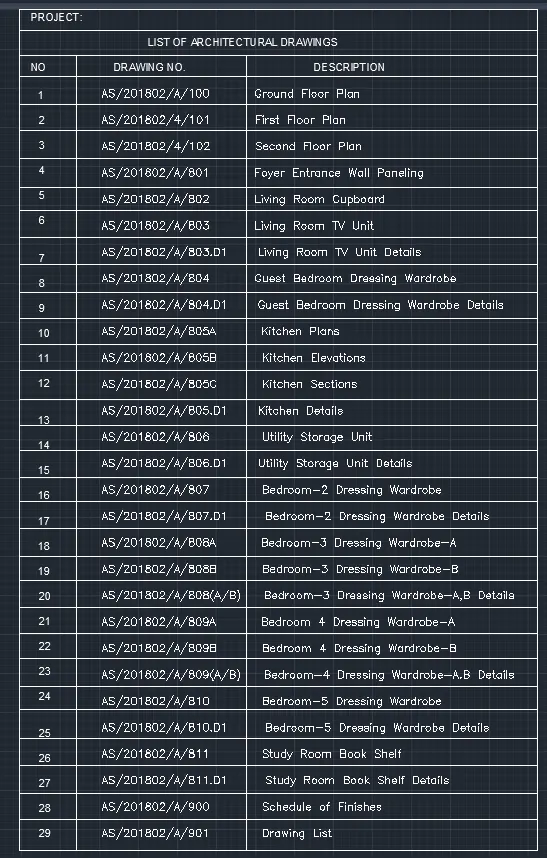
To Create the list of drawing schedule as shown in the figure using AutoCad.
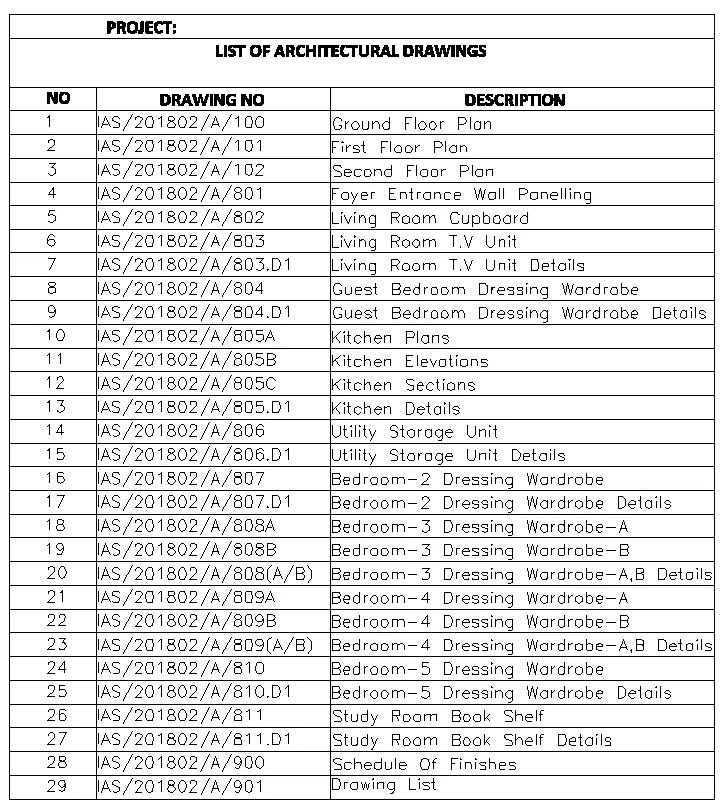
PROCEDURE:
- Open AutoCad software and start a new drawing
- Using RECTANGLE and LINE commands plot the table as shown
- Then using MTEXT command type the text where it is needed
- Font to be used is romans.shx of height 8"
- The required diagram is plotted, using AutoCad.
RESULT:
5)
AIM:
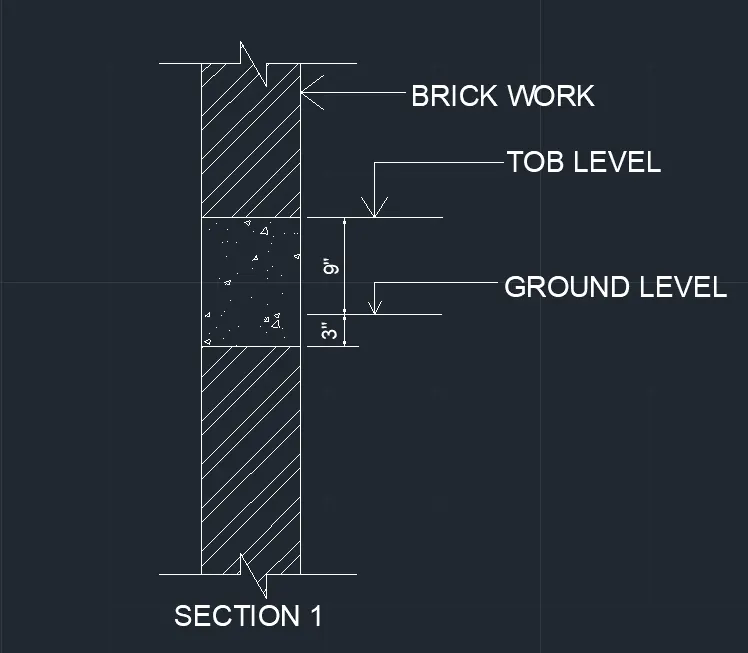
To create the Beam detail as shown in the figure and provide text wherever given using AutoCad.
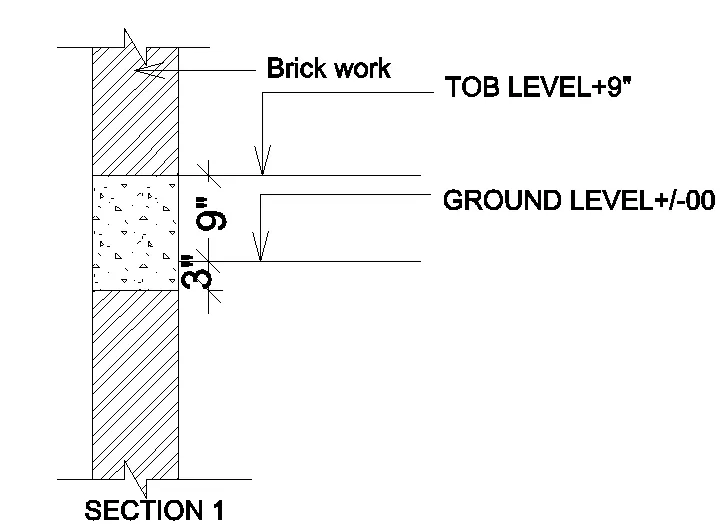
PROCEDURE:
- Open AutoCad software and start a new drawing
- Using RECTANGLE command with height 12" and with some width draw a rectangle
- Now using LINE command extend the top corners of the rectangle to a certain height on both sides of the rectangle
- Join the lines and close the figure
- Using BREAK command break at two points in the centre of brickwork and using LINE make a marking to show it is continuous on both sides
- Now using HATCH command, take ANSI32 for brickwork and AR-CONC for the concrete part.
- Using DIMS command mark the dimensions and using MTEXT type out what is shown in the figure.
- The required diagram is done, using AutoCad.
RESULT:
THANK YOU.