Creation of Column Schedule and Drawing Template using AutoCad
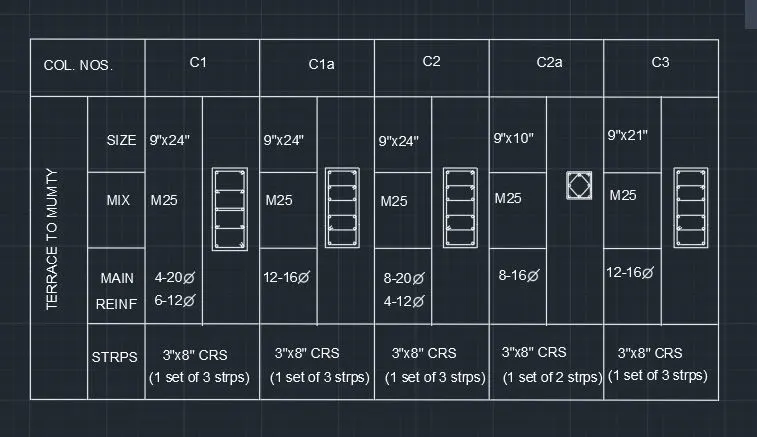
1) Aim:- To create a column schedule as shown in the figure
procedure :
- start a new page in autocad with units as inches.
- create a column as required using the line option and offset option while keeping the orthomode on.
- using Dtext, roman style and height of text as 8 inches, write down the texts as given.
- next we have to draw the column schedule using the line tool, fillet option and circle option.
- the resulting table is as given as below.
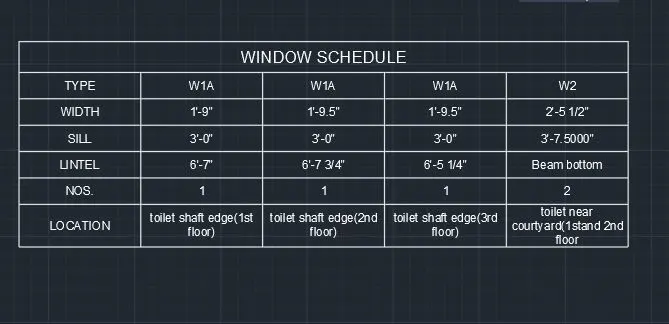
2) Aim:- To create a window schedule as shown in the question
procedure :
- start a new page in autocad with units as inches.
- create a column as required using the table option with 5 columns and 7 rows.
- enter the texts as required in the table created by double clicking each cell.
- align the texts im center middle
- the resulting table is as given as below.
3) Aim:- To create a drawing template as shown in the figure
procedure :
- start a new page in autocad with units as inches.
- create a column as required using the line option and offset option while keeping the orthomode on.
- using Dtext, write down the texts as given
- to create the notes use mtext and write down th edetails a sgiven in the question
- align the texts im center middle
- the resulting table is as given as below

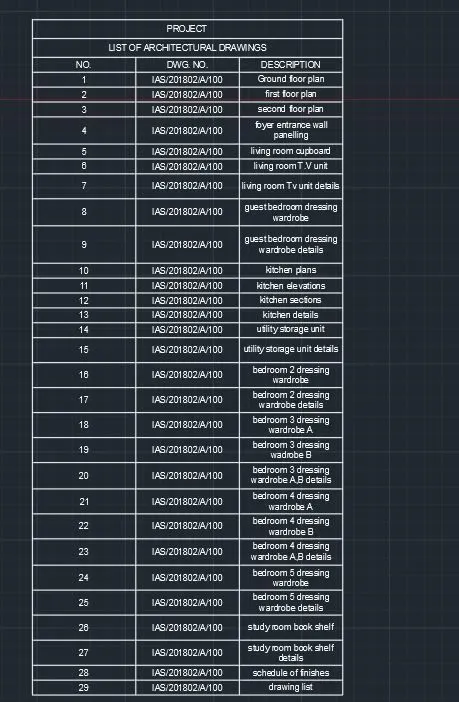
4) Aim :- To create the list of drawing schedule as shown in the question
procedure :-
- start a new page in autocad with units as inches.
- create table using table option with 3 columns and 29 rows
- enter the texts as given in the question by double clicking on the cells.
- align the texts as center and middle
- the resulting table is given as below.
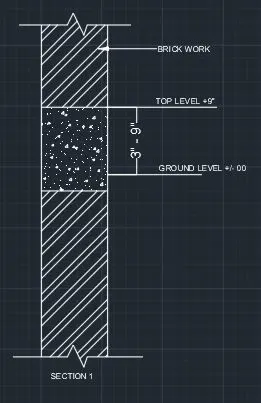
5) Aim:- To create the beam details as given in the question
procedure :-
- create new autocad page with unit in inches
- draw a rectangle with line option and offset horizontal line two times to make the concrete section .
- draw lines to mark ground level and top level
- using text option, write down the required texts
- using hatch option hatch the brick wall and concrete wall. scale the hatched portion such that the hatch is seen properly
- mark dimensions using dimension option
- the resulting figure is given as below.