Creation of Column Schedule and Drawing Template using AutoCad
1. COLUMMN SCHEDULE
AIM:
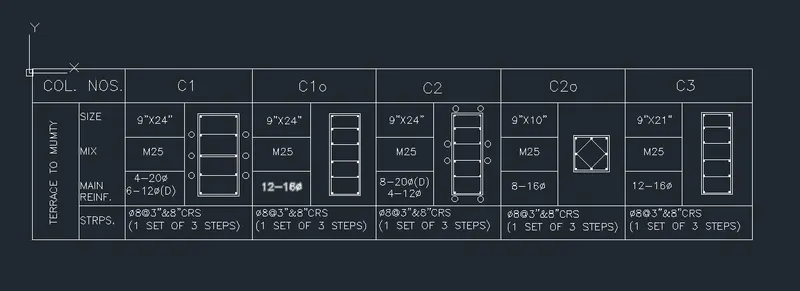
Create a column schedule with the help of lines. Also, insert text with the help of Dtext command or Single Line text.
INTRODUCTION:
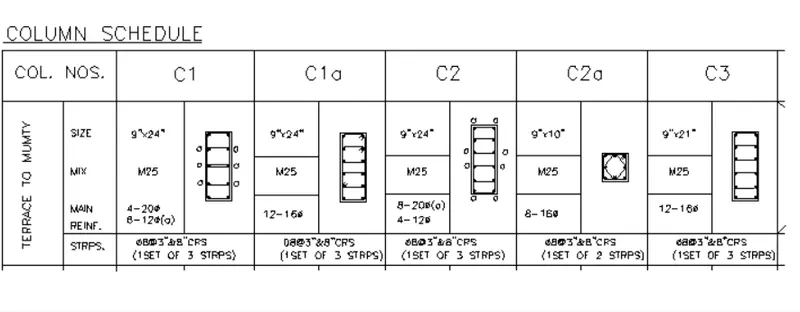
PROCEDURE:
- Open AutoCAD application.
- Create a New Sheet.
- Use TABLE command.
- Create a Table as given above.
- Then Use REC command.
- Then Draw seperately the Bar diagrams as below.
- The REC is 4'x8'.
- Then Use OFFSET command and create the lines at 2" each.
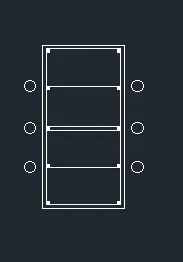
- Again use REC command and draw a rectangle at dimension of 3.5'x8'.
- Then Use OFFSET command and create the lines at 1.6' each.
- Use REC command again and create a rectangle at a dimension of 4'x4'.
- OFFSET is for 2".
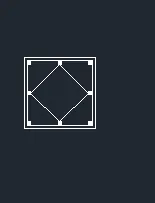
- Use REC command again and create a rectangle at a dimension of 3.5'x8'.
- Then Use OFFSET command and create the lines at 1.6'' each.
- Use Circle command and draw a circle.
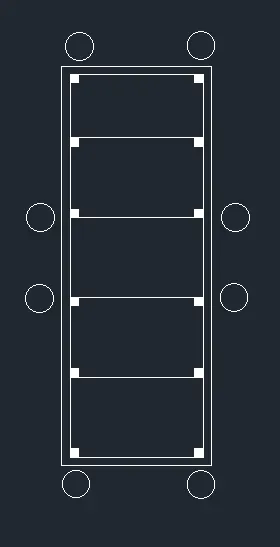
- The Use COPY command copy it and place it in the Table.
- Now use DTEXT command and Type it as given.
- Text style is Romans.shx;
- Text height is 8" and for titles 10".
- It is Justify as Left.
RESULT:
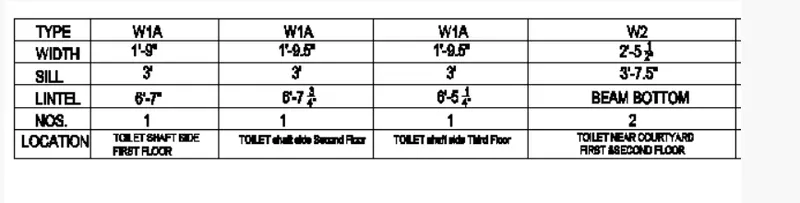
2. WINDOW SCHEDULE
INTRODUCTION:
PROCEDURE:
- Open AutoCAD application.
- Create a New Sheet.
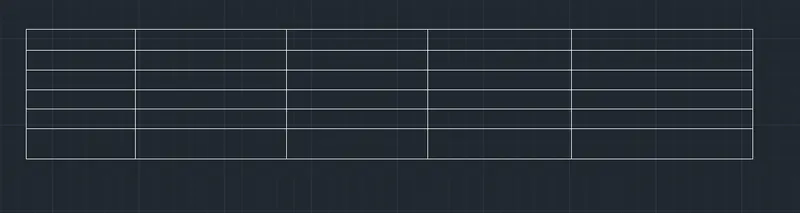
- Use TABLE command.
- Create a Table as given above.
- Column-5, Row-6.
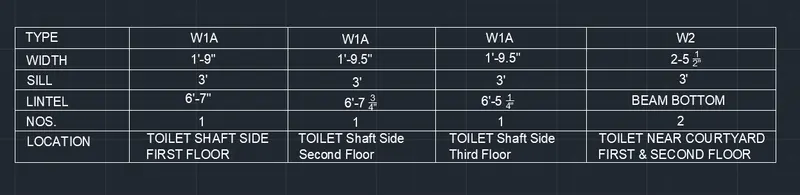
- Now use MTEXT command and type the words as given.
- Text style is Verdana.
- Text height is 5".
RESULT:
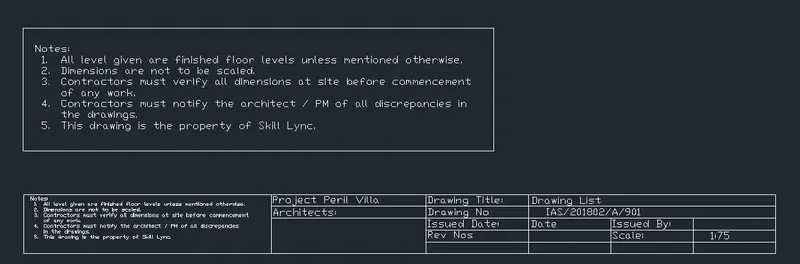
3. Create the drawing template as shown in the figure.
INTRODUCTION:
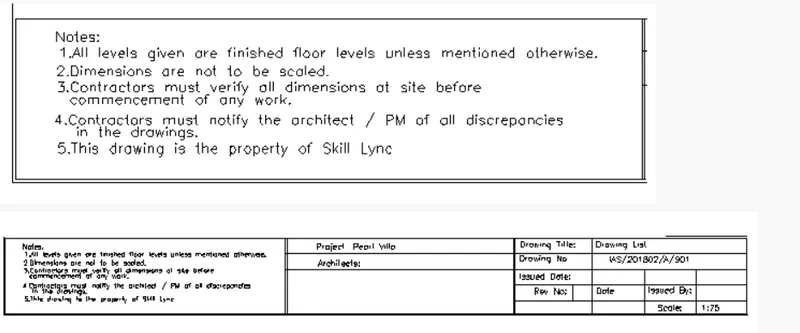
PROCEDURE:
- Open AutoCAD application.
- Create a New Sheet.
- Create a Box using REC or TABLE command.
- Use MTEXT command and write as given above.
- Text style is Romans.shx;
- Text height is 5".
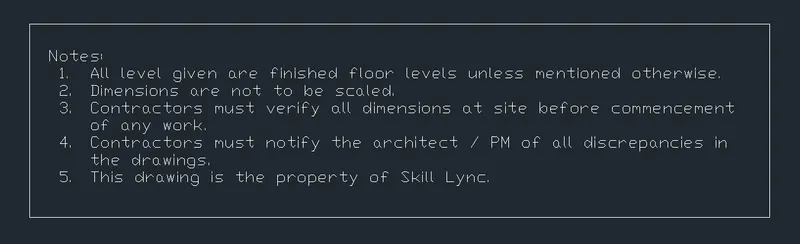
- Again use TABLE command and create a Table as given.
- Use MTEXT command and write as given above.

RESULT:
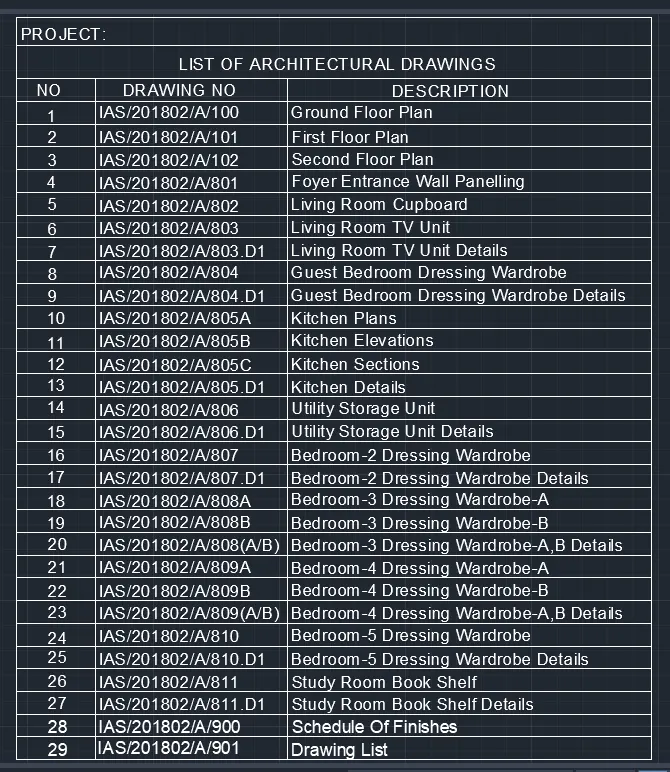
4. Create the list of drawing schedule as shown in the figure
INTRODUCTION:
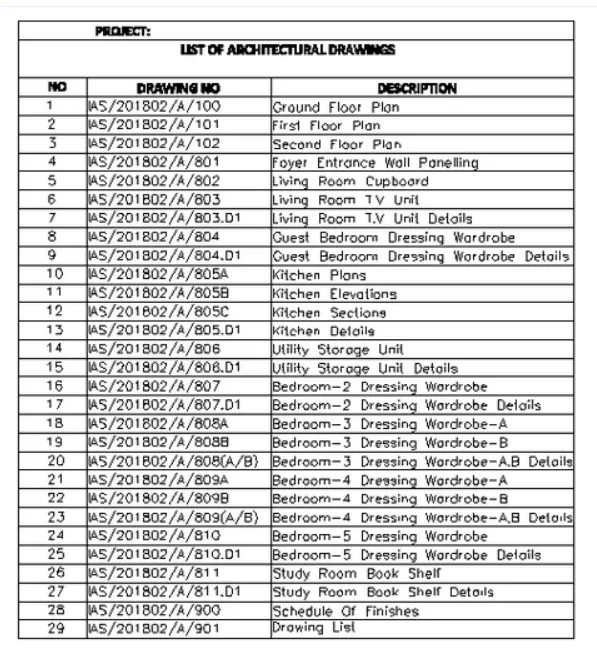
PROCEDURE:
- Open AutoCAD application.
- Create a New Sheet.
- Use TABLE command.
- Create a Table as given above.
- Use MTEXT command and write as given above.
- Text style is Verdana.
- Text height is 5".
- Title Height is 8".
RESULT:
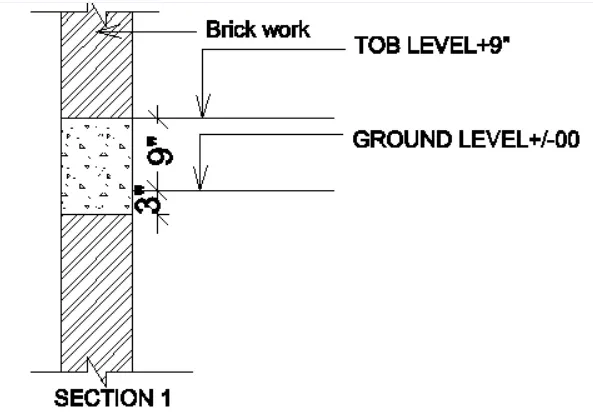
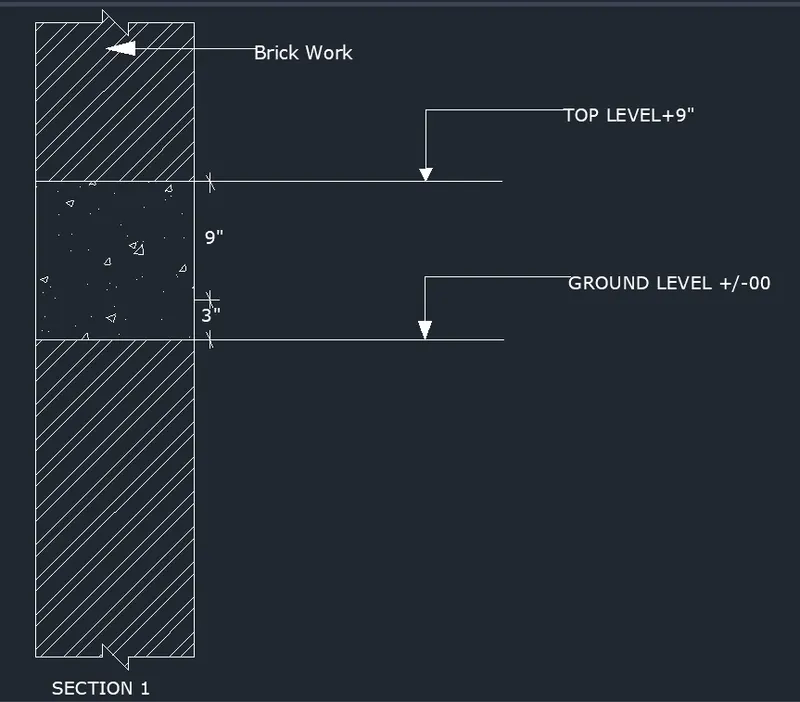
5. Create the Beam detail as shown in the figure and provide text wherever given.
INTRODUCTION:
PROCEDURE:
- Open AutoCAD application.
- Create a New Sheet.
- Use Line command and draw a section at a dimension of 1' x 4'.
- And use OFFSET command and offset it for 2', 3" and 9".
- Use POLYLINE for Arrows.
- Use MTEXT command and write it as above diagram.
- Use HATCH command and ANSI32 for Brick work and AR-CONC for Concrete.
RESULT: