Creation of Column Schedule and Drawing Template using AutoCad
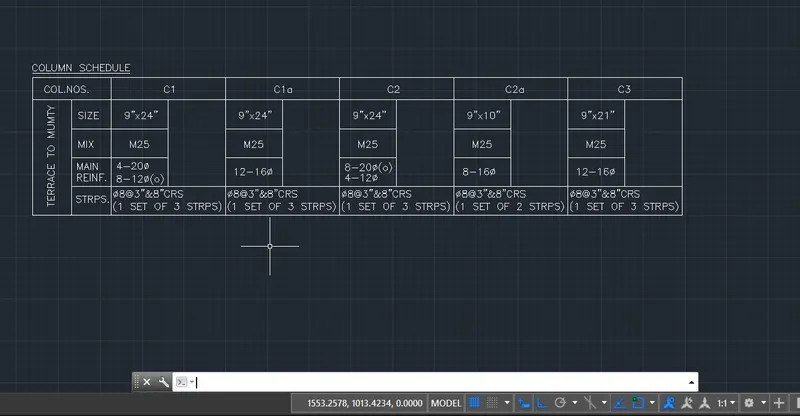
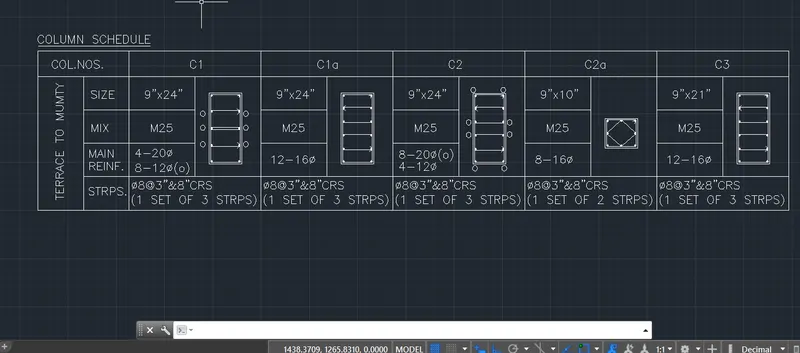
1.Create a column schedule as shown in the figure.
Note: Create a column schedule with the help of lines. Also, insert text with the help of Dtext command or Single Line text.
Hint: Use font name: romans.shx; Height: 8”, Justify: Left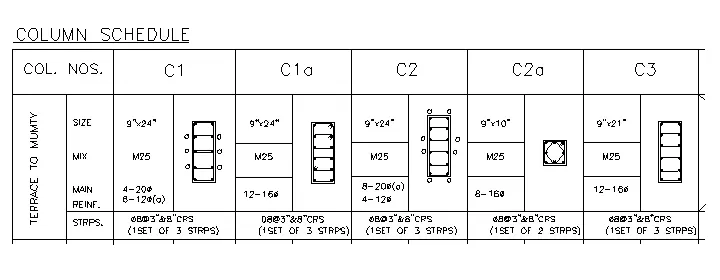
Challenge 1.
AIM: To create column schedule by drawing table and entering texts using MText or Single Text and the column details as mentioned in the figure using romans.shx font of 8"height and with text alignment justified left
PROCEDURE:
- Click on the Table icon on the ribbon or Command Table.
- Create a table by entering required number of columns, size of column width, number of rows and row height
- To adjust the column width or row heights click on the table and pull the grip points as required.
- The columns and rows can be merged as required by selecting the number of columns or rows.
- With help of text style change the font to romans.shx and font size 8".
- Enter the given column details and title using MText in rows and columns.
- For diameter symbol enter %%C as mentioned in the symbol tab.
- Draw the column reinforcemnt details as shown and insert in the column space provided
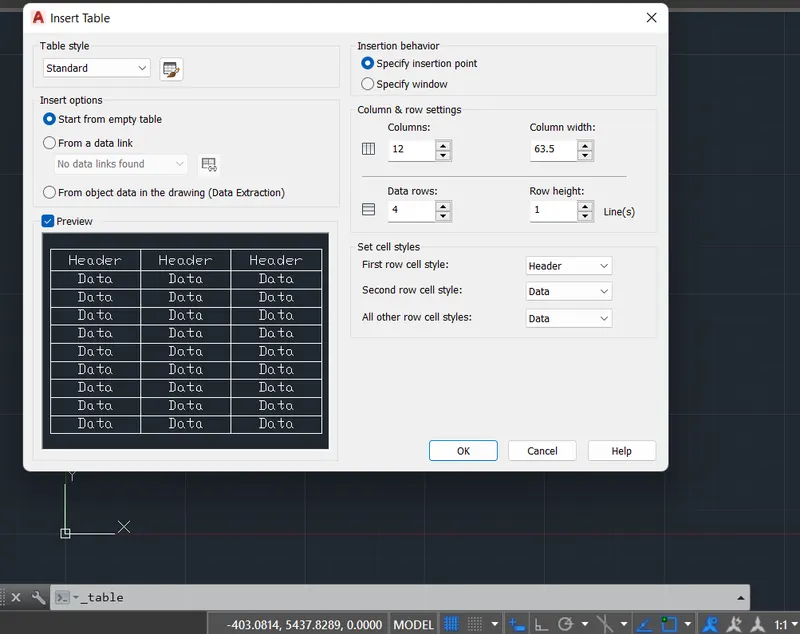
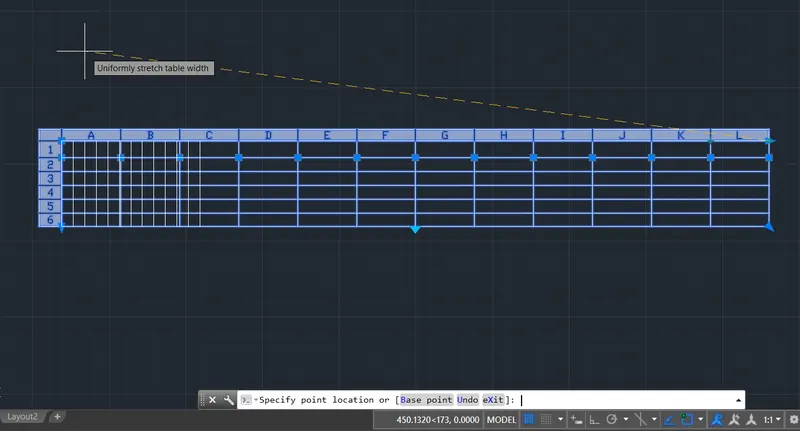
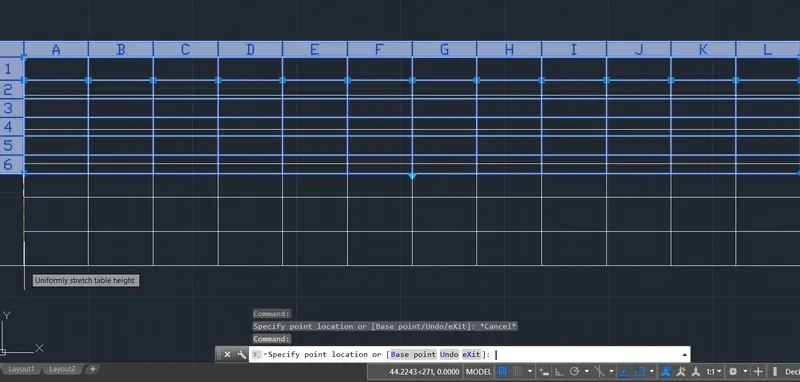
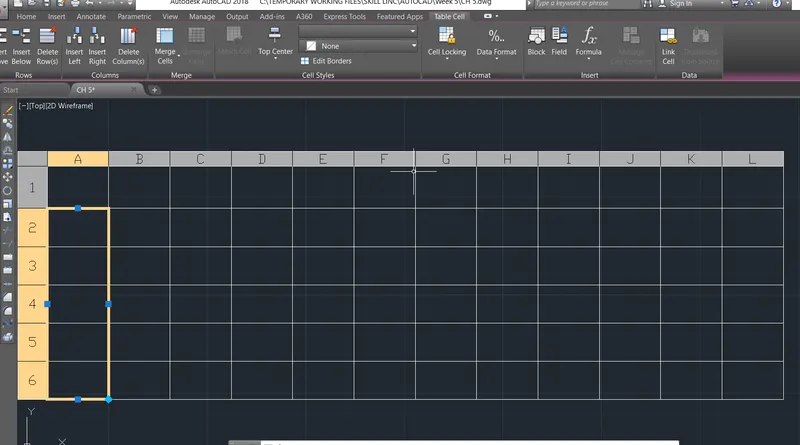
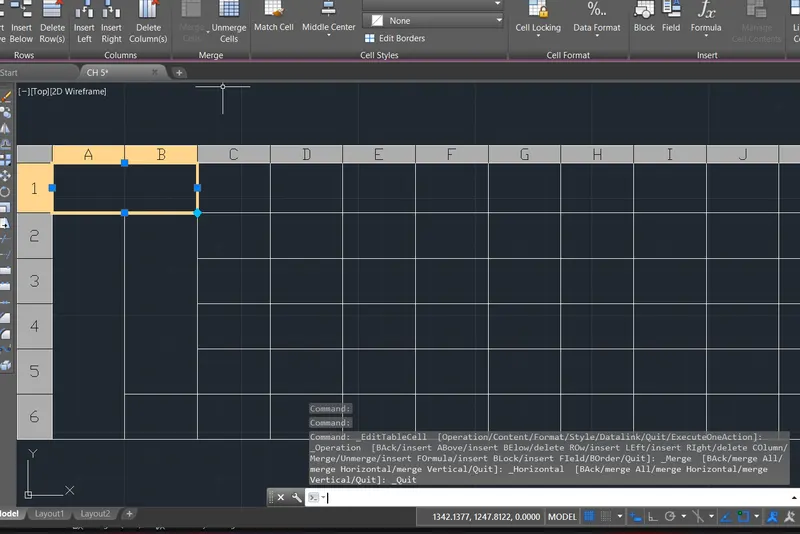
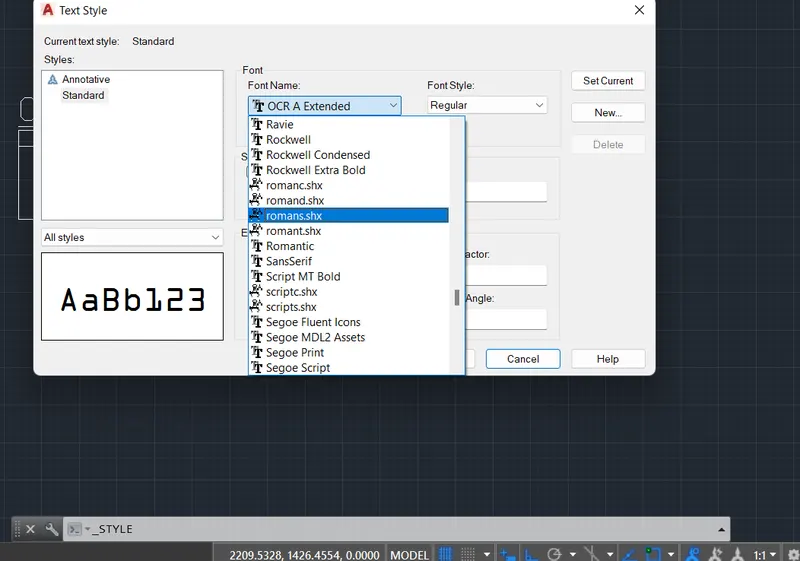
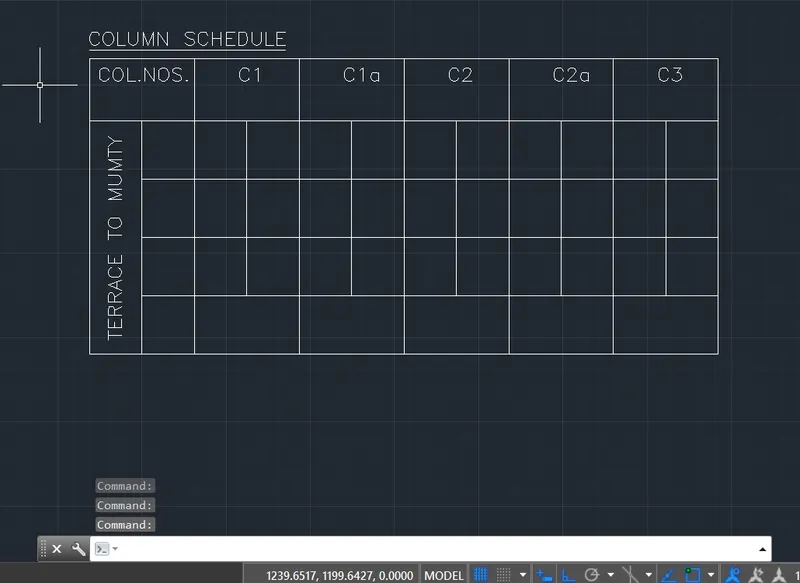
CONCLUSION:
Thus using the Table,Text and drawing tools, we have drafted and created the Column schedule as given in the figure1. The sreenshots for stage wise drawings are attached along with the final drawing of Column Schedule for reference.
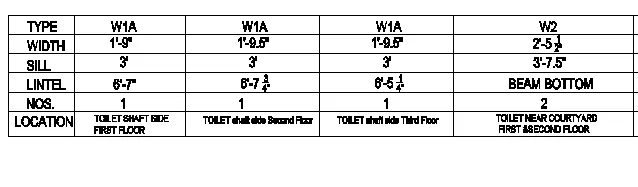
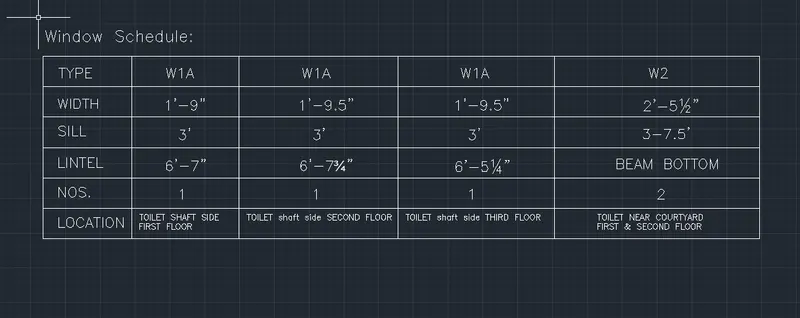
2. Create a window schedule as shown in the figures:
Window Schedule:
Challenge 2:
AIM: To create Window schedule by drawing table and entering texts using MText or Single Text and the Window details as mentioned in the figure-2.
PROCEDURE:
- Click on the Table icon on the ribbon or Command Table.
- Create a table by entering required number of columns, size of column width, number of rows and row height
- To adjust the column width or row heights click on the table and pull the grip points as required.
- With help of text style change the fonts of text to required size as per figure.
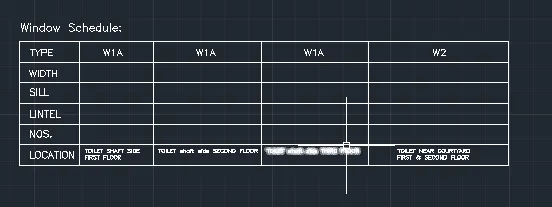
- Enter the given Window details and title using MText in rows and columns.
- For the 1/2, 1/4 & 3/4 units use the symbols from symbol tab.
CONCLUSION:
Thus using the Table,Text tools we have drafted and created the Window schedule as given in the figure 2. The sreenshots for stage wise drawings are attached along with the final drawing of Window Schedule for reference.
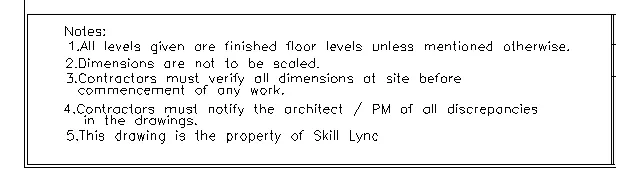
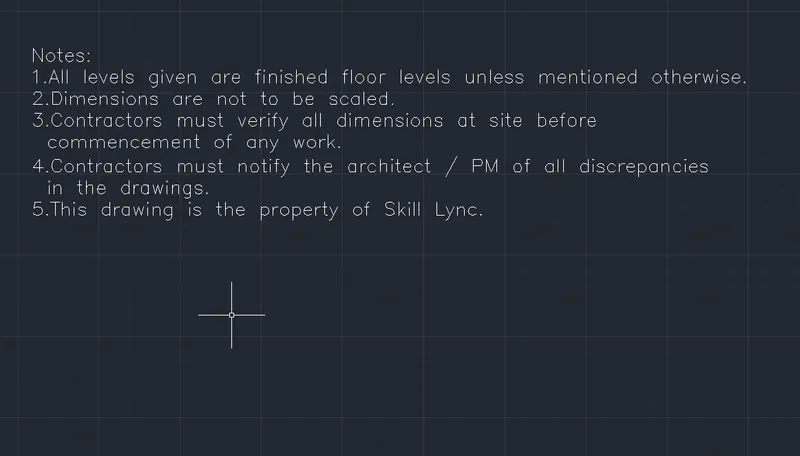
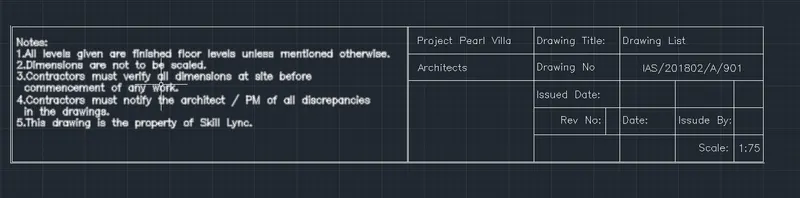
3. Create the drawing template as shown in the figure:< Use the Notes as in the figure>

Challenge 3:
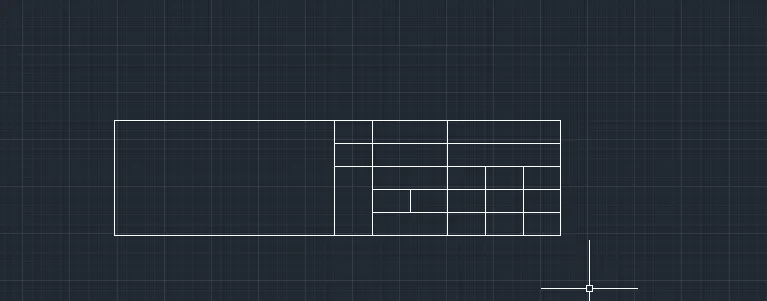
AIM: To create drawing template using the Table and Text tools showing the Notes, Project detail and drawing details as mentioned in the figure-3.
PROCEDURE:
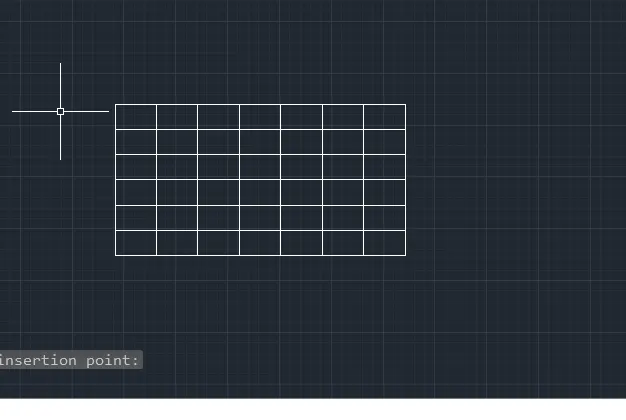
- Click on the Table icon on the ribbon or Command Table.
- Create a table by entering required number of columns, size of column width, number of rows and row height
- To adjust the column width or row heights click on the table and pull the grip points as required.
- The columns and rows can be merged as required by selecting the number of columns or rows.
- With help of text style change the font to required font or size.
- Write down the Notes as shown in figure using Mtext.
- Copy and paste the Notes details in the cell created for notes as per required size in table and write the drawing details and Project title using MText in remaining rows and columns of the template.
CONCLUSION:
Thus using the Table,Text tools we have drafted and created the Template for drawing as given in the figure 3 The sreenshots for stage wise drawings are attached along with the final drawing of Template for reference.
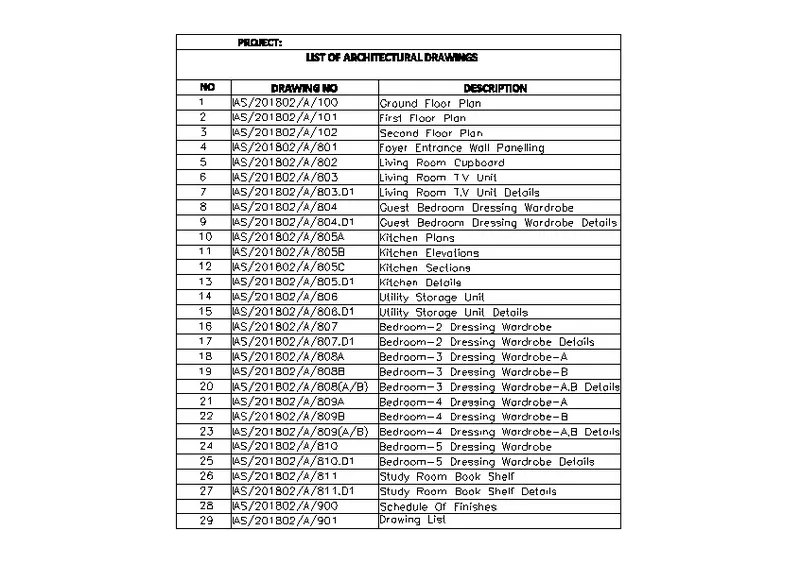
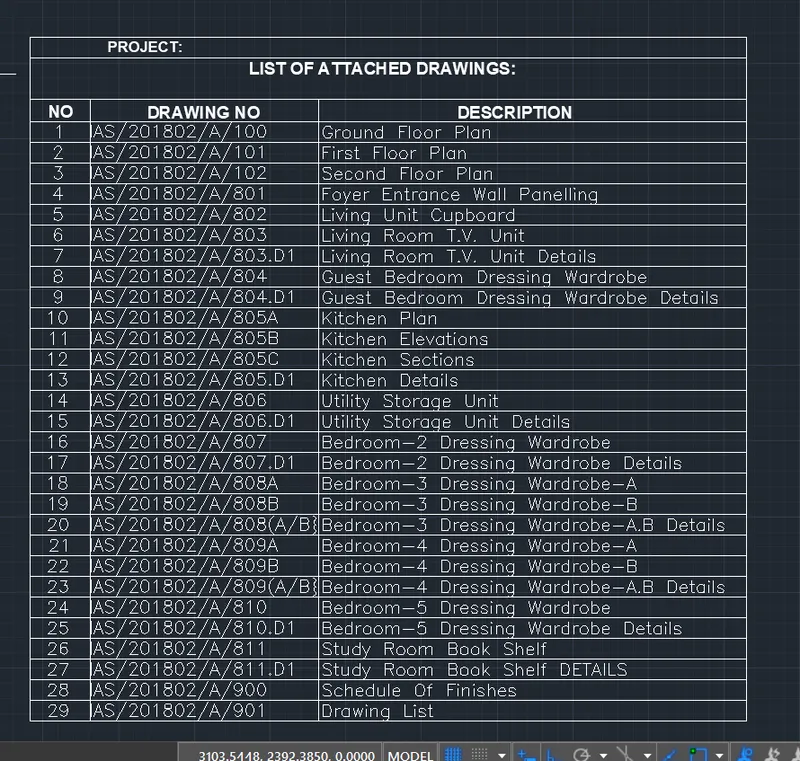
4. Create the list of drawing schedule as shown in the figure:
Challenge 4:
AIM: To create drawing Schedule using the Table and Text tools showing t as mentioned in the figure-4.
PROCEDURE:
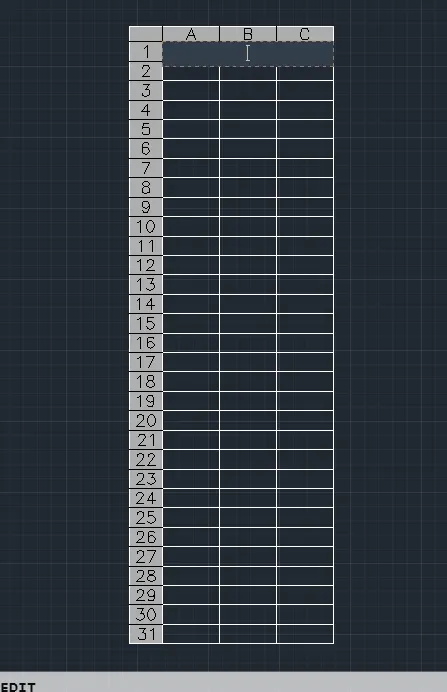
- Click on the Table icon on the ribbon or Command Table.
- Create a table by entering required number of columns, size of column width, number of rows and row height
- To adjust the column width or row heights click on the table and pull the grip points as required.
- With help of text style change the font to required font or size.
- Write down the Notes as shown in figure using Mtext for the drawing schedule as per the figure 4.
CONCLUSION:
Thus using the Table,Text tools we have drafted and created the Drawing Schedule as given in the figure 4. The sreenshots for stage wise drawings are attached along with the final drawing of Drawing Schedule for reference.
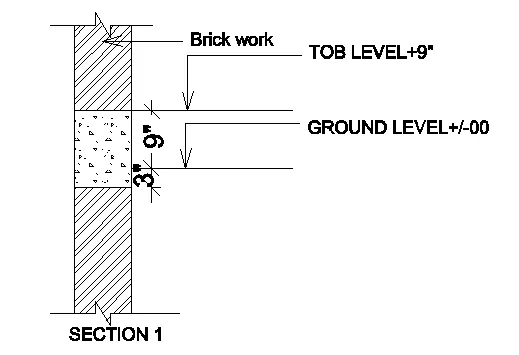
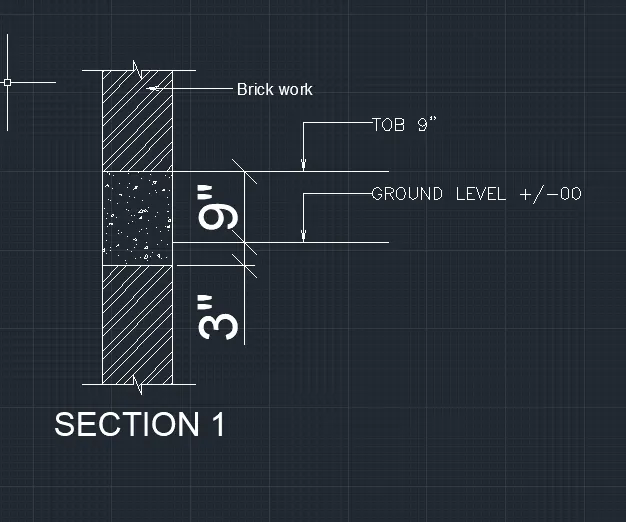
5. Create the Beam detail as shown in the figure and provide text wherever given.
Challenge 5:
AIM: To create the Beam Details using various drawing tools like line, hatch, leaders, dimensions, Mtext etc. menntioned in the figure-5.
PROCEDURE:
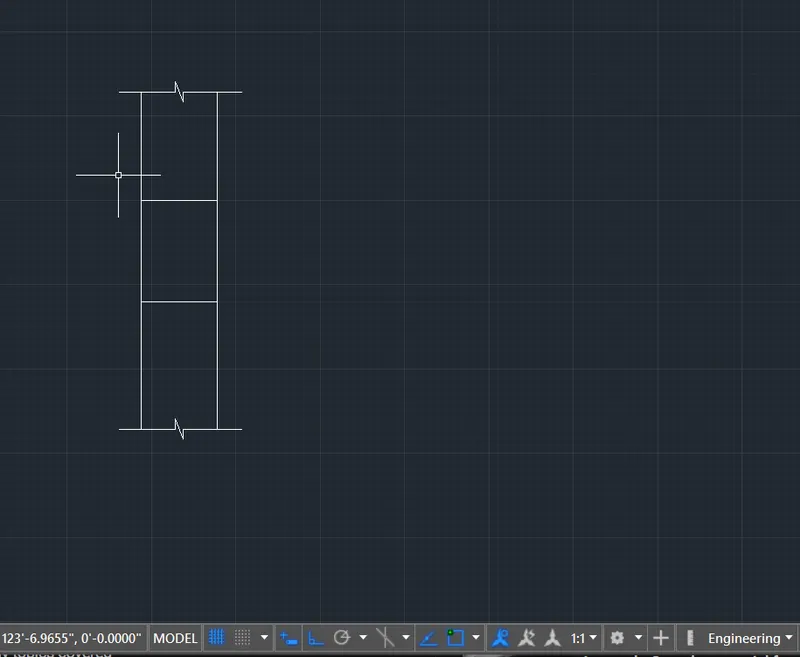
- Enter the line command and draft the wall thickness by offset command.
- Draw the horizontal lines for dividing the concrete and block areas and continuation line at top and bottom.
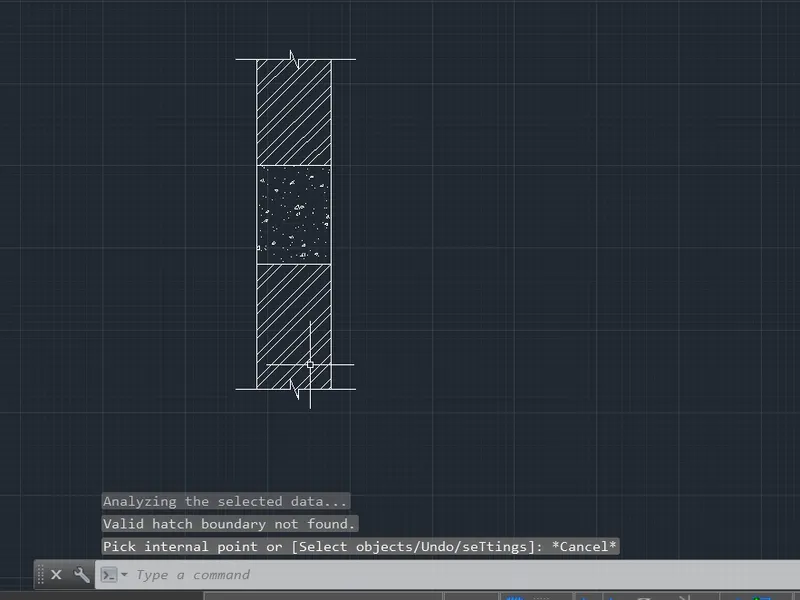
- Provide hatch to the wall and concrete areas using the required hatch patterns and adjusting by scale as required.
- Provide the leader and the text for the details as shown in figure.
- Show the dimensions of the concrete area as shown in figure using Dimlinear command.
- Write the drawing name "Section 1" using Mtext command and adjusting the font and size of Text by using Style command.
CONCLUSION:
Thus using various drawing tools we have drafted and created the Drawing as given in the figure 5. The sreenshots for stage wise drawings are attached along with the final drawing as per figure for reference.