Creation of Column Schedule and Drawing Template using AutoCad
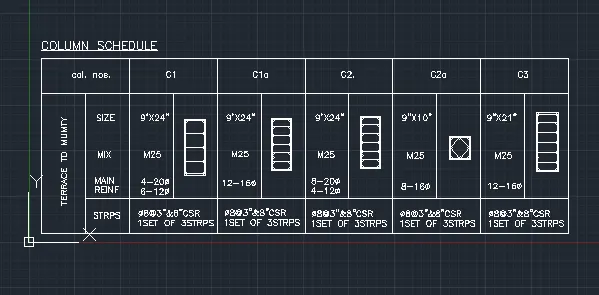
Aim:- Create a column schedule as shown in the figure.
Procedure:
Creating table:
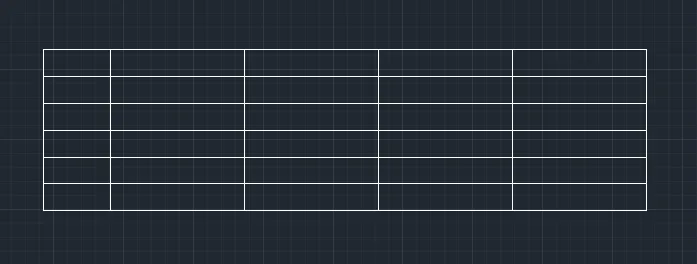
- Create the rectangle angle of 60'x20' , explode it.
- Divide the 60' column and again divide each 10' to 5' by using offset command
- Create raw at top and bottom of 2' and 4' respectively by offset command.
- Command offset select the top line and give distance as 2' again command o select the bottom line and give offset distance as 4'.
- Trim off the unecessary lines.
Extering text:-
- Enter the text in the table by using singeline text from the text drop down menu specify the point of text specify text height as 8" and angle as 0 degree .
- "Terrace of mumty" give text angle as 90 degreeand type the text.
- after entering the text , right click and select properties- then list of properties will be displayed
- ensure the text height is 8" and make justify as left
- To change the style of text command "ST" a dialouge box apperas and select the font name as "romans.shx"
- Then insert all the text or copy the text created and edit it to the required text in respective rows and columns
- Give the healding as column shedule:
Drawing the column section:
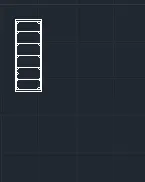
- Draw a rectangle of sixe 9"x24" by using rec command
- Draw the column outline after a cover of 40mm i.e 0.5" by offest command
- and draw the circle reinforcement command "c" click on tan tan radius on the command box .
- And use the copy command and draw the again column
And, Final Result:
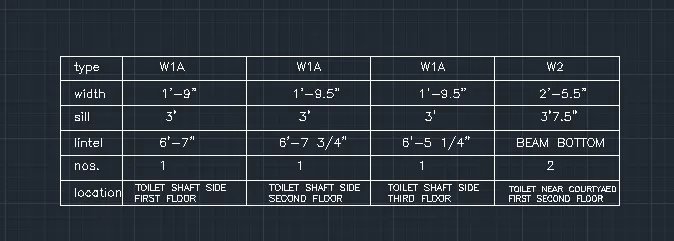
2. Window Shedule:
Aim: Create a window schedule as shown in the figures:
Procedure:
Creating table:
- Create the rectangle angle of 50'x12' , explode it.
- Divide the 50' column and again divide each 10' by using offset command
- Create raw at top to bottom of 2' respectively by offset command.
- Command offset select the top line and give distance as 2' again command o select the bottom line and give offset distance as 2'.
- Trim off the unecessary lines.
inserting text:-
- Enter the text in the table by using singeline text from the text drop down menu specify the point of text specify text height as 8" and angle as 0 degree .
- after entering the text , right click and select properties- then list of properties will be displayed
- ensure the text height is 8" and make justify as left
- To change the style of text command "ST" a dialouge box apperas and select the font name as "romans.shx"
- Then insert all the text or copy the text created and edit it to the required text in respective rows and columns
Final result:
Creating template:
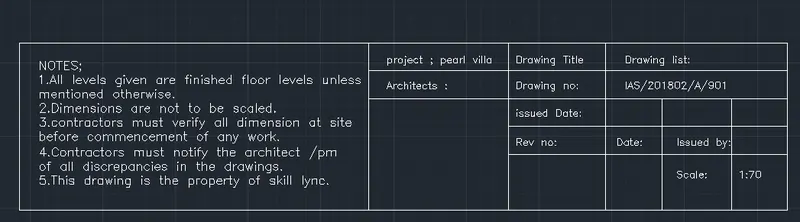
Aim: Create the drawing template .
Procedure:
Creating table:
- Create the rectangle angle 40'x15' , explode it.
- copy this rectangle and plce it next to it with snap on , copy 2 of them.
- command co select the object the base point select the point where we need to place the rectangle.
- Divide the 2nd column of table into two and the 3rd column into 5
- command o offset distabe 3' select the object and creat the row
- also divide the 3rd column into 4 each of 10' by command "o" anf trim the unwanted line bt "tr".
inserting text:-
- Enter the text in the table by using singeline text from the text drop down menu specify the point of text specify text height as 8" and angle as 0 degree .
- after entering the text , right click and select properties- then list of properties will be displayed
- ensure the text height is 8" and make justify as left
- To change the style of text command "ST" a dialouge box apperas and select the font name as "romans.shx"
- Then insert all the text or copy the text created and edit it to the required text in respective rows and columns
Final Result:
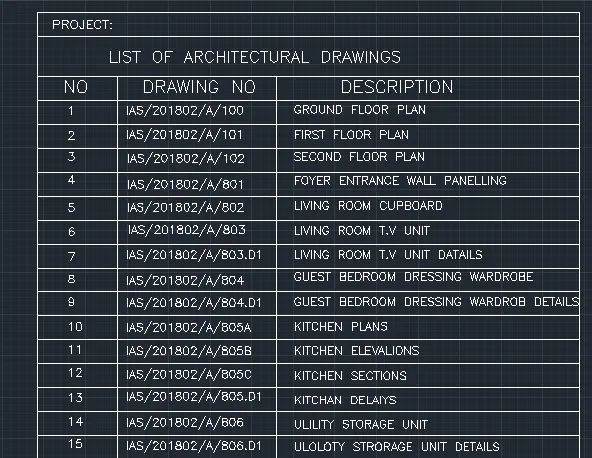
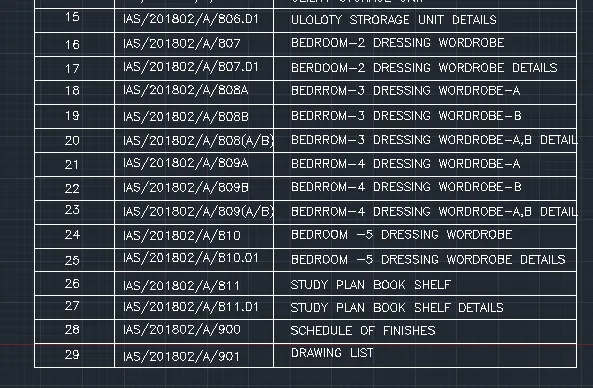
4. List of drawing schedule:
Aim: Create the list of drawing schedule
Procedure:
Creating table:
- With line tool draw the outline of the table of 102' x direction with command "l" and 83' in y direction.
- Draw the column by offset command "o" with a distance of 10',32',60' respectively from the left side.
- Create the row by offseting distance of 3',5' and 3' from the top side for the headings.
- Trim off the unecessary lines.
inserting text:-
- Enter the text in the table by using singeline text from the text drop down menu specify the point of text specify text height as 8" and angle as 0 degree .
- after entering the text , right click and select properties- then list of properties will be displayed
- ensure the text height is 8" and make justify as left
- To change the style of text command "ST" a dialouge box apperas and select the font name as "romans.shx"
- In the 2nd row using multiline text type "List of architectural drawing" with text height of 2'1" and same type
- In the 3nd row using multiline text type "no., drawing no, description" with text height of 1'8" and same type
- And 4 to 29 raw using multiline text type with text height of 1'8" and same type
Final result:
5. Beam Details:
Aim: Create the Beam detail
Procedure:
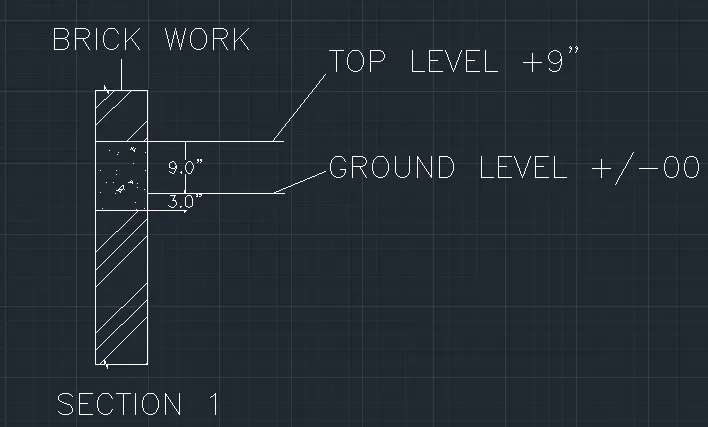
- Draw a cross section of beam with height 4' and thickness 9"
- with command "l" draw a line of 4' in y direction an 9" in x direction and download and close.
- from top give an offset of 9", which marks the ground level, command "o" select the top portion give the offset distance as 9" and extend the groumd level line
- then give an offset of 3" from 9" line command "o"
- Hatch the portion of brick and concrete and trim off the line of ground level from the cross section of the beam.
inserting text:-
- Enter the text in the table by using singeline text from the text drop down menu specify the point of text specify text height as 8" and angle as 0 degree .
- after entering the text , right click and select properties- then list of properties will be displayed
- ensure the text height is 8" and make justify as left
- To change the style of text command "ST" a dialouge box apperas and select the font name as "romans.shx"
Final result: