Creation of Column Schedule and Drawing Template using AutoCad
AIM
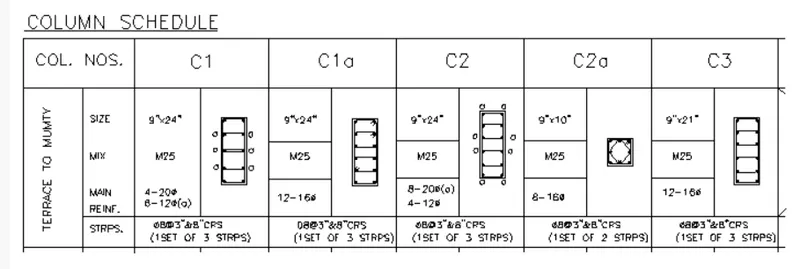
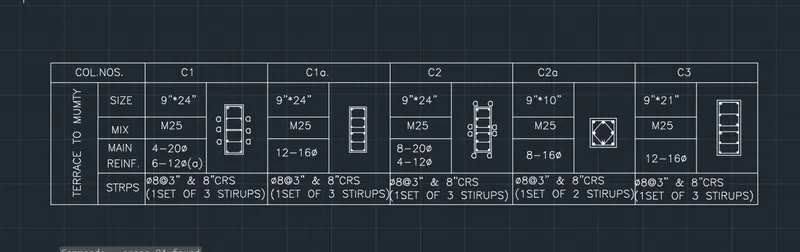
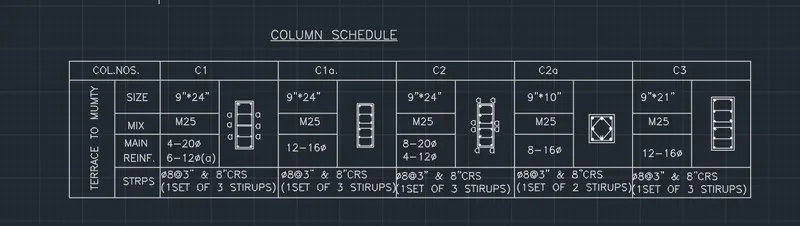
To create a column schedule as shown in the figure.
INTRODUCTION
Column schedule is a schedule that give the complete details of column required for the design purpose . It gives the size , mix , main reinforcement and stirrups required for the column design . Therefore column scheduling is important for column detailing .
COMMANDS USED
- Unit command
- Limit command
- Line command
- Offset command
- Trim command
- scale command
- Rectangle command
- Dimlinear command
- Mtext command
- Dtext command
- Dimstyle command
- Move command
- Copy command
- Divide command
- Mirror command
PROCEDURE
- Open a new file
- In the command line type units , select engineering(dimensions will be in feet and inches), and also set the precision
- In the command line type 'LIMITS' and specify the limits at lower left corner and upper right corner as
- Then zoom all
STEP :1
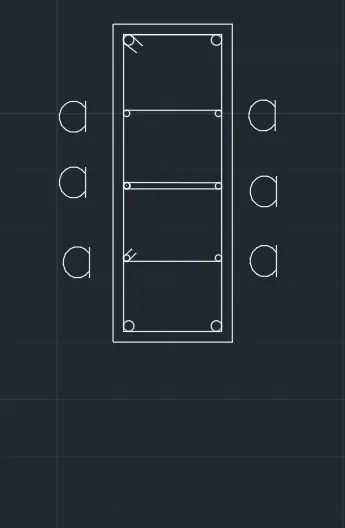
COLUMN 1 (C1)
- Using line command draw the column .
- First draw 9" horizontally and 24" vertically .
- Then again draw 9" horizontally .
- Finally we join the first line and the last line .
- Using offset command offset the rectangle drawn by 0.6" ,do it inside the rectangle
- Using divide command divide the rectangle and give the 4 segments inside the rectangle
- Using circle command draw circle outside of the previously drawn rectangle ,take diameter as 0.787" and 0.472"(by converting given dimensions from mm to inches )
- Now place the circle in every segment
- place the circle on one side and mirror it to the other side
- put the stirrups in the columns
- We denote 12 mm bars as "a"
COLUMN 2(C1a)
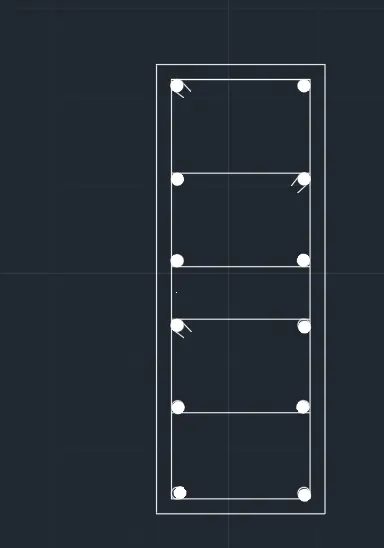
- Using line command draw the column .
- First draw 9" horizontally and 24" vertically .
- Then again draw 9" horizontally .
- Finally we join the first line and the last line .
- Using offset command offset the rectangle drawn by 0.6" ,do it inside the rectangle
- Using divide command divide the rectangle and give the 5 segments inside the rectangle
- Using circle command draw circle outside of the previously drawn rectangle ,take diameter as 0.629"(by converting given dimensions from mm to inches )
- Now place the circle in every segment
- place the circle on one side and mirror it to the other side
- put the stirrups in the columns
COLUMN 3(C2)
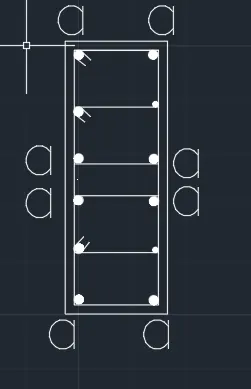
- Using line command draw the column .
- First draw 9" horizontally and 24" vertically .
- Then again draw 9" horizontally .
- Finally we join the first line and the last line .
- Using offset command offset the rectangle drawn by 0.6" ,do it inside the rectangle
- Using divide command divide the rectangle and give the 5 segments inside the rectangle
- Using circle command draw circle outside of the previously drawn rectangle ,take diameter as 0.787" and 0.315"(by converting given dimensions from mm to inches )
- Now place the circle in every segment
- place the circle on one side and mirror it to the other side
- put the stirrups in the columns
- We denote 20 mm bars as "a"
COLUMN 4(C2a)
- Using line command draw the column .
- First draw 9" horizontally and 10" vertically .
- Then again draw 9" horizontally .
- Finally we join the first line and the last line .
- Using offset command offset the rectangle drawn by 0.6" ,do it inside the rectangle
- Using divide command divide the rectangle and give the 2segments inside the rectangle
- Using circle command draw circle outside of the previously drawn rectangle ,take diameter as 0.629"(by converting given dimensions from mm to inches )
- Now place the circle in every segment
- place the circle on one side and mirror it to the other side
- put the stirrups in the columns
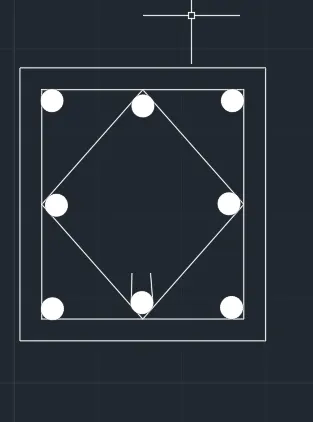
COLUMN 5(C3)
- Using line command draw the column .
- First draw 9" horizontally and 21" vertically .
- Then again draw 9" horizontally .
- Finally we join the first line and the last line .
- Using offset command offset the rectangle drawn by 0.6" ,do it inside the rectangle
- Using divide command divide the rectangle and give the 5segments inside the rectangle
- Using circle command draw circle outside of the previously drawn rectangle ,take diameter as 0.629"(by converting given dimensions from mm to inches )
- Now place the circle in every segment
- place the circle on one side and mirror it to the other side
- put the stirrups in the columns
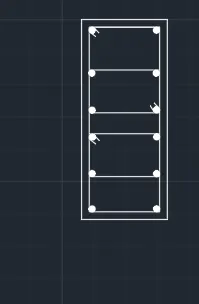
STEP :2
- Draw a table as given below
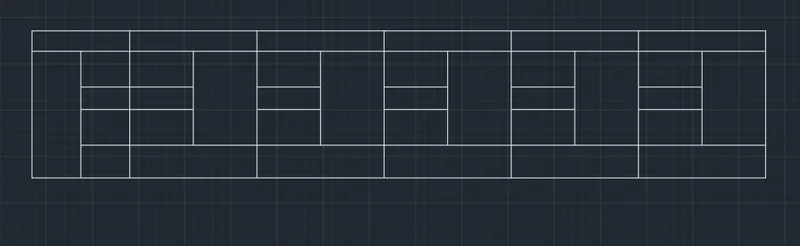
STEP :3
- Next we need to enter the details of column using Dtext and M text command
- And place the above drawn column to their respective position in the column and scale them according to the table size
RESULT
AIM
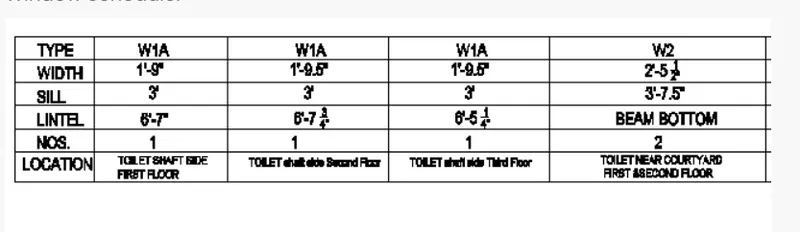
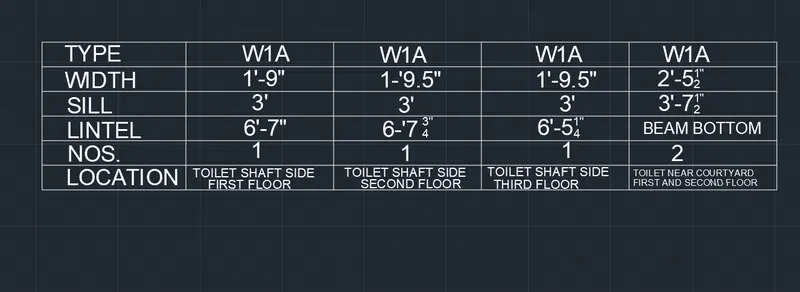
To Create a window schedule as shown in the figure
INTRODUCTION
Window schedule is a schedule which helps to give the details that required foe window construction .It gives the type, width, sill, lintel, location .
COMMANDS USED
- Unit command
- Limit command
- table command
- Offset command
- Dimlinear command
- Dtext command
- Dimstyle command
- Move command
- Copy command
PROCEDURE
STEP :1
- Open a new file
- In the command line type units , select engineering(dimensions will be in feet and inches), and also set the precision
- In the command line type 'LIMITS' and specify the limits at lower left corner and upper right corner as
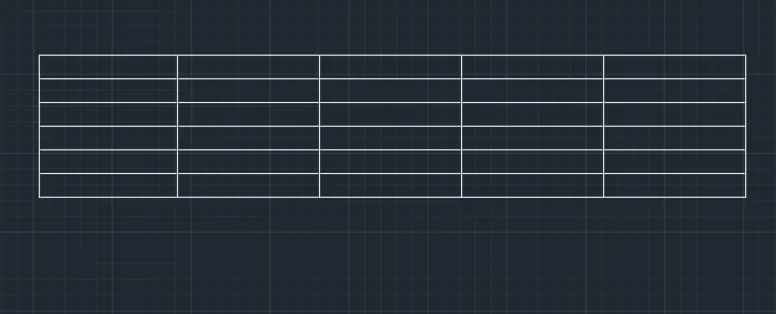
- Using table command make table with 5 columns and 6 rows
- insert the table and adjust the size as required to enter the data
STEP :2
- Now we can enter the details of window schedule using Dtext in the above table
RESULT
AIM
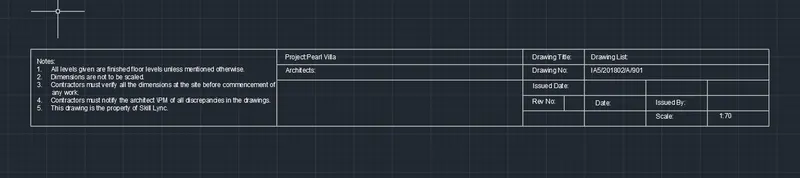
To Create the drawing template as shown in the figure

INTRODUCTION
Templates help to create a future drawing without intial settings ,it reduces the worktime .
COMMANDS USED
- Unit command
- Limit command
- table command
- Offset command
- Dimlinear command
- Dtext command
- Dimstyle command
- Move command
- Copy command
- Line command
- Mtext command
PROCEDURE
STEP :1
- Open a new file
- Set the units
- In the command line type 'LIMITS' and specify the limits at lower left corner and upper right corner as
- Next we have to draw the table using the line command

STEP :2
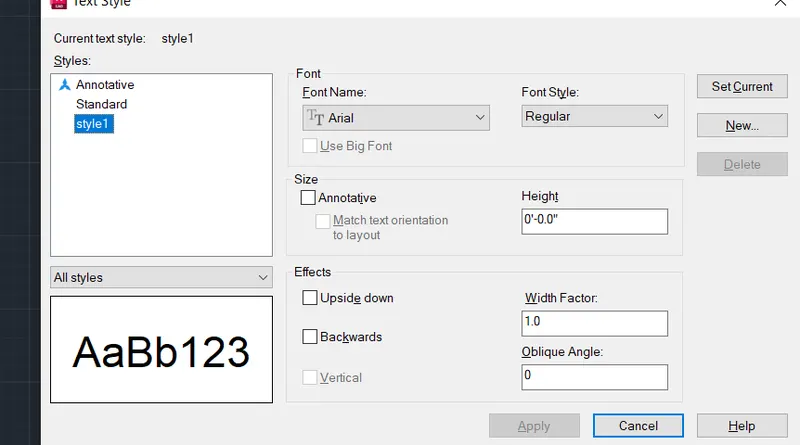
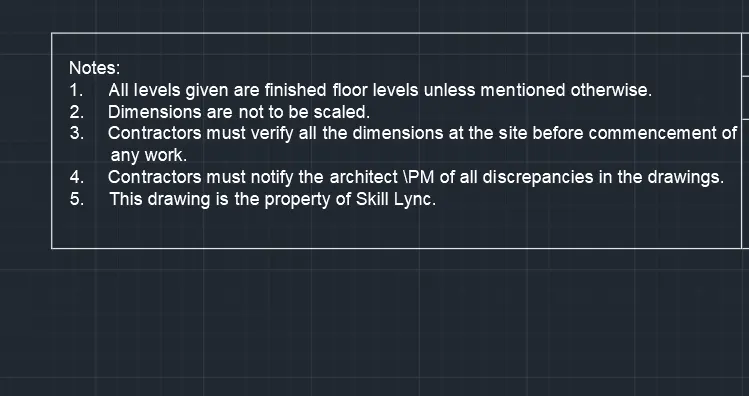
- After drawing the table using mtext command to enter the notes and project details
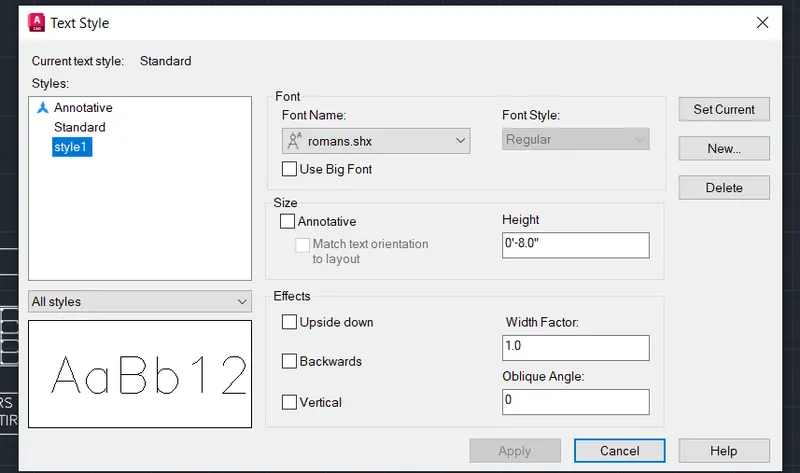
- Font= arial and text height =4"
RESULT
AIM
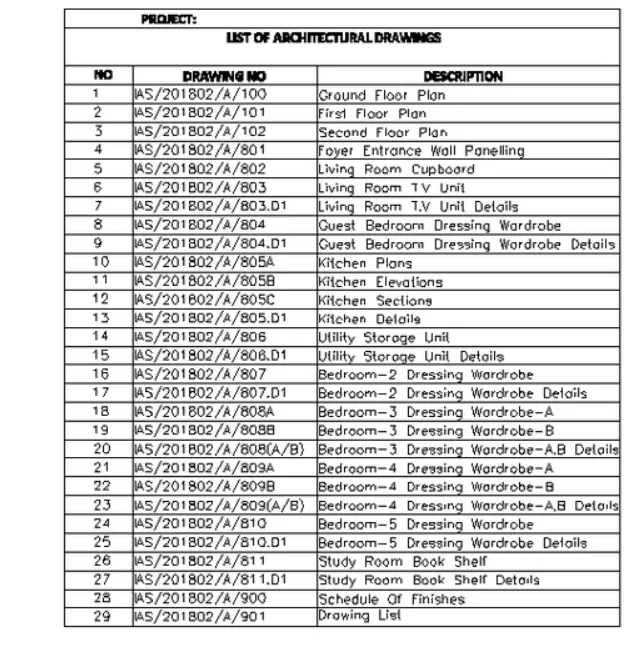
To Create the list of drawing schedule as shown in the figure
INTRODUCTION
A schedule of drawings is an itemised drawings required for a building project. it can be included as part of an invitation to tender,or may be prepared as a part of design managment plan.
COMMANDS USED
- Unit command
- Limit command
- table command
- Offset command
- Dimlinear command
- Dtext command
- Dimstyle command
- Move command
- Copy command
PROCEDURE
STEP :1
- Open a new file
- In the command line type units , select engineering(dimensions will be in feet and inches), and also set the precision
- In the command line type 'LIMITS' and specify the limits at lower left corner and upper right corner as
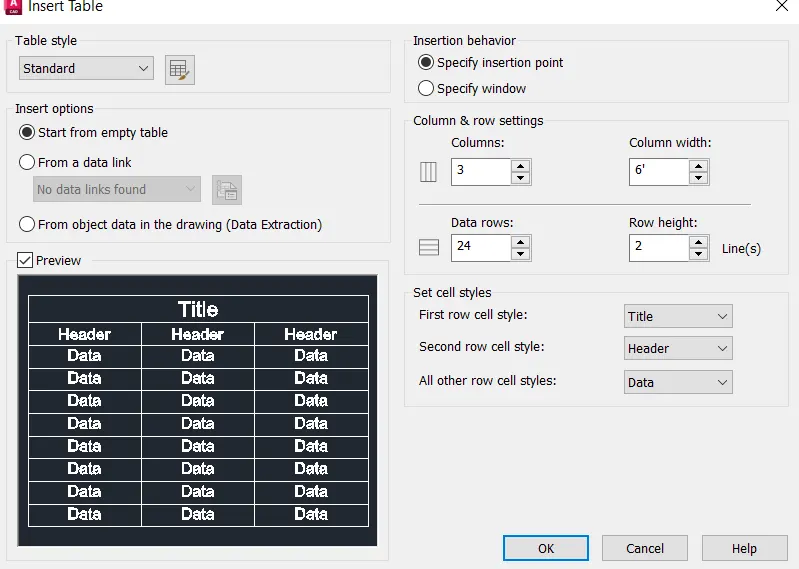
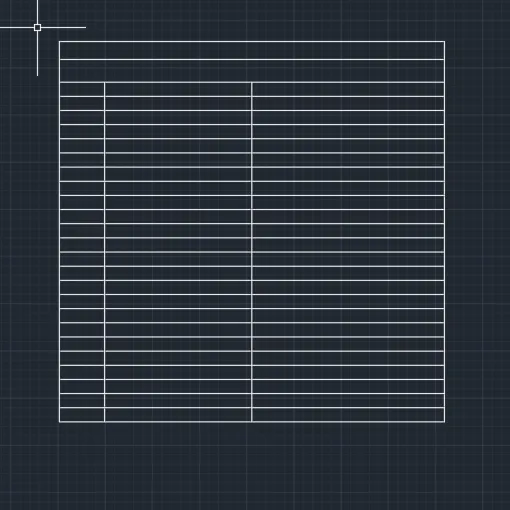
- Using table command make table with 5 columns and 6 rows
- insert the table and adjust the size as required to enter the data
STEP :2
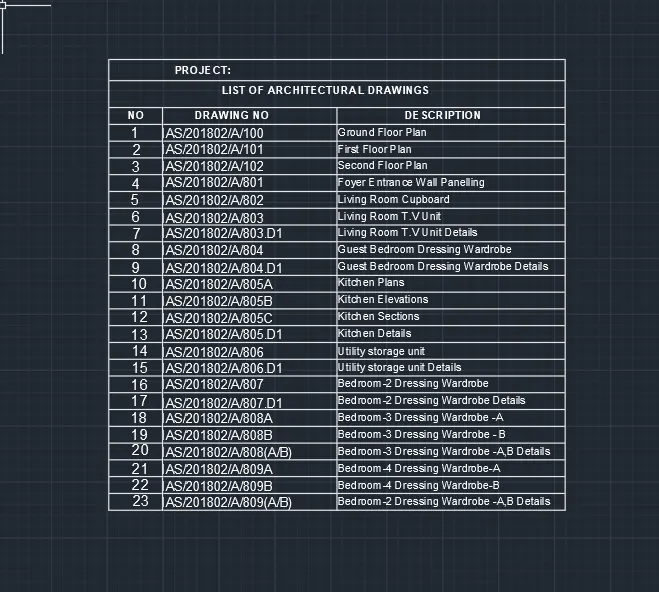
- Using Dtext command enter the details as shown in the figure
RESULT
AIM
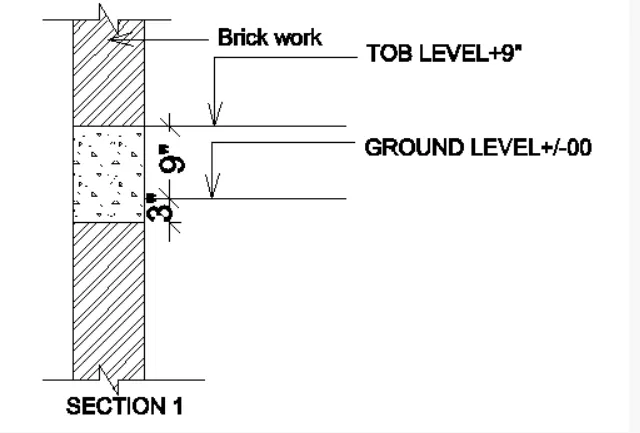
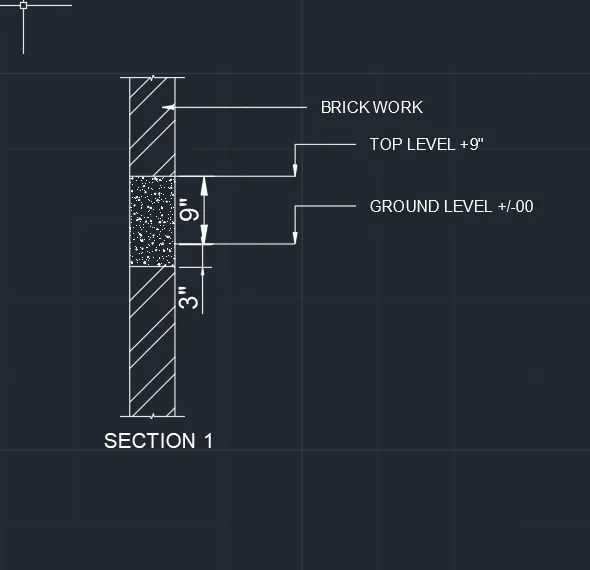
To Create the Beam detail as shown in the figure
INTRODUCTION
A beam is a structural element that primarily resists the loads applied laterally to the beams axis .Its mode of reflection is primarily by bending
COMMANDS USED
- Line command
- Dimliner command
- Breakline command
PROCEDURE
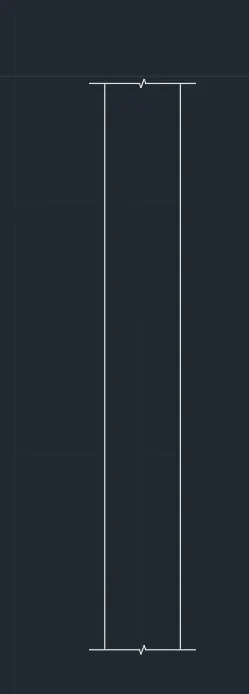
- Using line command draw two parallel lines at a distance of 6.5"
- Using the break the line command make break line at top and bottom
- Using mtext and leader do the required labelling as in the figure
- Using hatch command hatch as per the drawing
RESULT