Creation of Column Schedule and Drawing Template using AutoCad
- Aim & Introduction:- Creation of Column Schedule and Drawing Template using AutoCad. This project deals with detailing in the drawings of various structures used in the construction industry. In this project, there is a TEXT command, Leader tool, Hatch tool, etc.
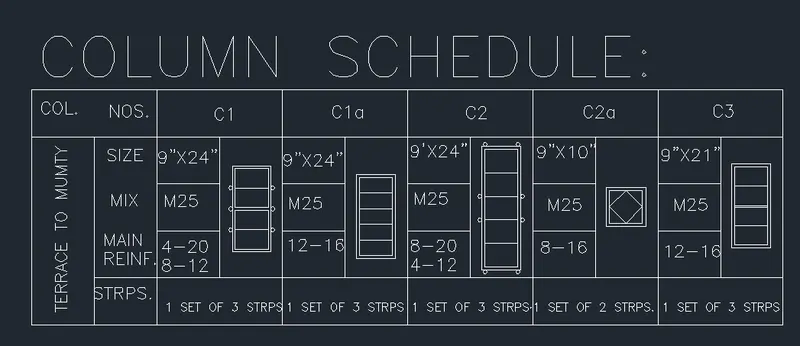
- Aim:- COLUMN SCHEDULE
- Procedure:-
- Type L in the command box to select the line tool.
- Draw a horizontal line of 24 units and continue with a 15 units vertical line.
- Continue the same line again with 24 units horizontally and then type C to form a rectangle.
- Type O in the command box to select the offset tool and specify the distance as 2 units.
- Offset the vertical line to draw 12 columns.
- Again select the offset tool and specify the distance as 3 units.
- Offset the horizontal line to draw 5 rows.
- Select the trim tool and trim off the non-required lines.
- Type DIMSTYLE in the command box to open the dimension style dialogue box.
- Go to modify, then Text, and select the font as roman.shx.
- Type TEXT in the command box to select the text tool and type all the required detailing.
- Again select the line tool and draw all the column detailing in the specified spaces.
- RESULT:
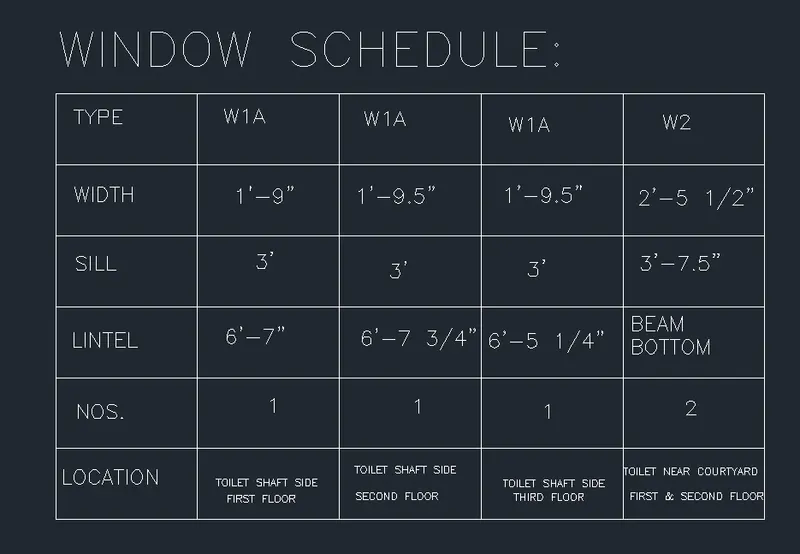
- Aim:- WINDOW SCHEDULE
- Procedure:-
- Type L in the command box to select the line tool.
- Draw a horizontal line of 10 units and continue with a 12 units vertical line.
- Continue the same line again with 10 units horizontally and then type C to form a rectangle.
- Type O in the command box to select the offset tool and specify the distance as 2 units.
- Offset the vertical and horizontal lines to draw columns and rows respectively.
- Type DIMSTYLE in the command box to open the dimension style dialogue box.
- Go to modify, then Text, and select the font as roman.shx.
- Type TEXT in the command box to select the text tool and type all the required detailing.
- RESULT:
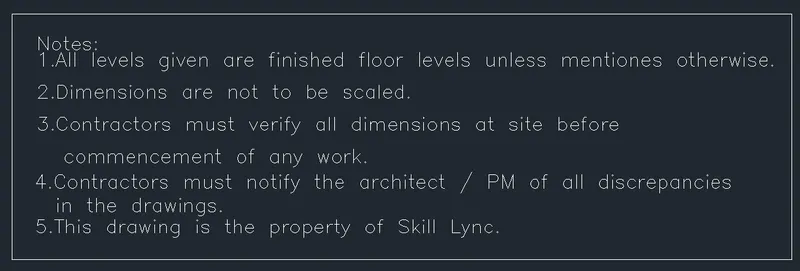
- Aim:- DRAWING TEMPLATE
- Procedure:
- Type DIMSTYLE in the command box to open the dimension style dialogue box.
- Go to modify, then Text, and select the font as roman.shx.
- Type TEXT in the command box to select the text tool and type all the required detailing.
- Draw the template with the help of the line tool.
- RESULT:

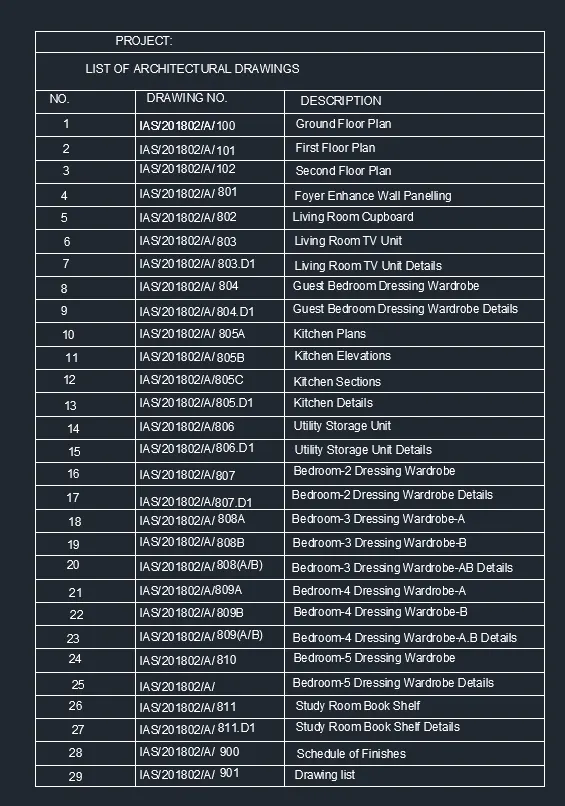
- Aim:- LIST OF DRAWING SCHEDULE
- Procedure:-
- Type L to select the line tool and draw a vertical line of 35 units and a horizontal line of 25 units and continue the line to form a rectangle.
- Type O to select the offset tool and specify the distance as 1 unit.
- Offset the bottom horizontal line 29 times towards the top.
- And the top horizontal line one time downwards.
- All the required rows will be drawn.
- Again select the offset tool and draw two more vertical lines as required.
- Type DIMSTYLE in the command box to open the dimension style dialogue box.
- Go to modify, then Text, and select the font as roman.shx.
- Type TEXT in the command box to select the text tool and type all the required detailing.
- RESULT:
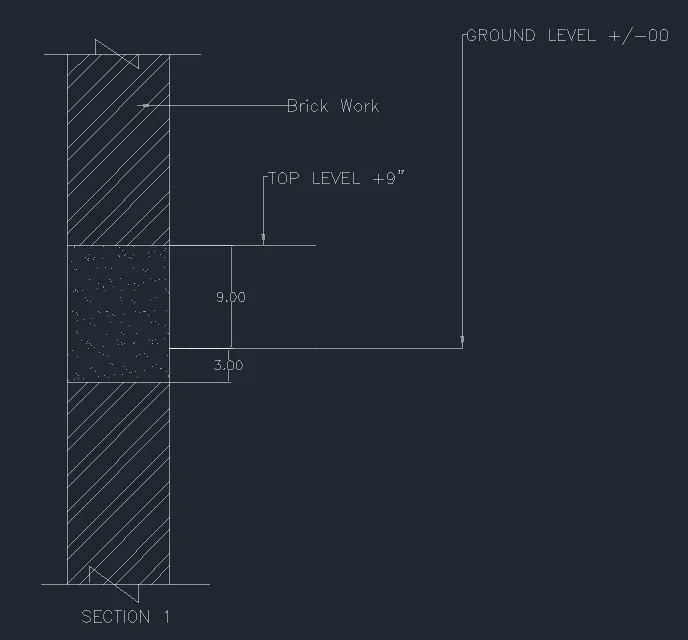
- Aim:- BEAM DETAILS
- Procedure:-
- Type L in the command box to select the line tool and draw a vertical tine of 12"
- Type O in the command box to select the offset tool and specify the distance as 9".
- Again select the line tool and draw all the horizontal lines required.
- There will be jogged lines at the top and bottom of the beam to show the continuity of the member.
- Select the hatch tool and specify the enclosed space to apply the hatch.
- Adjust the scale to 2.
- Select the gradient tool and specify the enclosed space to apply the gradient.
- Adjust its scale too.
- Select the leader tool and mark the drawing.
- Specify the dimensions.
- RESULT: