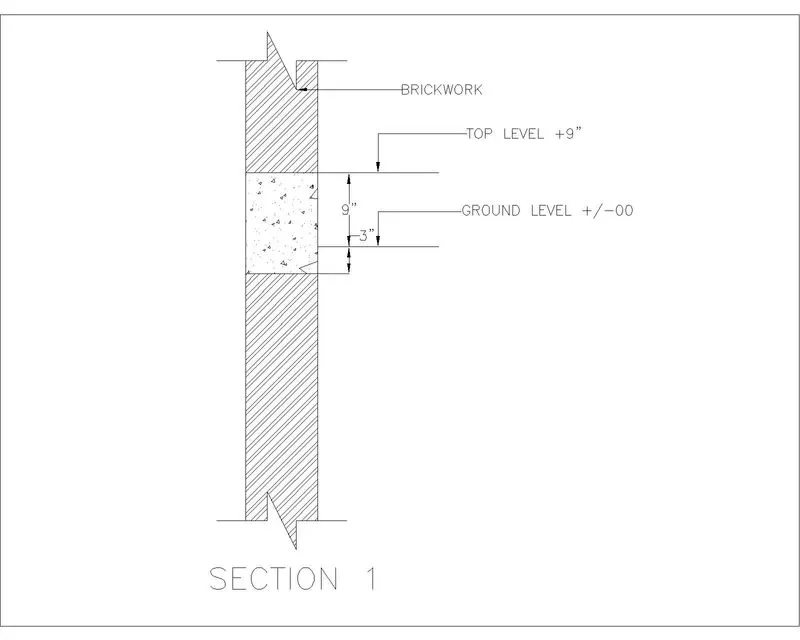
Creation of Column Schedule and Drawing Template using AutoCad
Question-1:
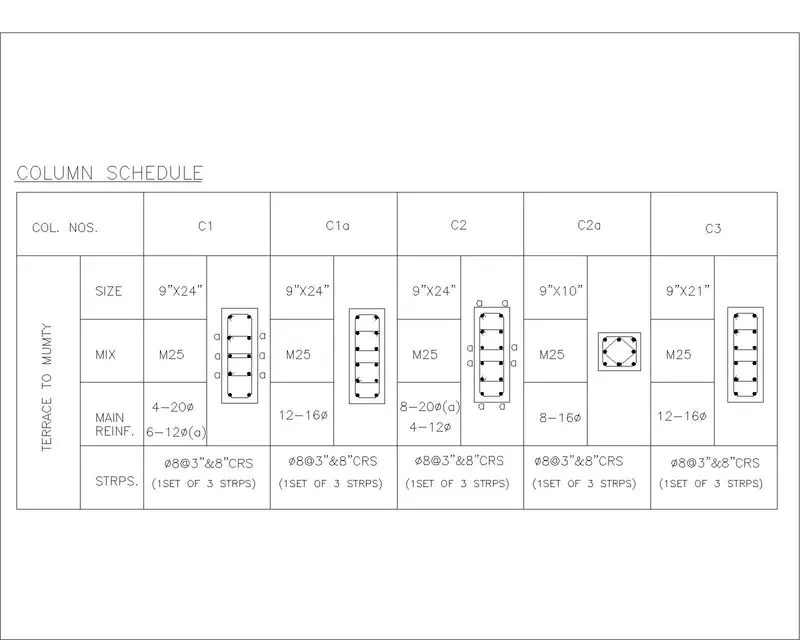
Aim: To create a column schedule from given figure by using Auto CAD. Column schedule has reinforcement details and no of bars should be provided which column and how it position to building.
Introduction:
Line: It connects one point to another points. Used to draft various elements.
Text: Single line text and multi line text used to write the description of the objects.
Trim: This modification tool helps to cut extended edges on the drawing. And to trim inbetween two line or elements. "TR" command to envoke this tool.
Offset: Offset the existing element with certain distance. this tool avoid to create new parallel elements.
Layer: Each and every elements has unique property and unique style. This layer tool helps to organize those. Line weight, line style, colour gradient, freeze, lock. it has numerous benefits in Auto CAD drafting.
Procedure:
Step-1: Type "UN" to set units of the drawing sheet. "Engineering" and set precision "0'-0.0"".
Step-2: Type "LIMITS" to set size of the sheet we required to draft.
Step-3: Type "L" to envoke line tool to plot lines.

Step-4: Assume the dimensions of the tabular column.
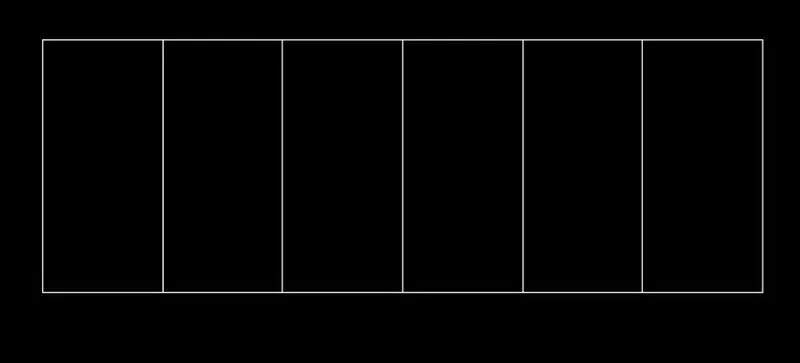
Step-5: Type "OFFSET" to offset lines to make required rows and columns for editing column schedule.
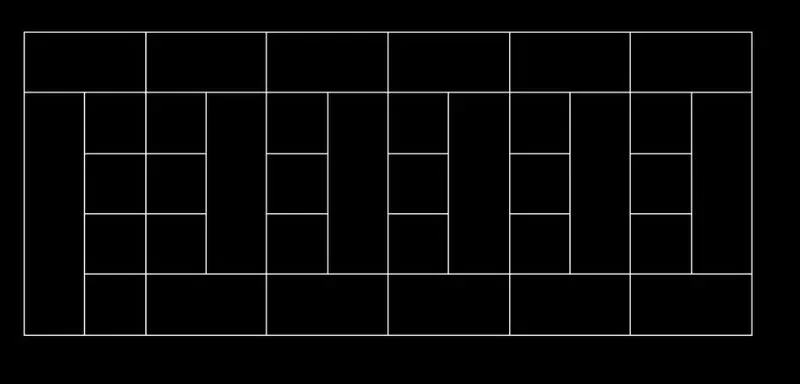
Step-6: Type "DT" to envoke single line text and set text fonts of romans.shx with the height of 8".
Step-7: Type "CO" to envoke copy tool select the required objects and paste it where it is required.
Step-8: Type %%C to create diameter symbol.
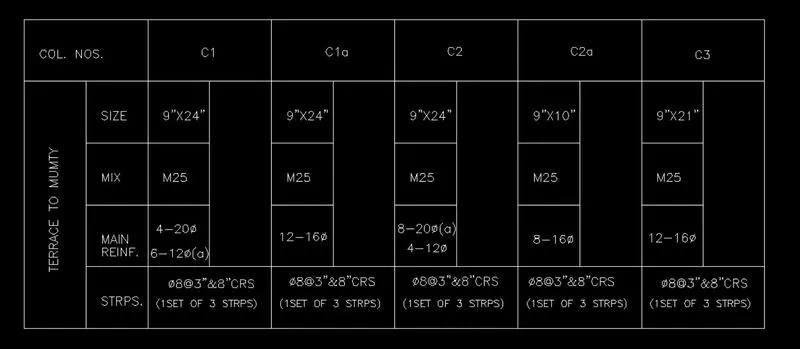
Step-9: To create reinforcement, Type "DONUT" command and enter inner diameter zero and outer diameter at reinforcement diameter.
Step-10: Type "AR" Array command to envoke array dialogue box and select no of rows and no of columns with the specific distance we reuqired to draft.
Step-11: Here, two no of rows and 5 no of columns we required.
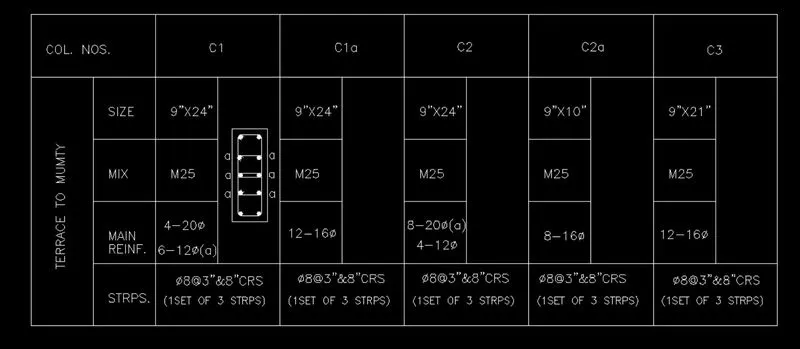
Step-12: Repeat the previous steps to make another three column reinforcement details.
step-13: To create reinforcement, Type "DONUT" command and enter inner diameter zero and outer diameter at reinforcement diameter.
Step-14: Type "AR" Array command to envoke array dialogue box and select no of rows and no of columns with the specific distance we reuqired to draft.
Step-15: Here, 2 no of rows and 6 no of columns we required.
step-16: Type "CO" copy the reinforcement details object and paste it to C2, C2a and C3.
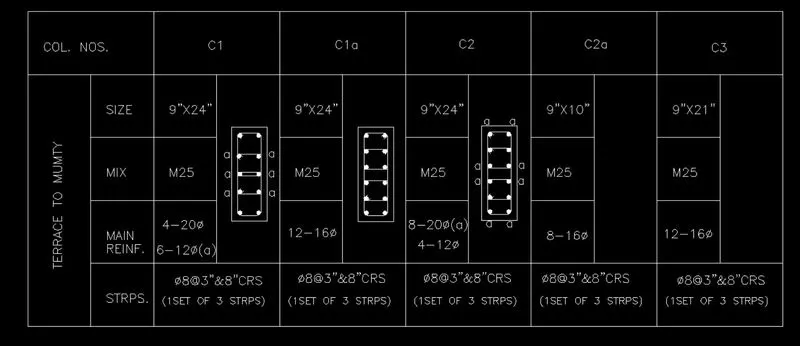
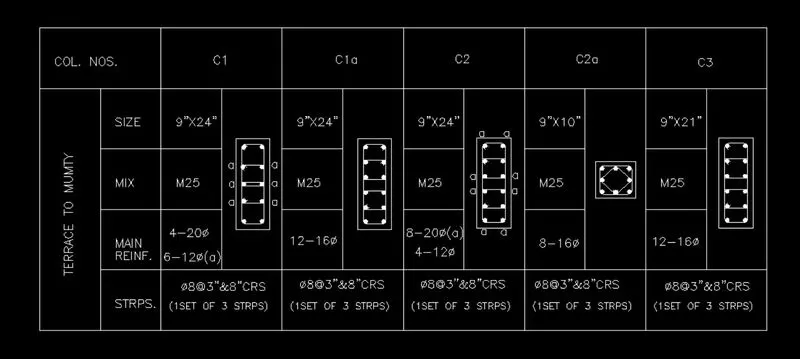
Step-17: Type "DT" to text Column Schedule heading.
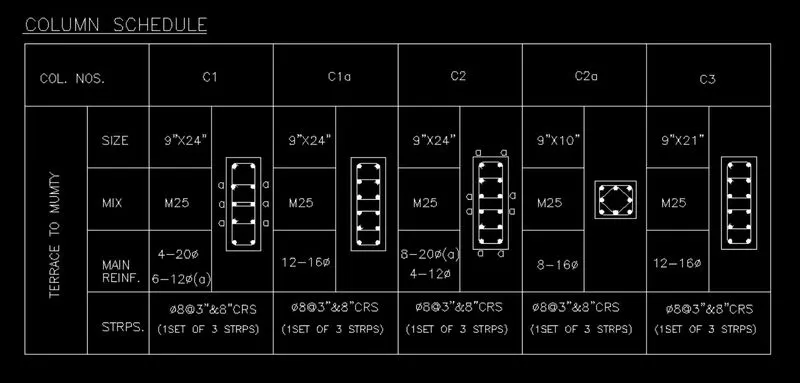
Result:
Create a column schedule with the help of Auto CAD it include's reinforcement bar, no of bars needed and stirupps details. Mentioned which type concrete mix used to making concrete.
Question-2:
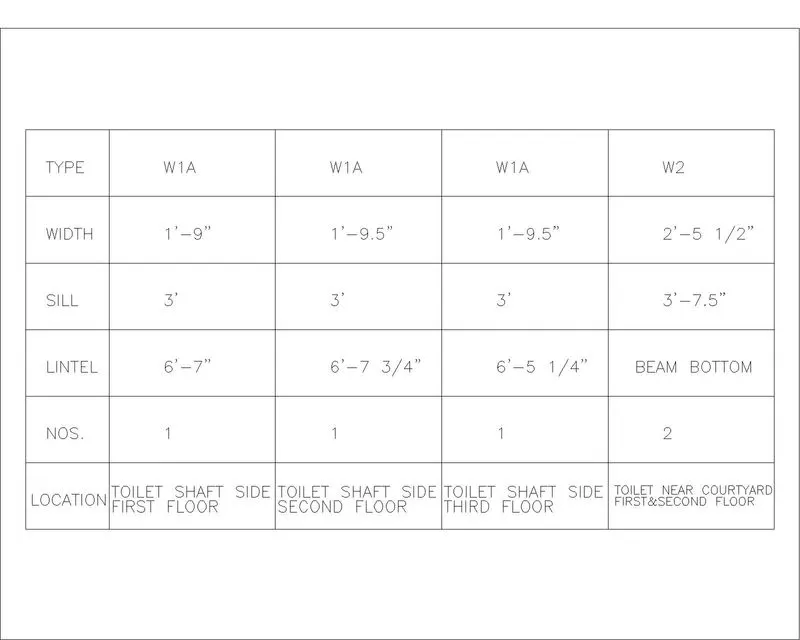
Aim: To create a window schedule by using Auto CAD.
Introduction:
Line: It connects one point to another points. Used to draft various elements.
Text: It helps to mention the details and description of the items.
Trim: This modification tool helps to cut extended edges on the drawing. And to trim inbetween two line or elements. "TR" command to envoke this tool.
Offset: Offset the existing element with certain distance. this tool avoid to create new parallel elements.
Layer: Each and every elements has unique property and unique style. This layer tool helps to organize those. Line weight, line style, colour gradient, freeze, lock. it has numerous benefits in Auto CAD drafting.
Procedure:
Step-1: Type "UN" to set units of the drawing sheet. "Engineering" and set precision "0'-0.0"".
Step-2: Type "LIMITS" to set size of the sheet we required to draft.
Step-3: Type "L" to envoke line tool to plot lines.
Step-4: Type "OFFSET" to create tabular column.
Step-5: Type "DT" to envoke text and select Justify Top left and Angle of the text and Height of the text.
Step-6: Type "CO" to copy all text and paste it required places.
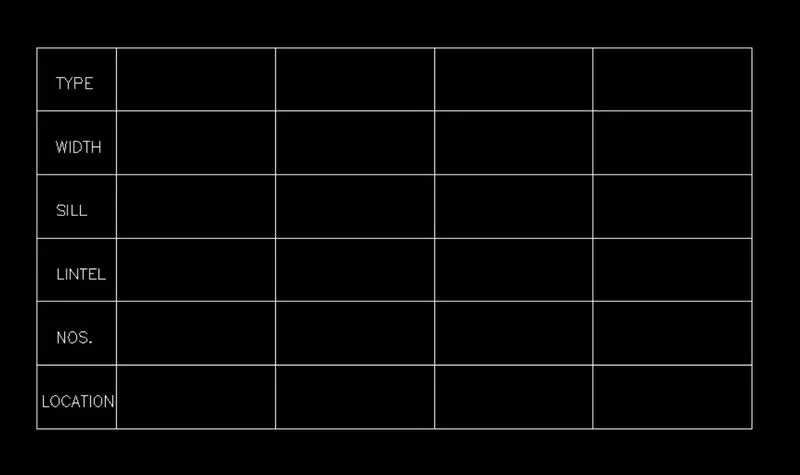
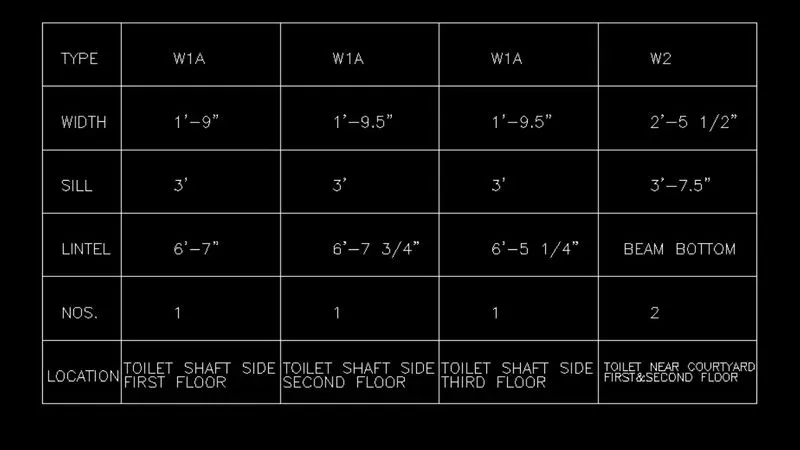
Step-7: Type "ED" edit the text and write actual given details.
Result:
Created and sketch a window schedule by using Auto CAD. This schedule helps to complete work in site with proper dimensions.
Question-3:
Aim:
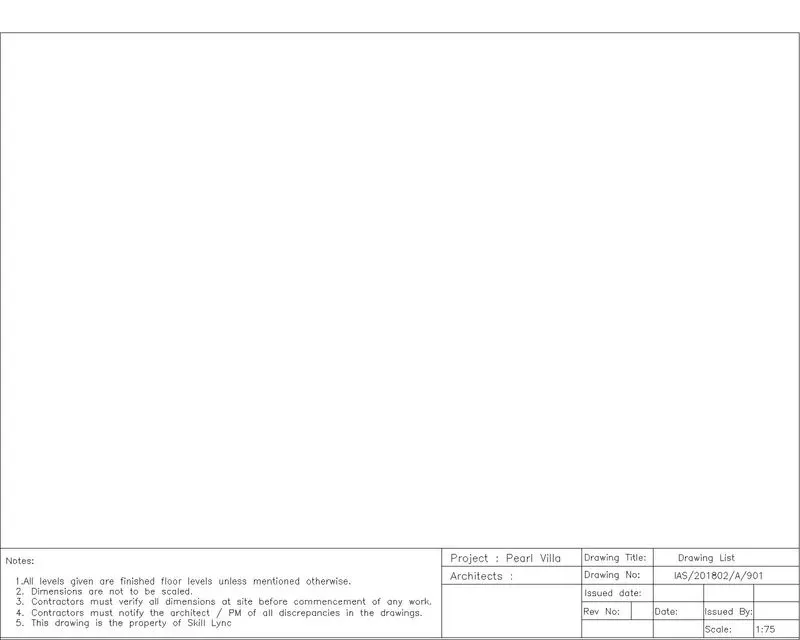
To create drawing template from given figure. This template is having all the instructions to refer and study diagram.
Introduction:
Line: It connects one point to another points. Used to draft various elements.
Text: It helps to mention the details and description of the items.
Trim: This modification tool helps to cut extended edges on the drawing. And to trim inbetween two line or elements. "TR" command to envoke this tool.
Offset: Offset the existing element with certain distance. this tool avoid to create new parallel elements.
Layer: Each and every elements has unique property and unique style. This layer tool helps to organize those. Line weight, line style, colour gradient, freeze, lock. it has numerous benefits in Auto CAD drafting.
Hatch: Hatching helps to fill the voids with certain texture on it. If we draft wall means, we mention the brickwork details with the help of hatching.
Procedure:
Step-1: Type "UN" to set units of the drawing sheet. "Engineering" and set precision "0'-0.0"".
Step-2: Type "LIMITS" to set size of the sheet we required to draft.
Step-3: Type "L" to envoke line tool to plot lines.
Step-4: Type "OFFSET" to create tabular column.

Step-5: Type "MT" to envoke multi line text tool and enter the given details of notes.
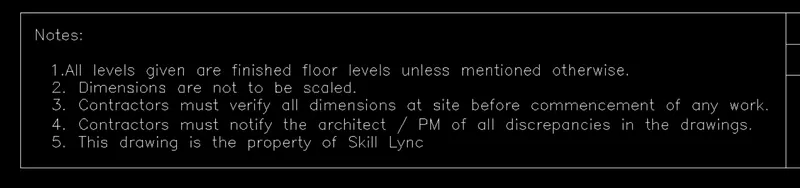

Step-6: Type "DT" to text other notes.


Result:
Create all the details of notes and template of the given figure. and also put into layout page to take print of it. This template is having all the instructions to refer and study diagram at site.
Question-4:
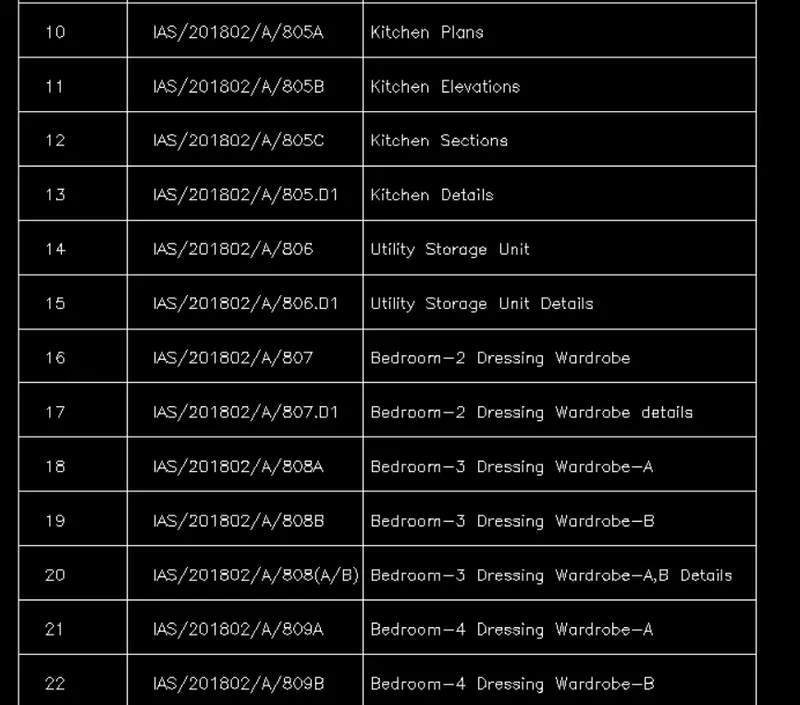
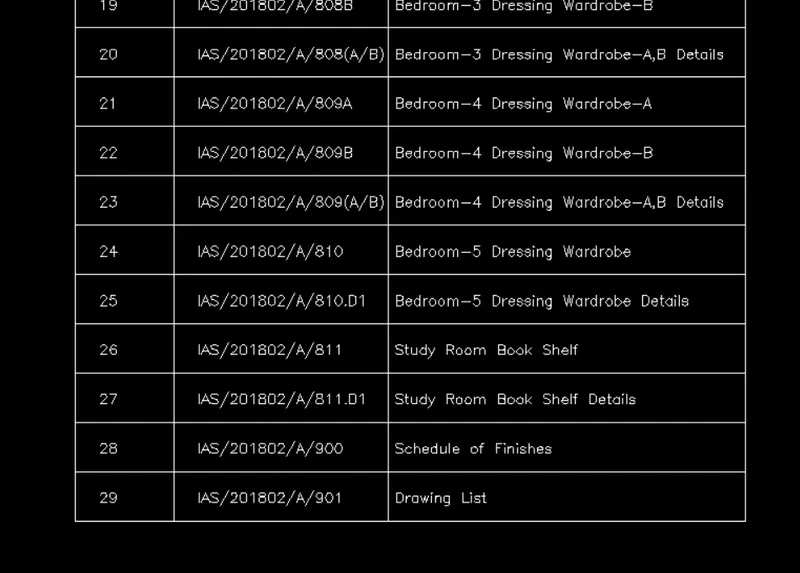
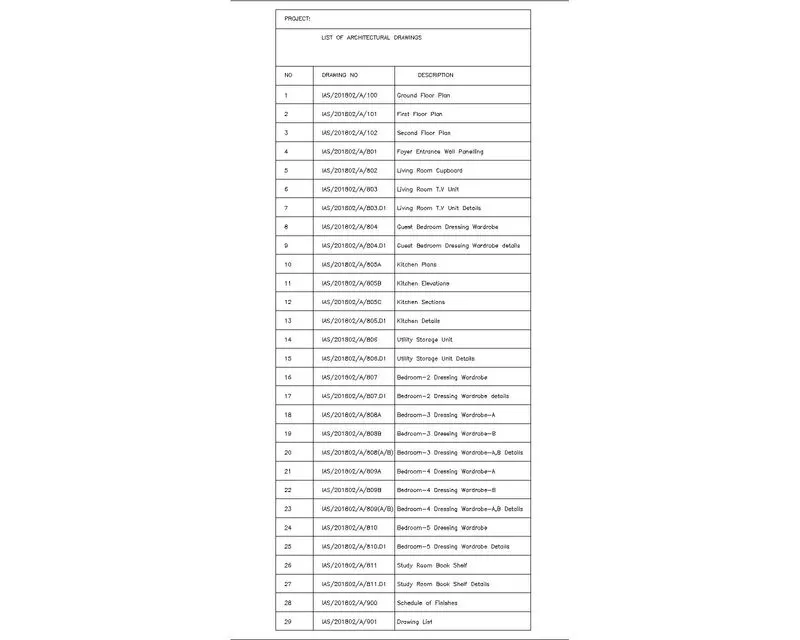
Aim: To create a list of drawing schedule as per figure.
Introduction:
Line: It connects one point to another points. Used to draft various elements.
Text: It helps to mention the details and description of the items.
Trim: This modification tool helps to cut extended edges on the drawing. And to trim inbetween two line or elements. "TR" command to envoke this tool.
Offset: Offset the existing element with certain distance. this tool avoid to create new parallel elements.
Layer: Each and every elements has unique property and unique style. This layer tool helps to organize those. Line weight, line style, colour gradient, freeze, lock. it has numerous benefits in Auto CAD drafting.
Hatch: Hatching helps to fill the voids with certain texture on it. If we draft wall means, we mention the brickwork details with the help of hatching.
Procedure:
Step-1: Type "UN" to set units of the drawing sheet. "Engineering" and set precision "0'-0.0"".
Step-2: Type "LIMITS" to set size of the sheet we required to draft.
Step-3: Type "L" to envoke line tool to plot lines.
Step-4: Type "OFFSET" to create tabular column.
Step-5: Type "AR" to create number of rows and column we required to create tabular column.
Step-6: Array dialogue box opened and select 30 columns and one row to created.
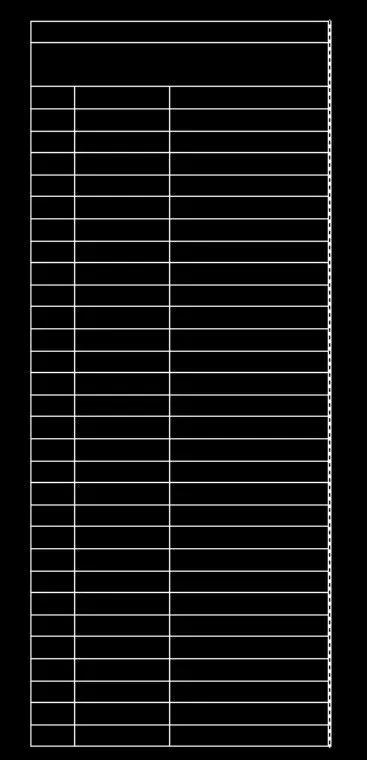
Step-7: Type "DT" to text headings of the given figure.
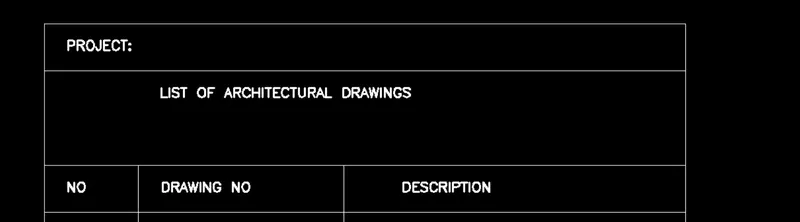
Step-8: Type "AR" to select array box and create serial numbers upto 29 by selecting 29 columns with sepcified distance with 270 degree.
Step-9: Type "ED" command to edit all the texts as per the given details.
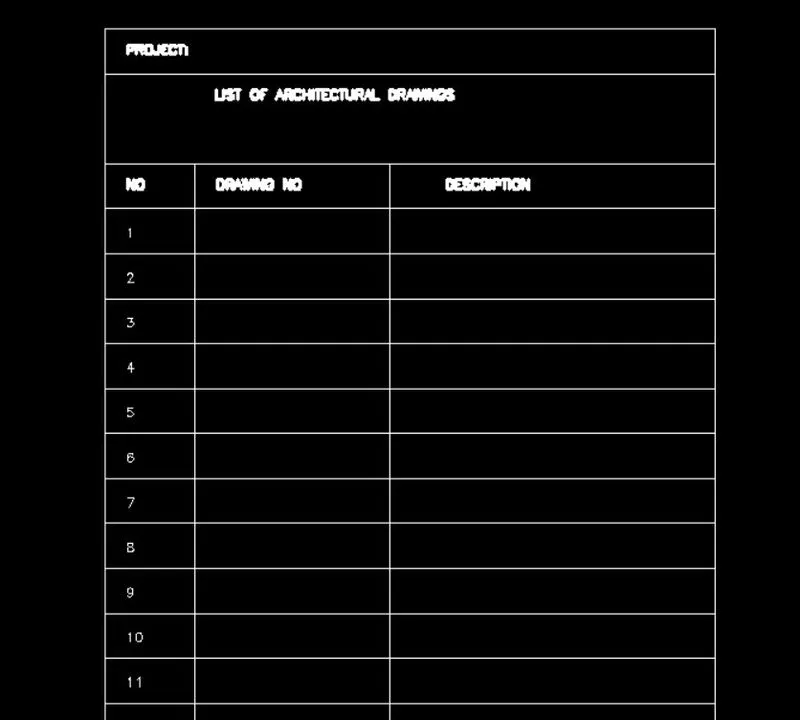
Step-10: TYpe "AR" to make drawing no portion.
Step-11: Type "ED" command to edit all the texts as per the given details.
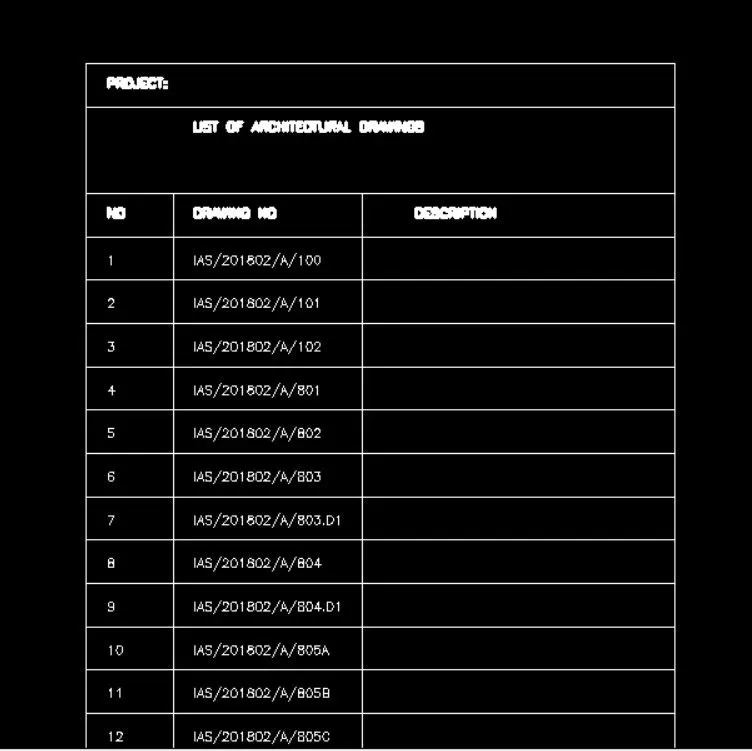
Step-12: Type "AR" to make drawing no portion.
Step-13: Type "ED" command to edit all the texts as per the given details.
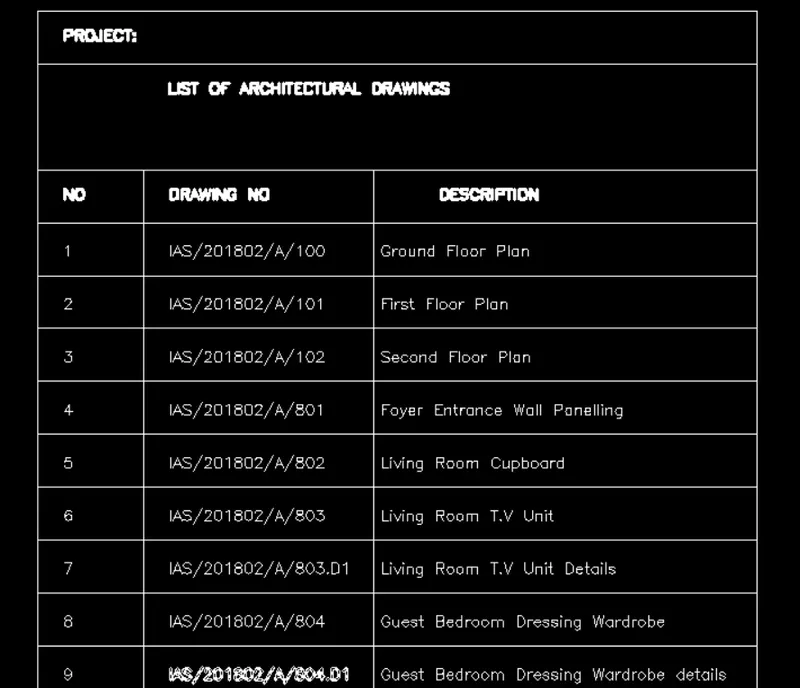
Result:
Created project details and list of drawing details by using Auto CAD. Drawing schedule has all kind of a drawing name and description on it. It used to refer random drawings and its location.
Question-5:
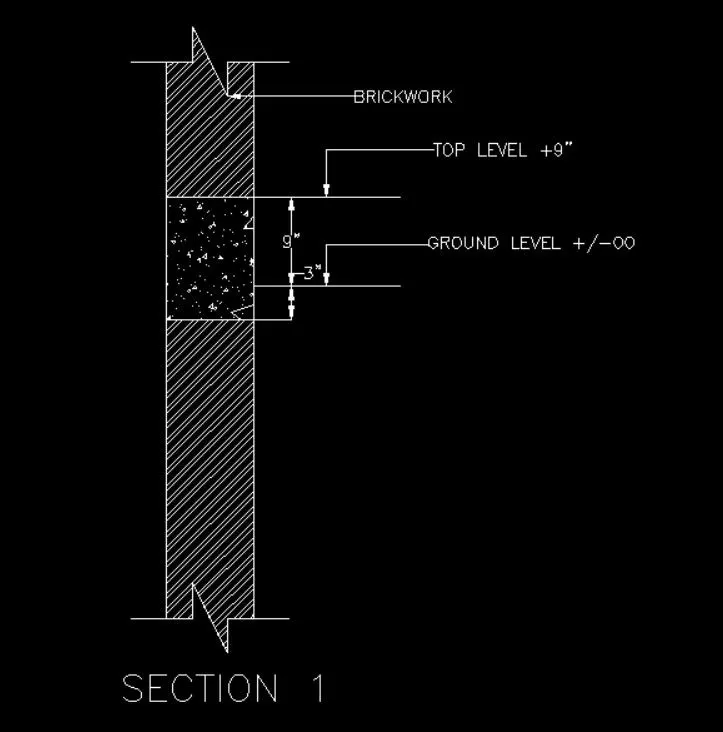
Aim: To create a Beam details from given figure. this drawing used to refer where beam is located at site and site engineer take a look and interprete with drawing.
Introduction:
Line: It connects one point to another points. Used to draft various elements.
Text: It helps to mention the details and description of the items.
Leader: It is used to mention the details of drawing with arrow mark or base point.
Trim: This modification tool helps to cut extended edges on the drawing. And to trim inbetween two line or elements. "TR" command to envoke this tool.
Offset: Offset the existing element with certain distance. this tool avoid to create new parallel elements.
Layer: Each and every elements has unique property and unique style. This layer tool helps to organize those. Line weight, line style, colour gradient, freeze, lock. it has numerous benefits in Auto CAD drafting.
Hatch: Hatching helps to fill the voids with certain texture on it. If we draft wall means, we mention the brickwork details with the help of hatching.
Procedure:
Step-1: Type "UN" to set units of the drawing sheet. "Engineering" and set precision "0'-0.0"".
Step-2: Type "LIMITS" to set size of the sheet we required to draft.
Step-3: Type "L" to envoke line tool to plot lines.
Step-4: Type "OFFSET" to create tabular column.

Step-5: Type "L" to create continuous symbol of given element.

Step-6: Type "CO" to copy the continuous symbol and paste it to other edge of the element.

Step-7: Type "H" to open Hatch dialogue box and select Brick work details
Step-8: Type "H" to open hatch dialogue box and select Concrete details.

Step-9: Type "DIMLIN" to measure linear dimensions.
Step-10: Type "LEADER" to mention the description with arrow.
Result:
Drafting a Beam details from given figure. This drawing used to refer where beam is located at site and site engineer take a look and interprete with drawing. Levels in the drawing is very important one for elevation purpose. As a site engineer keep it in the same way the draftsman given.