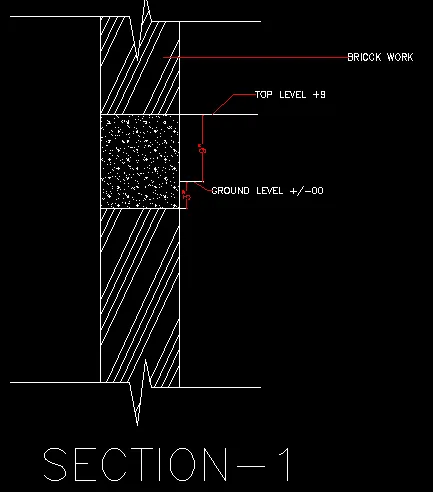
Creation of Column Schedule and Drawing Template using AutoCad
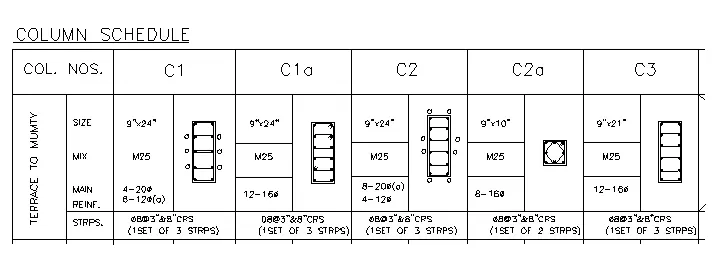
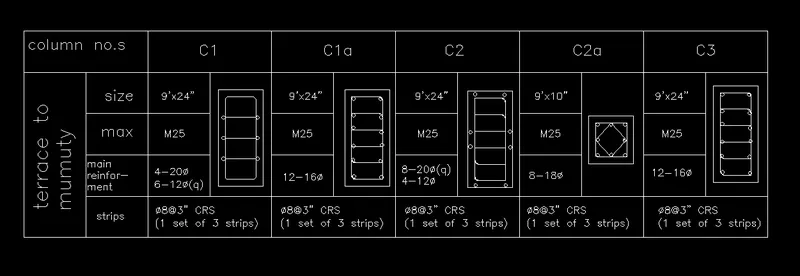
AIM : Create a column schedule as shown in the figure.
Note: Create a column schedule with the help of lines. Also, insert text with the help of Dtext command or Single Line text.
Hint: Use font name: romans.shx; Height: 8”, Justify: Left
PROCEDURE:
STEP-1
- create new file < select new drawing enter units as a decimals.
- create annotate settings in ribbon
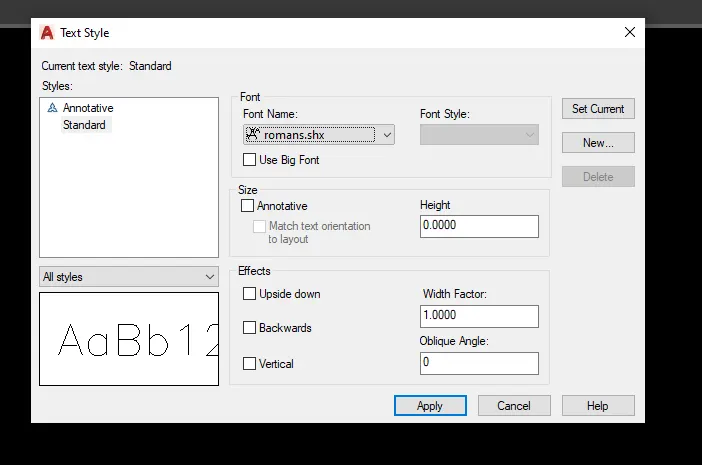
- fon selected as romans and font size selected as 8".
- select justify as left.
step-2
- use line command draw a tabile 10' x 10' tabile with 12 columns and 5 rows.

- use trim and fillet command divide the lines as required shape.
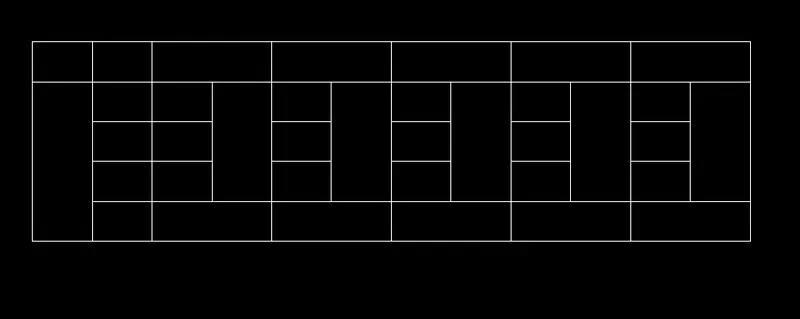
- use mtext command write the text as required given in drawing
- and also draw bbs prepared as required autocad software.
RESULTS:
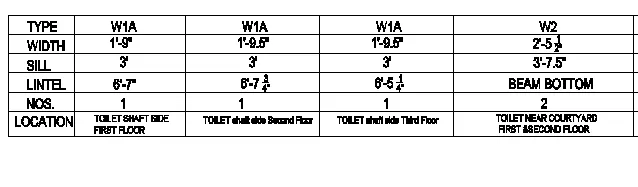
AIM:2 Create a window schedule as shown in the figures:
Window Schedule:
STEP-1
- create new file < select new drawing enter units as a decimals.
- create annotate settings in ribbon
- fon selected as romans and font size selected as 8".
- select justify as left.
step-2
- Select annotate in ribbon and tabile in command bar
- in this dailog box we have to select 6 rowa and 5 coloumns.
- apply text action with useing text command.
RESULTS:
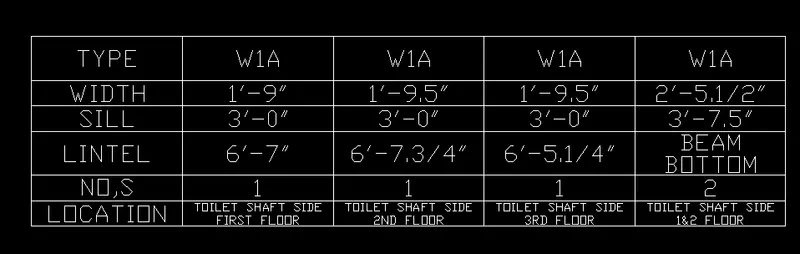
AIM3:
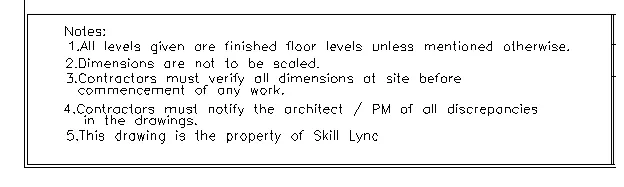
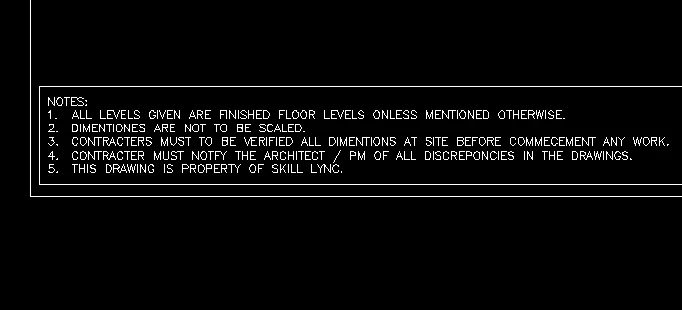
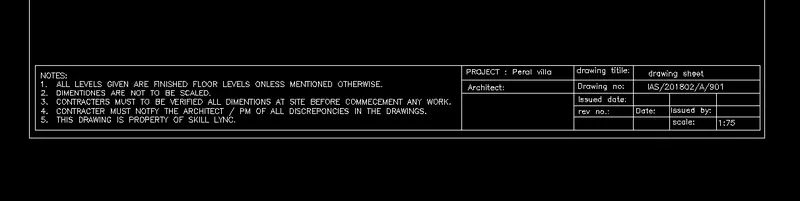
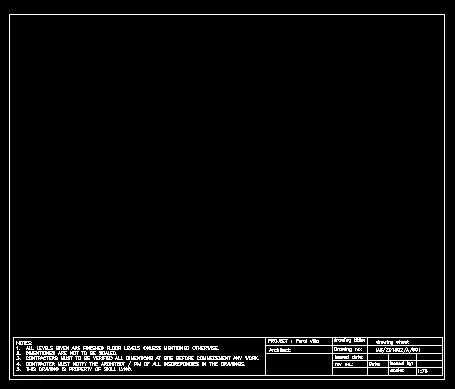
Create the drawing template as shown in the figure:< Use the Notes as in the figure>

STEP-1
- create new file < select new drawing enter units as a decimals.
- create annotate settings in ribbon
- fon selected as romans and font size selected as 8".
- select justify as left.
STEP-2
- As useing line command drw a line as required.
- as useing trim, fillet and extend command design template as required.
- useing text command write content as we required.
RESULTS:
AIM3:
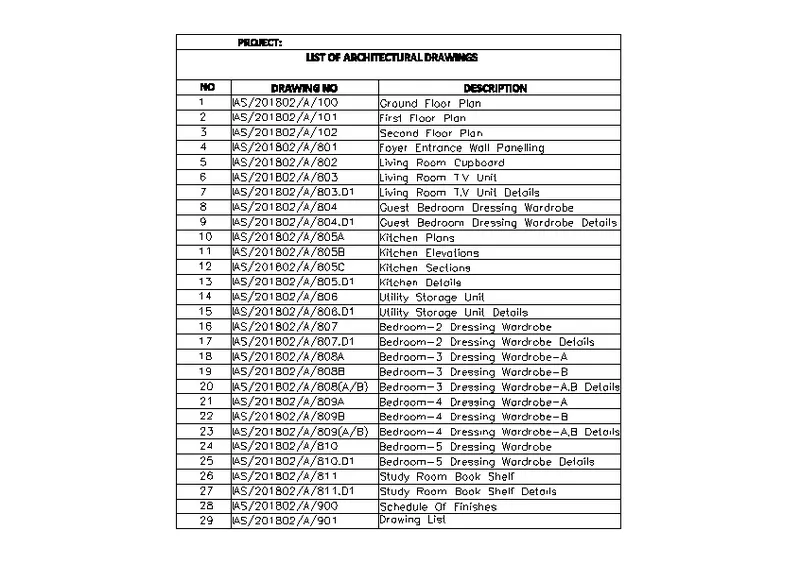
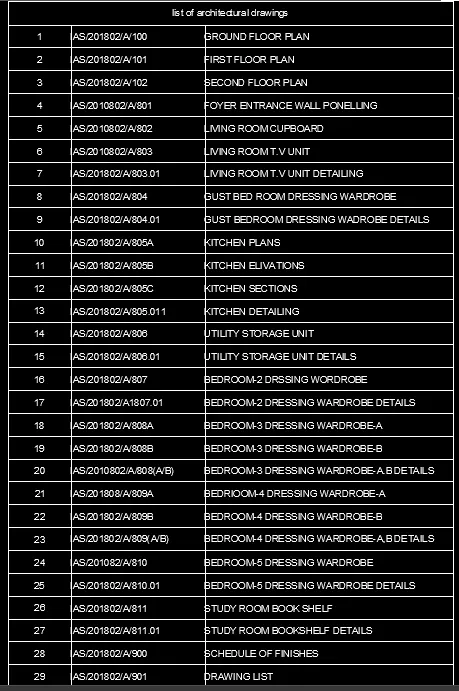
Create the list of drawing schedule as shown in the figure:
PROCEDURE:
STEP-1
- create new file < select new drawing enter units as a decimals.
- create annotate settings in ribbon
- fon selected as romans and font size selected as 8".
- select justify as left.
- Select annotate in ribbon and tabile in command bar
- in this dailog box we have to select 29 rowa and 3 coloumns.
- apply text action with useing mtext command.
RESULTS:
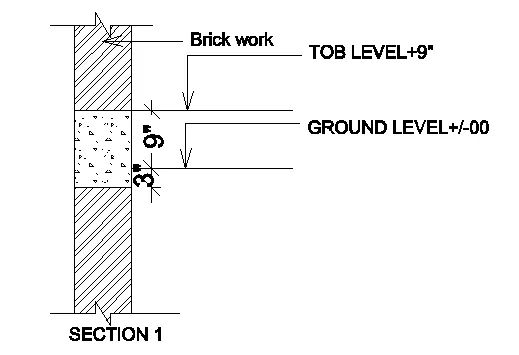
AIM 4: Create the Beam detail as shown in the figure and provide text wherever given.
PROCEDURE:
STEP-1
- create new file < select new drawing enter units as a decimals.
- create annotate settings in ribbon
- fon selected as romans and font size selected as 8".
- select justify as left.
- Select annotate in ribbon and tabile in command bar
- in this dailog box we have to select 29 rowa and 3 coloumns.
- apply text action with useing mtext command.
STEP-2:
- useing qleader command draw dimentions and also text.
RESULTS: