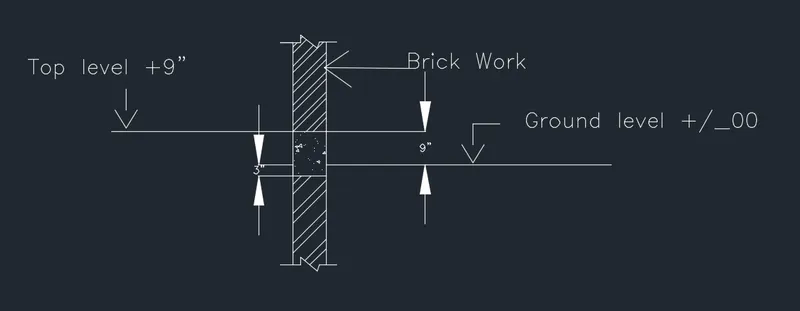
Creation of Column Schedule and Drawing Template using AutoCad
1. Create a column schedule as shown in the figure.
- AIM: To create column schedule as shown in the figure
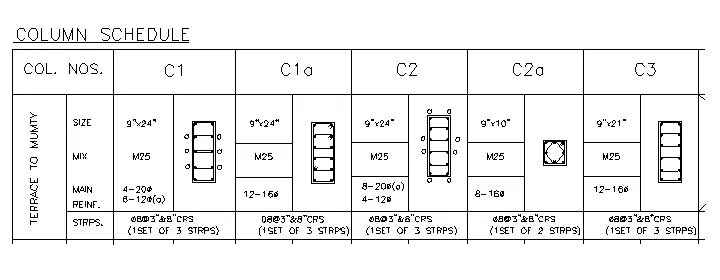
- INTRODUCTION:
Open AutoCAD Application and run
In command - type - QNEW
Select Imperial as default settings
Select Engineering as default units
- PROCEDURE:
In command - type - line to create table
In command - type - st - for font style - romans.shx (font name) - Height of the text as 8" - left justify
In command - type - text to text the given text in the figure
In command - type - Mtext - Right click to symbols - Select the desired symbol (diameter) required
- RESULT:
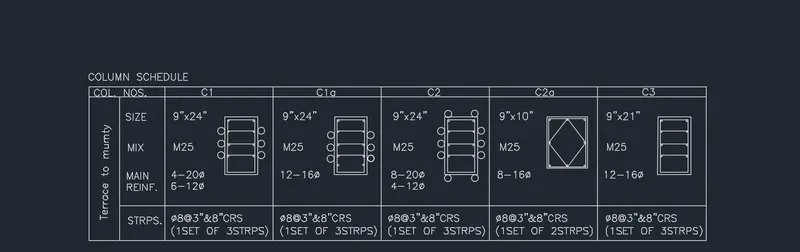
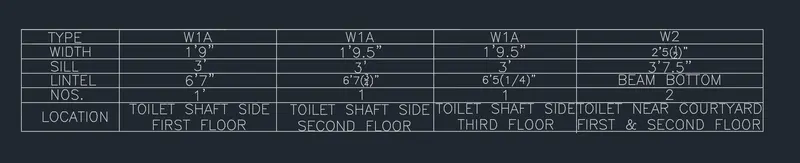
2. Create a window schedule as shown in the figures
- AIM: To create window schedule as shown in figure.
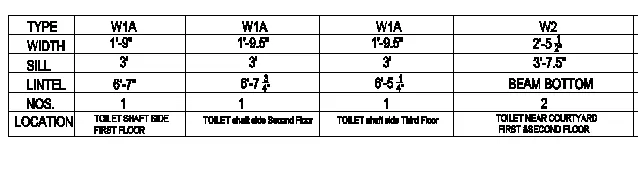
- INTRODUCTION:
Open AutoCAD Application and run
In command - type - QNEW
Select Imperial as default settings
Select Engineering as default units
- PROCEDURE:
In command - type - line to create table
In command - type - st - for font style - romans.shx (font name) - Height of the text as 8" - center justify
In command - type - text to text the given text in the figure
- RESULT:
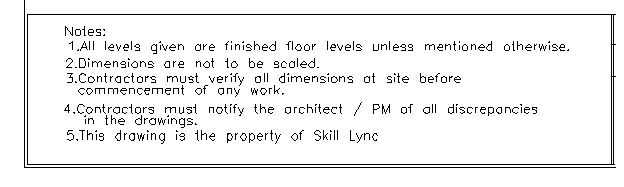
3. Create the drawing template as shown in the figure:< Use the Notes as in the figure>
- AIM: To create drawing template as shown in figure.
- INTRODUCTION:
Open AutoCAD Application and run
In command - type - QNEW
Select Imperial as default settings
Select Engineering as default units
- PROCEDURE:
In command - type - line to create table
In command - type - st - for font style - romans.shx (font name) - Height of the text as 8" - left justify
In command - type - text to text the given text in the figure
- RESULT:
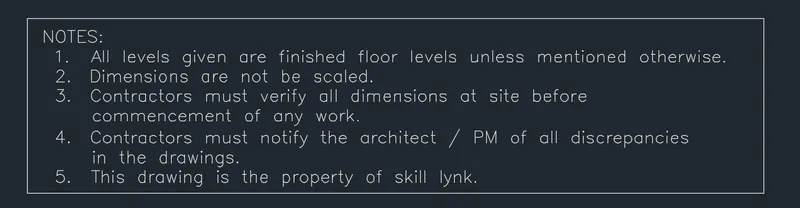
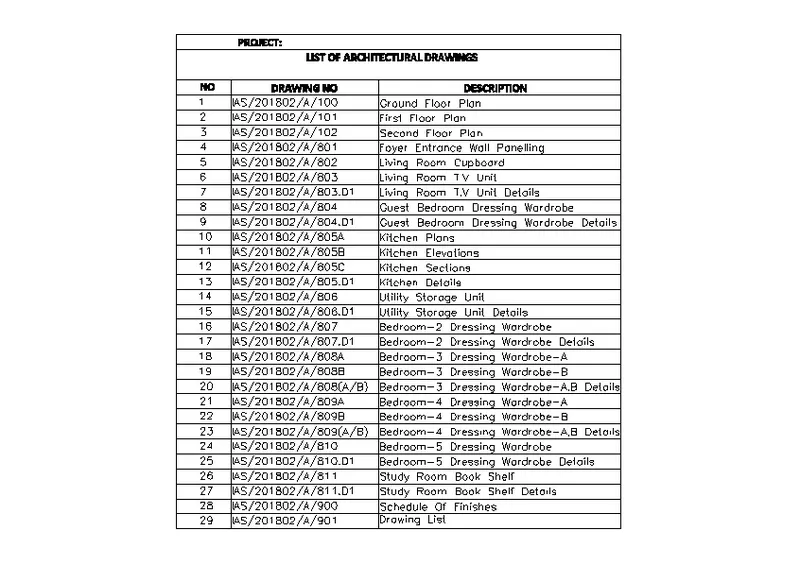
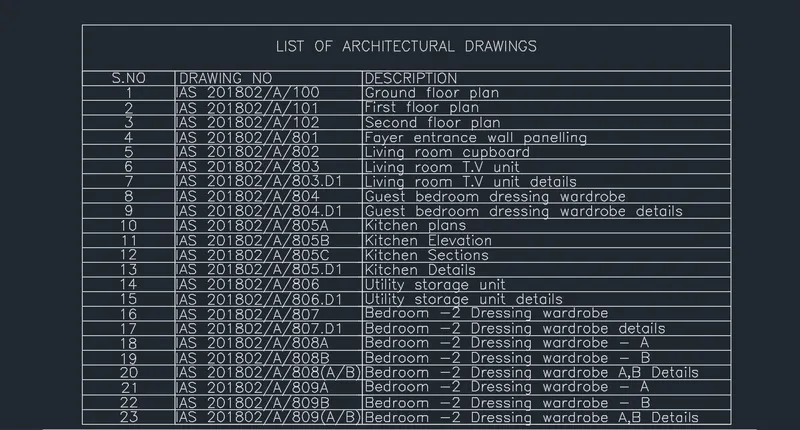
4. Create the list of drawing schedule as shown in the figure:
- AIM: To create list of drawing schedule as shown in figure
- INTRODUCTION:
Open AutoCAD Application and run
In command - type - QNEW
Select Imperial as default settings
Select Engineering as default units
- PROCEDURE:
In command - type - line to create table
In command - type - st - for font style - romans.shx (font name) - Height of the text as 8" - left justify
In command - type - text to text the given text in the figure
- RESULT:
5. Create the Beam detail as shown in the figure and provide text wherever given.
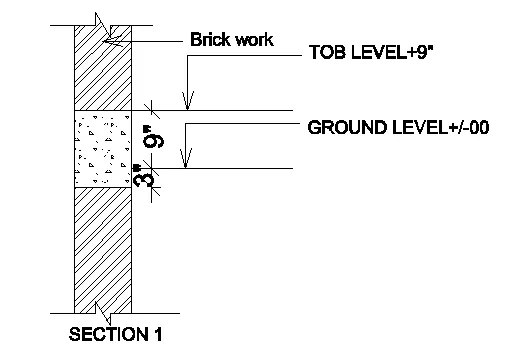
- AIM: To create beam detail as shown in figure.
- INTRODUCTION:
Open AutoCAD Application and run
In command - type - QNEW
Select Imperial as default settings
Select Engineering - Inches as default units
- PROCEDURE:
In command - type - line to create column
In command - type - text to text the given text in the figure.
In command - type - Hatch - to hatch the given segments in drawing.
And add pick up points before hatching
RESULT: