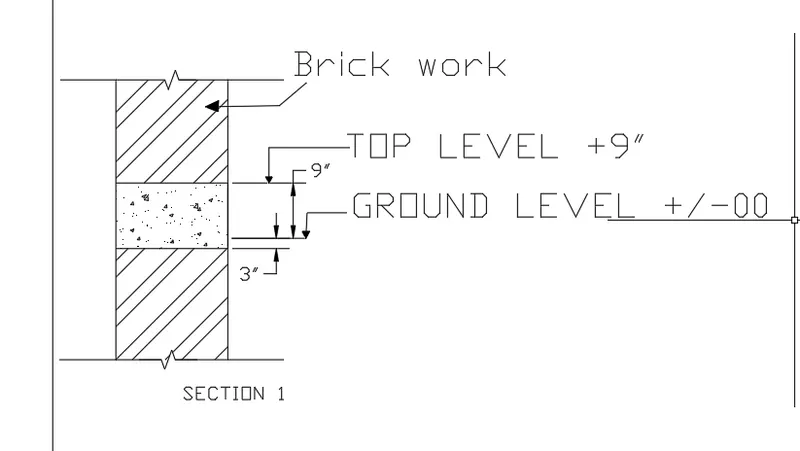
Creation of Column Schedule and Drawing Template using AutoCad
C1
AIM: To Create a column schedule as shown in the figure
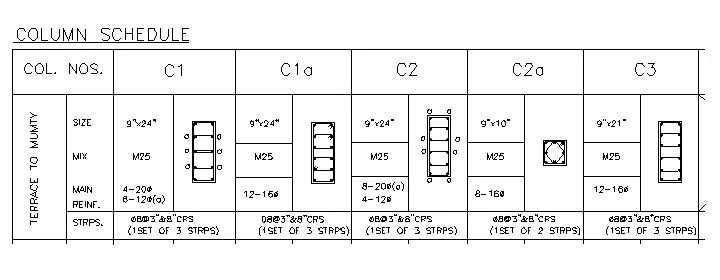
PROCEDURE:
STEP 1:
- Open AutoCAD software
- In command prompt type QNEW, set to DECIMAL,
- In command prompt type UNITS, precision = 0.00
STEP 2: ASSIGN OF GIVEN DATA
- In command prompt type ST, assign font name - Times New Roman and font height as 0.5
- In command prompt type TEXT, assign the given text in table
RESULT:
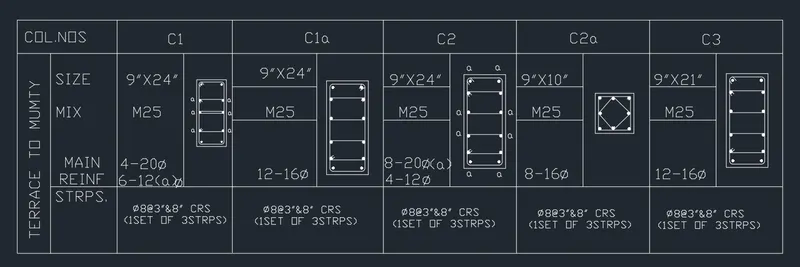
FROM LAYOUT 2
C2
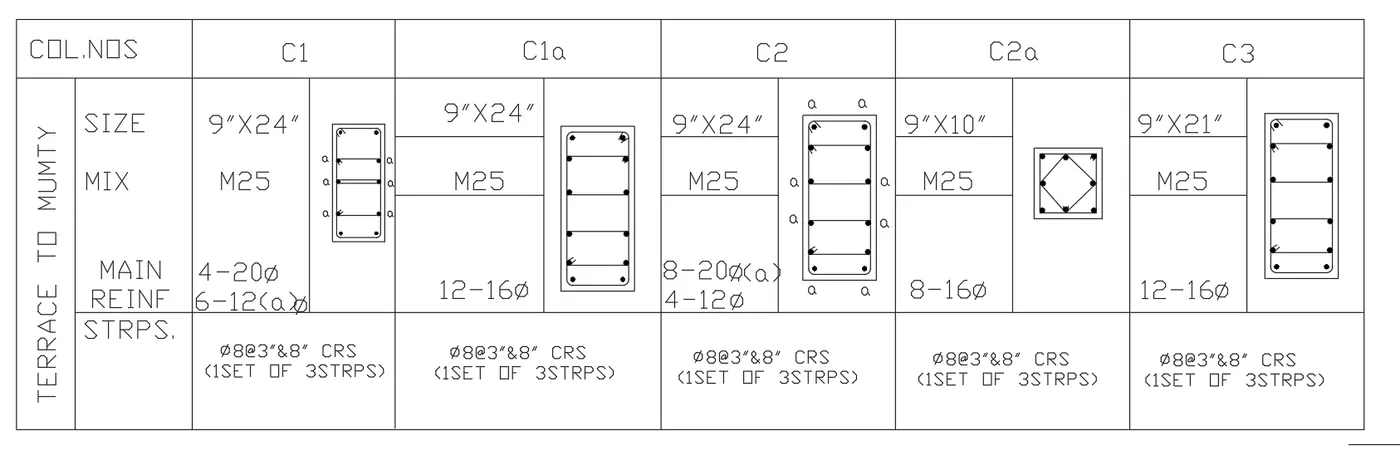
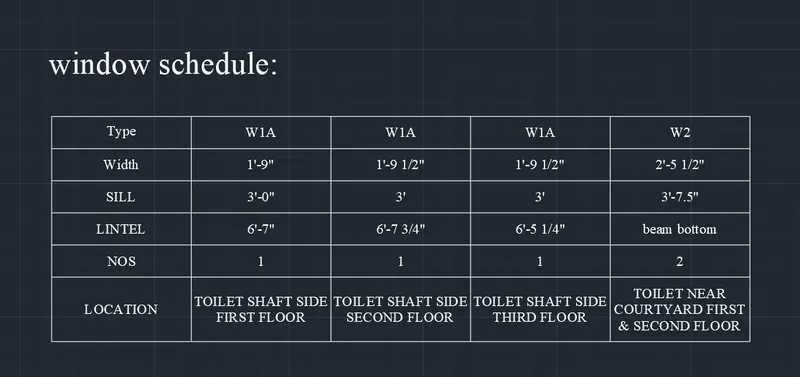
AIM: To create a window schedule as shown in the figures
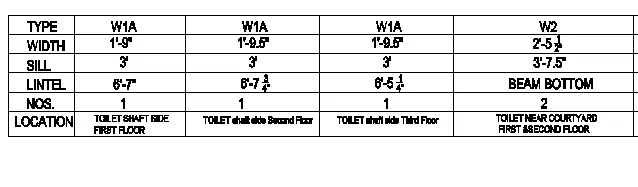
PROCEDURE:
STEP 1:
- Open AutoCAD software
- In command prompt type QNEW, set to Imperial,
- In command prompt type UNITS set to INCHES, precision = 0'-0 1/2"
STEP 2: In ribbon, select Annotate tab -> select table in tables -> Assign rows as 6 and row height as 2 -> Assign column as 5 and column width as 2.5 -> Select table style ->modify -> general -> Alignment -> middle centre; in text style -> select load -> Font name - Times New Roman and Font style - regular -> Apply -> Close -> OK -> Set current -> Close -> Ok -> delete unwanted rows and columns -> Assign the given data in table
RESULT:
C3
AIM:To create the drawing template as shown in the figure
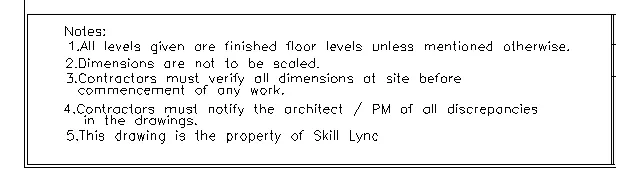

PROCEDURE:
STEP 1:
- Open AutoCAD software
- In command prompt type QNEW, set to DECIMAL,
- In command prompt type UNITS, precision = 0.00
STEP 2: ASSIGN OF GIVEN DATA
- In command prompt type ST, assign font name - Times New Roman and font height as 0.5
- In command prompt type TEXT, assign the given text in table
- In command prompt type REC, spread the rectangle over the text
- In command prompt type OFFSET, specify distance 0.2 and offset the rectangle
RESULT:
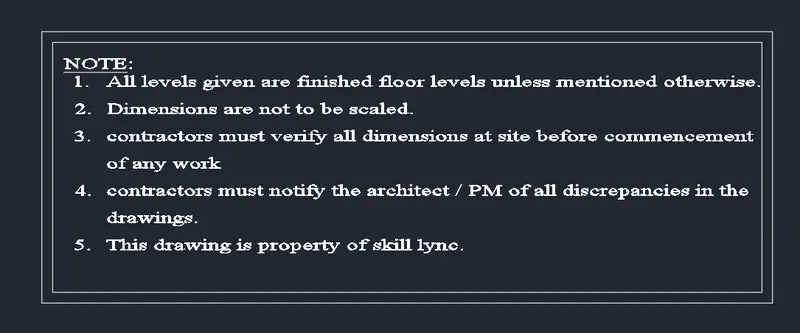
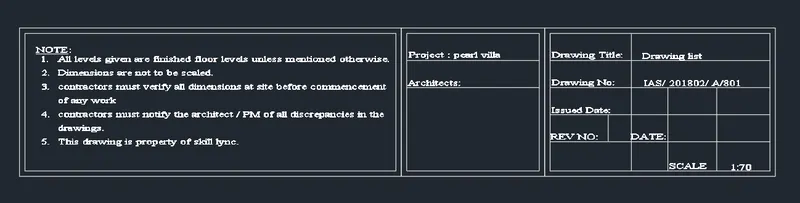
FROM LAYOUT 2
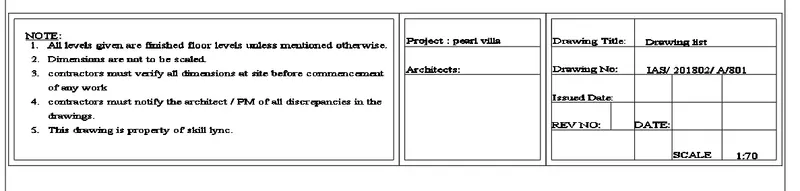
C4
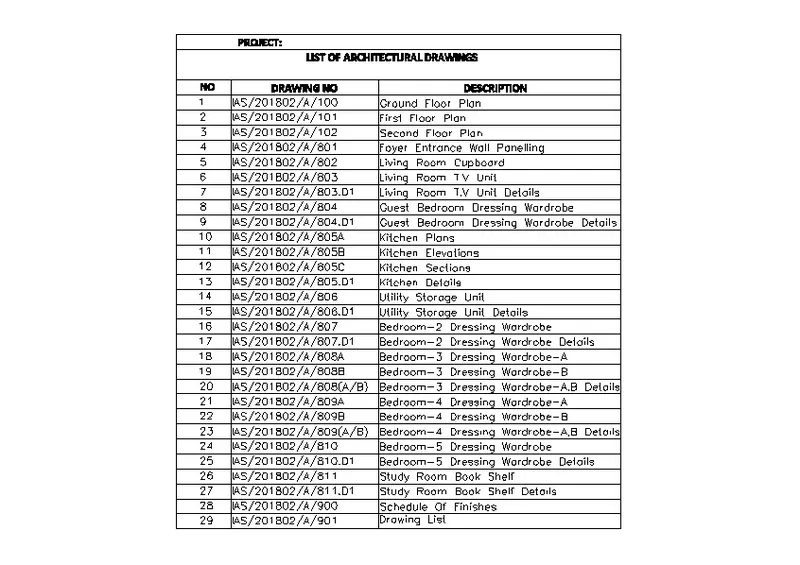
AIM: To Create the list of drawing schedule as shown in the figure
PROCEDURE:
STEP 1:
- Open AutoCAD software
- In command prompt type QNEW, set to DECIMAL,
- In command prompt type UNITS, precision = 0.00
STEP 2: CREATION OF TABLE
- In command prompt type XL, specify Horizontal line anywhere
- In command prompt type OFFSET, specify distance as 1 and select Multiple and assign offsets as per requried
- In command prompt type XL, vertical line anywhere
- In command prompt type OFFSET, specify distance as 3 and offset the previous line
- In command prompt type OFFSET, specify distance as 8 and offset the previous line
- In command prompt type OFFSET, specify distance as 15 and offset the previous line
- In command prompt type Trim, time the unwanted lines
STEP 3: ASSIGN OF GIVEN DATA
- In command prompt type ST, assign font name - Times New Roman and font height as 0.5
- In command prompt type TEXT, assign the given text in table
RESULT:
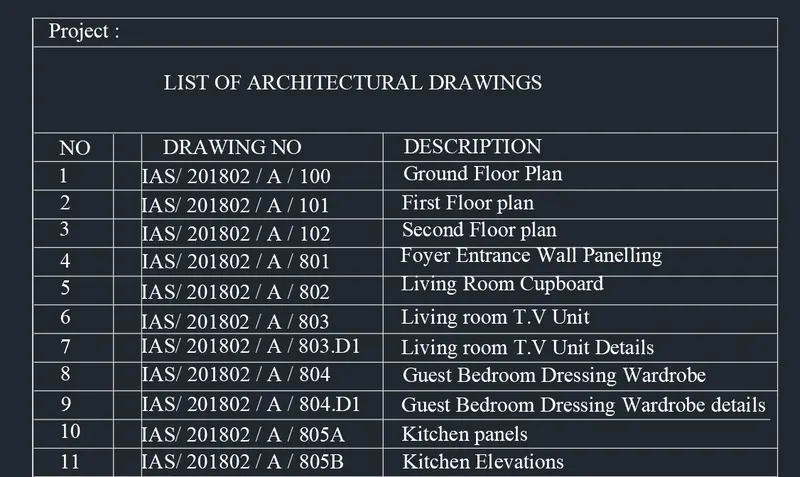
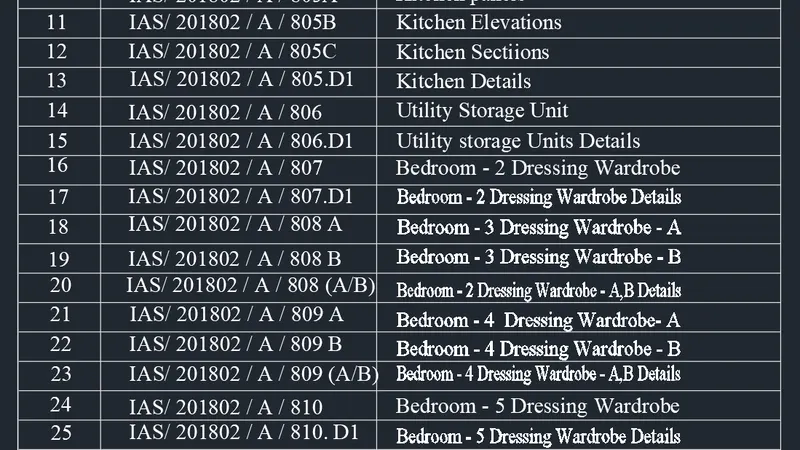
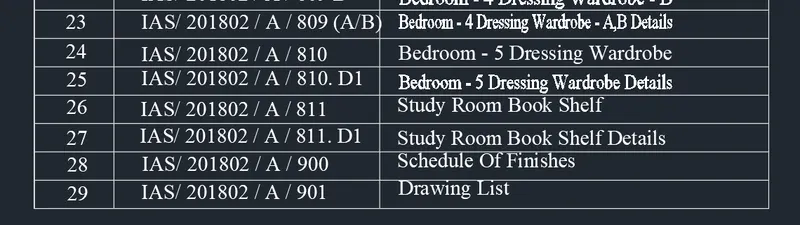
FROM LAYOUT 2
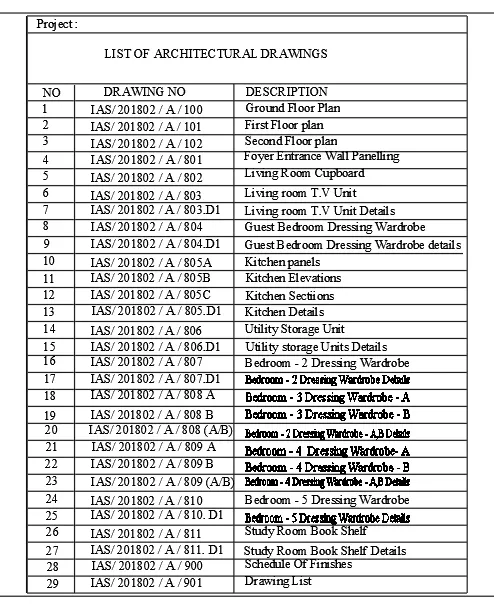
C5
AIM: To Create the Beam detail as shown in the figure
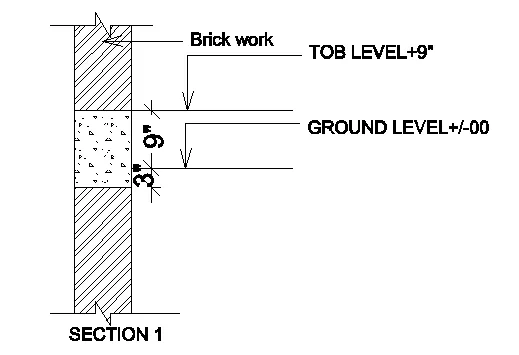
PROCEDURE:
STEP 1:
- Open AutoCAD software
- In command prompt type QNEW, set to Imperial,
- In command prompt type UNITS set to INCHES, precision = 0'-0.0"
STEP 2:
- In command prompt type LINE, specify point anywhere and assign values as @2'<0, @5'<90, @2'<180, @5'<270 and click close
- .In command prompt type HATCH, assign the required hatch details
- In command prompt type TEXT, assign the text given in diagram
RESULT:
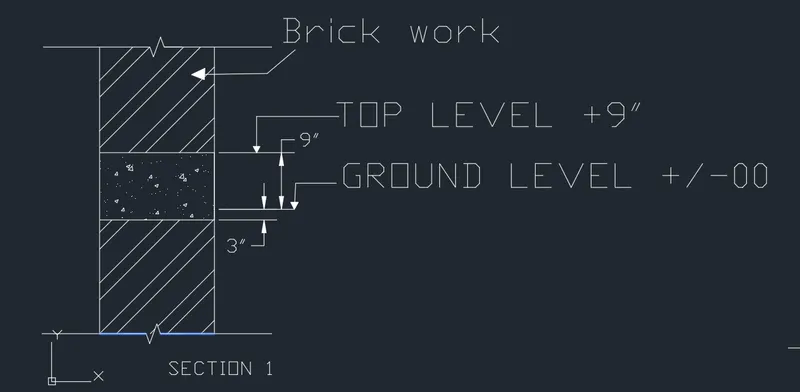
FROM LAYOUT 2