Creating Walls, Partition walls and Floors for a residential layout using REVIT
Q.1) Use the project file created from Week 2. Use it for this assignment. Based on your layout from week 2, using floor tool under architecture tab and select the floor with appropriate material and thickness using the property browser create a layout in the Ground floor Level. Align the floor plan with grids created from week 2.
AIM :-
To create the floor with appropriate material and thickness using the property brouser and create a layout in the ground floor level using revit software
INTRODUCTION :-
Using the file which is created from week 2 challenge and adding the floor with appropriate material from property Browser. Revit software is widely used for its 3D Modelling and drafting purpose in the industrial fields to make the work easy and comparatively more purposeful.
PROCEDURE :-
1. To create the floors open the project which we have created and then go to the architectural tab in which go to floor and select architectural floor
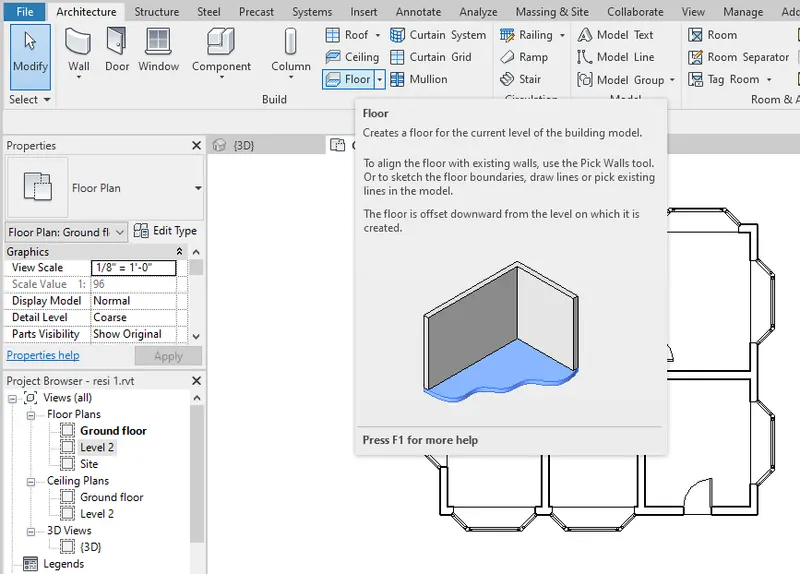
2. After that another tab opens in which select the boundary line as the pick lines option.
3. Then carefully selected the outer edges of the wall to create the floor for the plan.
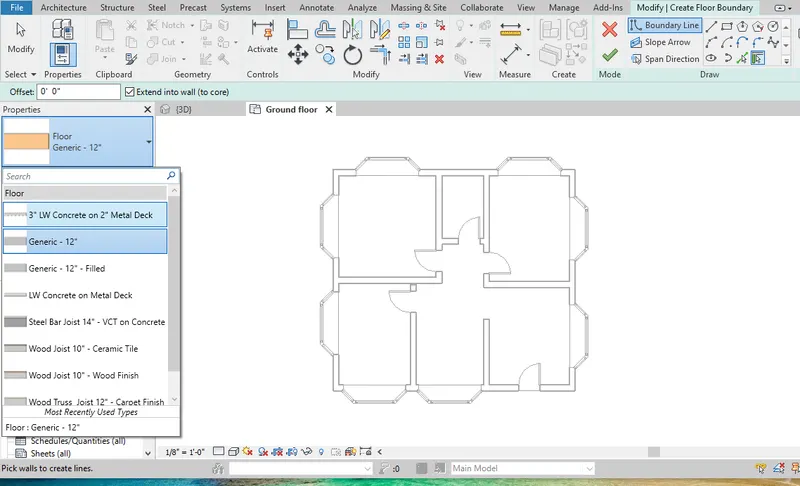
Now to change the material and thickness of the floor
Go to the property Browser and then go to edit type option.
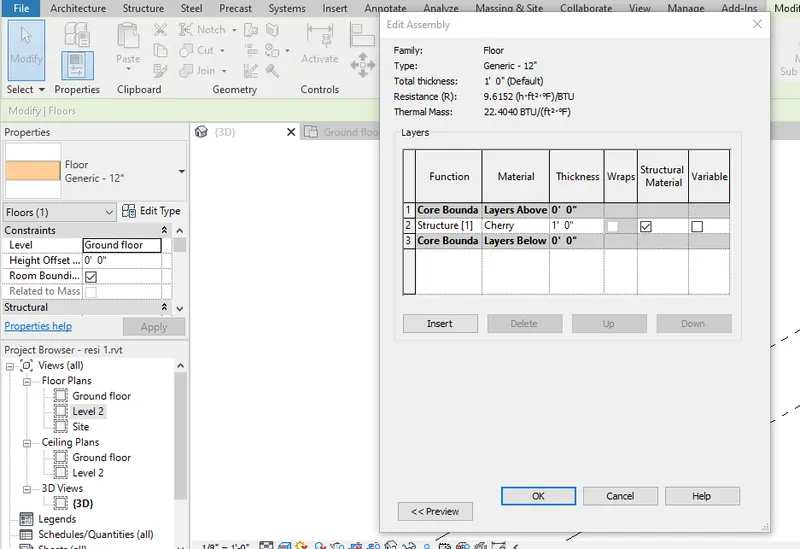
Then a dialogue box will open. Go to structure and select edit
Now you can select different materials for the floor and hence they can be applied by clicking on the apply and ok option.
Similarly to change the thickness of the floor go to the same edit type option and then go to
the structure and click on edit option there you will get the option to change the thickness of the floor.
Q.2) Add walls based on the floor layout. Pick lines or use the draw tool to modify the boundary of walls. Use the property browser to select appropriate material and thickness for walls. After creating the walls verify using the property browser to see if the top and bottom of the walls are constrained.
AIM:-
To add walls based on the floor layout and also use the property browser to select appropriate material and thickness for walls.
INTRODUCTION :-
Revit software is widely used for its 3D Modelling and drafting purpose in the industrial fields to make the work easy and comparatively more purposeful. We can do many things related to building construction modelling Structure Analysis etc
PROCEDURE :-
As we have already created the walls layout in the previous assignment but the steps are as follows
1. To create wall go to the architecture tab and then go to the wall option and select architectural wall
2. After selecting architectural wall a Ribbon tab opens in which select the line tool to draw the wall.
3. Draw the walls as per the dimensions you are using or mentioning in the figure.
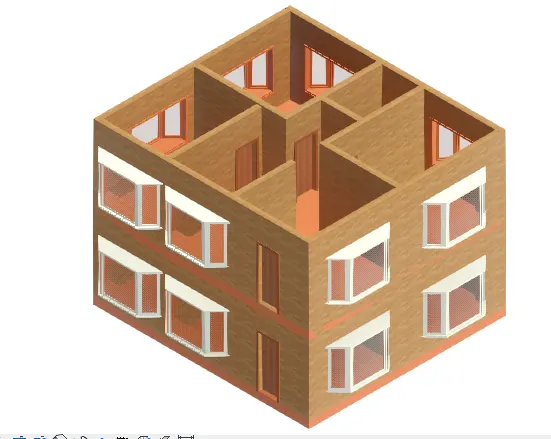
4. After creating the walls now select the walls to change their properties and material.
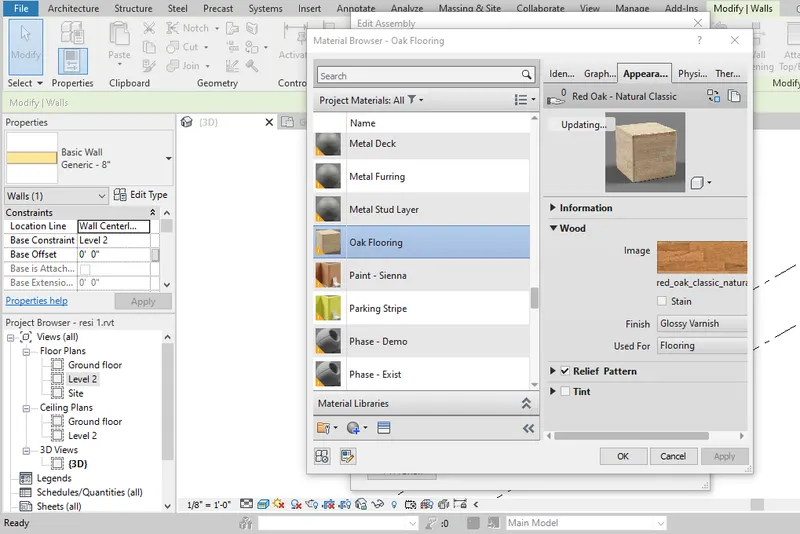
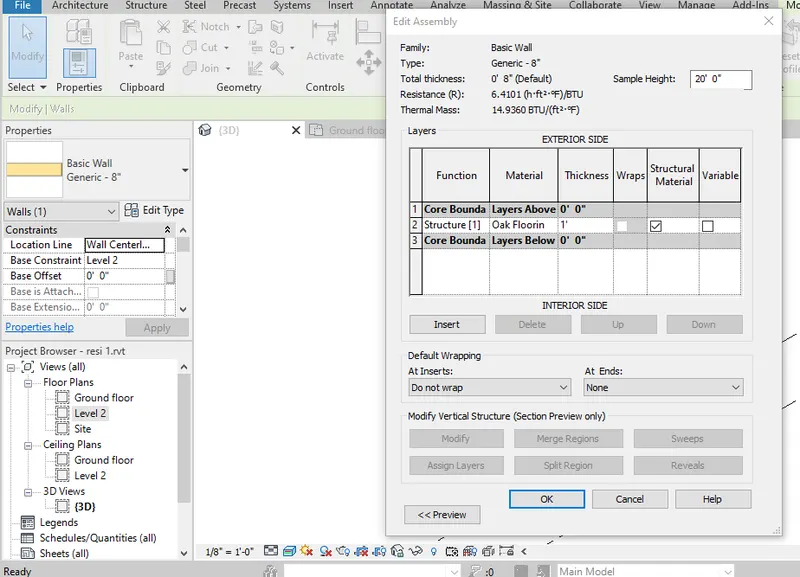
After the selection of the walls go to the edit type option which is available on the properties Browser and then a dialogue box opens
Then from the structure parameter, click on the edit option , and then the dialogue box again opens
After that go to the material and select whatever material you want from the material Browser and click on apply to apply the material.
To change the thickness of the wall go to the thickness tab which is available on the dialogue box only and click on the thickness tab and edit the value as per your requirement.
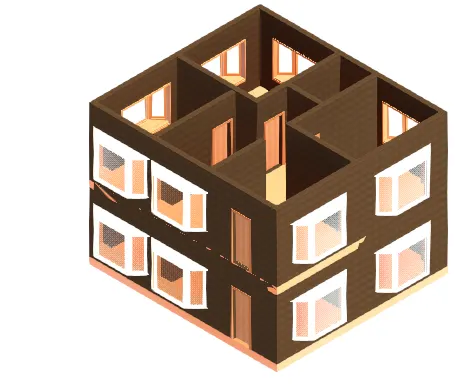
Q.3) Copy the model elements ( wall, floor ) modelled to Ground Floor Level and paste it aligned to First Floor Level . Use modify tab to utilize copy and paste options to align
elements to a different level.
AIM :-
To copy the model elements that is wall and floor from the ground floor level and paste them to the first floor level.
INTRODUCTION :-
Revit software is widely used for its 3D Modelling and drafting purpose in the industrial fields to make the work easy and comparatively more purposeful. We can do many things related to building construction modelling Structure Analysis etc
PROCEDURE :-
To copy the ground level to the first floor level following steps are to be taken.
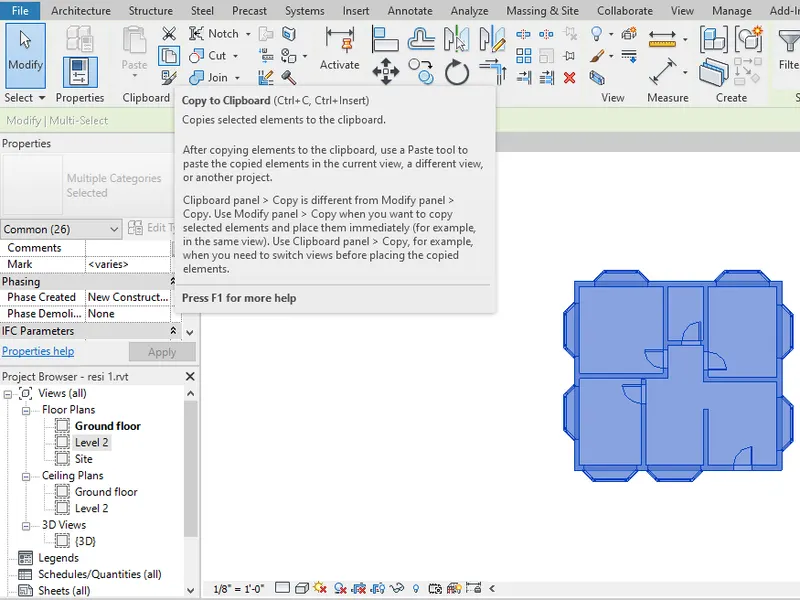
The first step involves is to select the ground level.
After selecting go to the tab where will the modified tabel open and hence the Ribbon tab will be changed.
Then go to the copy to clipboard option
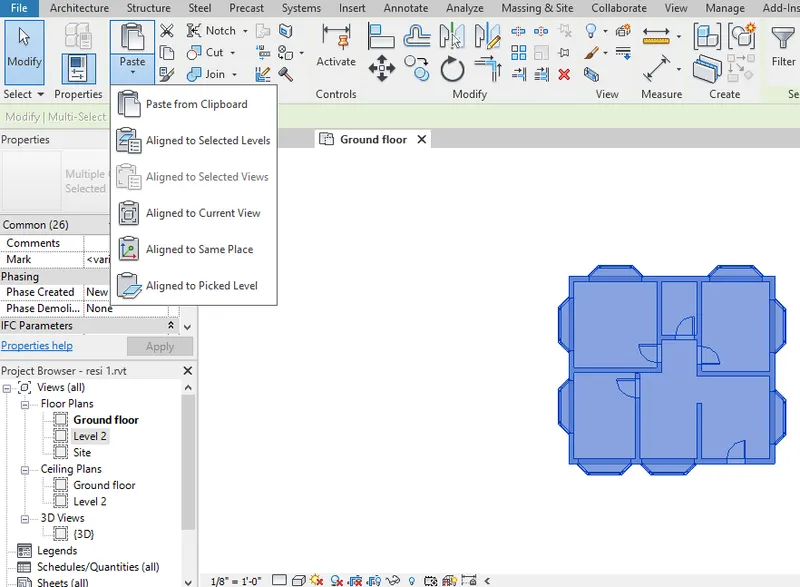
After that go to the paste option and drop down it and after dropping it down there occurs different options, select the align to selected levels option and click on that.
Now you will see that your ground floor level has been copied to the first floor level whatever part you have been selected.
To change the material of floor ,
Select the floor
go to edit type on the properites browser
After that select the required floor material from the material browser and click on the ok to see the change of material in the project.
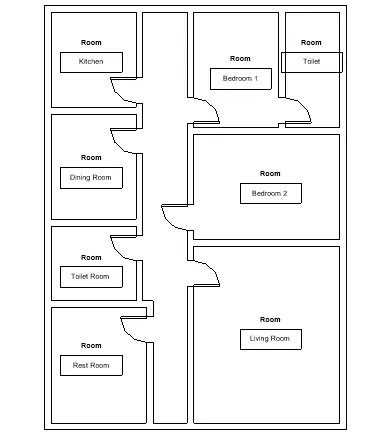
Q.4) Use interior partition walls to create separate rooms within your residential unit. The model must include the following rooms
a. Living Room/ Drawing Room ( 15’ X 18’)
b. Dining Room (9’ X 11’)
c. Bed Room ( 9’ X 12’ and 15’ X 11’)
d. Rest Room ( 10’ X 12’ )
e. Kitchen (8’ X 10’)
AIM :-
To create the internal partitions wall and to separate rooms and also have the given room types.
INTROCUTION :-
Revit software is widely used for its 3D Modelling and drafting purpose in the industrial fields to make the work easy and comparatively more purposeful. We can do many things related to building construction modelling Structure Analysis etc
PROCEDURE :-
As in our previous assignment we have already created rooms for our project.
So,
as rooms are created , let's mention the rooms by using the room tab in the architectural tab.
Go to architectural tab and then select the room option
After that provide the different room types as per your convenience or need or if you want to add a room separator between any room then you can do so by going to the room separator option.
Hence our rooms have been created and to rename them just double click on the name and provide the proper name for that room so that it would be identified.
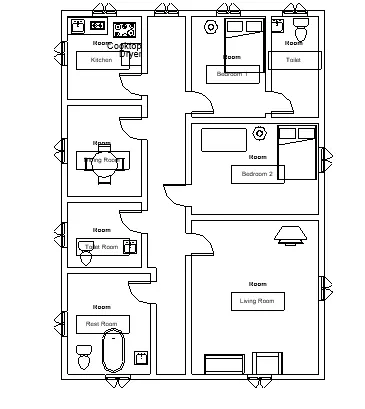
Q.5) Based on week 2 assignment, the components to be included in a residential unit were inserted to the Revit file. Place these components in appropriate locations to add details to your residential model.
AIM :-
To insert the different components in the residential unit using the revit file as given im question.
INTRODCUTION :-
Revit software is widely used for its 3D Modelling and drafting purpose in the industrial fields to make the work easy and comparatively more purposeful. We can do many things related to building construction modelling Structure Analysis etc
PROCEDURE :-
To place the different components go to the architectural tab and then go to the component option where select place a component.
After dialogue box open then go to the preferred file location where you are downloaded the files and then place them wherever there required.
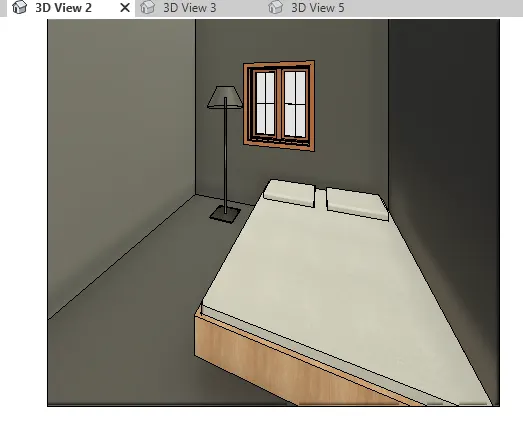
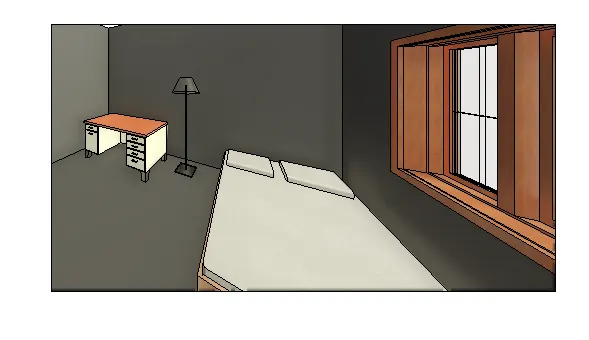
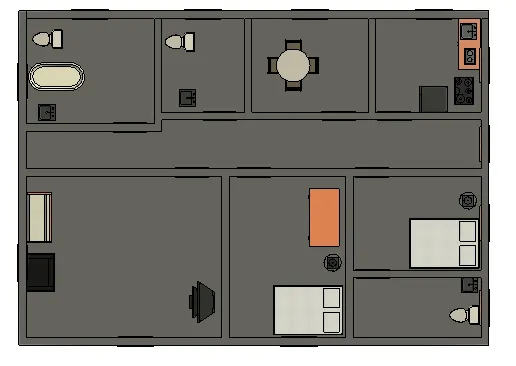
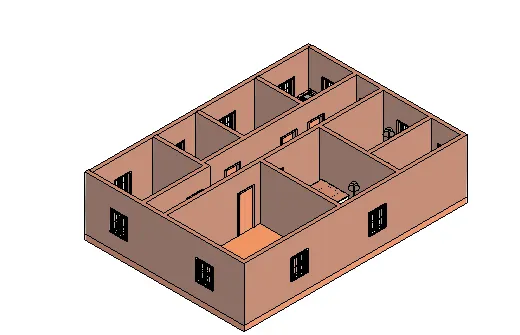
I have added some of the camera views which are rendered after placing the components in the different rooms.
RESULT :-
Given objectives are created using revit software.