Creating Walls, Partition walls and Floors for a residential layout using REVIT
TASK 1:
AIM:
To create a Floor and Edit the Materials & Thickness of the floor.
PROCEDURE:
STEP: 1 Creating the Floor.
- Now we will Continue the task 1 with the same Project file Challenge - 2.
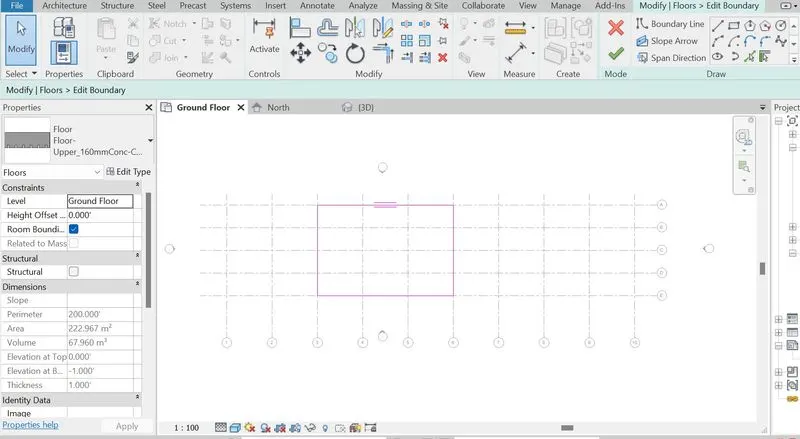
- Click the Architectural Floor in the Architectural Tab under the Build option.
- After Clicking the Architectural Floor, the Architectural Tab will be shifted to Modify / create the floor boundary Tab.
- In the Modify tab we will have the Draw Floor option like Line, Rectangle, Circle, Arc,pick lines, etc.,
- Among these option we can choose any one Tool to Draw the Floor Boundary.
- I will choose rectangle tool since my layout is Rectangle.
- After selecting the draw tool we will any one corner of the Layout the Opposite coner of the Layout which covers the Layout completly.
- After Drawing the Floor check all the edges and Corners have closed loops without any intersections.
- After confirming Click the Finish edit Mode option, which we can see before the Draw tool with Green Tick.
- After Clicking the Green Tick Floor has been Created in the Layout.
STEP: 2 Editing the Floor Materials and Thickness.
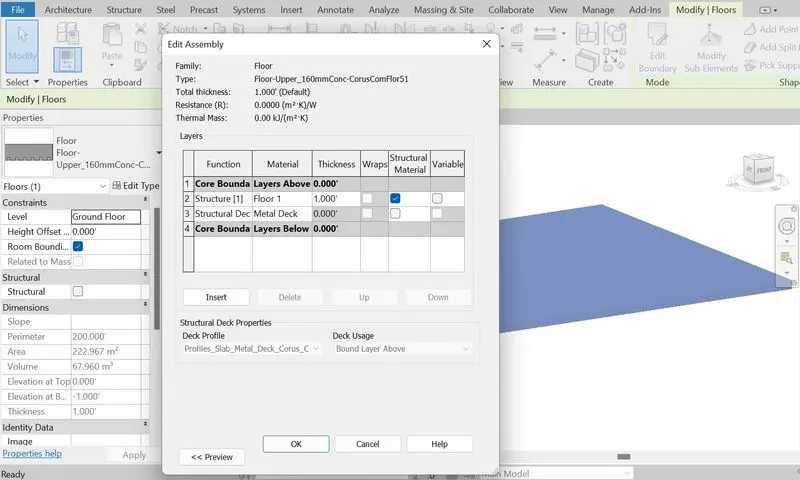
- Select the Floor, Click the Edit type in the Properties Browser.
- Revit will open a tab in the name Type Properties.
- Type Properties is the tab where we are going to edit the floor.
- In the Type Parameters under the Construction tab, we will have Edit option in Structure.
- Clicking the edit option we will have a tab as edit assembly were we can Edit the thickness for the Floor which is in the 2 row Structure [1].
- Change the Thickness as 1 feet and the give Apply.
- After changing the thickness we can edit the Floor materials.
- Under the Materials in the same Edit Assembly Tab, we can Edit the Floor Material by clicking the materials in the 2 row Structure [1].
- By clicking the materils will have "..." this option, click that 3 dots we will be taken to a New browser called Material Browser.
- In the Material Browser we have an option to create a New material under the Open/ Close Material editor option which is located in the Bottom Left of the Material browser.
- After creation of New material. Select that New material in the material browser rename as Floor 1. And then click the Asset browser which is next to the Material Edit option.
- We will have a new Tab naming Asset Browser. In the Left side of the asset Browser, Click the Appearence Library under the Document assets.
- Select the Flooring option under the Appearence Library, we will have multiple type of Materials like Wood, Stone, Tile, Carpet and Vinyl.
- Select any one of the Material and give Apply and the give OK.
- Click OK of all the other tabs till we reach the workspace.
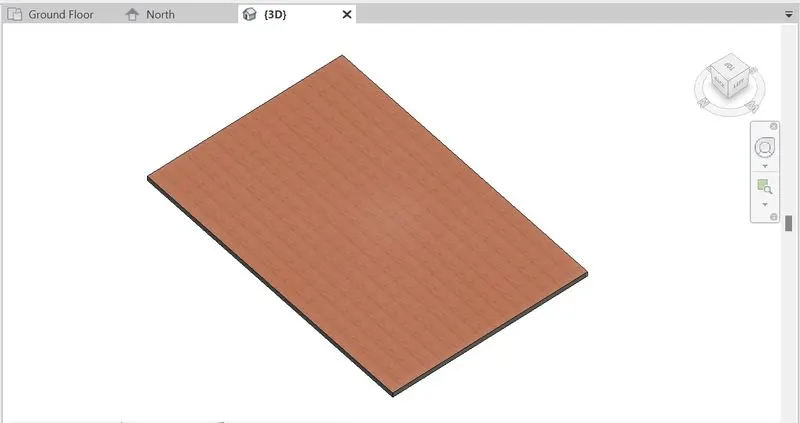
- After changing the Model Display option to Realistic Mode in the 3D view we can See the Material Change in the Project.
TASK : 2
AIM:
To add Walls on the Floor Layout by using Pick lines or Draw tool and Check the Top abd bottom of the Walls are Constrained.
PROCEDURE:
STEP : 1 Adding of walls in the floor Layout.
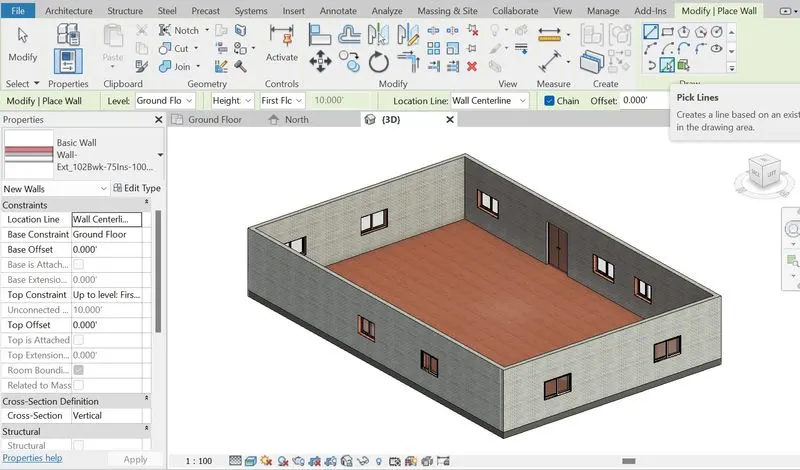
- open the Ground Floor Plan. Click the Wall. we will be to Modify tab - Place the Wall.
- We can Place the wall using the Pick lines which has its own unique coloue green Line in the Draw tool.
- Selecting the Pick lines tool we can select the edges of the floor to Place the wall.
STEP : 2 Adding of Wall Materials and changing of wall Thickiness.
- Select the Wall which we have been placed in the Layout. Click Edit Type in the Properties Browser.
- In the edit type Under the type parameters click Edit in the Structure.
- In the Edit assembly Under the thickness option, Enter the thickness value according to the project.
- After entering the value click Apply.
- Now we can change the material by clicking the "..." this option, click that 3 dots - we will be taken to a New browser called Material Browser.
- We can change the Material from the Material Browser as we did for the Floor.
- After Selecting the material. Click Apply and then Click OK.
- Click Ok untill our changes are Visible in the Workspace of the Floor Plan or in any of the views.
- Select the Wall and check in the properties for the base and top Constraints.
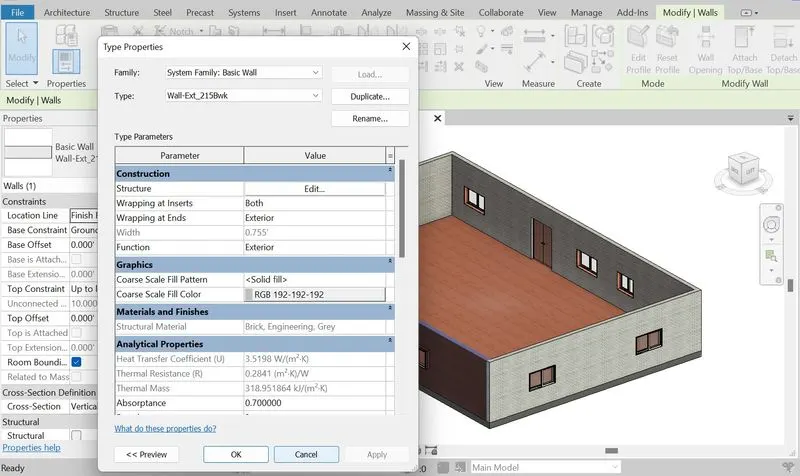
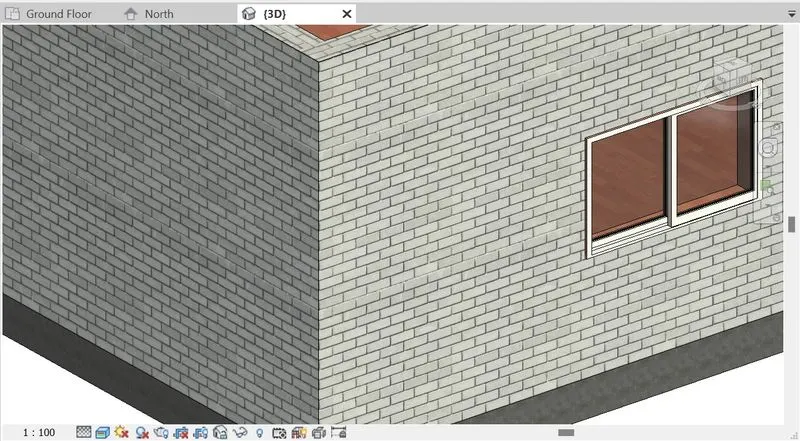
a. If the wall were unconnected we will have a choice of placing the wall as double count and If we change the height of the level the wall will remain in same height. If the we assiociate with the Levels we can be free from double count and we can change the Level height also wall will be connected to levels. If the
b. By Height option is convenient for modeling walls.
TASK - 3
AIM:
To copy and paste the modelled Ground Floor level to the First Floor Level.
PROCEDURE:
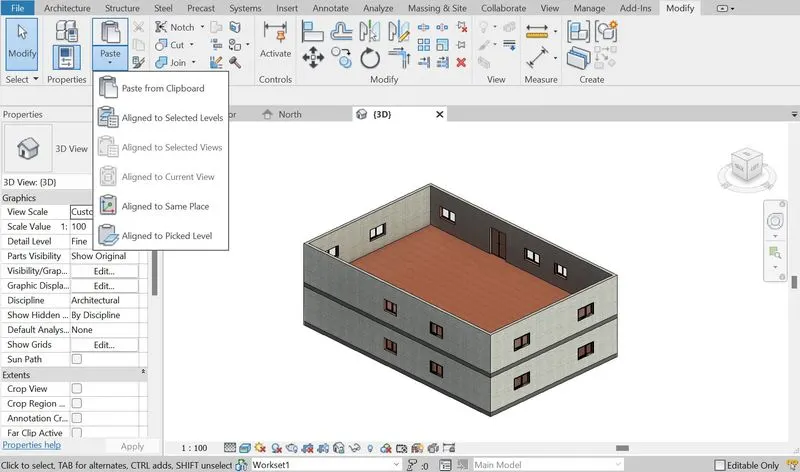
- Select the modelled Floor and Walls - in the ribbon tool bar under the modify tab we have an option called clipboard.
- In the clipborad option we have a tool called Copy to clipboard.
- Copy the model by clicking the copy to clipboard option.
- In the same Clipboard option we will have Paste option Just drop the down arrow and select paste to aligned to selected Levels.
TASK : 4
AIM:
To create a partition walls to seperate desired Rooms.
PROCEDURE:
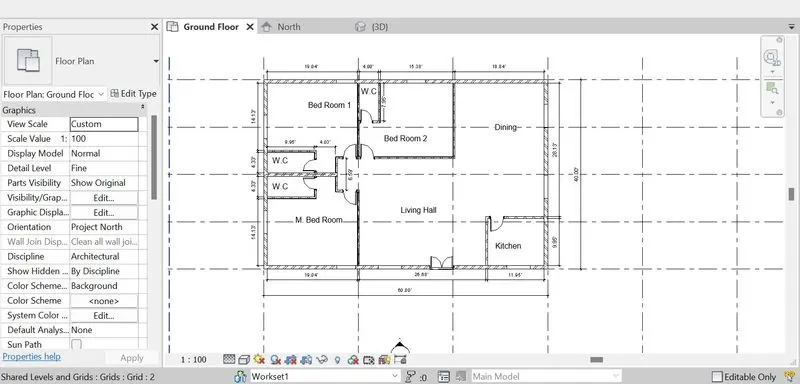
- Click the walls in the Architectural Tab.
- In the Properties Browser Select the wall element to Interior wall.
- Now Place the Interior Wall as the partition with appropriate room sizes.
- Use the Annotate tab to give the dimension by using Linear or Aligned Dimension to detail the Layout.
TASK : 5
AIM:
To place the Components which required for the room in the Residential Unit.
PROCEDURE:
- Click the components in the Ribbon tool.
- Search for the requied Components like Bed for Bed rooms.
- The components are available since we have loaded already in the previous Challenge.
- After selecting the component Place the components in the appropriate Place and position.
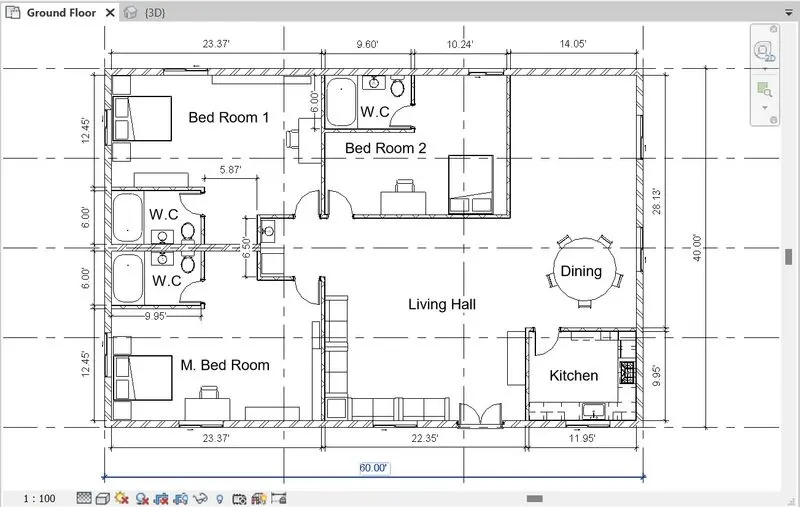
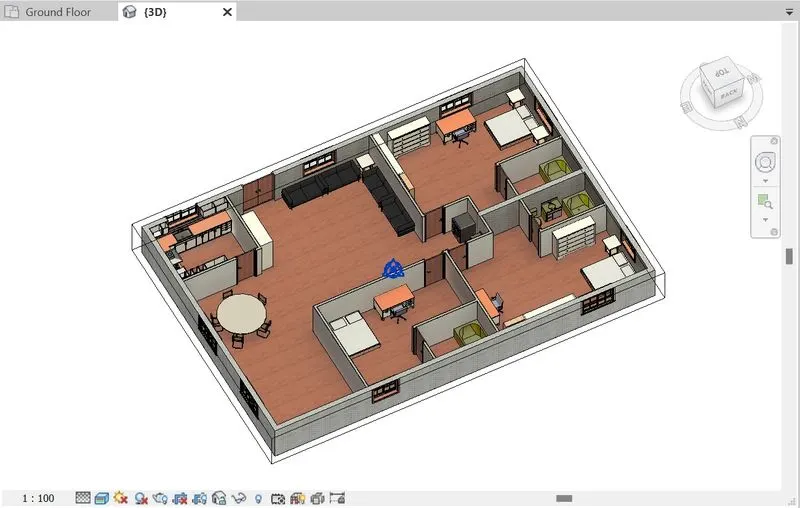
Thus the Challenge 3 has been completed.