Creating Walls, Partition walls and Floors for a residential layout using REVIT
Creating Walls, Partition walls and Floors for a residential layout using REVIT
1) Use the project file created from Week 2. Use it for this assignment. Based on your layout from week 2, using floor tool under architecture tab and select the floor with appropriate material and thickness using the property browser create a layout in the Ground floor Level. Align the floor plan with grids created from week 2.
AIM:
To create layout, walls, floors, place some components in each rooms, doors and windows in appropriate places. Also, explain the procedure step by step and obtain the result.
INTRODUCTION:
Revit is a BIM (Building Information Modelling) software to drive efficiency and accuracy across the project lifecycle, from conceptual design, visualisation and analysis to fabrication and construction.
Begin modelling in 3D with accuracy and precision.
Automatically update floor plans, elevations and sections as your model develops.
PROCEUDRE:
- Open the Revit software.
- Open the previous week 2 challenge.
- The layout has already been created in the week 2 challenge itself.
- The following picture is the snap of week 2 challenge.
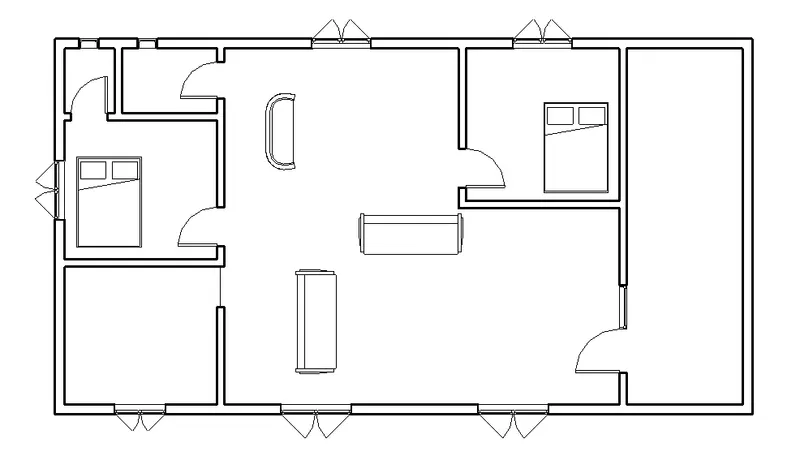
- Now, to create floor.
- Go to architectural tab - select floor - pick the lines for the floor to be stretched - and finish edit mode.
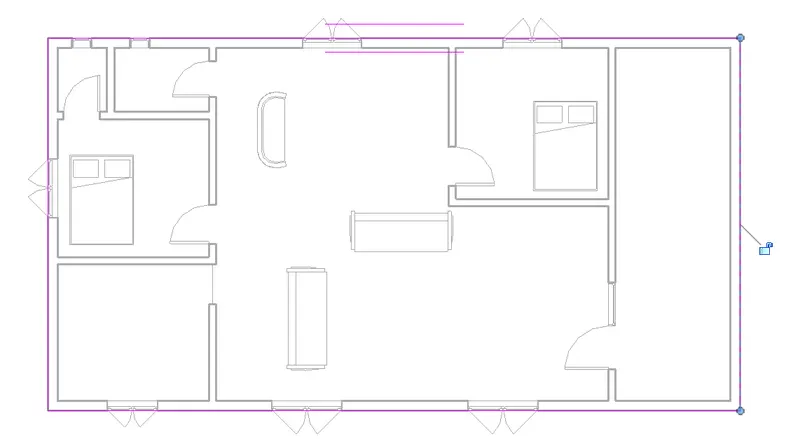
- The following image shows the floor created based on the boundaries given.
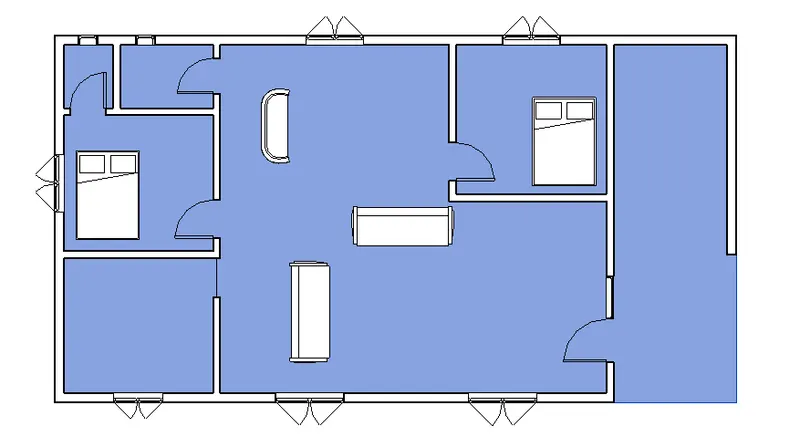
- Now, select the floor created - go to properties browser - and click edit type.
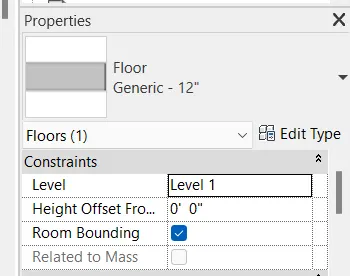
- In edit type, choose the materials which you want and select ok and give apply and ok.
- Here, I have chosen Concrete material.
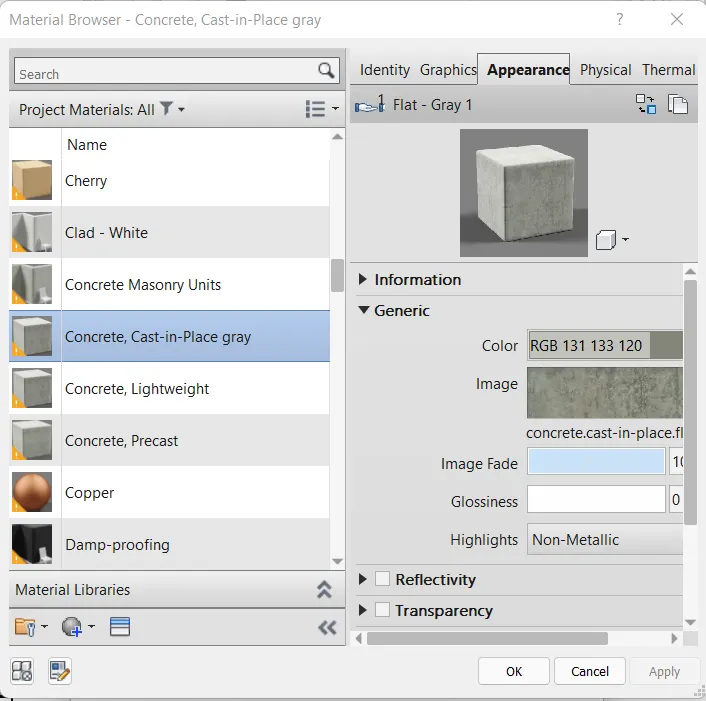
- Again, go to edit type, edit structure and change the thickness as per your design.
- Here, I have taken 8" thickness.
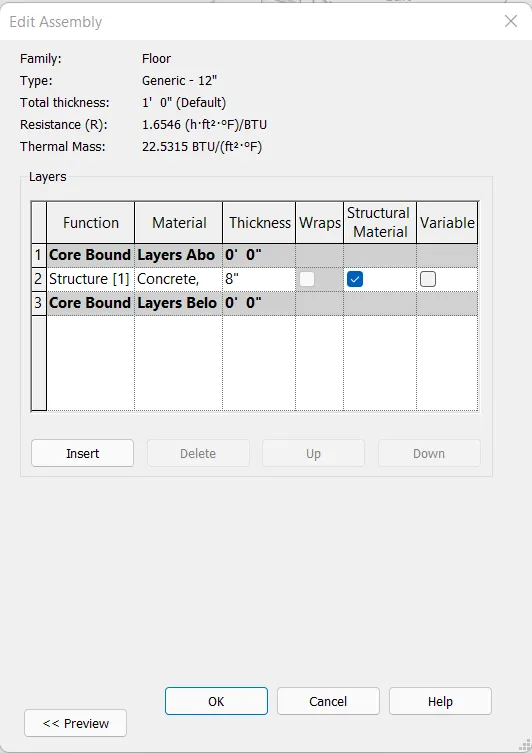
- The following image shows the 3D view of the CONCRETE FLOOR created.
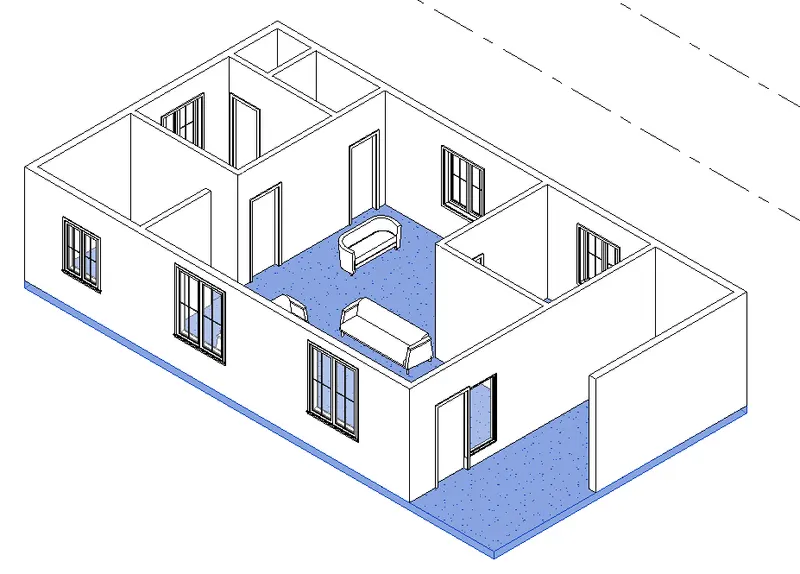
RESULT:
2) Add walls based on the floor layout. Pick lines or use the draw tool to modify the boundary of walls. Use the property browser to select appropriate material and thickness for walls. After creating the walls verify using the property browser to see if the top and bottom of the walls are constrained.
AIM:
To create layout, walls, floors, place some components in each rooms, doors and windows in appropriate places. Also, explain the procedure step by step and obtain the result.
INTRODUCTION:
Revit is a BIM (Building Information Modelling) software to drive efficiency and accuracy across the project lifecycle, from conceptual design, visualisation and analysis to fabrication and construction.
Begin modelling in 3D with accuracy and precision.
Automatically update floor plans, elevations and sections as your model develops.
PROCEUDRE:
- Open the Revit software.
- Open the previous week 2 challenge.
- The layout has already been created in the week 2 challenge itself.
- The following picture is the snap of week 2 challenge.
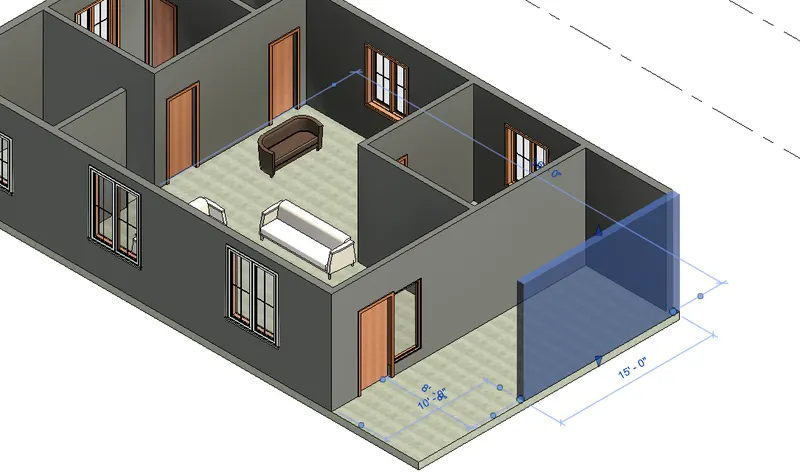
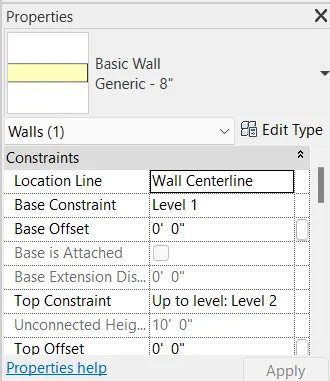
- Select the wall created - go to properties browser - insert the top constraint as LEVEL 2 and change the thickness and material as per your wish in the edit type box.
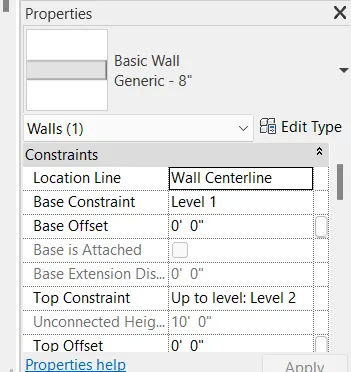
- Slect EDIT TYPE - go to structure edit and open the CATEGORY.
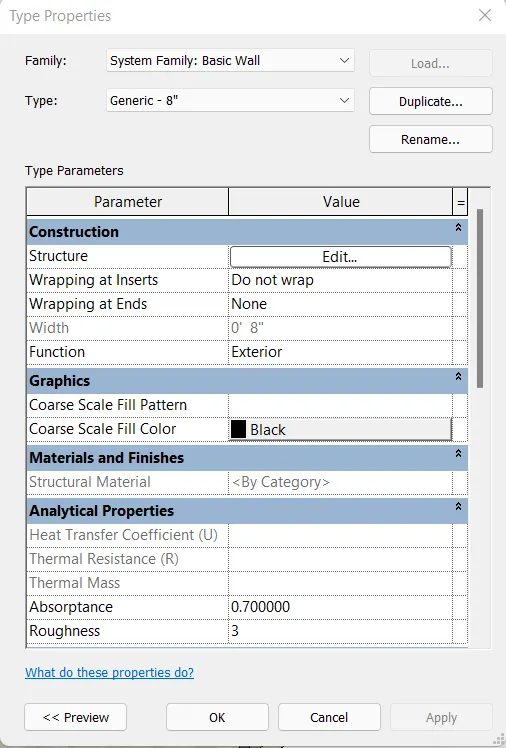
- Choose the material which you want and give apply and ok.
- Here, I have selected softwood lumber.
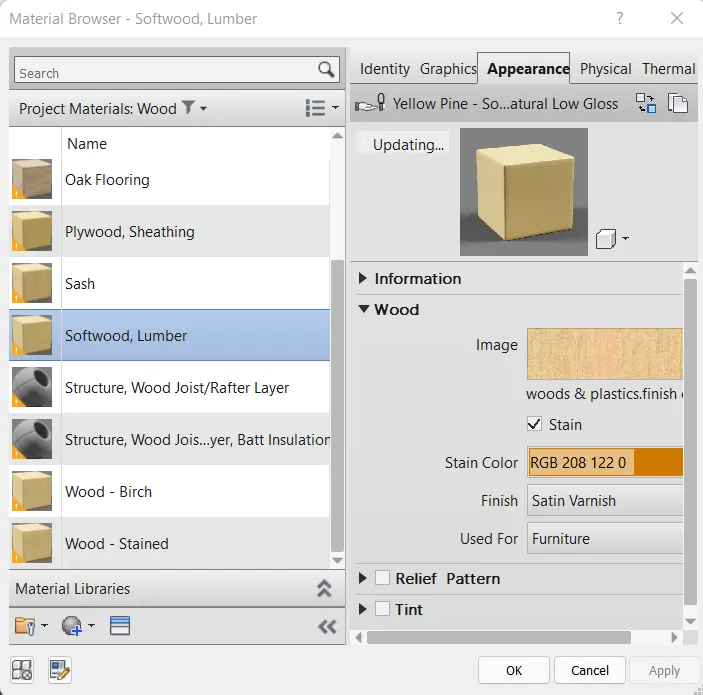
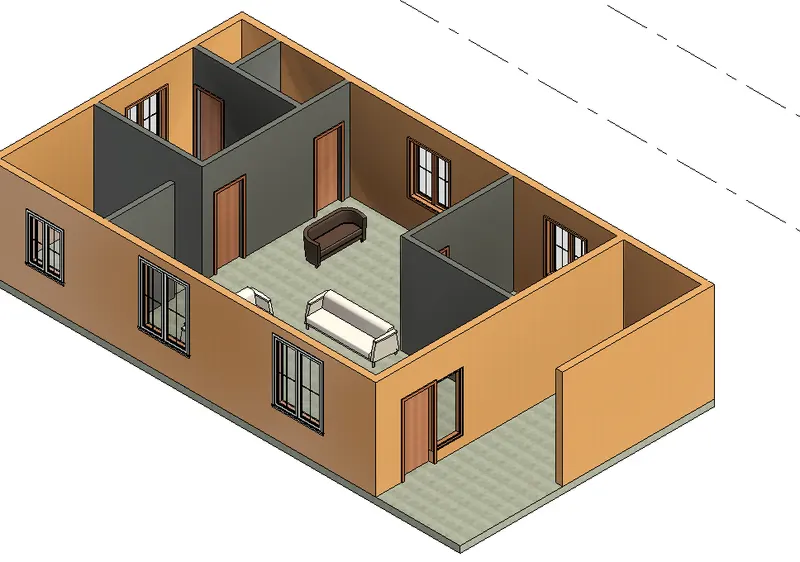
- The following image shows the wall material change.
- Again go to EDIT TYPE and change the thickness as per your design.
- Here, I have selected 8" thickness wall.
RESULT:
3) Copy the model elements ( wall, floor ) modelled to Ground Floor Level and paste it aligned to First Floor Level . Use modify tab to utilize copy and paste options to align
elements to a different level.
AIM:
To create layout, walls, floors, place some components in each rooms, doors and windows in appropriate places. Also, explain the procedure step by step and obtain the result.
INTRODUCTION:
Revit is a BIM (Building Information Modelling) software to drive efficiency and accuracy across the project lifecycle, from conceptual design, visualisation and analysis to fabrication and construction.
Begin modelling in 3D with accuracy and precision.
Automatically update floor plans, elevations and sections as your model develops.
PROCEUDRE:
- Open the Revit software.
- Open the previous week 2 challenge.
- The layout has already been created in the week 2 challenge itself.
- The following picture is the snap of week 2 challenge.
- Select the Entire drawing created in the level 1 - and choose COPY TO CLIPBOARD option the architectural tab.
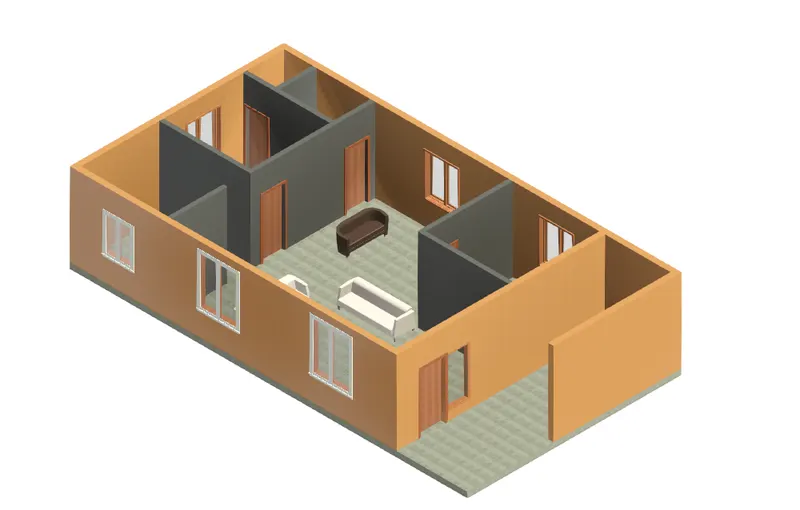
- Now, choose PASTE option in the architectural tab - select copy to selected levels - And select LEVEL 2.
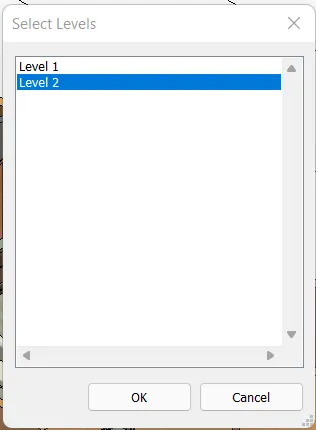
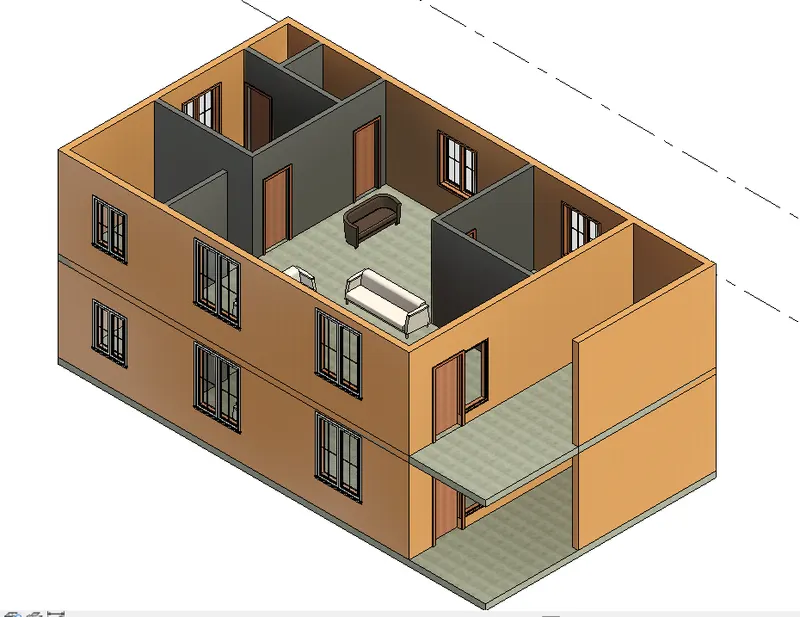
- Now, the first floor walls, floors and elements have been copied in the level 2 as shown in the figure.
- The following image shows the 3D image of the drawing with first floor and second floor.
- Using Roof too from the architecture tab, I have created roof to cover the second floor.
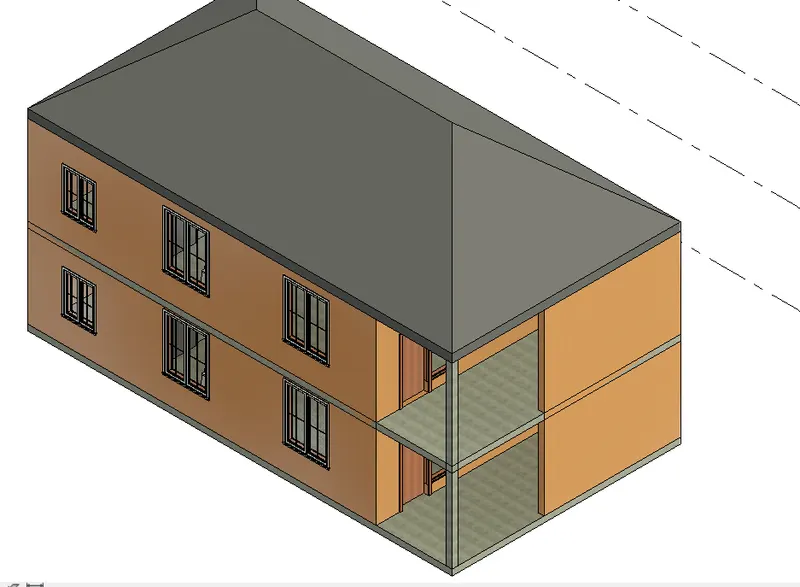
RESULT:
4) Use interior partition walls to create separate rooms within your residential unit. The model must include the following rooms
a. Living Room/ Drawing Room ( 15’ X 18’)
b. Dining Room (9’ X 11’)
c. Bed Room ( 9’ X 12’ and 15’ X 11’)
d. Rest Room ( 10’ X 12’ )
e. Kitchen (8’ X 10’).
AIM:
To create layout, walls, floors, place some components in each rooms, doors and windows in appropriate places. Also, explain the procedure step by step and obtain the result.
INTRODUCTION:
Revit is a BIM (Building Information Modelling) software to drive efficiency and accuracy across the project lifecycle, from conceptual design, visualisation and analysis to fabrication and construction.
Begin modelling in 3D with accuracy and precision.
Automatically update floor plans, elevations and sections as your model develops.
PROCEUDRE:
- Open the Revit software.
- Open the previous week 2 challenge.
- The layout has already been created in the week 2 challenge itself.
- The following picture is the snap of week 2 challenge.
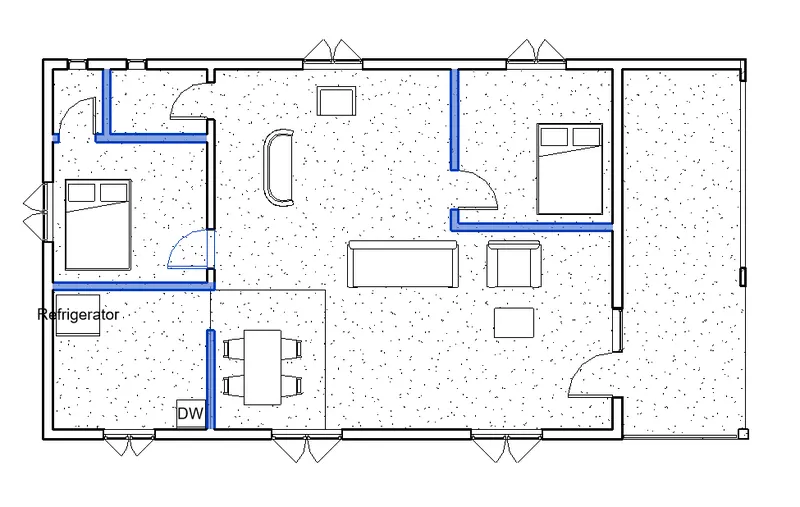
- Using the wall tool from architectural tab, I have inserted partition walls to separate the rooms and create a model house.
- Here, I have used GENERIC 6" walls.
- The following image shows the partion walls created in the drawing to separate rooms from one another.
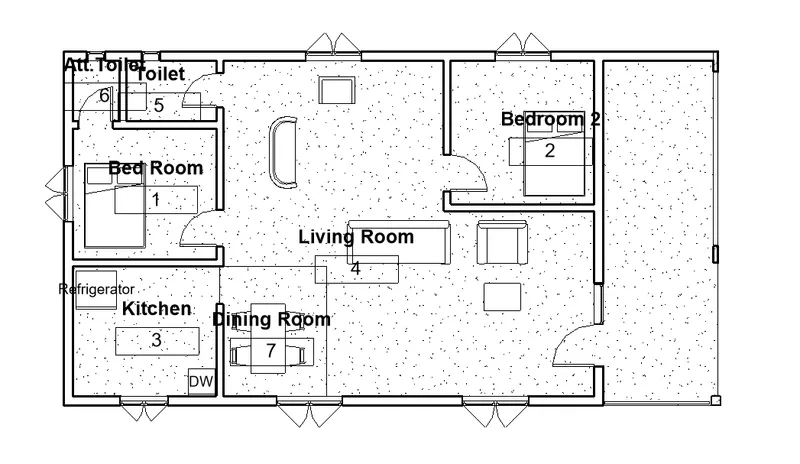
- Using the ROOM TAG option in the architectural tab, I have every room and named them.
- The following image shows the TAGGED rooms and their names.
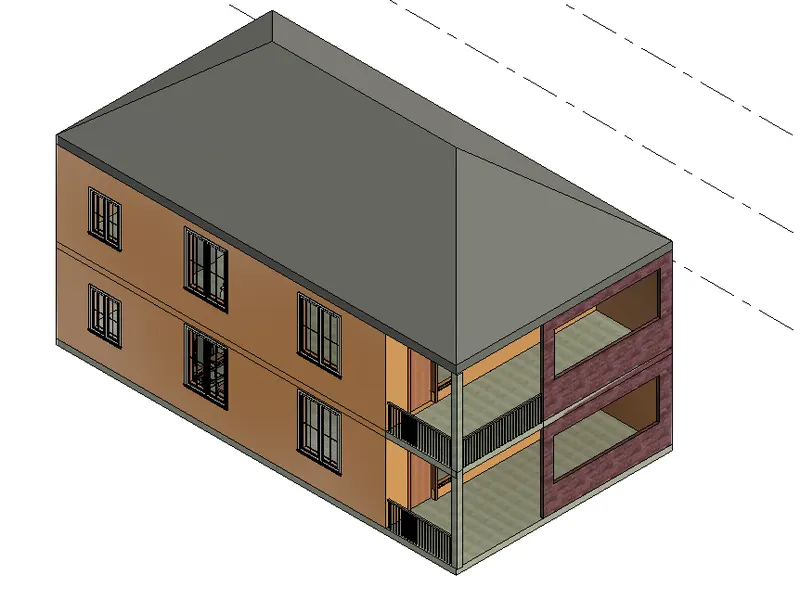
- Here, I have inserted RAILINGS to the entrance porch using railings tool from the architectural tab.
- Also, Using wall opening tool from the architectural tab, I have created an opening in the east side wall as shown in the image.
RESULT:
5) Based on week 2 assignment, the components to be included in a residential unit were inserted to the Revit file. Place these components in appropriate locations to add details to your residential model
a. Place Doors and windows in the wall at appropriate locations
b. The Living Room must include furniture set, couch table and TV desk and shelf cabinets
c. The Dining Room must include a table and chairs serving the purpose of eating
d. Bed Room must include a bed set, shelf, lighting and individual study desk and chair
e. Rest room should include bath tub and plumbing fixtures discussed in class
f. Kitchen should include countertops, gas stove cabinet and shelves to store food items
g. The wash/storage room can include washing machines and shelves to store clothes.
AIM:
To create layout, walls, floors, place some components in each rooms, doors and windows in appropriate places. Also, explain the procedure step by step and obtain the result.
INTRODUCTION:
Revit is a BIM (Building Information Modelling) software to drive efficiency and accuracy across the project lifecycle, from conceptual design, visualisation and analysis to fabrication and construction.
Begin modelling in 3D with accuracy and precision.
Automatically update floor plans, elevations and sections as your model develops.
PROCEUDRE:
- Open the Revit software.
- Open the previous week 2 challenge.
- The layout has already been created in the week 2 challenge itself.
- The following picture is the snap of week 2 challenge.
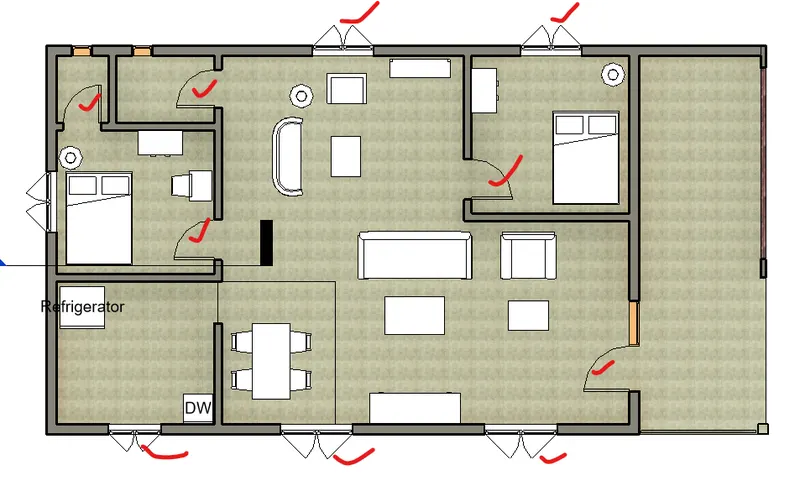
- Here, Using the WINDOWS AND DOORS option from the architectural tab, I have inserted different windows of my choice from LOAD FAMILY LIBRARY.
- The following image shows the doors and windows inserted at appropriate places.
- Some, 3D CAMERA IMAGES of the windows and doors inserted.
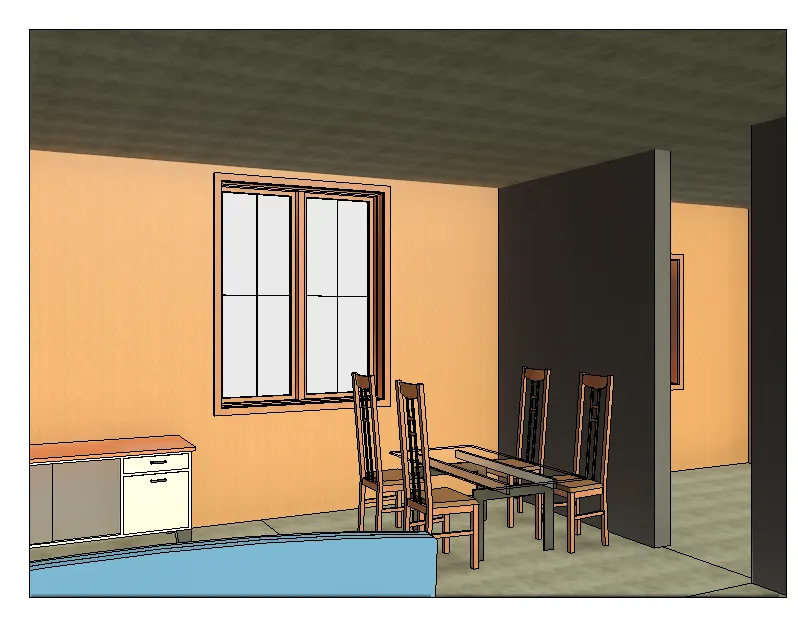
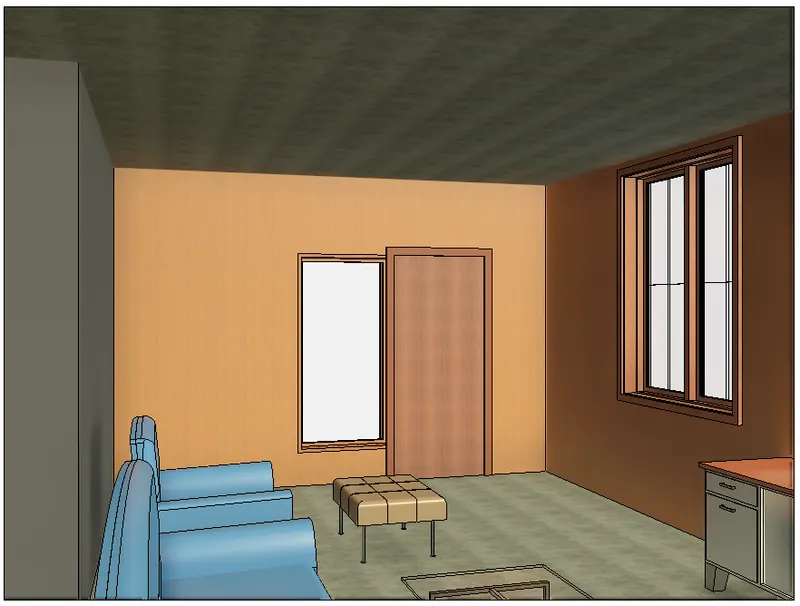
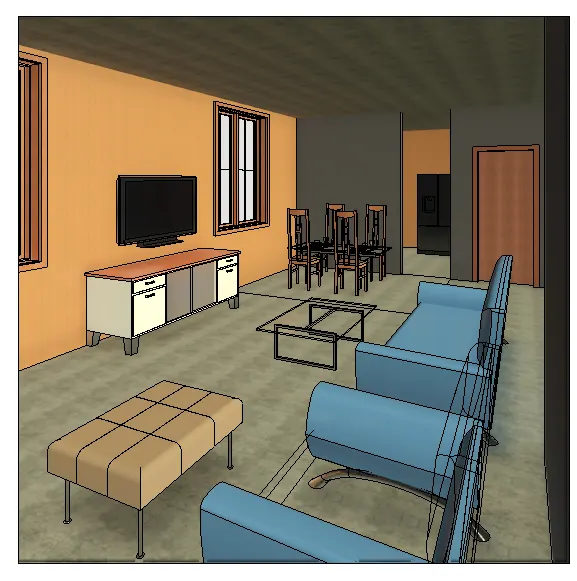
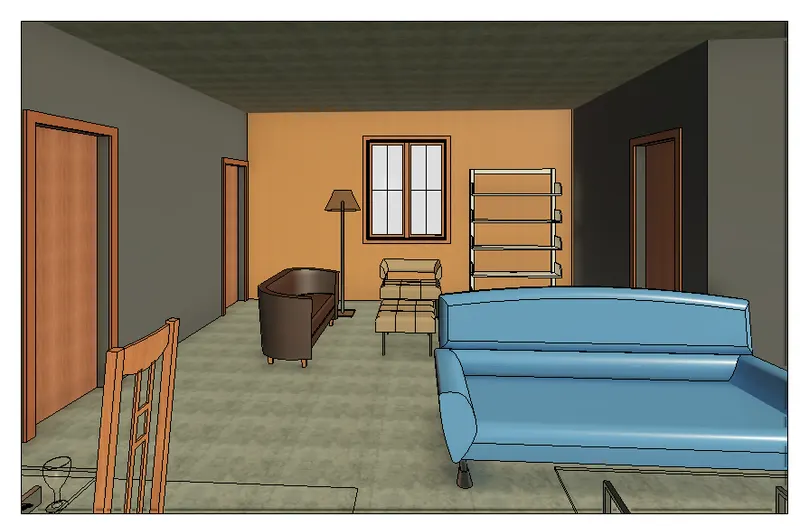
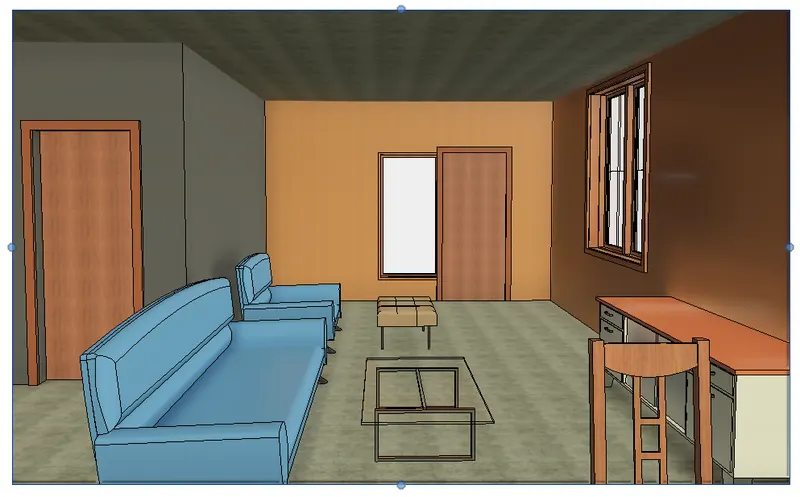
- Using PLACE A COMPONENT - LOAD FAMILY option in the architectural tab - Choosing FURNITURES in the libraby, I have inserted SOFA/COUCH, COFFEE TABLE, TV and STORAGE TABLE in the Living room.
- The following image shows the 3D camera view of the living room components.
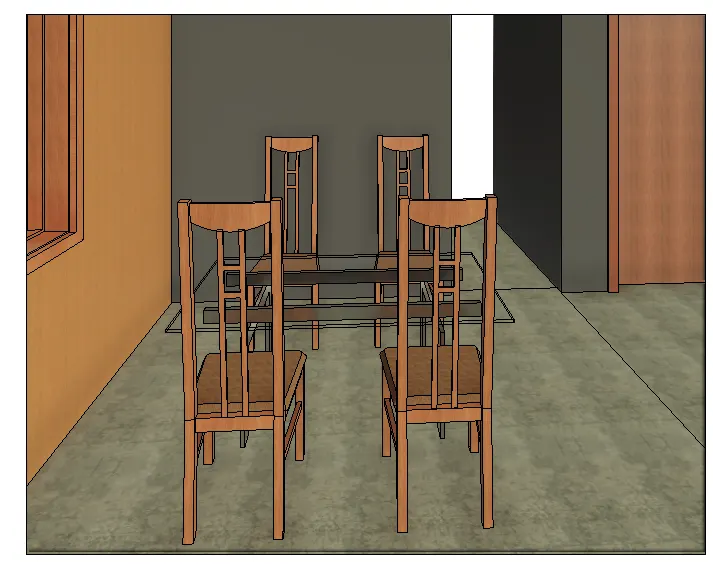
- Using PLACE A COMPONENT - LOAD FAMILY option in the architectural tab - Choosing FURNITURES in the libraby, I have inserted a RECTANGULAR DINING TABLE and DINING CHAIRS near the kitchen.
- Again, Using PLACE A COMPONENT - LOAD FAMILY option in the architectural tab - Choosing DOMESTIC in the libraby - Selecting the CUTLERY FOLDER, I have inserted some dining plates and cups set-up on the table.
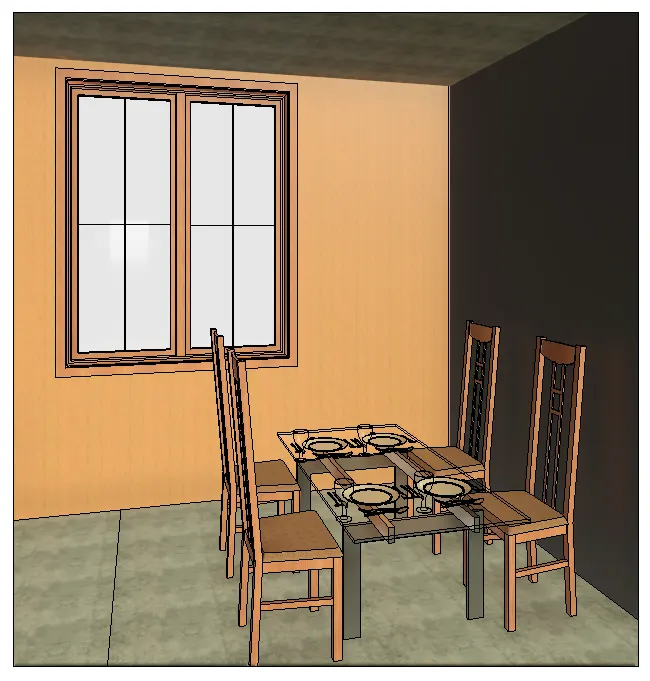
- Using PLACE A COMPONENT - LOAD FAMILY option in the architectural tab - Choosing FURNITURES in the libraby, I have inserted a WARDROBE CLOSET, a FLOOR LAMP and a STUDENT DESK, CHAIR in the Bedroom.
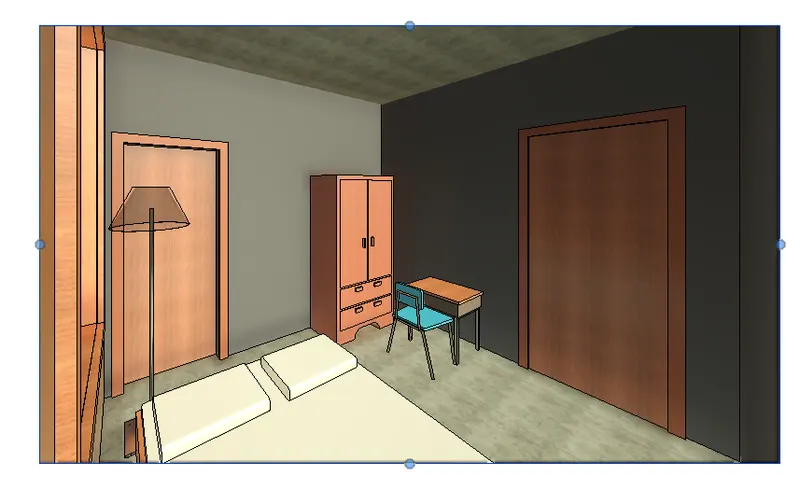
- The following image shows the SECTIONAL VIEW of the BEDROOM ELEMENTS created.
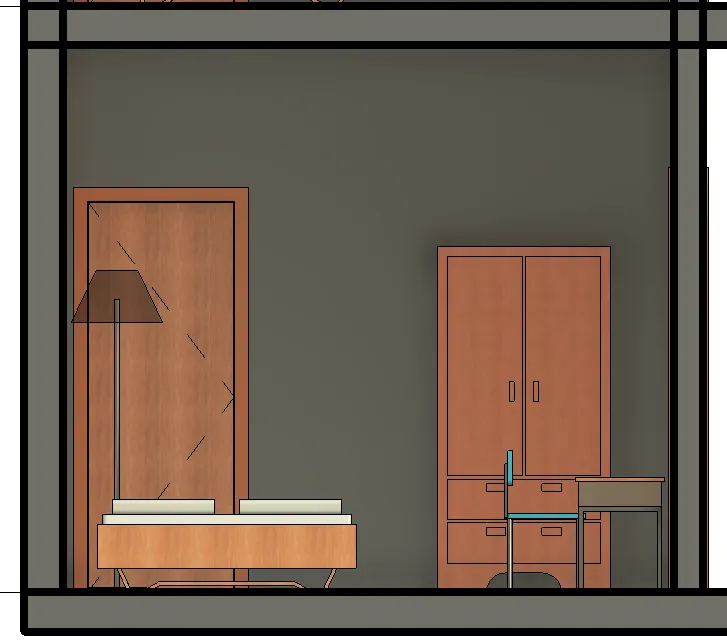
- Using PLACE A COMPONENT - LOAD FAMILY option in the architectural tab, Choosing PLUMBING FIXTURES from the library, I have inserted various Rest room elements like WATER CLOSET, WASH BASIN, TAPS, TOWEL HANGERS and WATER DRAIN in the drawing.
- The following image shows the 3D camera view of the Rest room elements.
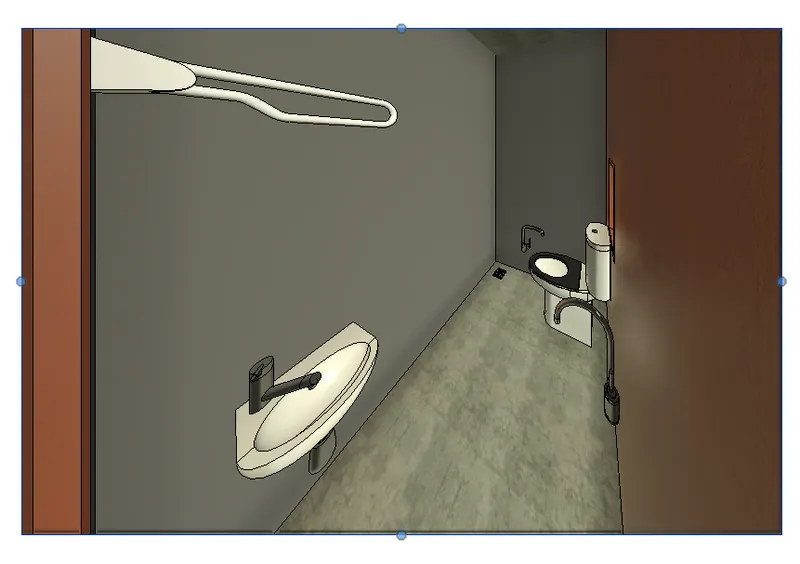
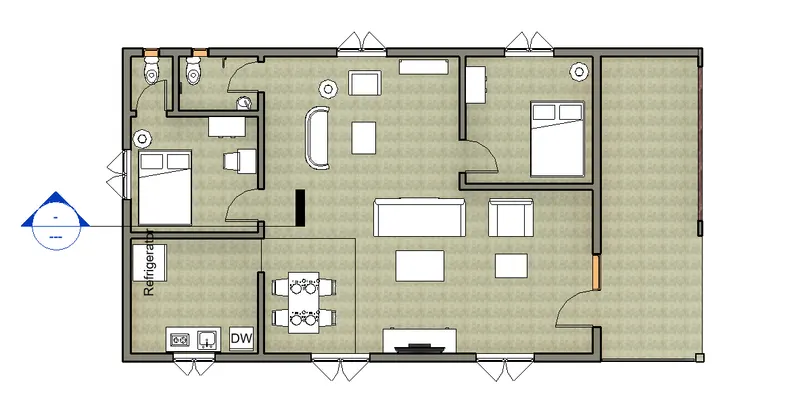
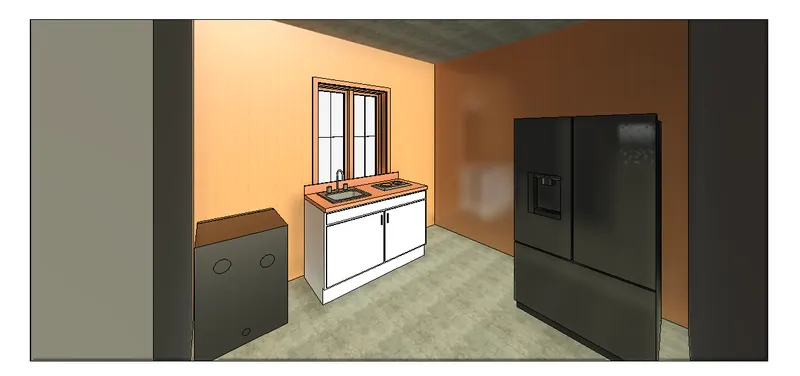
- Using PLACE A COMPONENT - LOAD FAMILY option in the architectural tab, on Choosing SPECIALITY EQUIPMENTS from the library, I have inserted a SMALL KITCHENETTE, a DISHWASHER and a REFRIGERATOR as shown in the image.
RESULT:
The Model house with all the doors, windows and components is shown below.