Creating various 3D Models like Furniture, Footing, Girder, Column drop with panel and Gable Wall in AutoCad
Aim: To create 3D models and elevations:
Furniture elements
Isolated foundations
AASTHO beams
Drop columns with slabs
Walls
Commands used:
Extrude .
offset.
UCS.
box.
Union
.
Subtract.
move.
3D orbit.
loft.
Sweep.
cone.
region.
boundary.
Steps:
Open AutoCAD, click Switch Workspace to change to 3D Modeling, and click the Home button next to the View Cube. Bounding and Zooming - All
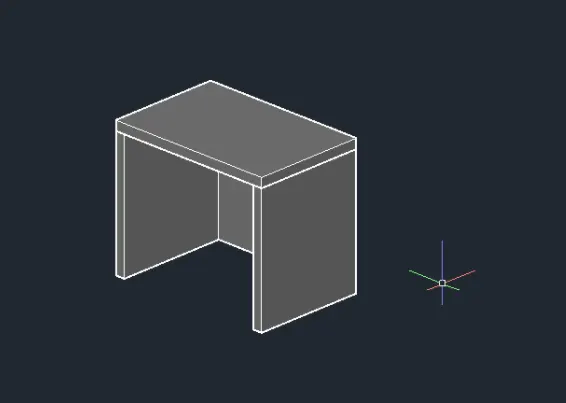
Drawing of furniture elements 3D:
1).
Aim: Create 3D models of furniture elements.
Procedure:
Step 1:
Open AutoCAD and select imperial as the units are feet and inches. Go to the "Units" command and set it to "Engineering" so you can insert feet and inches.
Step 2: Click the
toolbar or the Box command to create a box, click Length, and specify a length of 3' and a width of 2'6".
Step 3:
Front and specify the x and y coordinates of the front surface horizontally and vertically respectively with the command 'ucs' or click Front to select the front surface. Enter the command "PLAN" to ensure the front is properly aligned.
Step 4: Draw a line 2 inches from the right side of the front view. Use the Rectangle command to draw a rectangle 32 inches by 2 feet 4 inches (because it says it's 2 inches thick).
Step 5: Move
Step 6: Erase the previously created row. Use the 3do command to circle the object and select a rectangle.
Step 7: Extrude the rectangle on the -z axis 2'4" with a thickness of 2". Then run the Subtract command, select the larger object in the 2D wireframe model, then select the smaller extruded rectangle.
Result: A 3D model of the furniture element is created.
2).
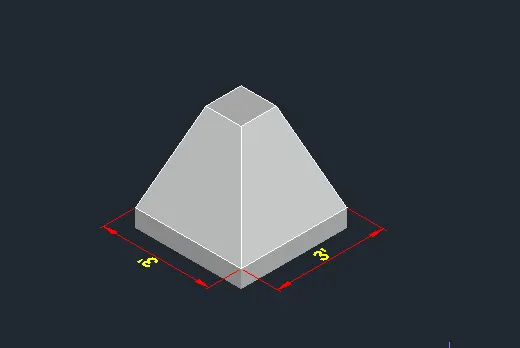
Isolated Foundation 3D Model:
Aim: Create a Isolated Foundation 3D Model
Procedure:
Procedure:
Step 1: Create a 2' x 2' rectangle on the floor plan. Create another 1' x 1' rectangle in plan view.
Step 2: Orbit the 3D with the command '3do' and orbit the view to the appropriate view. Use the 'M' command to move the small 1'x1' x 2' rectangle in the +z direction and turn on Ortho mode.
Step 3 : Click Loft on the Home toolbar and select the two rectangles to loft.
Step 4:
Switch to Top view again and create a rectangle on top of the larger rectangle of the same size. Click Extrude on the home toolbar, select the rectangle you created, enter 6 inches for the height of the extrusion, and the mouse will show the direction of the extrusion.

Step 5 : Specify dimensions using UCS commands.
Result:
3). AASTHO type beam using AutoCAD 3d.
Procedure:
Step 1: Click on the
front view. Use the UCS command to set the X and Y axes to the front view plane.
Step 2:
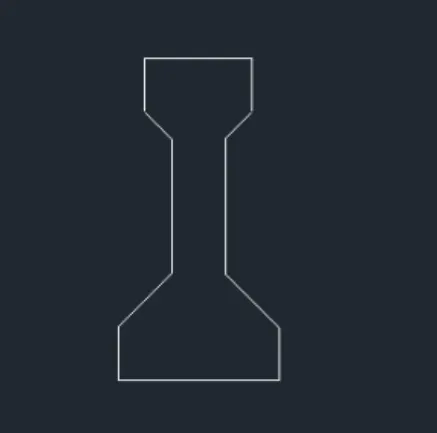
Then use the Line command to draw the I section with the specified dimensions. Command 'L', Draw a line of 1' which is the top width of the beam
Drag the line down 6". With Snap on, draw a line from the center of 1' and offset 3" to either side so that the panel is 6" wide.
Step 3: Enter the
taper distance to join the web and flange Mirror the same on the other side The
web is given a height of 1'6" and is 1' from the tapered end of the flange section A distance of 6" is offset (1').
Step 4: Extend the
bridge to the offsite line.
Step 5:
Offset 6" down from the bottom horizontal line to define the height. To taper down 1'4" from center: Draw line and offset 8" on each side.
Step 6: Extend 6" offsite line and trim remaining line. Draw vertical line down and taper as well.
Step 7: Use the
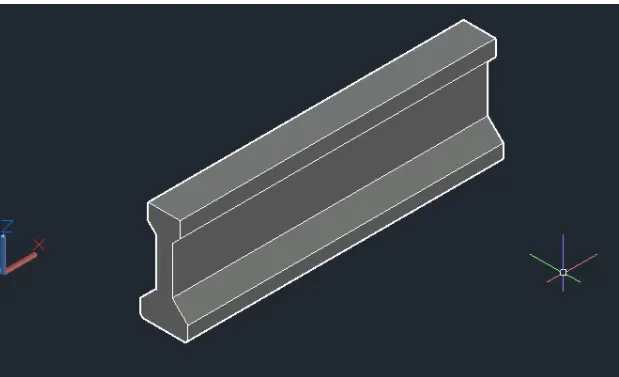
3D Orbit to rotate the view and draw a line 10' in the z direction. Click Sweep on the Home toolbar, select a section, then select a path to sweep the section.
H. This line.
Result: A 3D model of the
AASTHO beam is drawn:
4). 3D model of a drop column using
plates
Aim: Create a 3D model of a drop column using panel sections and view its isometric view.
Procedure:
Step 1: Create a 1.6 inch diameter circle on the
floor plan.
Step 2: Create a command for each
region and select the rectangle. Extrude with Extrude on the home toolbar and enter a distance of 10'.
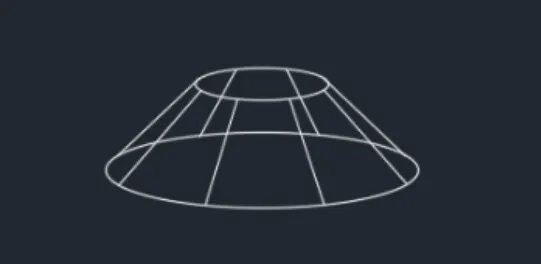
Step 3: Click Cone on the
Home Toolbar to create a cone. Click Diameter and enter 1'6" for the bottom diameter.
Step 4:
Click on the top radius and enter a value of 1'6" and enter a height of 1" for the cone.
Step 5:
Place the truncated cone on top of the extruded circle, or front view column, using the placement snap option so that the centers of the two objects are coincident
6" x 4'6". Extrude to 6" high.
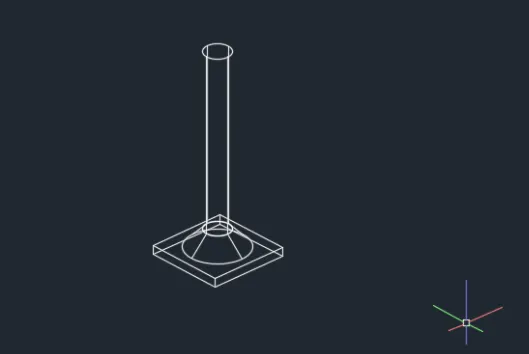
Step 7:
Center the rectangle in the top view and adjust it in the front view as well, or perform a move command and specify the coordinates as 0,10',0. Front view.
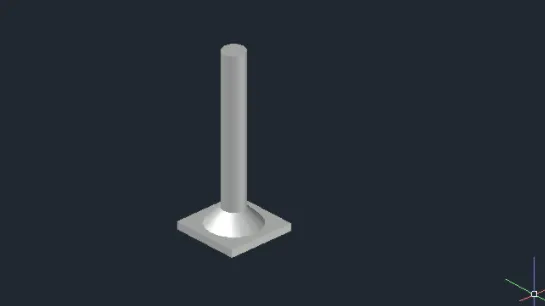
Result: The 3D model of the
case column with panel is cut and the isometric view is also displayed:
5).
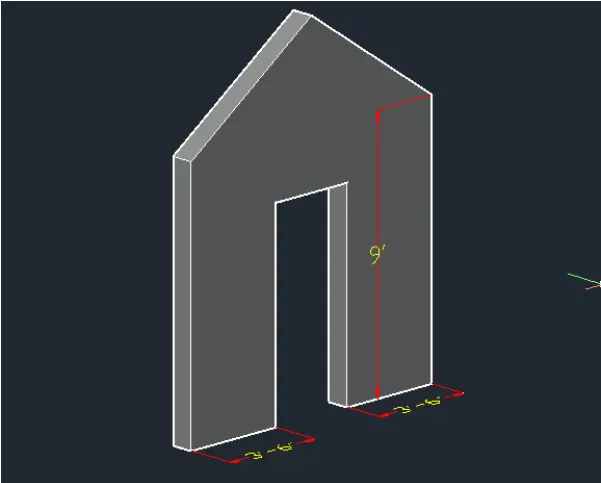
Wall 3D Model
Aim: To draw a wall 3D model.
Procedure
Step 1: Draw a
10 foot x 9 inch rectangle. The doorway is 3 inches wide, so draw a line in the middle and offset it 1.5 inches on each side.
Step 2: Use
“BO”. Use commands to create boundaries and create regions. That is, both areas on either side of the doorway.
Step 3: Extrude the area to a total height of 12' 6".
Step 4: Create a rectangle in place of the door in plan view. Rectangle 7'
from the bottom in the Z axis.
Step 5: Go to the front view and draw a line from the center of the moved door line Draw a diagonal line from the center line that intersects the edge
from the overall height Line up on the opposite side
Draw a horizontal line to connect.
Step 7 : Cut off the excess lines and centerlines and use the Connect command to connect the triangles. Create a region with the triangles you just created using the Region command.
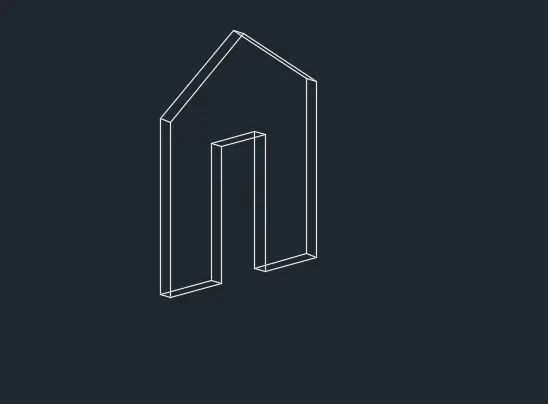
Step 8: Select the extruded rectangle and use the handles on both sides to fit the height of the base of the triangle. Extrude the door rectangle to the same height as the base of the triangle.
Result: 3D model of the wall is drawn.
RESULT:
A 3D model of the furniture element is created.
A 3D model of the seismic isolation foundation is created.
Creates a 3D model of an AASTHO type beam.
Creates a 3D model of the column with panels.
Creates a 3D model of the wall.