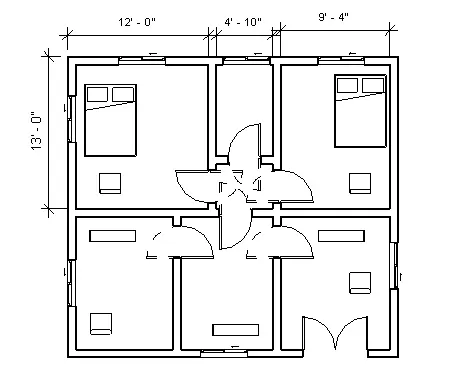
Creating Levels, Grids, Layout and model elements for a residential unit using REVIT
Q.1 What is BIM? Summarize the features of BIM and benefits of using BIM over 2D CAD tools.
Ans:- BIM is a new process and methodology by which a team of architects, engineers and contractors work collaboratively to design and build a commercial building utilizing the same database and computer model. This allows the team to analyze and visualize design decisions long before a project even breaks ground, at its core, BIM offers a digital representation of the real facility, including function systems (HVAC, electrical) and aesthetics (walls, roof, windows). It does so while being a shared resource from start to finish across multiple disciplines participating in the design and build
Benefits of using BIM over 2D CAD tools are:-
- Early detection of a collision
- Faster design and construction
- More precise planning
- Visualization at an early stage of the project
- Higher quality of performed work
- Better communication in the project
- Reducing delays and errors
- Increasing efficiency and productivity
- Competitiveness
- Easy access to information
- Improvement of OSH
- Project life cycle
Advantage of BIM
There are several BIM advantages, including the following:
- BIM offers a more complete representation of a building’s design. It takes more than the building’s core components into account. For example, BIM allows you to design electrical and HVAC systems, as well as the building itself. This means the project team can take full advantage of the space and resources available.
- BIM pulls your documents into a single database. Several people can work on the same model and save it to the cloud. This allows for instant updates, so you won’t waste time searching for documents when you need to make changes.
- A BIM model will allow you to prefabricate important components ahead of time. You won’t have to adjust them based on the building design. Instead, such components are part of the initial design.
- You can provide much more to your clients using BIM than you could with CAD. The models you give to your clients update constantly as you work on your project. Your client can check in any time, which leads to quicker approval for milestones and more efficient project development.
- Resource tracking is a key component of BIM models.
Q.2) Understand the concept of Categories, Families, Elements, Instances in Revit. Go to Insert Tab, choose a category. Pick a family and element. Understand the instances and insert it to Revit mode.
AIM :-To understand the concept of categories, family and elements in Revit software and also to insert them in the drawn model.
INTRODUCTION :-
Here we use Revit software to understand the concept of categories families and elements and also to insert them in the project model. We know that Revit software is a 3D modelling software which is used to draw 3D objects and is a very useful software for engineers of any field.
PROCEDURE :-
1. The first step involves is to open the Revit software and open the previous project which we made and edited as per requirement.
2. Then the next step involves is to go to the architectural tab and click on the door option to insert the doors.
3. Then there opens the modify/ place door tab and then click on the load family option.
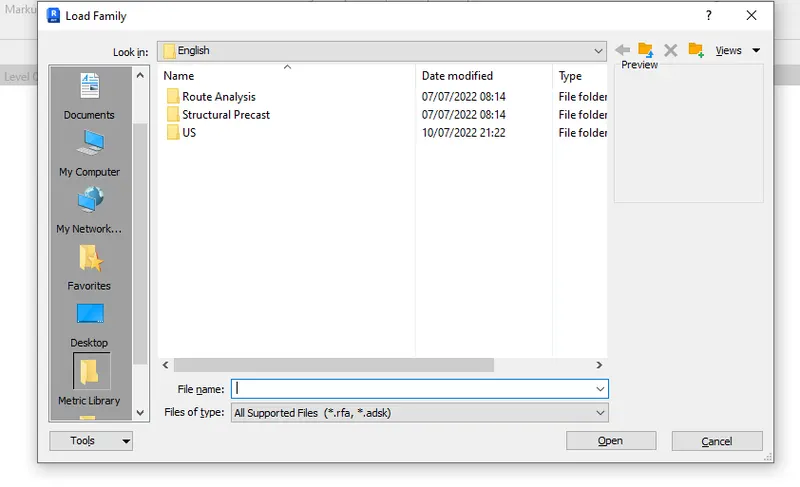
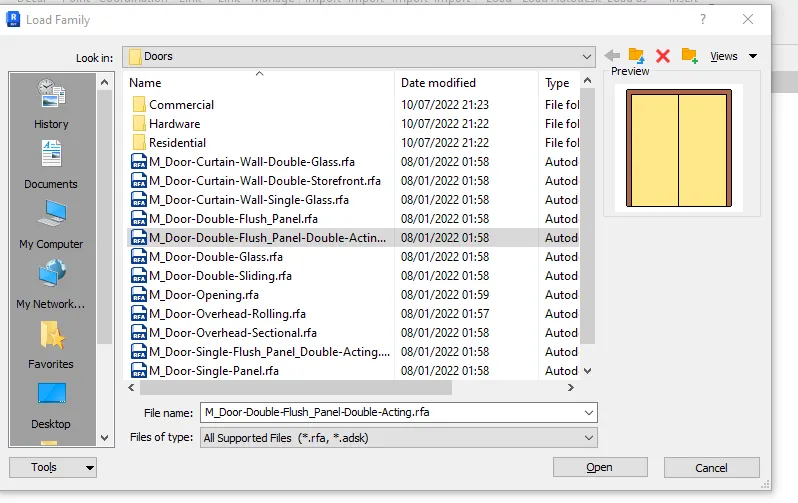
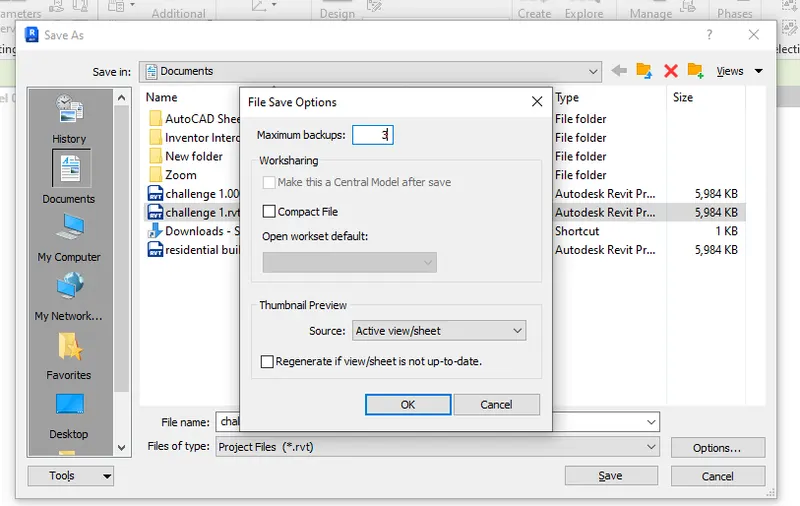
Q.3) Setting up a Project – Open a project file with architectural template. Save the file with appropriate name. Set up the project units to Imperial / Metric based on your convenience of modelling. Complete the project information under Manage tab. Set up the maximum backups for project file to 3
Aim:- To create a new project with primary details.
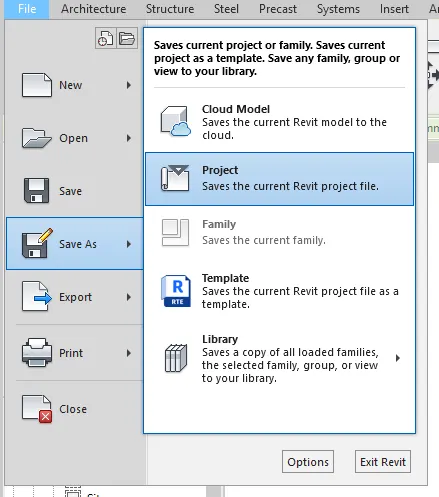
Step 1:-file>new>project
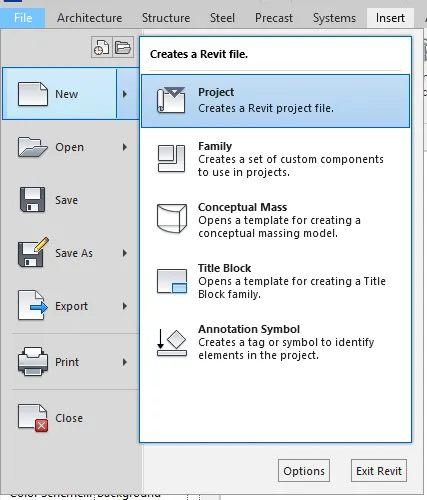
Step 2:-save as >file name "residential building".
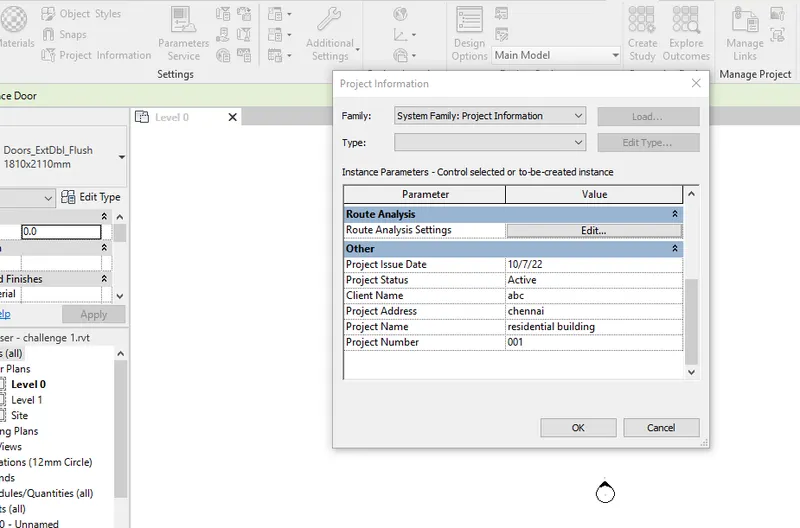
Step 3:- manage>project information >other
Step 4:- maximum backup
Q.4) Understand the concept of Levels and Grids. Follow the naming and conventions. Create the following Levels: ( Convert to metric equivalents if metric is your units)
Ground Floor @ 0’
First Floor @ 10’
Second Floor @ 20’
Roof @ 30’
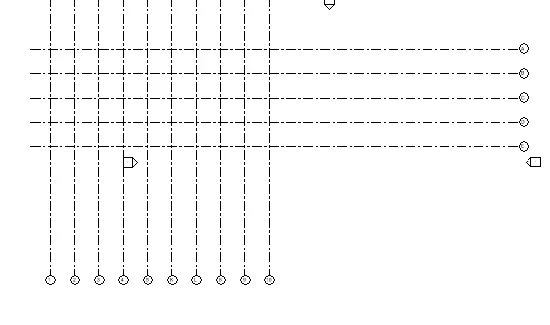
Grids Transverse Grids A, B,C,D, E @ 10’ spacing
Longitudinal Grids from 1 to 10 @ 20’ spacing
Aim: To create levels & Grids
Step 1: Project browser > Elevation > "Choose a direction"
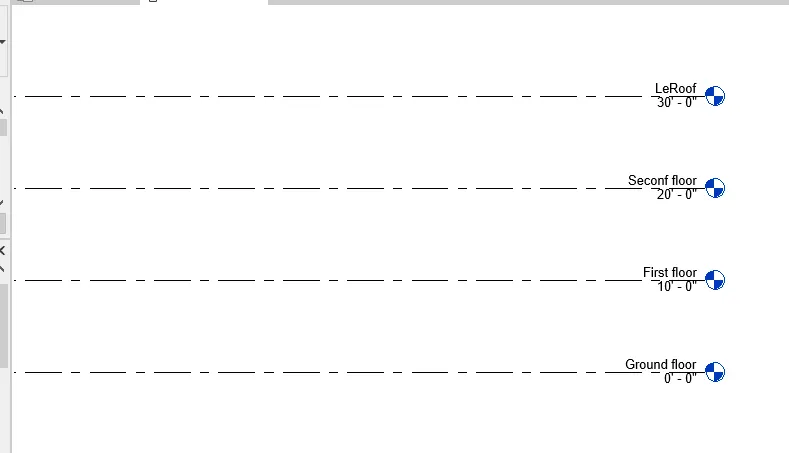
Step 2:- Grid line First floor
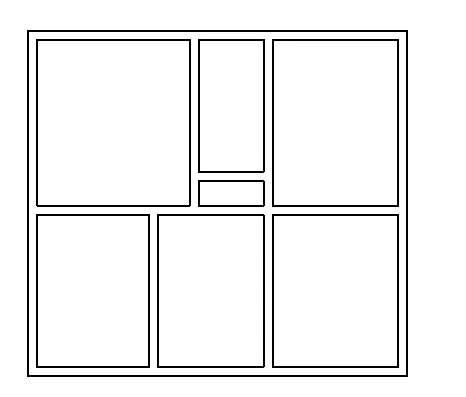
Q.5) 3D modelling of residential unit – From looking at your house / or a place you aspire. Create a conceptual layout of the residential unit. You can measure using a tape or you can access your residential plan to create a similar layout.
AIM:-To create a 3D model of residential unit.
INTRODUCTION :-
Revit software is used as a 3D modelling software and is a very useful software for engineers and architectures to design 3D models. It can also be said that it is the upgraded version of autocad and is used widely in every construction modelling.
PROCEDURE :-
1. Open Revit software and then go to new option and then go to project.
2. Now architecture>Wall
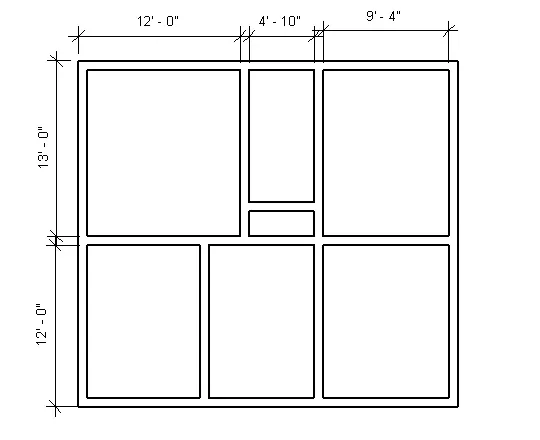
Q.6) In the layout created draft the level of details you are planning to include – Dimensions of room, components you plan to add in the residential unit.
PROCEDURE :-
1. Open Revit software and then go to new option and then go to project.
2. Now architecture>annotabe
Q.7) Identify the residential model elements such as Door, Windows, Tables, Chair, Couch, Bed, Lamps from the library and insert them to the model . Save the project for use
for Assignment 3
PROCEDURE :-
1. Open Revit software and then go to new option and then go to project.
2. Now architecture>insert tab>family load