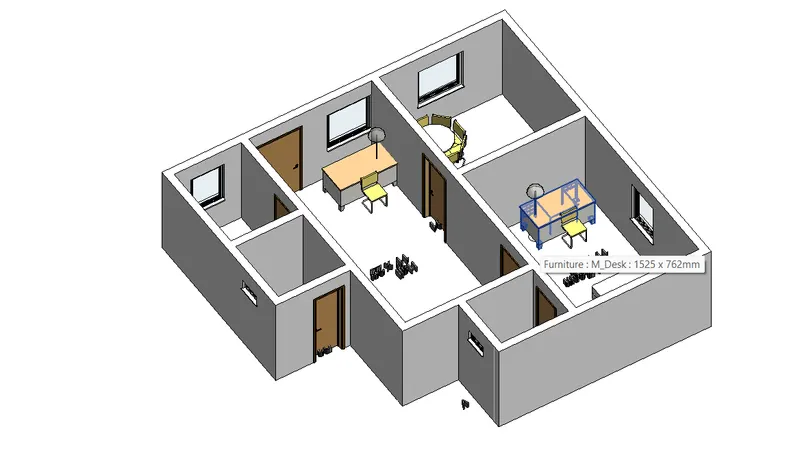
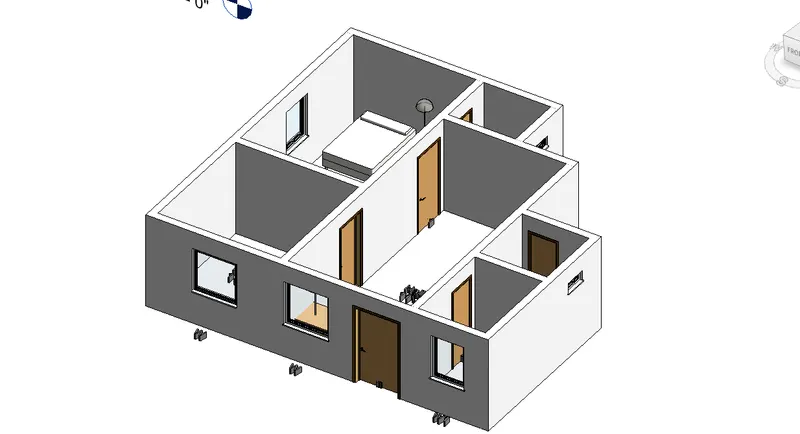
Creating Levels, Grids, Layout and model elements for a residential unit using REVIT
- QUESTION : 1
- AIM :
- What is BIM? Summarize the features of BIM and benefits of using BIM over 2D CAD tools.
- ANS : About BIM and its features and benefits given below :
- BIM : BUILDING INFORMATION MODELLING :
- The term BIM means building information modelling . this BIM concept has been developed since the 1970s but it only become an agreed term in early 2000s.
- it is the process which support by various tools and technologies and contracts involving the genration and management of digital representation of physical and fuctional characteristices of places .
- the BIM software is used by individuals businesses and goverement agencies who plwn , design , construct, oprate and maintain buildings and diverse the physical infrastructures such as water ,refuse, buildings , bridges ,port and tunnels etc.
- it is an buliding information modelling or management this process that allows architects, enginners , deveplovers , and other construction profrssionals to plan ,desing , and construct the structure or buildings within one 3D module .
- FEATURES OF BIM :
- EASY ACESES TO INFORMATION :
- it is the physical representation of the project in which the all minute details are also given in the project .
- MAKING THE PROCESS MORE EXPRESSIVE :
- In CAD software that can allow to user to work accurate in 3dimension that length , width, and breth but but revit software allow to work accurate in 5 dimension as length , width, bredth ,time and cost . it helps to make the material cost and prepare the estimate also time schedule of the project even as design as BIM development .
- COMMPRESSIVE VIEW OF THE PROJECT :
- BIM module not just provide the 3D view of the project but they provide the more commpressive view of the project like topography of the project location , lightning feacture project information etc .
- BENEFITES OF USING BIM OVER 2D CAD TOOLS :
- the CAD deals with desing of modeles and floorplan but BIM include more than designing , the BIM is the method that entire firms needs to accept any chance of succeeding in its use .
- the main defference between CAD and BIM is the interactivity of the different dimension that comprise an object are interconnected . therfour when we can changes in length , width that can be change in just single edit.
- the great effecency of the BIM software is designer can focuse on there creativity aspect of the project without having to to constantly worry about updating the altitude of lines entities throughout the entire project .
- BIM software save a lot of times .
- it reflects in the paperspace and module space also.
- in CAD 2d tools we cant edit the modifacation in plan elevation etc . but in revit changes made in one view that automatically change in other view .
this is about BIM its feactures and benefites over 2D CAD TOOLS .
- QUESTION : 2
- AIM :
- Understand the concept of Categories, Families, Elements, Instances in Revit. Go to Insert Tab, choose a category. Pick a family and element. Understand the instances and insert it to Revit model ?
- ANS :
- THE CONCEPT OF CATEGORIES , FAMILIES , ELEMENTS , INSTANCES IN REVIT IS GIVEN BELOW :
- CATEGORY :
- The categories are the group of elements having common properties
- it is the predefined by the software like a door , window , wall ets this is the example of the categories .
- it control the organization , visibility , graphical representation and schedulling option of the family within the project .
- we can insert the elements of our requriments and choise and create the category.
this is about category in revit .
- FAMILY :
- family is the different element having same properties like single flush door , double flush door it has different sizes availlable in revit software .
- family is the groping of 2D , 3D information that serves to represent a discreate building or documentation elements in the project .
- ELEMENTS :
- elements is the basic which can not be subdiveded like in single flush door the different sizes represents the elements .
- for the single flush door having sizes likes 30" x 80" , 30" x 84".
- elements is the specific representation in the family which is define by distinct paramenric , graphical and documentation charasteristic which make it unique froms other types in the family .
this is about element in revit software
- INSTANCE :
- it is the individual representation of a type in the project define by unique parametric , graphical and documentation characteristic which make it unique from other insertance in the project .
- for example :
- start the autodesk revit software
- click on insert tab
- go to the load family

- after clicking on load family then a dialogbox is opened
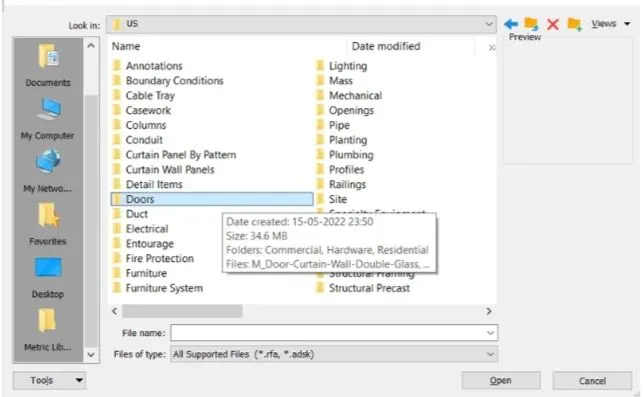
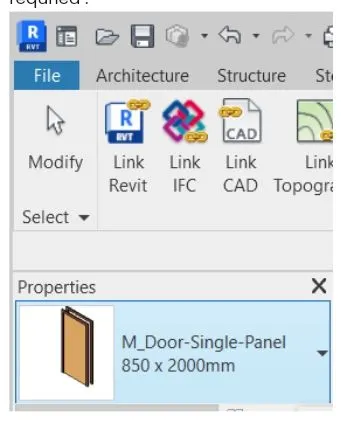
- then double click on door after double clicking on door then door family is open shown in below
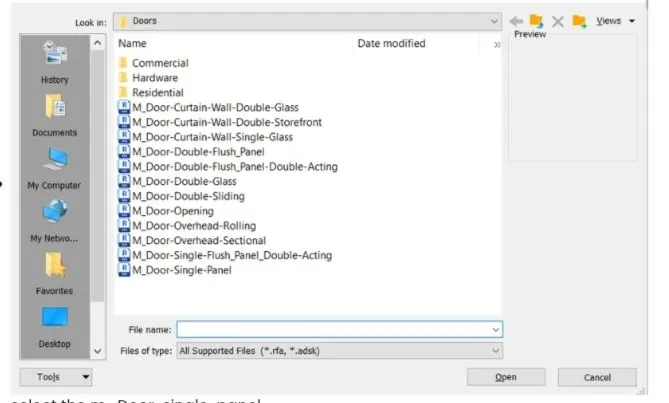
- select the m_Door-single-panel
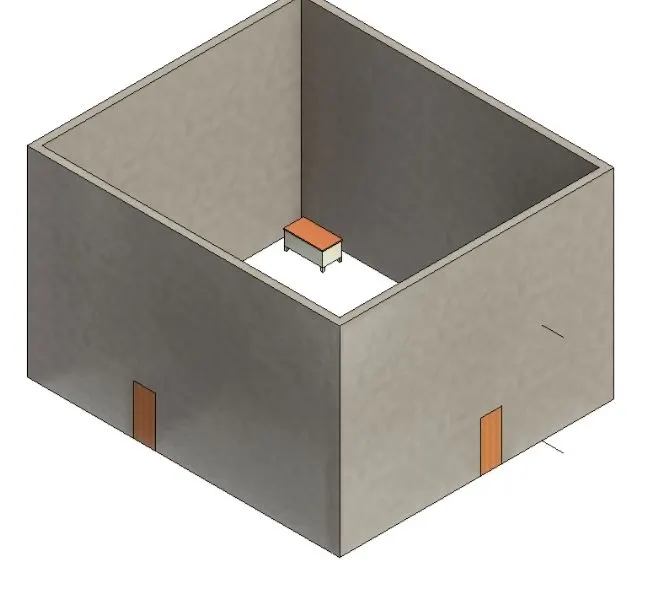
- then go to the properties select the requried size of door and drug it where it requried .
- QUESTION : 3
- AIM :
- Setting up a Project – Open a project file with architectural template. Save the file with appropriate name. Set up the project units to Imperial / Metric based on your convenience of modelling. Complete the project information under Manage tab. Set up the maximum backups for project file to 3
- ANS :
- SETTING UP A PROJECT :
- first the start the revit 2023 software
- it takes some time to start after that a homepage is open shown in below
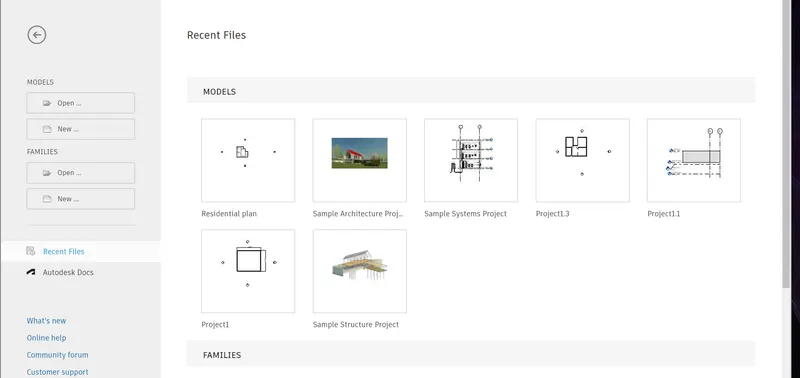
- then click on NEW from that homepage
- then click on dropdown and select the tamplet file as architectural templet
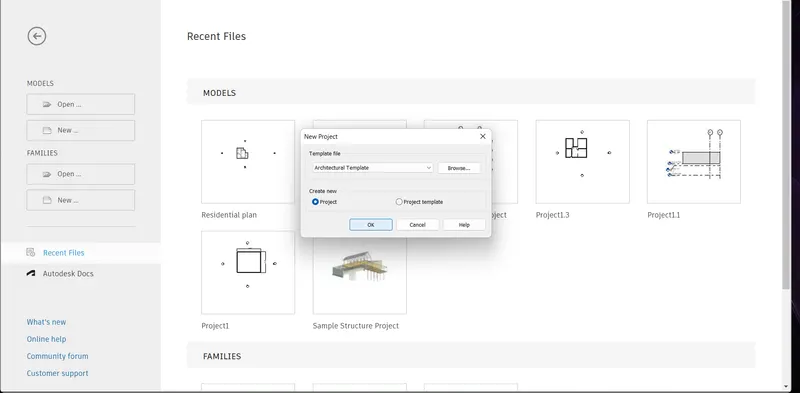
- click ok
- then clcik on FILE
- and save the file
- then go to the manage tab
- click on project information and fill the information as shown below
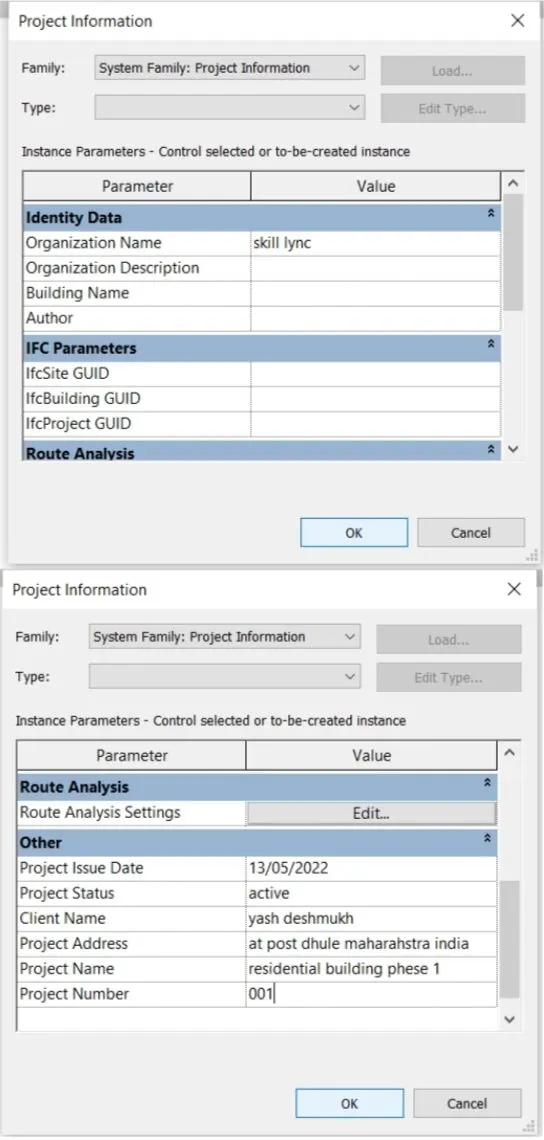
- then click ok
- then go to the file manu
- new dialogbox is opened
- click on save as
- then click on OPTION
- then select the maximum backup as shown below
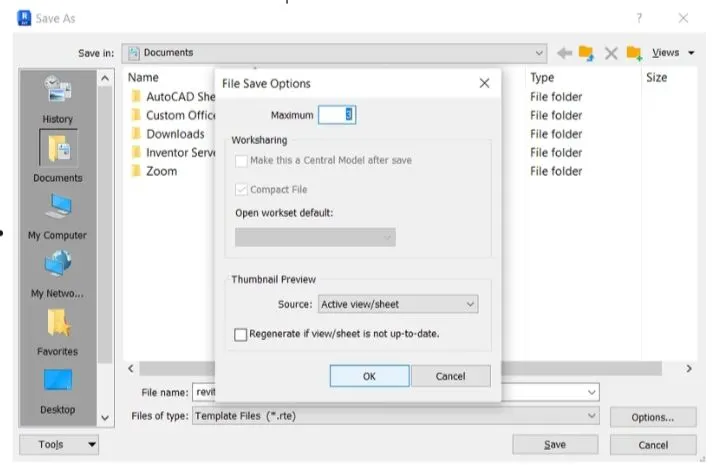
- then click ok
- and save it
- in this way project setting is ready
- RESULTS :
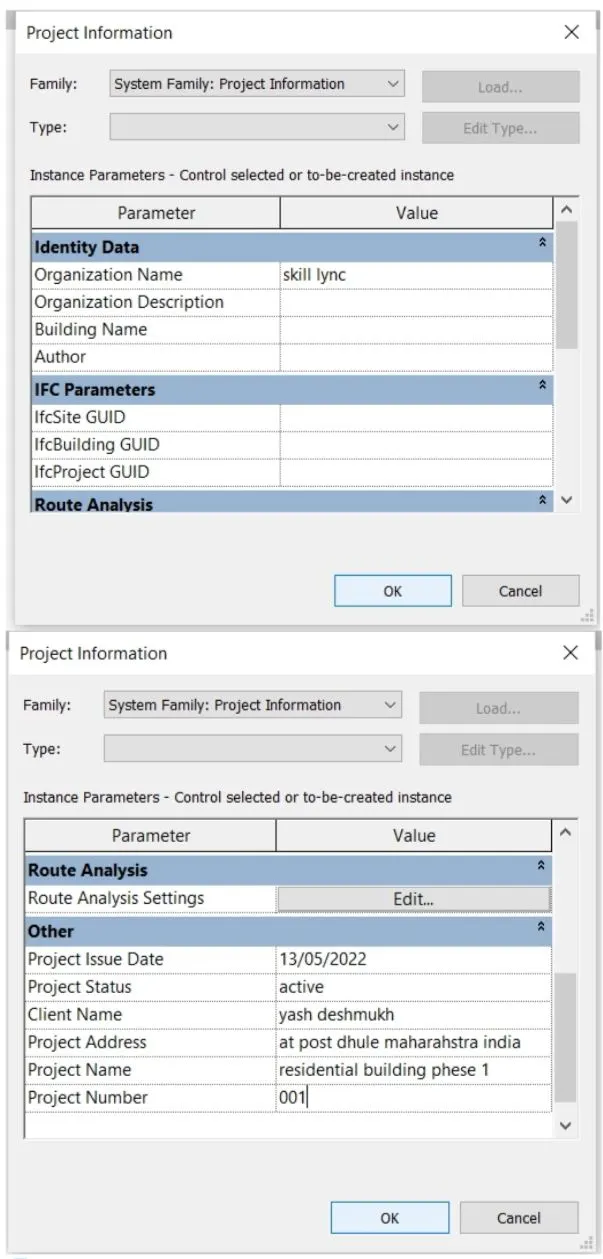
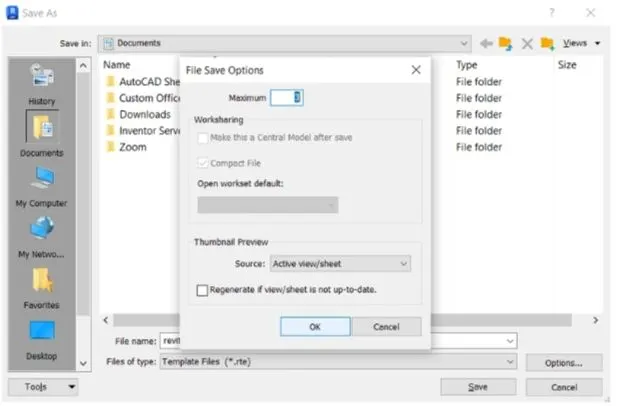
- QUESTION : 4
- AIM :
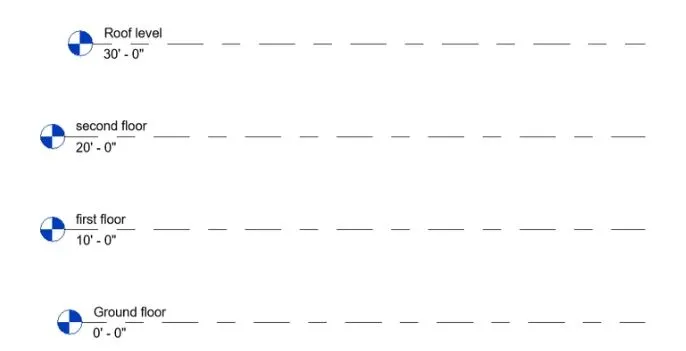
- Understand the concept of Levels and Grids. Follow the naming and conventions. Create the following Levels: ( Convert to metric equivalents if metric is your units)
Ground Floor @ 0’
First Floor @ 10’
Second Floor @ 20’
Roof @ 30’ - ANS :
- first start the revit 2023 software
- after that a homepage is open as shown below
- then click on NEW and select the file as archictural templet file
- as shown below
- click ok
- then click on FILE
- click on save
- and save the file
- then go to the manage tab
- click on project information
- and fill the details as shown below
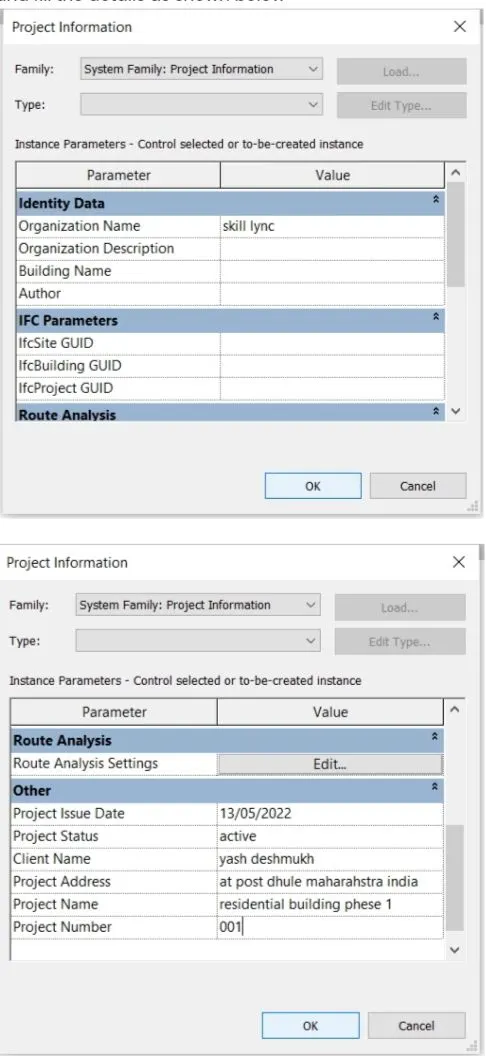
- click ok
- then go to the file tab
- click on save as
- click on option
- select the max backup as shown below
- then save the project
- type UN for project units select the imperical
- then go to the properties browser
- then click on elevation
- then give the view scale as 1: 100
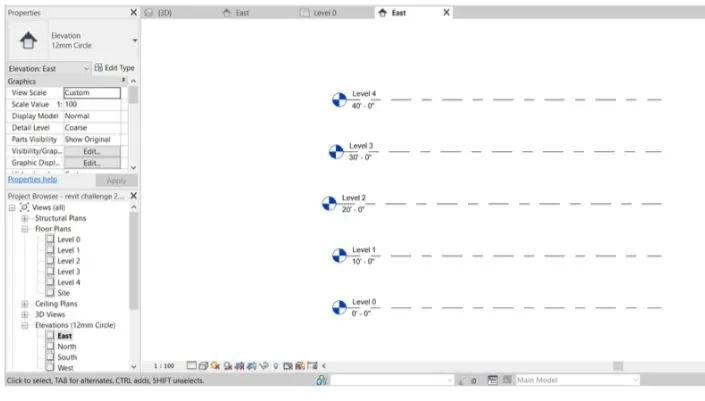
- then go to the datam in that click on level
- and add the level as shown below
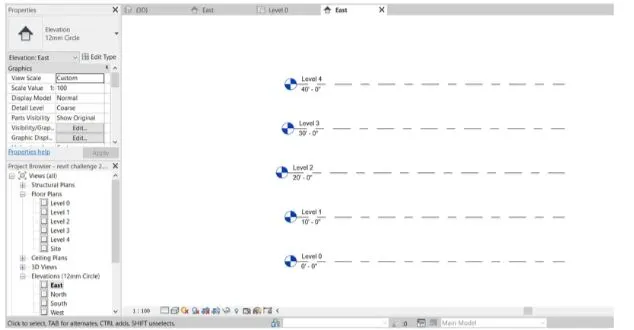
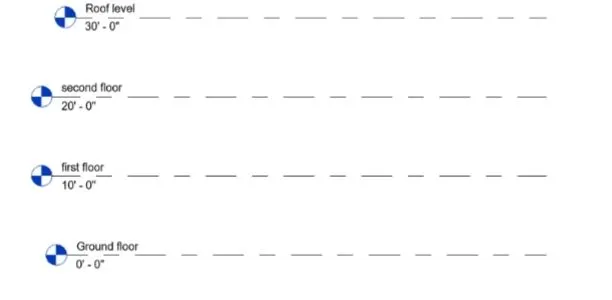
- then clcik on levels and rename as ground floor level , first floor level, second floor level and room level
- shown below
- RESULTS :
- AIM :
- CONCEPT OF GRIDS :
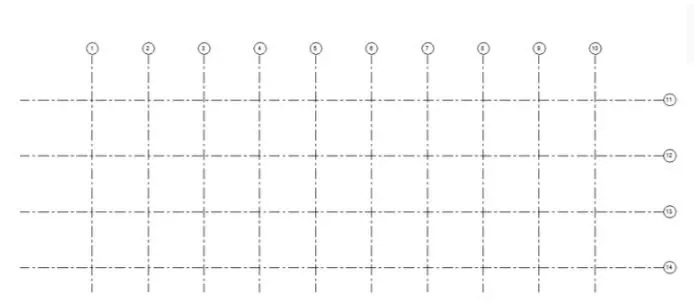
- go to the architecture view
- then go to the datam
- click on grid option
- then draw the first grid line
- then give the another grid line having distance is 20'
- as shown below
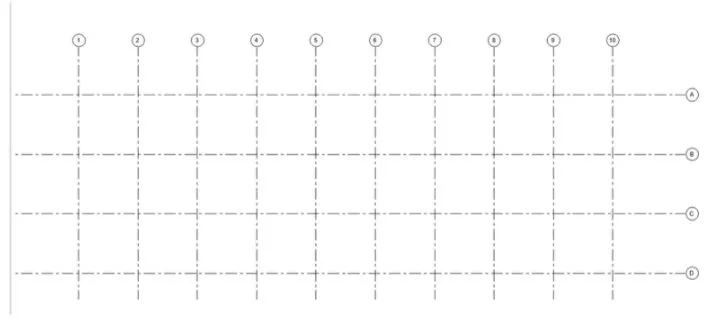
- then double click on horizontal grid and reneme it
- give the name as A,B,C and D
- As show below
- RESULTS :
- QUESTION : 5
- AIM :
- 3D modelling of residential unit – From looking at your house / or a place you aspire. Create a conceptual layout of the residential unit. You can measure using a tape or
you can access your residential plan to create a similar layout. - ANS :
- start the revit software
- homepage is opened shown below
- click on NEW
- one dialogbox is open. in that dialogbox click on dropdown
- and select the file templet as architectural templet as shown below
- click ok
- then click on file
- then click on save
- give the file name as revit challenge 2
- and save it
- go to manage tab
- click on project information
- and fill all requried project information
- as shown below
- click on ok
- then go to the file
- click on save as
- then select the project option
- one dialogbox is open click on OPTION from that tab
- and save the project
- click ok
- and then save .
- then type UN for units
- then give the length unit as mm
- cllick ok
- then type PP for properties browser
- cliick on elevation
- then click on EAST
- one east windown is opened
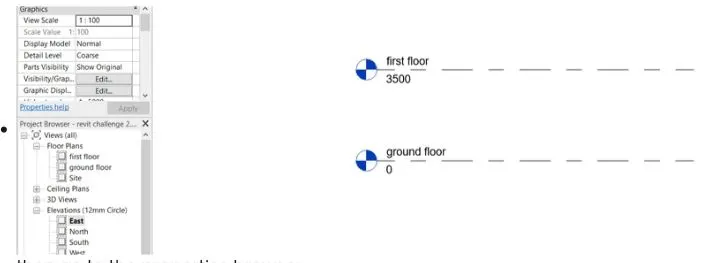
- then rename the the level 0 as GROUNDFLOOR
- and level 1 as FIRST FLOOR NAME
- then double click on first floor layer and give the distance as 3500
- as shown below
- then go to the properties browser
- click on ground floor plan
- from the architecure tab
- selct the wall option
- and click anywhere
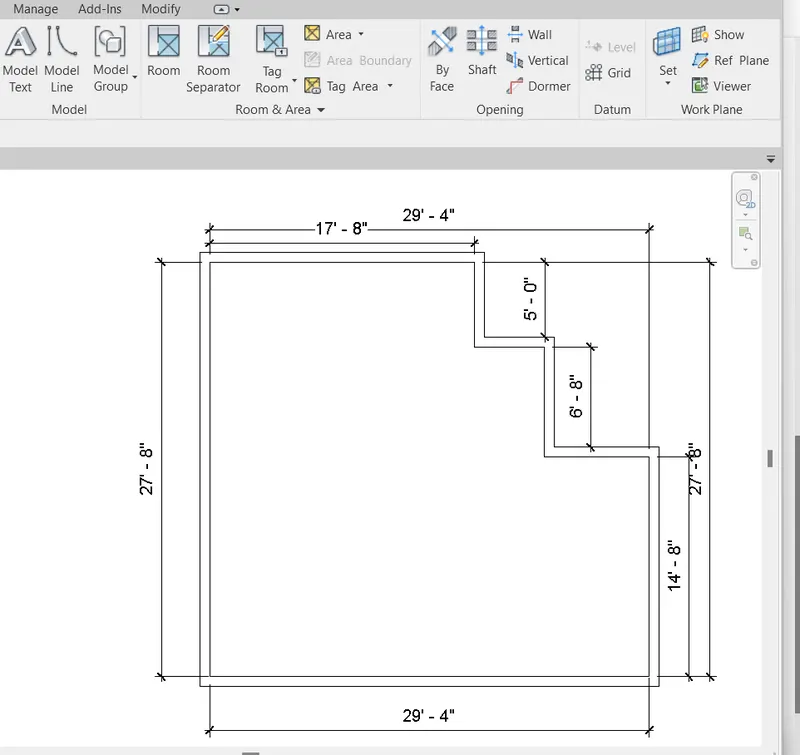
- then move the couser right 17'8"
- then move downward 5'
- then move the right 6'
- then move down 6'8"
- then move right 6'
- then move down 14'8"
- then move left side 29'4"
- then click on first point
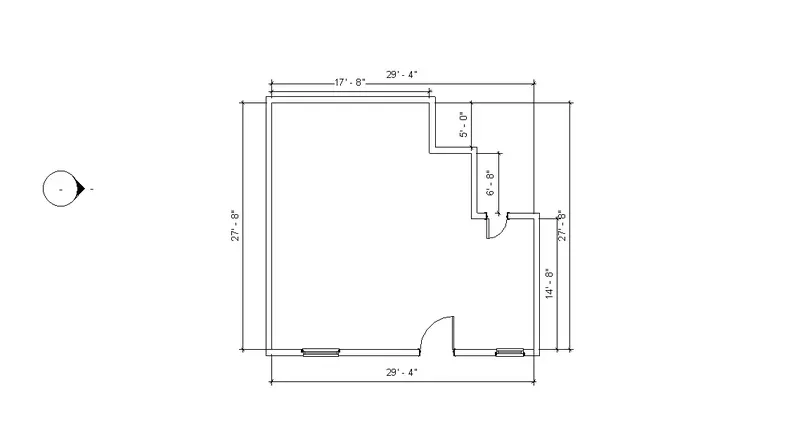
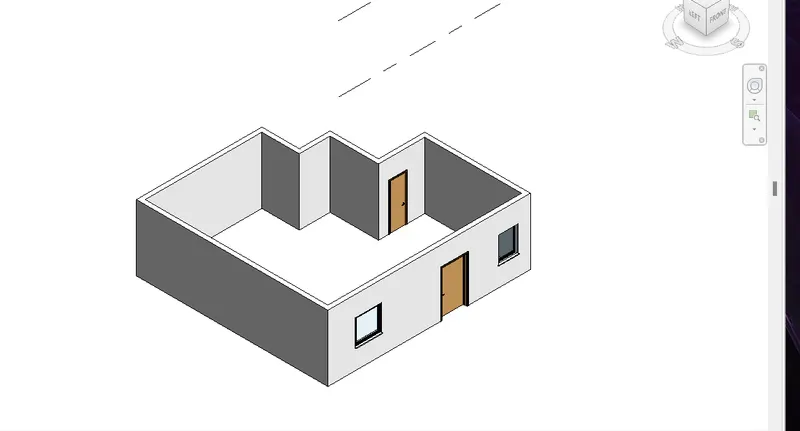
- the residential wall unit is ready
- RESULTS :
- QUESTION : 6
- AIM :
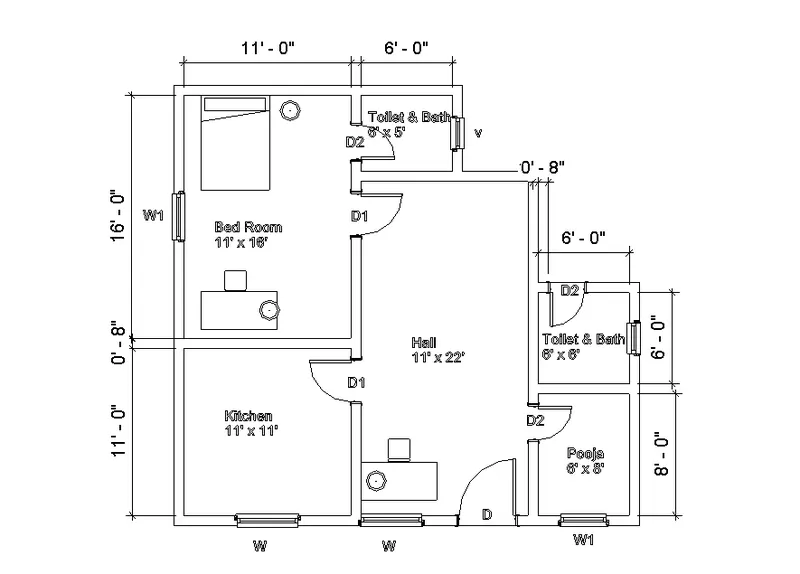
- In the layout created draft the level of details you are planning to include – Dimensions of room, components you plan to add in the residential unit.
- ANS :
- start the revit software
- the homepage is open
- as shown below
- click on OPEN option from the homepage
- select the file which are alrady created in above question
- go to the properties broswer
- click on ground floor plan
- then from architectural tab
- click on WALL option
- then go to the wall properties
- and select the proper wall type shown below
- then go to the anotation tab
- select the linnear dimension
- and give the dimension to all units in plan shown below
- then click the TEXT from annotation tab
- then select the proper text style and height of text
- and write the text over each units in plan shown below
- RESULTS :
- QUESTION : 7
- AIM :
- Identify the residential model elements such as Door, Windows, Tables, Chair, Couch, Bed, Lamps from the library and insert them to the model . Save the project for use
- ANS :
- start the revit 2023 software
- it takes some time to start
- after that homepage is open
- as shown below
- click on OPEN option from that homepage
- open the file as revit challange 2
- then file is opened
- then go to the INSERT tab
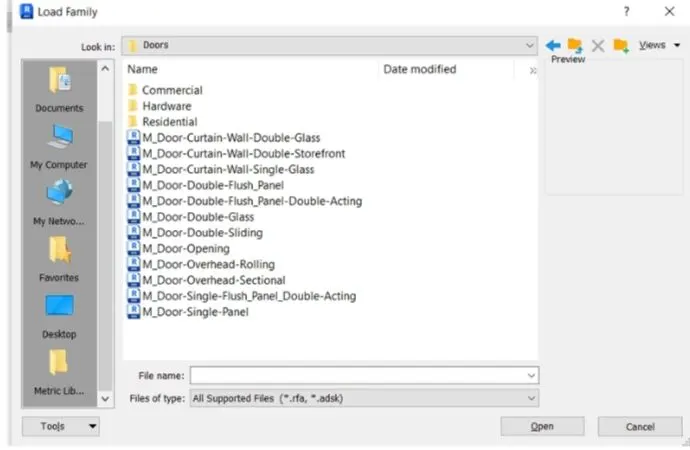
- then click on LOAD FAMILY
- and insert the doors, bed , lamp, ets
- click on door then lotes of door option is open selet and load it
- as show in results
- then again go to load family
- and click on furniture and load bed table as shown in results
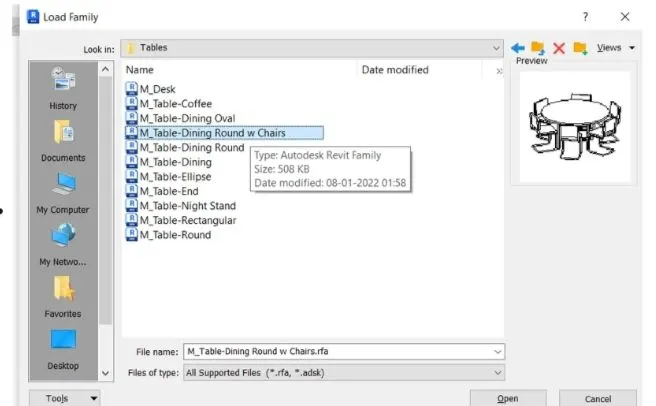
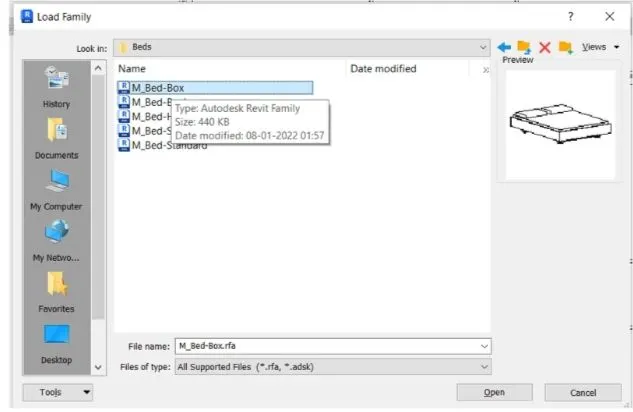
- then again click on load family
- click on lightning
- and load the lamp shown in results
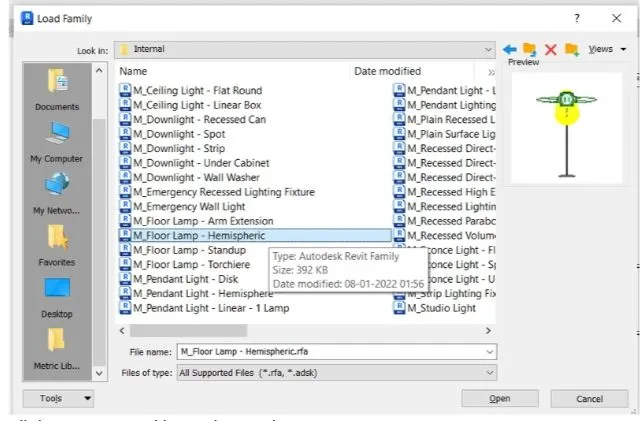
- click on open and insert it our plan
- RESULTS :