Creating Levels, Grids, Layout and model elements for a residential unit using REVIT
1) What is BIM? Summarize the features of BIM and benefits of using BIM over 2D CAD tools.
Building information Modelling is a process of creating and managing information of built asset.
A coordinated digital discerption of built asset is developed by using BIM.
BIM Is the foundation of digital transformation in Architect, Engineering and construction industry.
Features of BIM
Easy access to information (provide detailed information of project in both 2D and 3D with minute detailing).
Making the process more expressive (it allows to work on 5D i.e., Length, Breadth, Depth, Schedule and Cost of Project).
Comprehensive view of the project
Benefits of BIM
Complete representation of project. It helps to cresate entire project in 2D and 3D with all the detailing in the project.
Instant updates.
Time Constraint.
Resource Tracking
2) Understand the concept of Categories, Families, Elements, Instances in Revit. Go to Insert Tab, choose a category. Pick a family and element. Understand the instances and insert it to Revit model
Aim
To create a Door and Window in an Existing project in Revit.
Procedure
Open Revit and go to insert tab press insert Revit file. Choose the existing Revit file and open. Thus, the existing file will appear.
In architecture tab we have Doors windows and components tools. Click on doors and select the existing door. If we want more doors, we can get it from load family.
Then place the doors in appropriate place in the project where ever required.
Select window component in the Architect tab and go to load family and load the required windows and place in the required place.
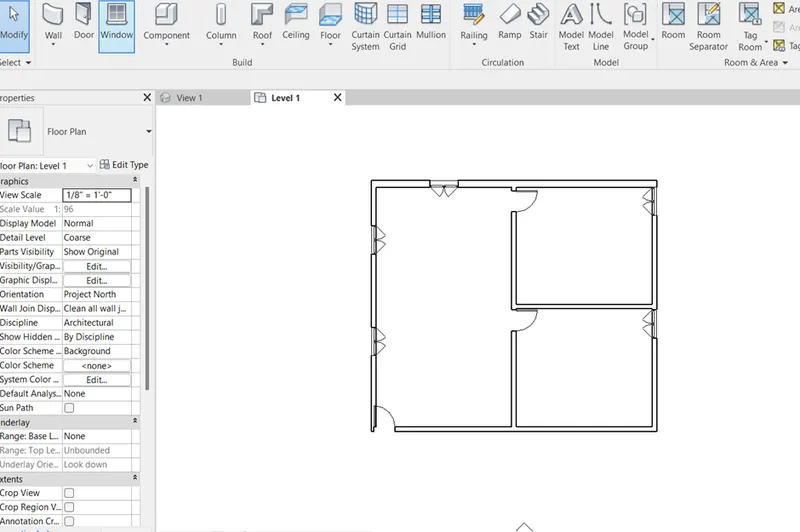
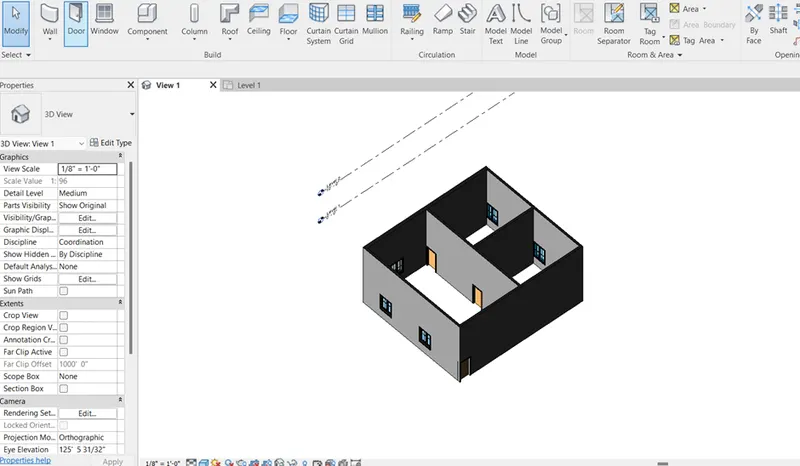
Result
Thus the elements are created in the project by using Revit.
3) Setting up a Project – Open a project file with architectural template. Save the file with appropriate name. Set up the project units to Imperial / Metric based on your convenience of modelling. Complete the project information under Manage tab. Set up the maximum backups for project file to 3
Aim
To set the maximum back up of the project file using Revit software.
Procedure
Open the existing project file with Architectural template.
Save the project and go to manage tab to provide project information.
Then, Go to file menu and click save as, click project
Choose the location to save and in the bottom left we have options click on it.
A tab will open displaying the backup options. We have maximum back up dialogue box give 3 nos and then click ok to save the changes.
The save the project 3 backup files will be created.
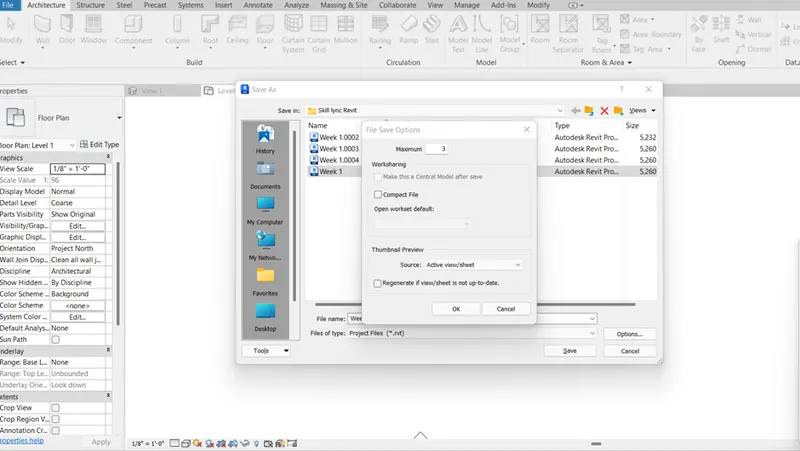
Result
Thus the backup file has been created and saved.
4) Understand the concept of Levels and Grids. Follow the naming and conventions. Create the following Levels: ( Convert to metric equivalents if metric is your units)
Ground Floor @ 0’
First Floor @ 10’
Second Floor @ 20’
Roof @ 30’
Aim
To create Levels and Grids for a project by using Revit
Procedure
Open a new project file with Architect imperial template.
Go to the elevation view to provide levels. In elevation view we have Level 1 and level 2 as existing In architect tab left corner, we have Level tool. Click on it and give pick line option with offset of 10’.
Then move curser on the level 2 and it will show the level 3 at 10’ offset press enter. Then move to level 3 it will show level 4 press enter.
Then at level 4 press enter. Then edit the level names as Ground floor, First floor, Second floor, Third floor, and roof.
Thus the levels are created.
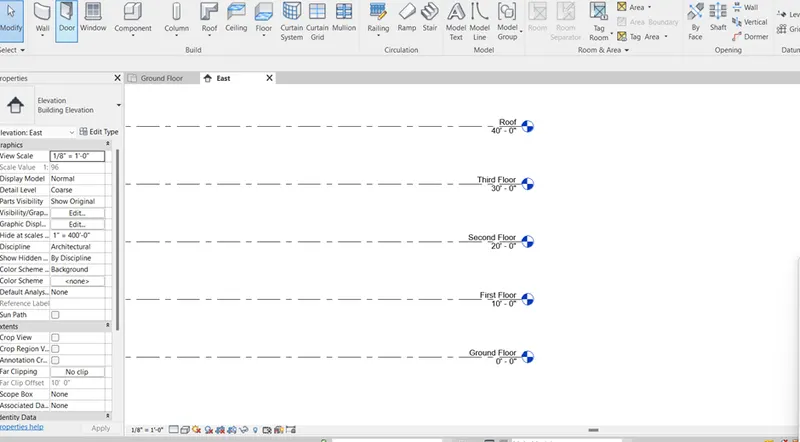
Then go to Ground floor plan and create grid lines.
At the top left there is a grit tool. Click on it and click on the screen and create first grid. Then click pick line option enter offset as 10’ in horizontal direction and create offsets of A,B,C,D & E.
Thus the horizontal grits are created.
Then press escape and pick grit again and create vertical grit line and click pick line option provide offset of 20’ and create 1 to 10 grit lines in vertical direction.
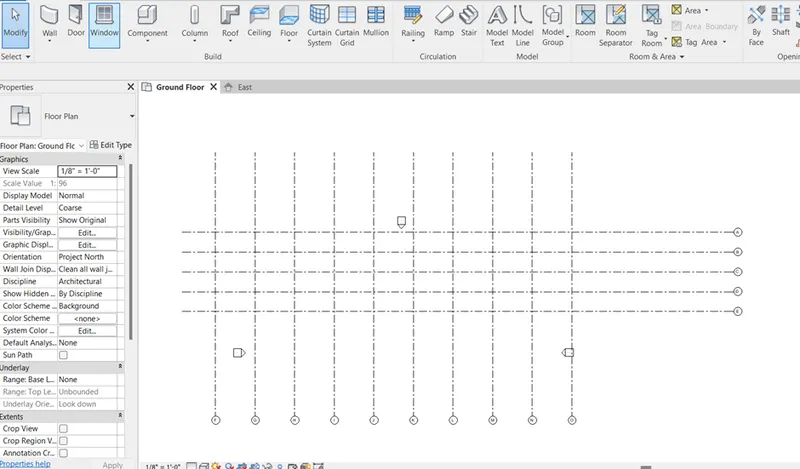
Result
Thus the elevation and grits are created.
5) 3D modelling of residential unit – From looking at your house / or a place you aspire. Create a conceptual layout of the residential unit. You can measure using a tape or
you can access your residential plan to create a similar layout
Aim
To create the 3D model of a Residential layout by using Revit software.
Procedure
Open the previous project work of Levels and Grids. Go to ground floor plan and in Architecture tab pick Wall tool.
In grid lings place the wall where ever necessary.
Then in Architecture tab go to doors and windows and place the doors in the plan and windows also.
In project properties their will be different style of doors and windows available. If not then load it from load family for the preferred style and dimensions.
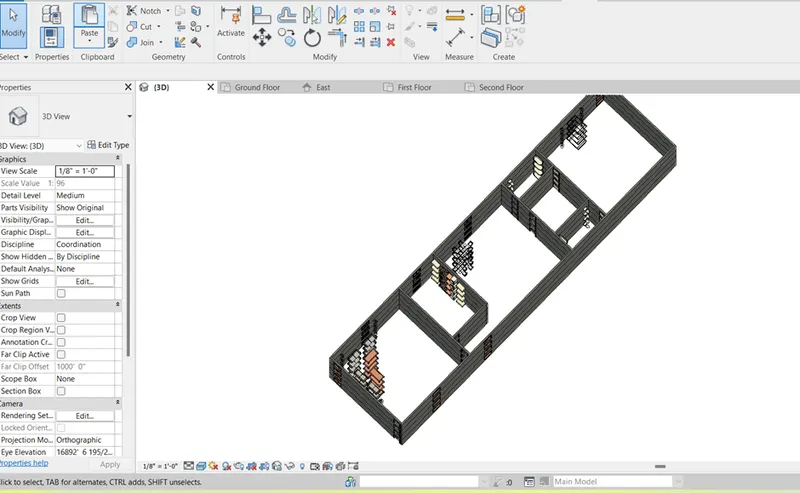
Then copy the ground floor plan and paste to aligned levels and click up to third floor level.
Thus the plan with all the doors and windows are pasted in the above levels.
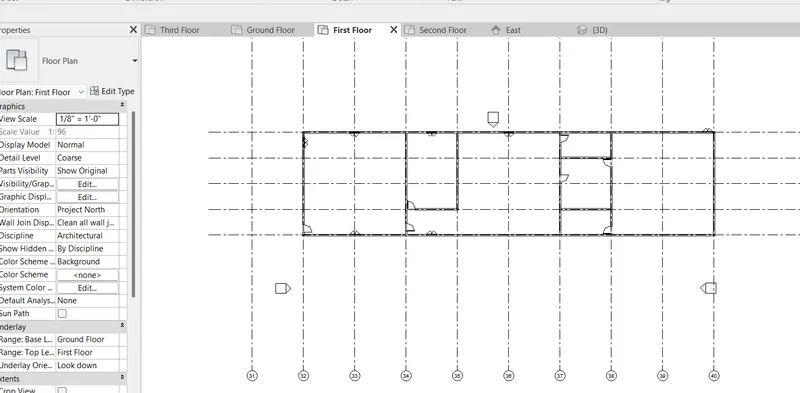
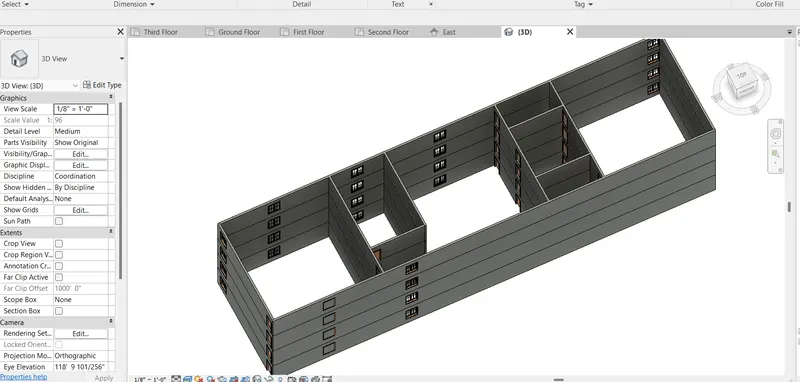
Result
Thus the plan and 3D view of the residential building is created.
6) In the layout created draft the level of details you are planning to include – Dimensions of room, components you plan to add in the residential unit.
Aim
To mark the dimension of the residential plan.
Procedure
Open the existing residential plan. Go to ground floor view.
In Annotate tab there is a tool to measure dimensions called Linear, aligned.
Choose linear and place the arrow to the inner corner of the plan and then to the next inner corner of the room then drag above and place it. It will show the dimension of the particular room.
Like this we need to provide dimensions for every single element.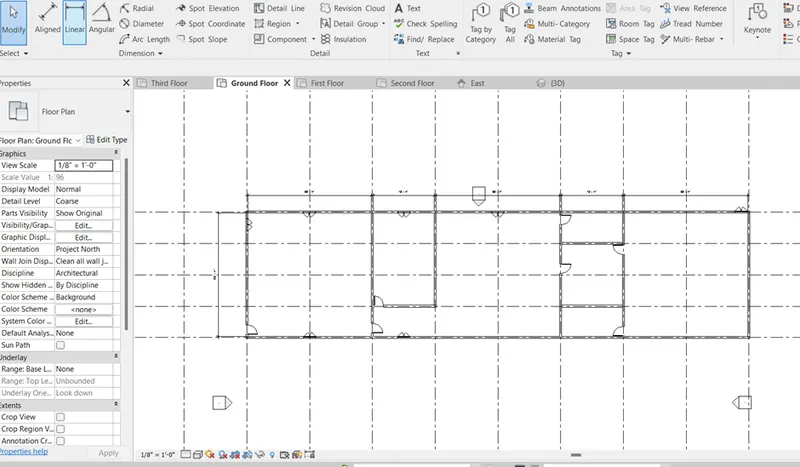
Result
Thus the dimensions are marked
7) Identify the residential model elements such as Door, Windows, Tables, Chair, Couch, Bed, Lamps from the library and insert them to the model .
Aim
To provide furniture’s in the residential building.
Procedure
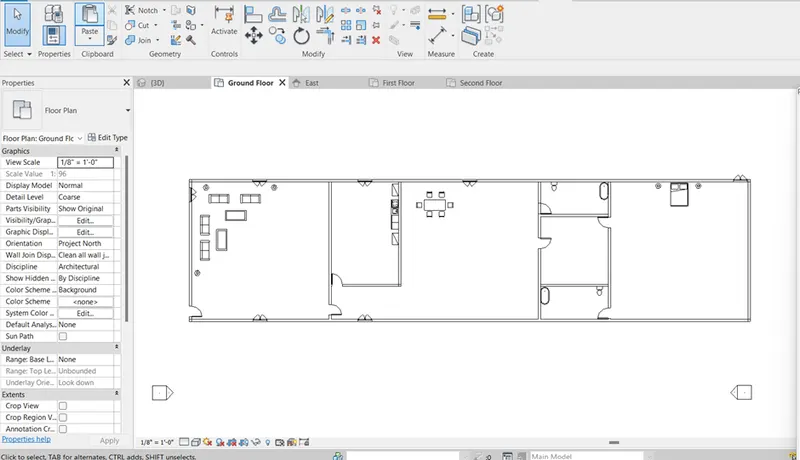
In the created residential plan go to the Ground floor view.
In Architecture, click place component and go to load family and go to furniture’s and click whatever the furniture required like for bed room click bed and choose type of bed and place it in bed room.
For dining and kitchen use dining option in load family and click appropriate dining model and place.
And in Seating click chair for dining and sofa in living room and coffee table.
Use appropriate furniture in the residential plan.
Result
Thus the Furniture and necessary items are inserted in the plan