Creating Levels, Grids, Layout and model elements for a residential unit using REVIT
CHALLENGE 2
1) What is BIM? Summarize the features of BIM and benefits of using BIM over 2D CAD tools.
AIM:
To identify and demonstrate the basic tools, its functions and explain the procedure step by step.
INTRODUCTION:
Revit is a BIM (Building Information Modelling) software to drive efficiency and accuracy across the project lifecycle, from conceptual design, visualisation and analysis to fabrication and construction.
Begin modelling in 3D with accuracy and precision.
Automatically update floor plans, elevations and sections as your model develops.
PROCEDURE:
Revit Platform for Building Information Modelling is a design and documentation system that supports the design,drawings and schedules that supports the building projects.
Revit Building elements are of three types:
* View Elements
* Model Elements
* Annotate Elements
i) Annotation Elements
ii) Datum Elements
Building Information Modelling:
BIM is a visual representation of the physical and functional characteristics of a facility from inception onwards. As such, it serves as a shared information respiratory for collaboration throughout a facility's life cycle.
Able to create a virtual model of the structure in 3D and share it to each other in the project.
Features of BIM:
* Easy access to information - It represents both Physical and functional characteristics of the building process that provides very minute details of the project.
* Making the process more expressive - i) CAD software provides 3D model via length, breadth and depth whereas REVIT provides 5D model that includes Time and Cost along with the length, breadth and depth.
ii) Therefore REVIT provides accurate cost and material estimates, precise time schedule of the project even as the design is being developed.
* Comprehensive view of the project - Revit provides various features like it shows from topographical information to quantity surveying and so on.
Benifits of BIM:
- Complete representation - It takes more than the building core components into account, for example BIM allows you to design electrical and hvac systems as well as the building itself.
- Instant updates - It allows you to provide the instant updates of all the components.
- Time constraint - BIM allows you to pre- fabricate important components ahead of time.
- Resource tracking - It provides how much resources are needed during the design stage, which is an advantage of using this software.
RESULT:
Easy access to information
Making the process more expressive
Comprehensive view of the project
Complete representation
Instant updates
Time constraint
Resource tracking
3) Setting up a Project – Open a project file with architectural template. Save the file with appropriate name. Set up the project units to Imperial / Metric based on your convenience of modelling. Complete the project information under Manage tab. Set up the maximum backups for project file to 3.
AIM:
To identify and demonstrate the basic tools, its functions and explain the procedure step by step.
INTRODUCTION:
Revit is a BIM (Building Information Modelling) software to drive efficiency and accuracy across the project lifecycle, from conceptual design, visualisation and analysis to fabrication and construction.
Begin modelling in 3D with accuracy and precision.
Automatically update floor plans, elevations and sections as your model develops.
PROCEDURE:
- Open the REVIT software.
- Select Architectural template and OK.
- Set units to Imperial.
- Go to File and save your project file as your wish.
- Here, I save the project as DEMO.
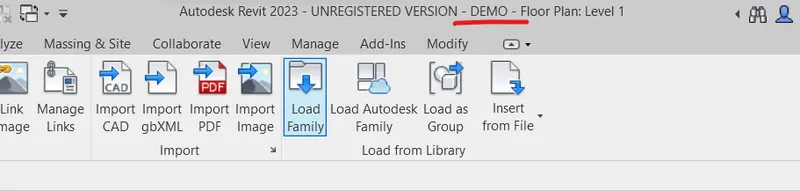
- Now, Go to MANAGE TOOLBAR - Select PROJECT INFORMATION - a dialogue box will appear.
- In that dialogue box give all the necessary details.
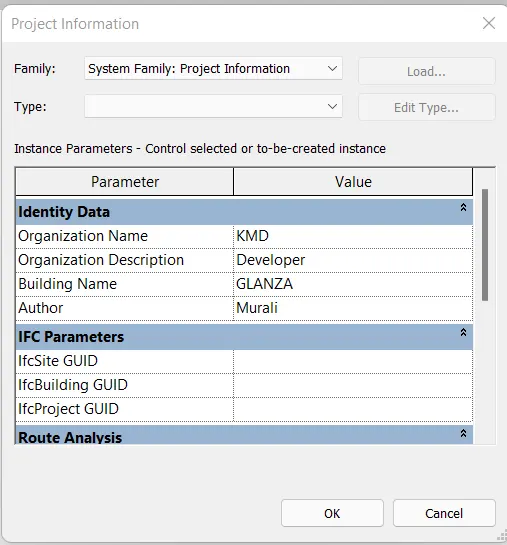
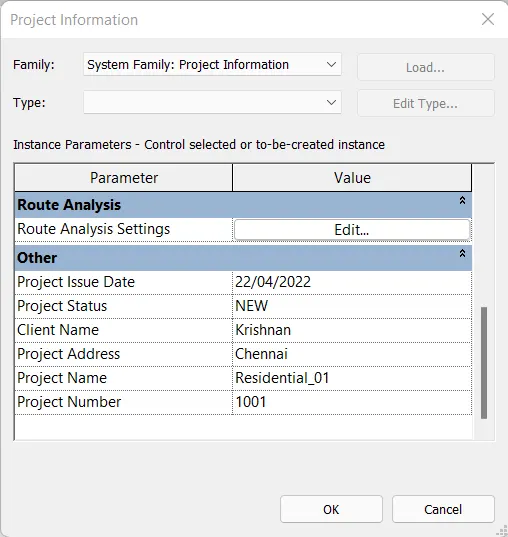
- Now, go to File - select SAVE AS - a tab will appear.
- In that TAB - select OPTIONS - a small tab will appear above it having FILE SAVE OPTIONS.
- Now, give the maximum BACKUPS as 3 and ok.
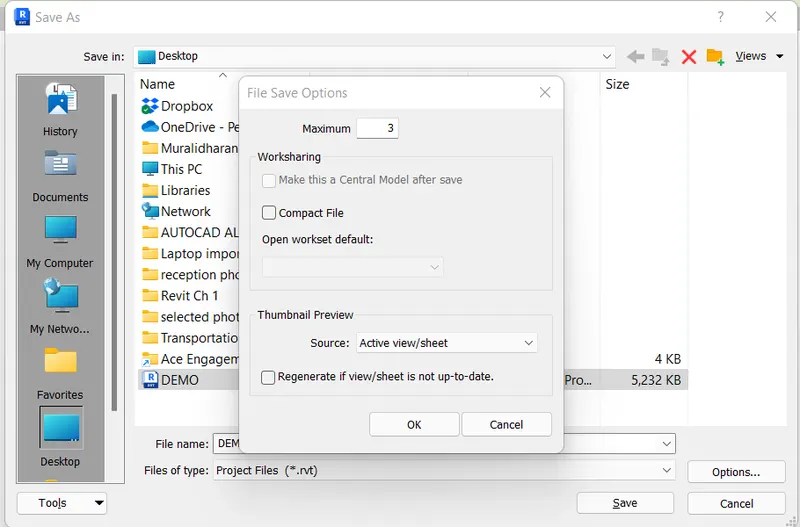
- Thus,the project file is set with 3 maximum backups.
RESULT:
SAVE
PROJECT INFORMATION
MAXIMUM BACKUPS
4) Understand the concept of Levels and Grids. Follow the naming and conventions. Create the following Levels: ( Convert to metric equivalents if metric is your units)
Ground Floor @ 0’
First Floor @ 10’
Second Floor @ 20’
Roof @ 30’
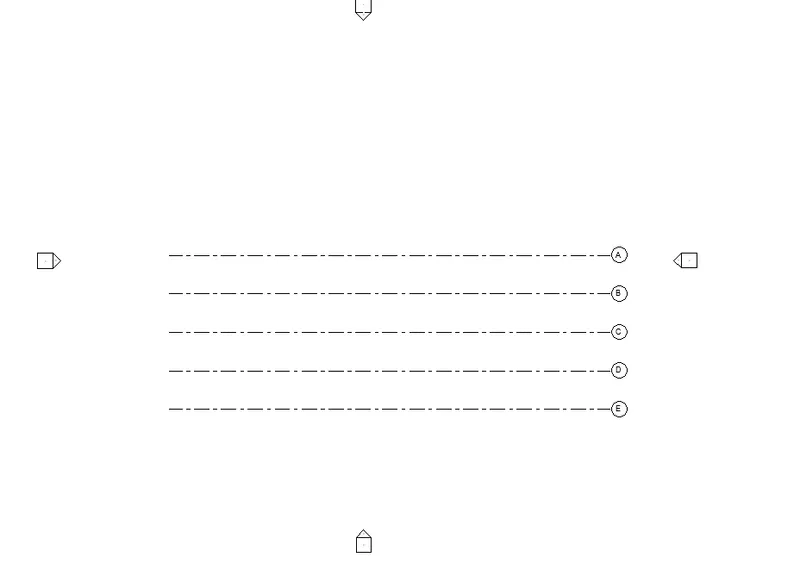
Grids Transverse Grids A, B,C,D, E @ 10’ spacing
Longitudinal Grids from 1 to 10 @ 20’ spacing.
AIM:
To identify and demonstrate the basic tools, its functions and explain the procedure step by step.
INTRODUCTION:
Revit is a BIM (Building Information Modelling) software to drive efficiency and accuracy across the project lifecycle, from conceptual design, visualisation and analysis to fabrication and construction.
Begin modelling in 3D with accuracy and precision.
Automatically update floor plans, elevations and sections as your model develops.
PROCEDURE:
- Open the REVIT software.
- Select Architectural template and OK.
- Set units to Imperial.
- Go to File and save your project file as your wish.
- Here, I save the project as DEMO.
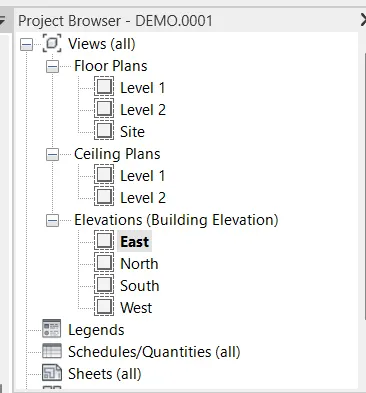
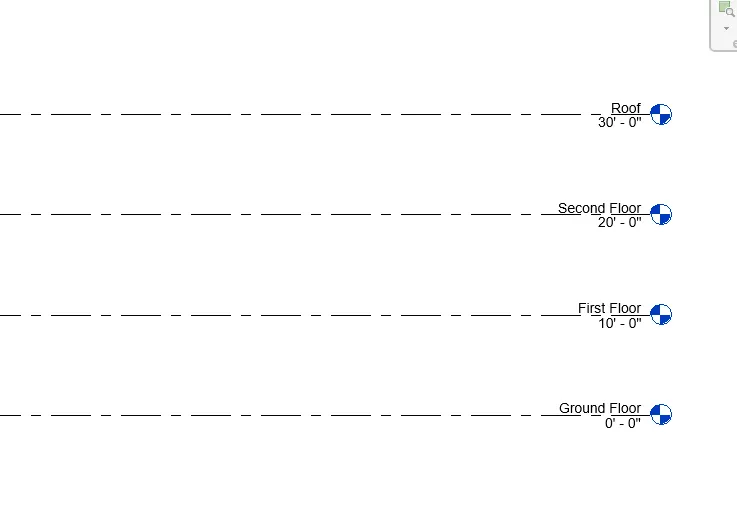
- Go to the project browser and select the EAST ELEVATION view as shown below.
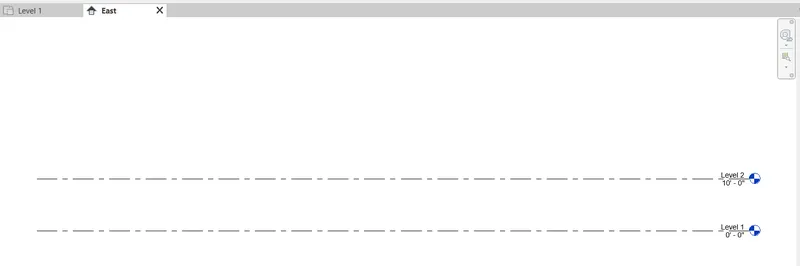
- The image below shows the elevation view from the EAST side.
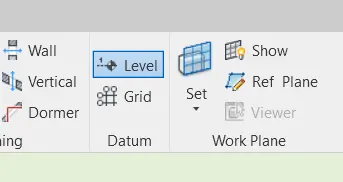
- Now, go to architectural toolbar and select LEVEL.
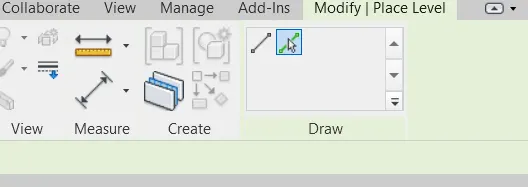
- Pick the Lines from the modify toolbar as shown below.
- Now, set the offset distance to 10' and create 2 extra levels/floors.
- Rename the levels as Ground floor, First floor, Second floor and Roof.
- Select FLOOR PLAN from the project browser.
- Go to architectural toolbar and select GRID.
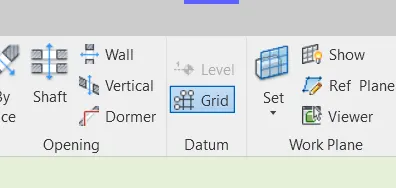
- Create TRANSVERSE GRIDS at 10' spacing as shown below and name them as A,B,C,D and E from top to bottom.
- With the same setting, create LONGITUDINAL GRIDS at 20' spacing and name them as 1 to 10 from Left to Right.
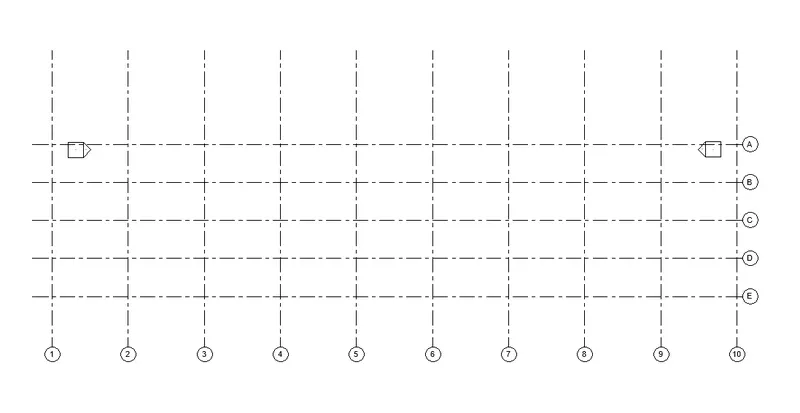
- Thus, TRANSVERSE and LONGITUDINAL GRIDS are created.
RESULT:
LEVELS
GRIDS
5) 3D modelling of residential unit – From looking at your house / or a place you aspire. Create a conceptual layout of the residential unit. You can measure using a tape or
you can access your residential plan to create a similar layout.
AIM:
To identify and demonstrate the basic tools, its functions and explain the procedure step by step.
INTRODUCTION:
Revit is a BIM (Building Information Modelling) software to drive efficiency and accuracy across the project lifecycle, from conceptual design, visualisation and analysis to fabrication and construction.
Begin modelling in 3D with accuracy and precision.
Automatically update floor plans, elevations and sections as your model develops.
PROCEDURE:
- Open the REVIT software.
- Select Architectural template and OK.
- Set units to Imperial.
- Go to File and save your project file as your wish.
- Here, I save the project as DEMO.
- Go to Architectural toolbar - select wall - set the properties of wall to GENERIC 8" and start creating the residential layout.
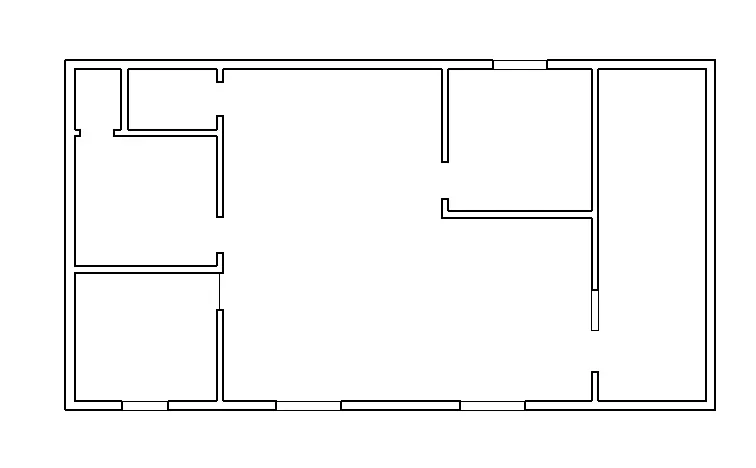
- Now, select WINDOWS from the architectural toolbar and place it in the required places.
- Then, select DOORS from the architectural toolbar and place it in the required places.
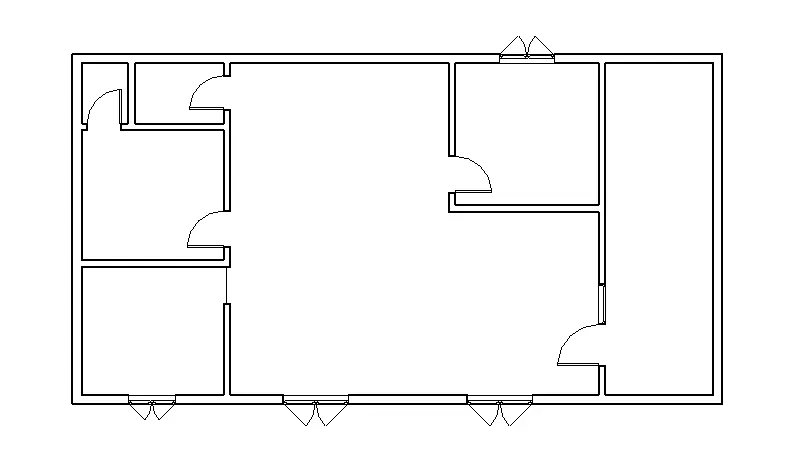
- The following image shows the 3D view of the layout created.
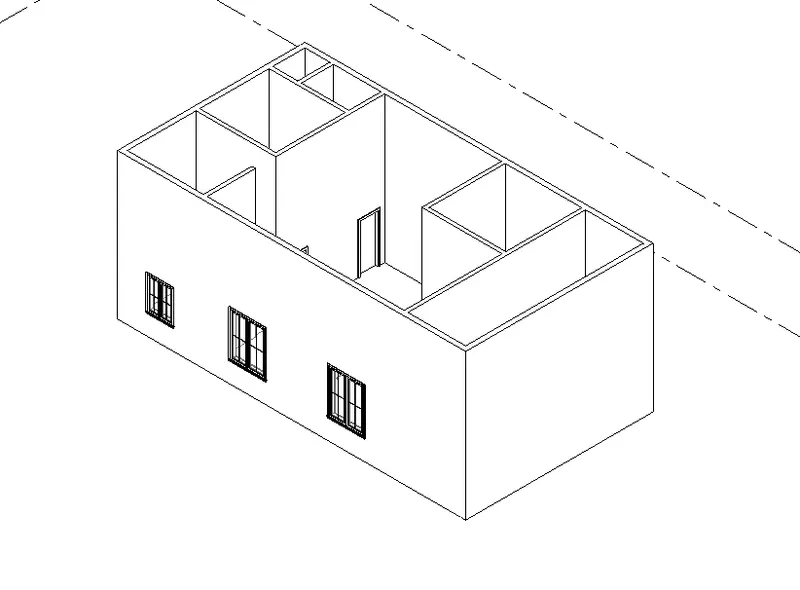
RESULT:
CONCEPTUAL LAYOUT
3D VIEW OF THE LAYOUT
6) In the layout created draft the level of details you are planning to include – Dimensions of room, components you plan to add in the residential unit.
AIM:
To identify and demonstrate the basic tools, its functions and explain the procedure step by step.
INTRODUCTION:
Revit is a BIM (Building Information Modelling) software to drive efficiency and accuracy across the project lifecycle, from conceptual design, visualisation and analysis to fabrication and construction.
Begin modelling in 3D with accuracy and precision.
Automatically update floor plans, elevations and sections as your model develops.
PROCEDURE:
- Open the REVIT software.
- Select Architectural template and OK.
- Set units to Imperial.
- Go to File and save your project file as your wish.
- Here, I save the project as DEMO.
- Go to Architectural toolbar
- Now, select WINDOWS from the architectural toolbar and place it in the required places.
- Then, select DOORS from the architectural toolbar and place it in the required places.
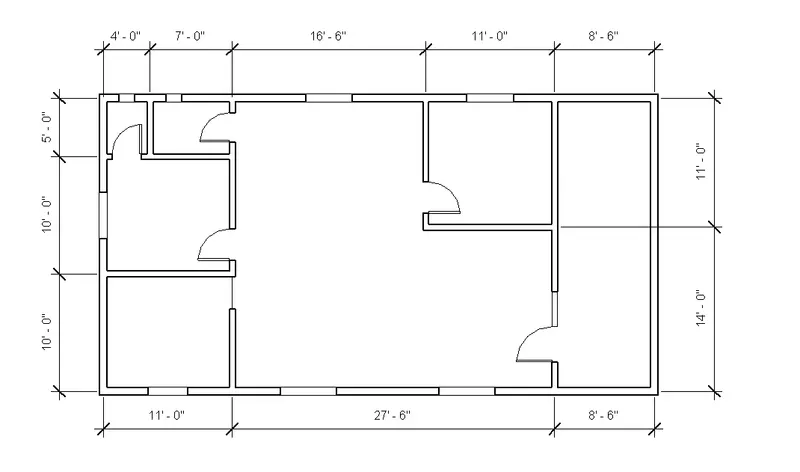
- Go to ANNOTATE toolbar - select ALIGNED DIMENSION and mark the dimensions for the layout.
- The following image shows the dimensions are marked using aligned dimension option for the conceptual layout created before.
RESULT:
LAYOUT WITH DIMENSIONS
7) Identify the residential model elements such as Door, Windows, Tables, Chair, Couch, Bed, Lamps from the library and insert them to the model . Save the project for use
for Assignment 3.
AIM:
To identify and demonstrate the basic tools, its functions and explain the procedure step by step.
INTRODUCTION:
Revit is a BIM (Building Information Modelling) software to drive efficiency and accuracy across the project lifecycle, from conceptual design, visualisation and analysis to fabrication and construction.
Begin modelling in 3D with accuracy and precision.
Automatically update floor plans, elevations and sections as your model develops.
PROCEDURE:
- Open the REVIT software.
- Select Architectural template and OK.
- Set units to Imperial.
- Go to File and save your project file as your wish.
- Here, I save the project as DEMO.
- Now, Go to INSERT - select LOAD AUTODESK FAMILY - a large TAB with ALL RESULTS of materials will occur as shown below.
- Choose the category which needed and load it in Current drawing.
- Now go to properties browser and select the material which was loaded and insert it in the required place.
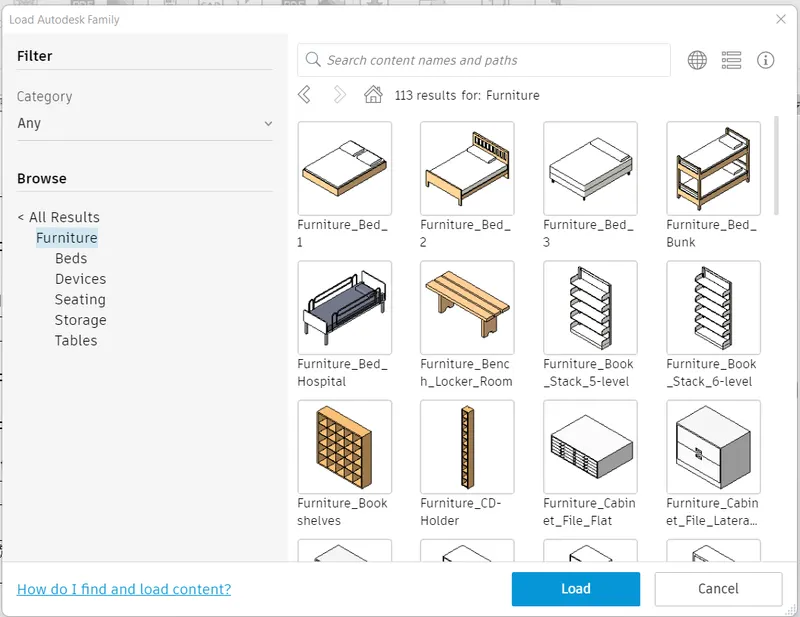
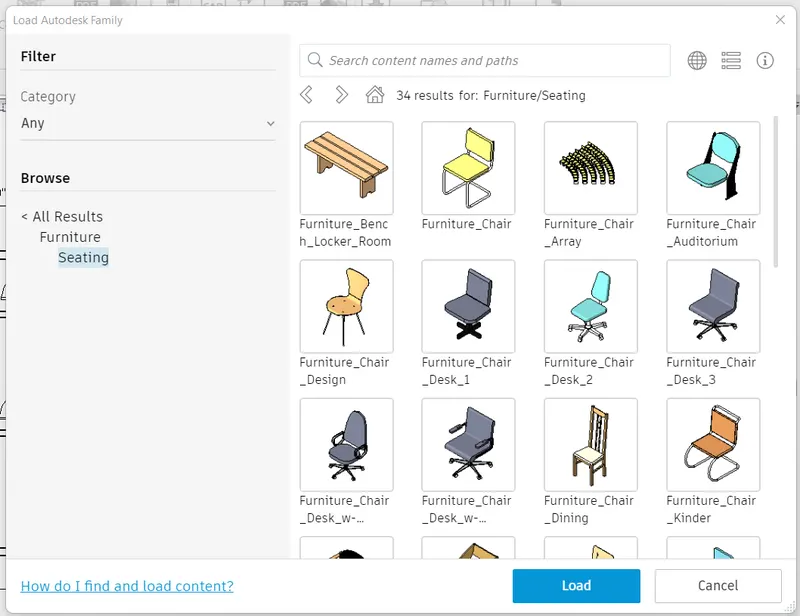
- Now go to properties browser and select the material which was loaded and insert it in the required place.
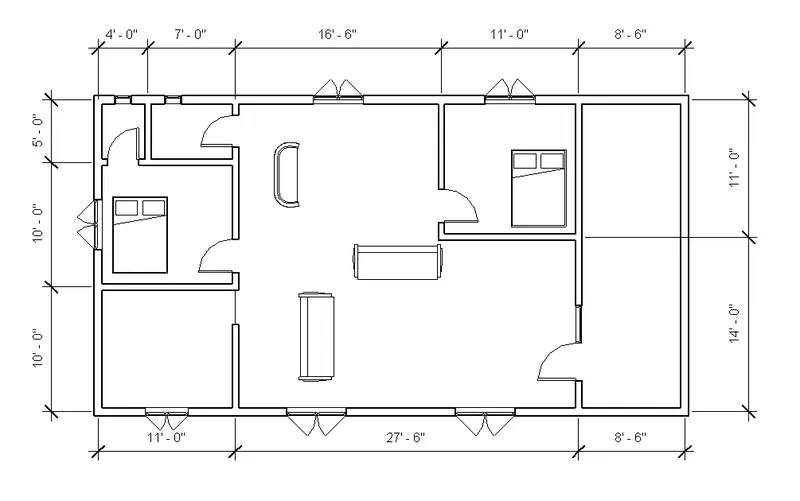
- In this layout, I have added COUCH of 2 varieties, a QUEEN BED, Windows and Doors of different sizes.
RESULT:
RESIDENTIAL MODEL ELEMENTS